Why Vacuum Suction Gets Weak Over Time
Vacuum suction usually declines because airflow becomes restricted, not because the motor suddenly fails. Dust buildup, clogged filters, worn seals, and blocked air passages force the motor to work harder while reducing cleaning performance. Understanding how airflow moves through your vacuum is the first step toward improving vacuum cleaner performance and restoring strong suction.
The Real Causes of Suction Loss
- Blocked airflow: Hair, lint, and debris trapped in the hose, wand, floor head, or internal air channels reduce the volume of air reaching the motor.
- Dirty or saturated filters: Filters protect the motor by capturing fine dust, but neglected filters gradually restrict airflow and reduce vacuum efficiency.
- Air leaks: Cracked hoses, worn gaskets, damaged seals, or loose fittings allow air to escape before it reaches the cleaning head.
- Brush roll resistance: Tangled hair, string, and carpet fibers prevent the brush from agitating debris effectively, making pickup appear weaker.
- Power limitations: Aging batteries, unstable electrical supply, or failing electronic components can reduce motor output, particularly in cordless models.
Because most suction problems are airflow-related, routine inspection and maintenance often restore performance without replacing the vacuum. Identifying the root cause early makes it much easier to improve vacuum suction and avoid unnecessary repairs.
Boost Vacuum Cleaner Suction: Step-by-Step Fixes That Actually Work
Weak suction can turn even a quality vacuum into an ineffective cleaner. Fortunately, most performance issues are caused by restricted airflow, full dust containers, clogged filters, or minor maintenance problems rather than a worn-out motor. This guide walks you through the most common causes, helping you boost vacuum cleaner suction with practical fixes that take only a few minutes.
⏱ 6 min read
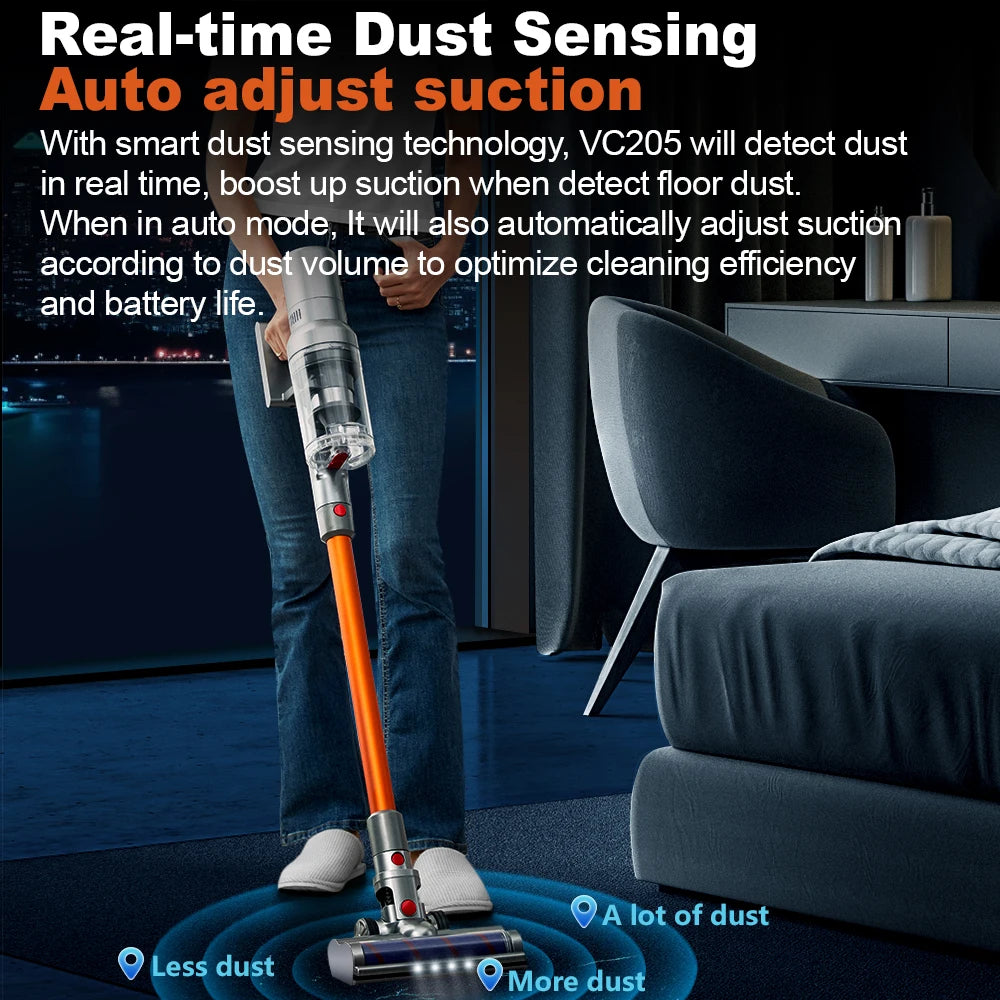
Strong suction starts with unrestricted airflow throughout the entire vacuum system.
Signs Your Vacuum Has Lost Suction
Recognizing the warning signs early helps you fix weak vacuum suction before it leads to overheating, unnecessary wear, or poor cleaning results. Most symptoms develop gradually, giving you plenty of opportunity to restore performance with regular maintenance.
Early Warning Signs
- Dust or fine debris remains on floors after a cleaning pass.
- The vacuum sounds louder or higher pitched than normal.
- Debris falls back out when lifting the floor head.
- Carpets require multiple passes to remove dirt.
- Airflow from the exhaust feels weaker than usual.
Severe Performance Issues
- Little or no suction at the nozzle.
- Frequent overheating or automatic safety shut-offs.
- A burning smell during operation.
- Dust escaping from vents or around loose connections.
- Noticeable loss of cleaning performance despite an empty bin.
If your vacuum shows one or more of these symptoms, performing a complete airflow inspection is usually the fastest way to restore suction and improve overall cleaning performance before considering replacement parts.
Quick Diagnosis: What’s Causing Weak Suction?
Use this simple troubleshooting workflow to identify the most likely cause before disassembling your vacuum. Start with the easiest checks first, then move to deeper inspections only if suction does not improve.
Symptom → Cause → Fix
| Symptom | Most Likely Cause | Recommended Fix |
|---|---|---|
| Weak suction at the nozzle | Blocked hose or floor head | Remove the blockage and test airflow again. |
| Power gradually decreases | Dirty or saturated filter | Clean reusable filters or replace worn filters. |
| Sudden loss of suction | Dustbin or bag is full | Empty the container before it reaches maximum capacity. |
| Whistling or hissing sound | Air leak around seals or hose connections | Inspect gaskets, fittings, and hose ends for gaps. |
| Poor carpet cleaning | Brush roll jammed with hair or thread | Clean the brush roll so it spins freely. |
| Motor runs but pickup stays weak | Internal clog or restricted airflow path | Inspect the wand, hose, and internal air channels. |
Following this order makes it easier to improve vacuum suction without replacing parts unnecessarily. Most performance issues are caused by restricted airflow rather than a failing motor.
Fast Self-Check in 60 Seconds
- Turn off the vacuum and unplug it or remove the battery.
- Empty the dustbin or replace the bag if it is close to full.
- Inspect the hose, wand, and floor head for visible obstructions.
- Check the filter for dirt, moisture, or heavy dust buildup.
- Spin the brush roll by hand to confirm it rotates freely.
- Reconnect everything securely and test suction on a hard floor.
These quick checks solve many cases of weak vacuum suction in just a few minutes and help determine whether a deeper inspection is necessary.
Step-by-Step: How to Boost Vacuum Cleaner Suction
Step 1 – Empty Dustbin or Replace Bag
A full dustbin or packed vacuum bag reduces airflow almost immediately. Empty bagless containers before they reach the maximum fill line, and replace disposable bags when they are heavily loaded. This simple habit is one of the easiest ways to boost vacuum cleaner suction and improve overall cleaning performance.
Step 2 – Clean or Replace Filters
Filters protect the motor by trapping fine dust, but clogged filters also restrict airflow. Wash reusable filters according to the manufacturer's instructions and allow them to dry completely before reinstalling. Replace HEPA or disposable filters when they no longer clean effectively. Learn more: how to clean HEPA filters
Step 3 – Remove Hose and Internal Blockages
Detach the hose and inspect it from both ends. Use a flexible cleaning tool or compressed air to remove compacted debris without damaging the lining. Also check extension wands and floor nozzles, since even a small obstruction can significantly reduce airflow.
For canister and upright vacuums, inspect every removable section of the airflow path. On wet/dry vacuums, check both the intake port and collection chamber because larger debris can restrict suction.
Step 4 – Inspect Brush Roll and Floor Head
Hair, thread, and carpet fibers wrapped around the brush roll reduce agitation, making carpets appear difficult to clean even when suction is adequate. Remove tangled debris, clean the end caps if accessible, and confirm the brush spins smoothly. See guide: vacuum brush not spinning
Robot vacuums also benefit from frequent brush maintenance, while cordless stick vacuums often require extra attention around the compact floor head where hair collects quickly.
Step 5 – Check for Air Leaks and Seal Damage
Inspect hose connections, rubber seals, gaskets, and removable attachments for cracks or loose fittings. Even small leaks allow outside air to enter the system, reducing the airflow reaching the cleaning head. Replacing worn seals is often enough to restore strong suction.
Step 6 – Test Motor and Power Supply
If airflow remains weak after completing the previous steps, inspect the power source. Recharge cordless batteries fully and replace batteries that no longer hold a normal charge. For corded models, verify the power cord and outlet are functioning correctly.
When upright, canister, cordless, robot, or wet/dry vacuums continue to lose suction after maintenance, the motor, fan assembly, or internal electrical components may require professional inspection. However, most homeowners can increase vacuum power through routine airflow maintenance rather than costly repairs.

Restore strong suction with routine airflow maintenance and timely cleaning.
Hidden Problems That Kill Vacuum Performance (Most Guides Miss These)
If your vacuum still struggles after completing routine maintenance, the problem may be hidden inside the airflow system. These less obvious issues often reduce suction gradually, making them easy to overlook.
Micro-blockages in Hose Bends
Dust, pet hair, paper fibers, and string can collect inside curved hose sections where they are difficult to see. Unlike a complete clog, these partial restrictions slowly reduce airflow, making the vacuum feel weaker over time.
- Detach the hose and inspect it from both ends using a flashlight.
- Flex the hose gently to locate compacted debris.
- Use a flexible cleaning brush or compressed air to remove hidden buildup.
Clearing these micro-blockages is one of the simplest ways to improve vacuum suction without replacing any components.
Worn Seals and Gaskets
Vacuums depend on an airtight airflow path. Rubber seals around the dustbin, hose connectors, and filter housing naturally wear over time, allowing outside air to enter the system instead of passing through the cleaning head.
- Inspect rubber gaskets for cracks, flattening, or hardening.
- Ensure removable parts lock firmly into place.
- Replace damaged seals if air leaks remain after cleaning.
Restoring an airtight seal helps make your vacuum cleaner stronger by directing maximum airflow where it is needed.
Battery Degradation (Cordless Models)
Battery performance naturally declines after hundreds of charging cycles. Even when a cordless vacuum powers on normally, an aging battery may no longer provide consistent output under heavy load, reducing suction during extended cleaning sessions.
- Notice whether runtime has become significantly shorter.
- Watch for suction that drops after only a few minutes.
- Allow the battery to cool before charging after demanding cleaning tasks.
If filters, airflow passages, and seals are in good condition, battery health may be the remaining factor affecting long-lasting vacuum performance.
Cordless Vacuum Suction Problems (Specific Fixes)
Battery-Related Issues
- Short runtime usually indicates normal battery wear rather than a clogged vacuum.
- Weak suction in maximum power mode may signal reduced battery output.
- Use the manufacturer's charger to maintain reliable charging performance.
- Store lithium-ion batteries at moderate temperatures to help extend service life.
Airflow Restrictions
- Compact cordless vacuums have narrower air passages that clog more quickly.
- Empty the dustbin more frequently during large cleaning jobs.
- Check compact cyclones, filters, and floor heads for fine dust buildup.
- Clean attachments regularly to maintain consistent airflow.
Power Mode Misuse
- Eco mode works well for hard floors and light debris.
- Switch to high or boost mode for thick carpets, pet hair, and heavy dirt.
- Reserve maximum power for difficult areas to balance cleaning performance with battery runtime.
Choosing the appropriate power setting helps increase vacuum power when needed while reducing unnecessary battery drain during everyday cleaning.
Explore the cordless handheld vacuum cleaner designed for everyday messes
Also read: extend cordless vacuum battery life
How Suction Power Really Works (And Why PA Ratings Mislead You)
Airflow vs Suction Pressure
Strong cleaning performance depends on two factors working together: airflow and suction pressure . Airflow measures how much air moves through the vacuum, while suction pressure measures the force used to pull debris from the floor.
High suction pressure helps loosen dirt embedded in carpets, but without adequate airflow, the vacuum cannot carry dust and debris into the collection bin efficiently. Likewise, strong airflow alone may struggle with heavier particles if suction pressure is insufficient. Improving vacuum cleaner performance requires balancing both measurements rather than maximizing only one.
Why Higher Numbers Don't Always Mean Better Cleaning
Many cordless vacuums advertise impressive PA (Pascal) ratings, but this specification reflects only suction pressure under specific testing conditions. It does not account for airflow, brush design, filtration efficiency, or sealed system performance.
- High PA with restricted airflow may reduce real-world pickup.
- An efficient brush roll often improves carpet cleaning more than additional suction alone.
- Clean filters and airtight seals frequently have a greater impact on everyday performance than motor specifications.
- A balanced vacuum maintains consistent pickup across hard floors, rugs, and carpets.
When comparing vacuums, evaluate the complete cleaning system instead of relying on a single specification. This provides a more accurate picture of real-world cleaning ability and helps increase vacuum power where it matters most.
Maintenance Checklist for Long-Lasting Vacuum Performance
Routine maintenance prevents airflow restrictions before they become noticeable. Following a consistent schedule keeps suction strong, reduces strain on the motor, and extends the lifespan of replaceable components.
Weekly Maintenance
- Empty the dustbin or replace the bag before it becomes overfilled.
- Remove hair, string, and fibers from the brush roll.
- Inspect the floor head for debris blocking airflow.
- Wipe exterior vents to prevent dust accumulation.
Monthly Deep Cleaning
- Wash reusable filters if recommended by the manufacturer.
- Inspect hoses, extension wands, and attachments for hidden blockages.
- Check rubber seals and hose connections for signs of wear.
- Clean the dustbin or cyclone assembly to remove compacted fine dust.
When to Replace Parts
- Filters: Replace every 3–6 months, or sooner with heavy use if cleaning no longer restores airflow.
- Batteries: Typically last 1–3 years depending on charging habits and usage frequency.
- Brush rolls: Replace when bristles become worn, bent, or damaged.
- Seals and gaskets: Replace if cracks or air leaks reduce suction.
Homes with pets, heavy carpet, or frequent vacuuming may benefit from shorter maintenance intervals. Regular care is the most effective way to maintain long-lasting vacuum performance and clean vacuum for better suction throughout its service life.
More tips: vacuum maintenance schedule guide
When to Repair vs Replace Your Vacuum
Cost vs Performance Decision Guide
Not every vacuum with weak suction needs to be replaced. In many cases, restoring airflow, replacing inexpensive parts, or servicing worn components can return the machine to near-original performance. Before buying a new vacuum, compare the repair cost with the value and remaining lifespan of your current model.
- Repair the vacuum if the problem is limited to filters, hoses, brush rolls, belts, seals, or other inexpensive wear items.
- Consider replacement when motor failure, damaged electronics, or major battery replacement makes repairs uneconomical.
- As a general guideline, replacing the vacuum is often the better value if repair costs exceed 50% of the price of a comparable new model.
Signs It's Time to Upgrade
- Persistent suction loss after completing a full maintenance inspection.
- Frequent overheating or automatic shutdown despite clean airflow passages.
- The battery no longer holds a useful charge or replacement batteries are no longer available.
- Replacement parts have become difficult to source.
- Visible cracks in the housing or repeated air leaks reduce long-term reliability.
If your vacuum still cleans effectively after routine maintenance, repairing it is usually the most cost-effective option. However, repeated performance issues despite proper care may indicate that upgrading will provide better long-term value.

Modern airflow design and efficient filtration help maintain consistent suction over time.
Quick FAQ: Boosting Vacuum Suction
How often should I clean vacuum filters?
For most households, inspect filters every two to four weeks and clean washable filters as recommended by the manufacturer. Homes with pets or heavy dust may require more frequent maintenance to maintain strong airflow.
Why is my vacuum still weak after cleaning?
If suction remains weak after cleaning the dustbin, filters, and brush roll, inspect for hidden hose blockages, worn seals, battery issues, or internal airflow restrictions. These problems are common causes of persistent suction loss.
Can I increase vacuum motor power?
No. The motor's maximum output cannot usually be increased, but you can restore much of the original cleaning performance by improving airflow, removing restrictions, and maintaining filters and seals.
Why does suction drop when the bin fills?
A full dustbin or vacuum bag disrupts airflow, increasing resistance inside the system. Emptying the container before it reaches maximum capacity helps maintain consistent suction.
How can I improve suction power on my wet dry vacuum?
To boost vacuum cleaner suction on a wet/dry vacuum, empty the collection tank, clean or replace the filter, inspect the hose for debris, confirm the lid seals tightly, and remove any obstructions from the intake ports. These steps restore unrestricted airflow and improve cleaning performance.
Related Guide: :contentReference[oaicite:0]{index=0}
Final Troubleshooting Checklist Before Replacing Your Vacuum
Before deciding that your vacuum has reached the end of its life, complete this final inspection. Most cases of weak suction are caused by restricted airflow or routine wear rather than permanent motor failure. Working through these checks can improve vacuum suction, restore cleaning performance, and help you avoid unnecessary replacement costs.
- Empty the dustbin or replace the vacuum bag.
- Clean or replace dirty filters according to the manufacturer's recommendations.
- Inspect the hose, wand, and floor head for hidden blockages.
- Remove hair and debris wrapped around the brush roll.
- Check seals, gaskets, and hose connections for air leaks.
- Verify that cordless batteries are fully charged and still holding a normal runtime.
- Test the vacuum on multiple floor surfaces using the appropriate power setting.
If suction improves after these steps, continue following a regular maintenance schedule to support long-lasting vacuum performance. If performance remains poor despite clean airflow paths, intact seals, and proper power delivery, professional servicing or replacement may be the most practical solution.
For additional cleaning advice, explore our vacuum maintenance guides, floor cleaning tips, and home appliance care guides to help keep your equipment performing at its best year-round.