

Does a door insulation curtain really reduce heat loss?
Yes. A door insulation curtain helps reduce heat loss by covering the door and surrounding gaps where warm indoor air escapes and cold outdoor air enters. When installed with complete edge coverage, an insulated door cover for winter can minimize drafts, maintain a more consistent indoor temperature, improve comfort, and provide a renter-friendly insulation solution without making permanent changes to the property.
How to Install a Door Insulation Curtain Correctly
Installing a door insulation curtain is one of the quickest ways to improve winter comfort, but achieving the best results depends on proper installation. Even a high-quality insulated door cover for winter can lose effectiveness if it leaves gaps around the frame or is mounted incorrectly. This guide explains how to install your curtain for maximum draft protection, better energy efficiency, and long-lasting performance.
⏱ 6 min read
Discover how a properly installed door insulation curtain changes comfort instantly.
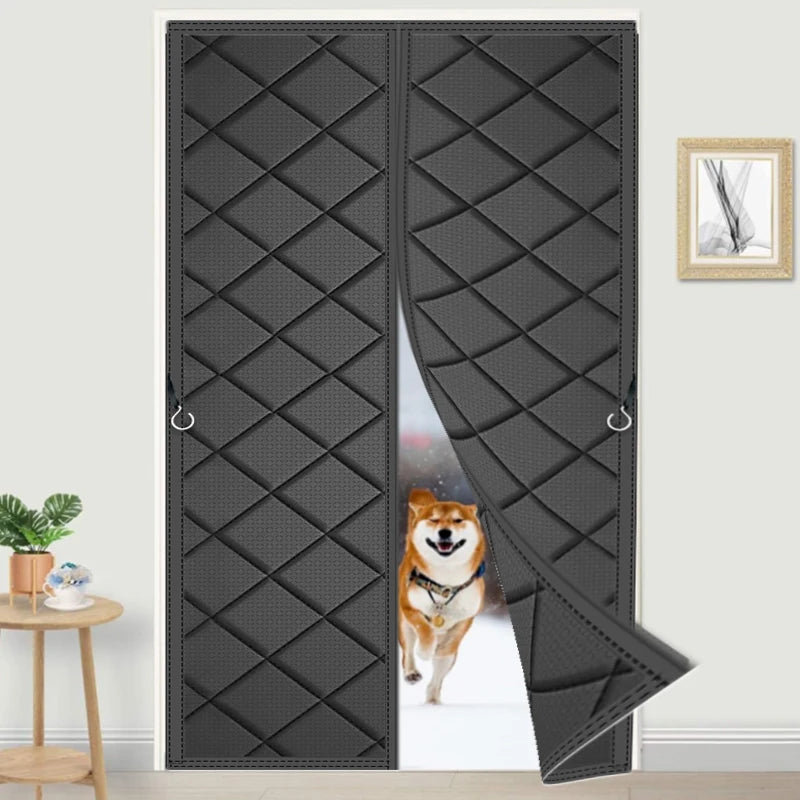
A door insulation curtain seals drafts quickly for a warmer, more comfortable home.
How Door Insulation Curtains Work (Quick Thermal Explanation)
A door insulation curtain creates an insulating barrier between your living space and the colder air outside. By trapping a layer of still air against the door, it slows heat transfer and helps keep indoor temperatures more stable throughout the day.
Many insulated door covers for winter use multiple layers of thermal fabric, foam, or reflective materials. Together, these layers help reduce the three primary forms of heat loss:
- Conduction: Reduces heat passing directly through the door surface.
- Convection: Limits cold drafts entering through gaps around the frame.
- Radiation: Reflects a portion of indoor heat back into the room instead of allowing it to escape.
For the best performance, the curtain should extend beyond the edges of the door and form a continuous seal. Proper installation can noticeably reduce drafts and improve comfort within a short time.
Why a Door Insulation Curtain Improves Comfort Immediately
Even well-built exterior doors can allow small amounts of cold air to enter around the frame, threshold, or weather seals. A properly fitted door insulation curtain adds another protective layer that reduces unwanted airflow while helping your heating system maintain a consistent indoor temperature.
- Blocks cold drafts near entrances and hallways.
- Helps rooms stay warmer with fewer temperature fluctuations.
- Provides a simple seasonal upgrade without permanent renovations.
- Can reduce outside noise while creating a cozier indoor environment.
Unlike permanent insulation projects, a thermal insulated door cover installs quickly, removes easily when the season changes, and is an excellent option for both homeowners and renters looking for an affordable way to improve winter comfort.
How to Choose the Right Door Insulation Curtain for Your Space
Selecting the right door insulation curtain is just as important as installing it correctly. The ideal curtain should completely cover the door opening, fit your door style, and use insulating materials that effectively reduce drafts without interfering with everyday use.
Measure Your Door Correctly Before Buying
Measure the full width and height of the door frame rather than the door alone. For the best seal, choose a curtain that extends approximately 2–4 inches beyond each side and above the frame. This extra coverage helps prevent cold air from leaking around the edges while improving thermal performance.
Best Curtain Types for Different Door Styles
- Hinged doors: Rod-mounted or Velcro-mounted thermal curtains offer reliable insulation while allowing easy daily access.
- Sliding glass doors: Wide insulated panels with ceiling or track-mounted systems provide continuous coverage across large openings.
- Metal doors: Magnetic-edge or adhesive-mounted insulated curtains create an effective seal without requiring extensive hardware.
For colder regions, prioritize thick, multi-layer thermal fabrics with insulated cores or reflective backing. These designs typically deliver better draft control and improved energy efficiency throughout the winter season. You can explore additional home comfort solutions in the Lifestyle collection.
Tools and Materials Needed for Installation
Preparing everything before you begin makes installation faster and helps ensure accurate positioning. Most installations require only basic household tools.
- Measuring tape
- Pencil or washable marker
- Drill or screwdriver
- Curtain rod, mounting track, or hook system
- Wall anchors for drywall, masonry, or concrete when needed
- Level for accurate alignment (recommended)
- Insulated curtain or thermal door cover
If you prefer a no-drill installation, keep adhesive Velcro strips, removable mounting hooks, or magnetic fasteners available. These options are especially useful for renters or temporary seasonal installations.
Step-by-Step: How to Install a Door Insulation Curtain Correctly
Step 1: Measure and Mark the Mounting Area
Identify the mounting points above the door frame, ensuring the curtain will extend beyond both sides of the opening. Double-check your measurements before drilling or attaching adhesive hardware to achieve complete coverage.
Step 2: Install the Mounting Hardware or Rod
Secure the curtain rod, mounting track, or hook system according to the manufacturer's instructions. When fastening into drywall, use appropriate wall anchors to prevent sagging and provide long-term support.
Step 3: Hang and Adjust the Curtain for Full Coverage
Attach the insulated curtain and center it carefully. The sides should overlap the frame, while the bottom should lightly touch or nearly touch the floor to reduce airflow beneath the door without dragging excessively.
Step 4: Seal Gaps to Reduce Drafts
Inspect the perimeter after installation. If you notice small openings, reinforce the seal with Velcro strips, magnetic edges, weather-resistant adhesive tape, or a draft stopper along the threshold. Even minor adjustments can noticeably improve insulation performance.
See how the winter magnetic insulated door curtain simplifies every step.
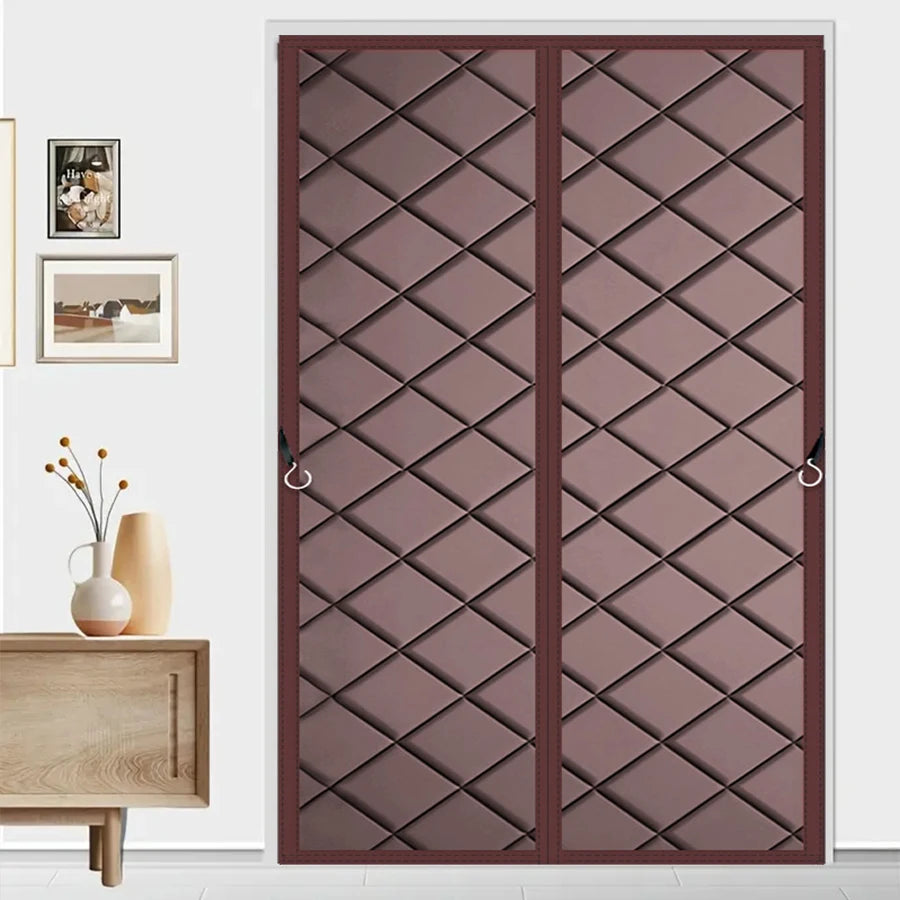
Correct positioning creates a tighter seal and helps minimize winter heat loss.
Installation Variations for Different Door Types
Hinged Doors
Mount the curtain several inches above the door frame so it overlaps the sides and top when closed. Choose tie-backs or split-panel designs if the doorway is used frequently, allowing convenient access without sacrificing insulation when the curtain is drawn.
Sliding Glass Doors
Large glass doors benefit from ceiling-mounted tracks or sturdy curtain rods that support wider thermal panels. Extend the curtain beyond both edges of the frame to reduce drafts and improve heat retention across the entire glass surface.
Metal or uPVC Door Frames
Adhesive mounting systems and magnetic fasteners work well on these door types because they eliminate the need for drilling while still creating a reliable seal. Clean the surface thoroughly before installation to help adhesives bond securely.
Common Door Insulation Curtain Installation Mistakes
- Installing the curtain too low or too narrow: Exposed gaps around the frame allow cold air to enter and reduce insulation performance.
- Measuring only the door instead of the frame: Incorrect sizing often leaves uncovered edges that permit drafts.
- Ignoring side and bottom seals: Even a thick insulated curtain performs poorly if air can leak around its perimeter.
- Using inadequate mounting hardware: Weak adhesive strips or undersized brackets may cause the curtain to sag or detach over time.
After installation, inspect the curtain from inside on a cold day. If light or moving air is noticeable around the edges, adjusting the position or improving the seal can significantly increase its effectiveness.
Troubleshooting: When Your Curtain Isn’t Working Properly
If your insulated door cover for winter is not delivering the expected level of comfort, a few simple adjustments can often resolve the problem.
- Cold drafts remain: Reposition the curtain so it overlaps the frame completely, then add weatherstripping or side seals where necessary.
- The curtain swings or lifts easily: Attach magnetic strips or small weights along the bottom edge to keep it in place.
- Rooms still lose heat: Check for additional air leaks around the threshold, frame, or nearby windows, and consider upgrading to a thicker multi-layer insulated curtain if needed.
- The doorway is difficult to use: Install tie-backs, split panels, or a sliding track system to improve accessibility while maintaining insulation.
Routine inspections throughout the heating season help ensure your door draft stopper curtain continues providing effective thermal protection and consistent indoor comfort.
DOT Approved Helmets List: Trusted Brands & Models
Choosing from a reliable DOT approved helmets list is easier when you focus on manufacturers with a long history of consistent quality, verified safety certifications, and positive long-term rider feedback. The brands below are widely recognized for producing dependable DOT certified helmets across multiple riding categories.
Full-Face Brands
Full-face helmets provide the highest level of facial and chin protection, making them the preferred choice for highway riding, sport riding, and long-distance touring.
- Shoei: Premium comfort, excellent aerodynamics, and low wind noise.
- Arai: Exceptional craftsmanship with race-proven safety engineering.
- AGV: Lightweight, performance-oriented helmets designed for sport and street riders.
- HJC: Reliable DOT-certified protection across entry-level and premium price points.
- Bell: Well-balanced models suitable for commuters and enthusiasts alike.
Modular Brands
Modular helmets combine the protection of a full-face design with the convenience of a flip-up chin bar, making them popular among touring riders and daily commuters.
- Schuberth: Outstanding comfort, quiet interiors, and premium touring features.
- Shoei: High-quality modular helmets with refined ventilation and fit.
- LS2: Practical modular designs that offer excellent value.
- HJC: Comfortable, dependable options available across multiple budgets.
Open-Face Brands
Open-face helmets prioritize visibility, airflow, and lightweight comfort for urban riding and relaxed cruising.
- Bell: Iconic styling combined with dependable DOT certification.
- Biltwell: Classic-inspired designs with modern construction.
- Scorpion EXO: Comfortable, lightweight helmets for everyday riding.
Regardless of brand, always verify current DOT certification, choose the correct size, and purchase from authorized retailers to ensure you're receiving a genuine helmet that meets applicable safety standards.
Frequently Asked Questions
Do DOT approved helmets expire?
Helmet materials gradually deteriorate because of UV exposure, sweat, repeated use, and normal aging. Most manufacturers recommend replacing a motorcycle helmet approximately every five years from the date of first use, or sooner if it has been involved in a crash or shows visible damage.
Is a full-face helmet safer than other styles?
Yes. Full-face helmets generally provide the highest level of protection because they cover the top, sides, back, and chin. This additional coverage offers better protection during many common motorcycle crash scenarios than open-face helmets.
Are more expensive helmets always safer?
Not necessarily. Every DOT certified helmet must meet minimum safety requirements. Higher-priced helmets often justify their cost through improved comfort, lighter materials, quieter aerodynamics, better ventilation, premium interiors, and additional certifications rather than dramatically higher basic impact protection.
How do I check DOT certification?
Look for the permanent DOT marking on the back of the helmet and review the interior label for manufacturer information and production details. Purchasing from reputable retailers is one of the best ways to avoid counterfeit or novelty helmets falsely claiming certification.
Can a helmet be DOT and ECE certified?
Yes. Many premium motorcycle helmets carry both DOT and ECE certifications. Dual certification indicates that the helmet complies with multiple recognized safety standards, making it a popular choice for riders who travel internationally or simply prefer additional testing assurance.
Are novelty helmets DOT approved?
No. Novelty helmets designed primarily for appearance generally do not meet FMVSS 218 requirements. Even if a novelty helmet displays a misleading sticker, it should not be considered a substitute for a properly certified motorcycle helmet.
How often should I replace my motorcycle helmet?
Replace your helmet immediately after any significant impact, even if no exterior damage is visible. Otherwise, follow the manufacturer's replacement schedule, monitor the condition of the shell, liner, straps, and visor, and replace the helmet if signs of wear or deterioration appear.
Riding confidently starts with protection you can trust. Selecting a properly fitting DOT certified helmet from a reputable manufacturer is one of the most important investments you can make for your safety. By matching your helmet to your riding style, maintaining it properly, and replacing it when necessary, you'll enjoy greater confidence, comfort, and protection every time you ride.













