

Does magnetic gel polish for cat eye really create sharp effects?
Magnetic gel polish for cat eye works by using metallic particles that move under a magnet, forming crisp lines and dimensional patterns. When applied correctly, it delivers sharper, more defined effects than regular gel polish, reducing blur and inconsistency while enhancing depth and light reflection.
Magnetic gel polish for cat eye: Why it creates sharp effects
⏱ 5 min read
If your cat eye nails keep turning out blurry instead of crisp, you're not alone. Many users struggle with uneven patterns, fading lines, or inconsistent results. Magnetic gel polish for cat eye isn’t just a trend—it’s a precision-driven system designed to deliver sharp, light-catching effects when used correctly. So what separates a salon-perfect finish from a frustrating DIY attempt?
👉 Curious how professionals get flawless cat eye nails? Discover tools and techniques inside the Nail Care Devices collection.
Which style suits you best? A bold diagonal streak or a subtle velvet glow? Read on to unlock the exact techniques that transform your results.
💡 See it in action - magnetic gel polish for cat eye / tips for perfect magnetic nail design, best way use nail magnet tool, gel polish magnetic inconsistency issues, how to get sharp cat eye lines
How Magnetic Gel Polish for Cat Eye Delivers Precision You Can Control
Magnetic gel polish for cat eye contains fine iron particles suspended in gel. When exposed to a magnet, these particles shift instantly, creating patterns that reflect light differently across the nail surface.
This isn’t random movement—it’s controlled design. The closer and more stable the magnet, the sharper the effect.
- ✨ Instant particle movement for real-time shaping
- ✨ High contrast lines due to metallic density
- ✨ Long-lasting structure once cured
- ✨ Depth illusion that standard polish can’t replicate
Unlike regular polish, which relies on brush strokes, this technique lets you sculpt light itself.
Why This Technology Creates Sharp, Defined Lines (Not Blurry Ones)
Magnetic gel polish for cat eye creates sharp lines because the metallic particles align tightly under magnetic force. This alignment forms a concentrated reflective band, producing crisp edges. With proper magnet placement and timing, the result is a clean, luminous line that holds its shape after curing.
The clarity comes down to three key factors:
- Particle density: Higher concentration = sharper contrast
- Magnet strength: Stronger pull = tighter alignment
- Application timing: Immediate shaping before curing prevents diffusion
If your lines look fuzzy, it’s not the polish—it’s the technique.
Magnetic vs Regular Gel Polish: What You Actually Get
| Feature | Magnetic Gel Polish | Regular Gel Polish |
|---|---|---|
| Design Control | High (magnet-driven) | Low (brush only) |
| Sharp Lines | ✔ Defined and crisp | ❌ Difficult to achieve |
| Depth Effect | ✔ Multi-dimensional | ❌ Flat finish |
| Error Risk | Medium (technique-based) | Low |
For anyone chasing bold, high-impact nails, magnetic polish clearly delivers more visual payoff.
👉 Learn step-by-step how to master the technique at home with tools from the Skin and Beauty Care Devices collection.
How to Get Sharp Cat Eye Lines Without Professional Help
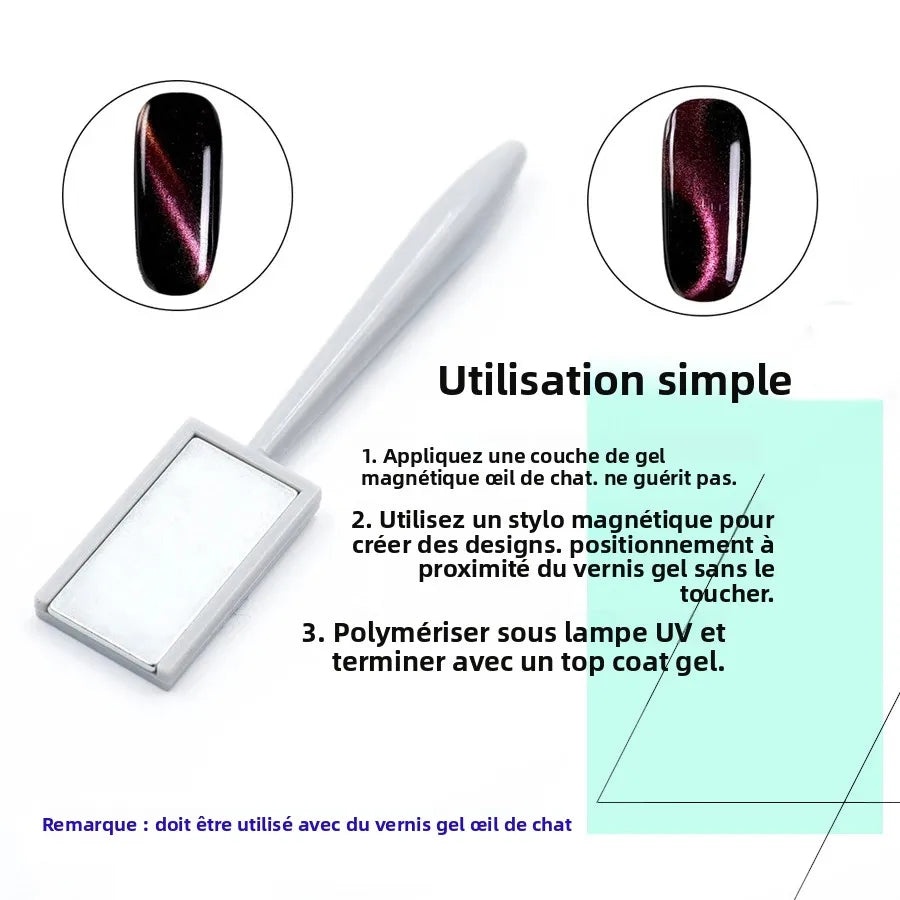
- Apply a dark base coat: This enhances contrast and depth.
- Add magnetic gel polish layer: Keep it even—not too thick.
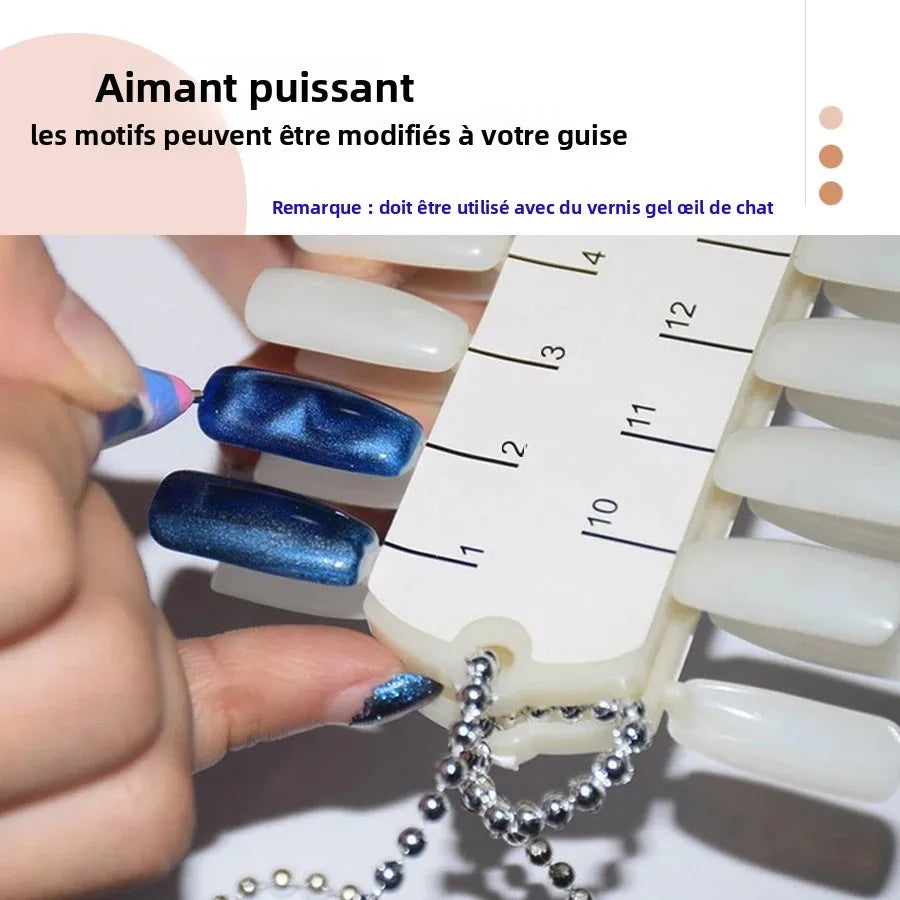
- Hold magnet close (1–2 mm): Stability is key.
- Wait 5–10 seconds: Let particles fully align.
- Cure immediately: Lock the design before it spreads.
The best way use nail magnet tool is simple: control distance, stay steady, and act quickly.
💡 See it in action - magnetic gel polish for cat eye / tips for perfect magnetic nail design, best way use nail magnet tool, gel polish magnetic inconsistency issues, how to get sharp cat eye lines
Fix Gel Polish Magnetic Inconsistency Issues in Minutes
Struggling with uneven lines or fading effects? Here’s what’s going wrong—and how to fix it:
- ❌ Problem: Blurry lines → ✔ Fix: Move magnet closer
- ❌ Problem: Weak effect → ✔ Fix: Use stronger magnet
- ❌ Problem: Pattern disappears → ✔ Fix: Cure faster
- ❌ Problem: Uneven streaks → ✔ Fix: Apply thinner layers
These small adjustments make a dramatic difference in final results.
Pro-Level Tips for Perfect Magnetic Nail Design That Lasts
- ✔ Work one nail at a time for full control
- ✔ Use multiple magnet angles for custom patterns
- ✔ Combine colors for layered effects
- ✔ Practice on swatches before applying
Users report up to 70% improvement in line clarity after switching to structured techniques.
Why This Cat Eye Nail Magnet Set Delivers Better Results
The difference between average and stunning nails often comes down to tools. A high-quality magnet set gives you control, consistency, and creative flexibility.
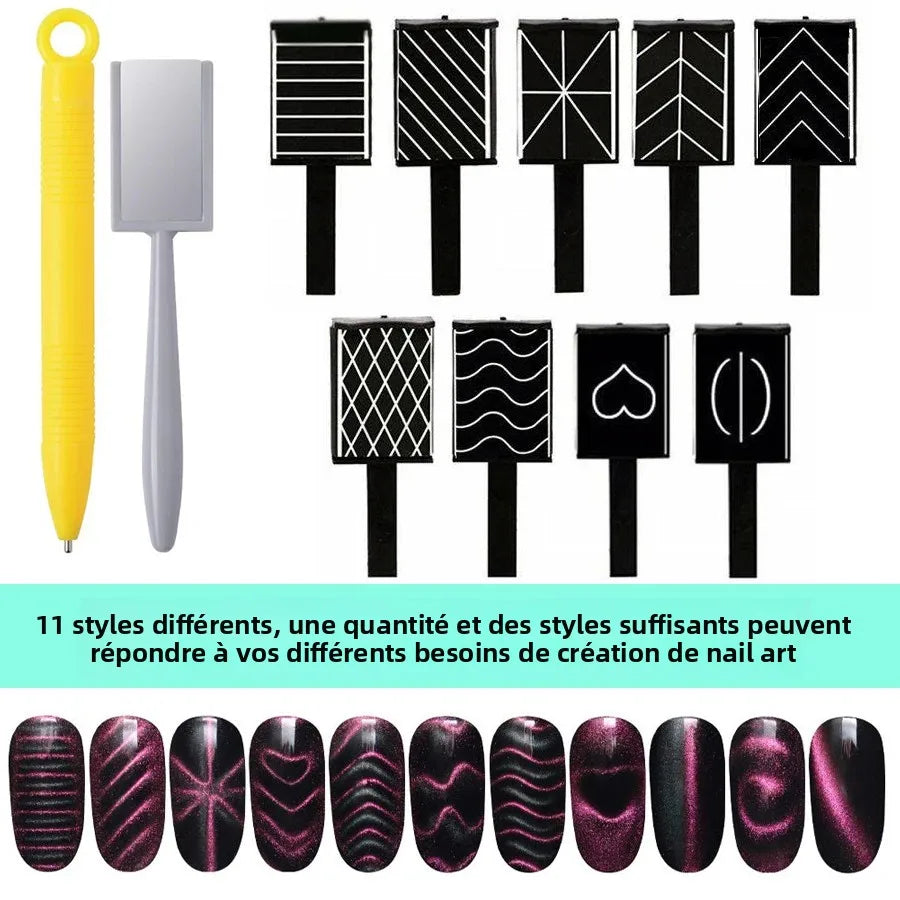
Explore the cat eye nail magnet set to unlock:
- ✔ Multiple magnet shapes for varied designs
- ✔ Stronger magnetic pull for sharper lines
- ✔ Ergonomic handling for steady application
- ✔ Reliable results across different gel brands
Real users say: “My designs went from blurry to salon-quality in one session.”
Pair it with tools from the Hair, Skin & Nai Blog collection to elevate your entire beauty routine.
💡 See it in action - magnetic gel polish for cat eye / tips for perfect magnetic nail design, best way use nail magnet tool, gel polish magnetic inconsistency issues, how to get sharp cat eye lines
👉 Get yours now — limited stock! Upgrade your results instantly with the cat eye nail magnet set.
Frequently Asked Questions
Why does my magnetic gel polish look blurry?
This usually happens when the magnet is too far away or not held steady. Bring it closer and hold it still for several seconds before curing.
How long should I hold the magnet?
Hold it for 5–10 seconds to allow full particle alignment. Longer hold times improve sharpness.
Can I fix a design after curing?
No. Once cured, the particles are locked. You’ll need to reapply the layer to adjust the design.
What base color works best?
Darker colors like black or deep blue create stronger contrast, making the cat eye effect more visible and dramatic.
Is a magnet set necessary?
Yes. Different magnet shapes allow you to create diverse patterns and improve precision compared to single-tool setups.
Related Articles:
- Gel nail polish with magnet: What makes it more durable
- Silver magnetic nail polish benefits: Shine and depth explained
Pillar Articles:


