
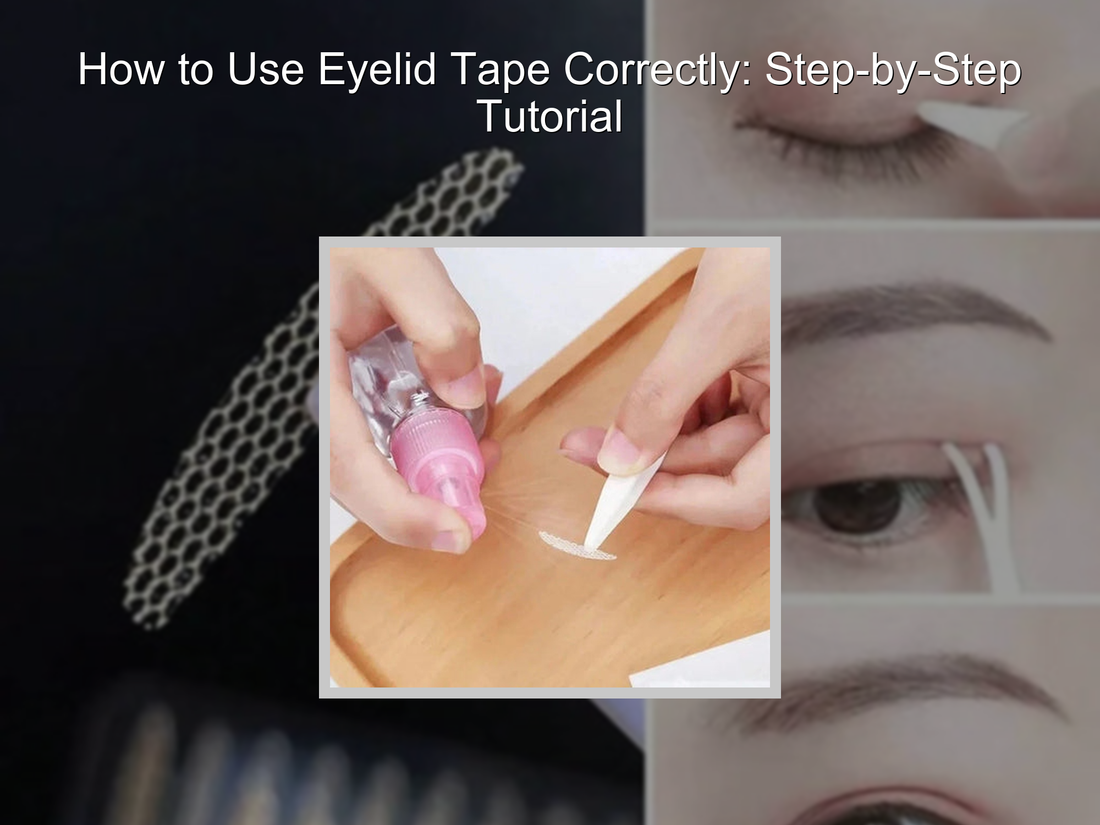
Eyelid Tape Tutorial: How to Apply Double Eyelid Tape Step-by-Step
Wondering how to use eyelid tape without it looking obvious? This step-by-step guide breaks down eyelid tape instructions, placement techniques, troubleshooting tips, and expert application methods for creating a natural-looking double eyelid crease. You'll learn how to choose the right tape, position it for different eye shapes, hide it under makeup, and make it last all day.
⏱ 7 min read
Quick Eyelid Tape Tutorial (Beginner Summary)
If you're wondering how to apply eyelid tape quickly, follow these basic steps:
- Clean your eyelids and remove oil or skincare residue.
- Identify where you want the crease to form.
- Place the tape slightly above your natural lash line.
- Use a Y-shaped tool to press the skin into a fold.
- Open and close your eyes several times to check symmetry.
5-Step Quick Application Guide
Most beginners achieve the best results by creating a low, natural-looking crease rather than placing the tape too high.
Best Placement Rule for Beginners
Position the tape where your eyelid naturally wants to fold. This reduces visibility and helps the tape stay in place longer.

How to use eyelid tape effortlessly — See it in action!
What Is Eyelid Tape?
Eyelid tape is a thin adhesive strip designed to temporarily create or enhance an upper eyelid crease. It works by gently folding the skin, producing the appearance of a double eyelid. Many users choose eyelid tape as a non-surgical way to create more defined eyes, improve eyelid symmetry, or support makeup looks.
How Eyelid Tape Creates a Crease
When properly positioned, the tape causes the eyelid skin to fold along a specific line whenever the eyes open. This creates a more defined crease without surgery and can make the eyes appear larger and more awake.
Who Benefits Most From Eyelid Tape
- People with monolids
- People with hooded eyelids
- People with uneven eyelid creases
- Anyone wanting a temporary crease for makeup looks
If you're exploring crease-enhancing solutions, you may also enjoy our guide to double eyelid techniques and eye-lifting methods available throughout our Eye Care Blog.
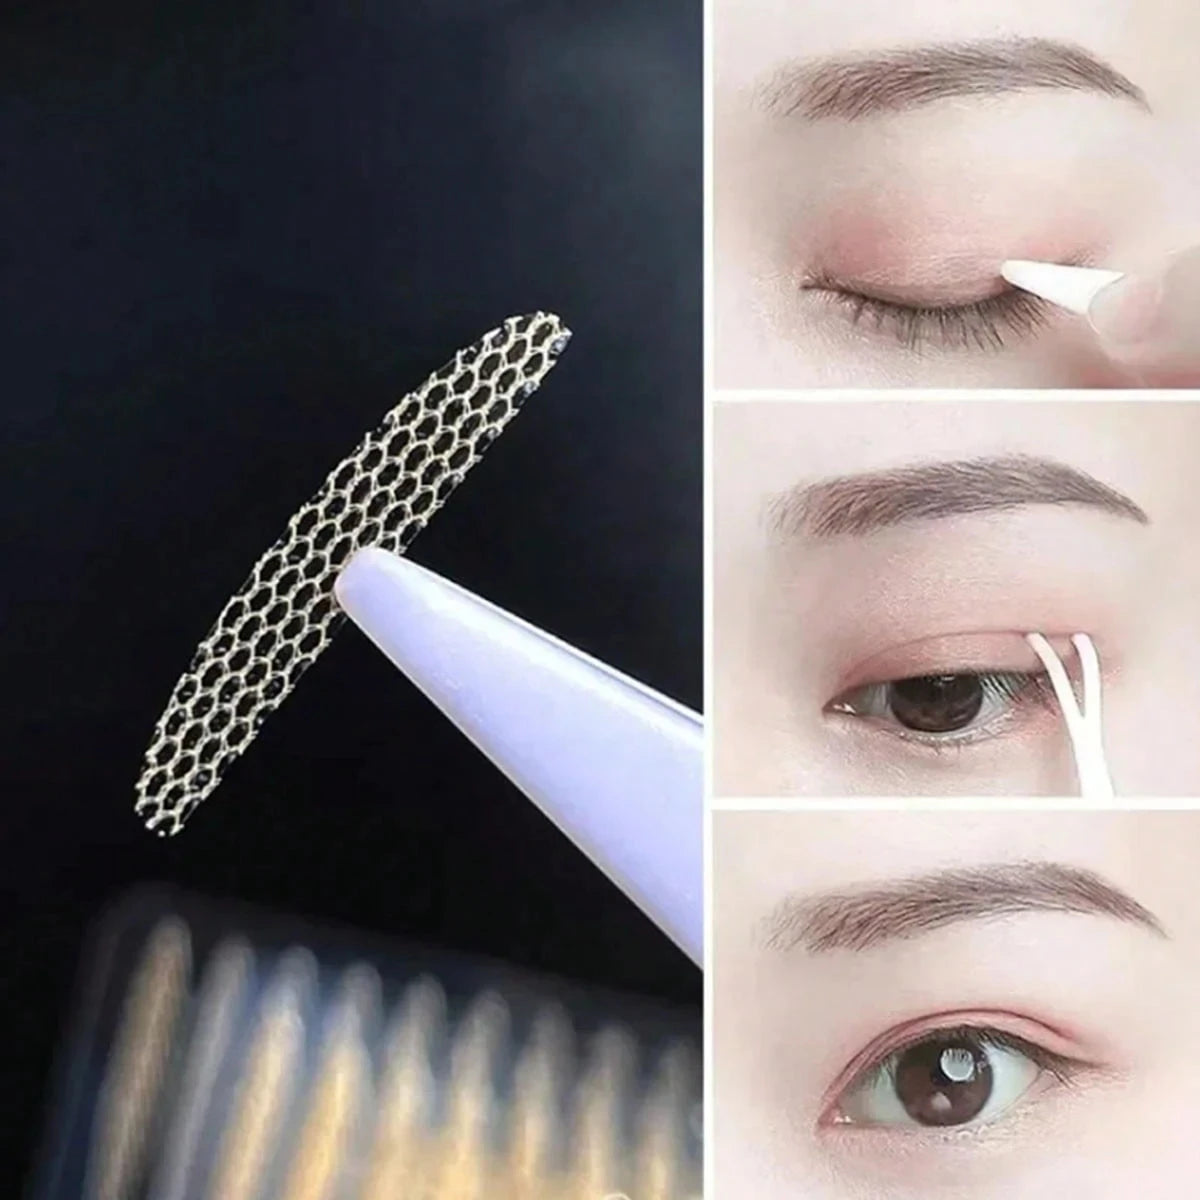
Types of Eyelid Tape Explained
Eyelid tape comes in single-sided, double-sided, fiber-strip, and mesh styles. Each offers different levels of visibility and hold. Beginners typically find pre-cut single-sided strips easiest to use, while advanced users often prefer fiber strips for their nearly invisible appearance.
For a deeper breakdown of styles and performance differences, see our related eyelid tape comparison resources.
Choosing the Right Eyelid Tape Before You Start
Single-Sided vs Double-Sided Tape
Single-sided tape is generally easier for beginners. Double-sided tape creates stronger folds but requires more precise placement and can be more noticeable if applied incorrectly.
Which Tape Shape Works Best
- Crescent-shaped tape for natural creases
- Oval tape for larger eyelids
- Slim strips for subtle enhancement
Choosing Tape Width and Size
Smaller tape pieces usually look more natural. Larger strips may provide stronger support but can be more visible under makeup. Testing several sizes often helps you find the most comfortable fit for your eye shape.
Tools You Need Before Applying Eyelid Tape
Essential Tools
- Eyelid tape
- Tweezers
- Mirror with good lighting
- Y-shaped crease tool
- Cotton pads
Optional Tools for Better Precision
- Magnifying mirror
- Oil-control blotting paper
- Translucent powder
- Fine eyeliner brush
Preparing these items beforehand helps make eyelid tape application faster, cleaner, and more accurate.
Eyelid Preparation Checklist
How to Remove Oil and Skincare Residue
Wash your face and ensure no moisturizer, sunscreen, primer, facial oil, or makeup remains on the eyelids. Adhesive performs best on clean, dry skin.
Mistakes That Reduce Adhesion
- Applying tape over skincare products
- Using tape on sweaty skin
- Applying tape immediately after foundation
- Touching the adhesive surface repeatedly
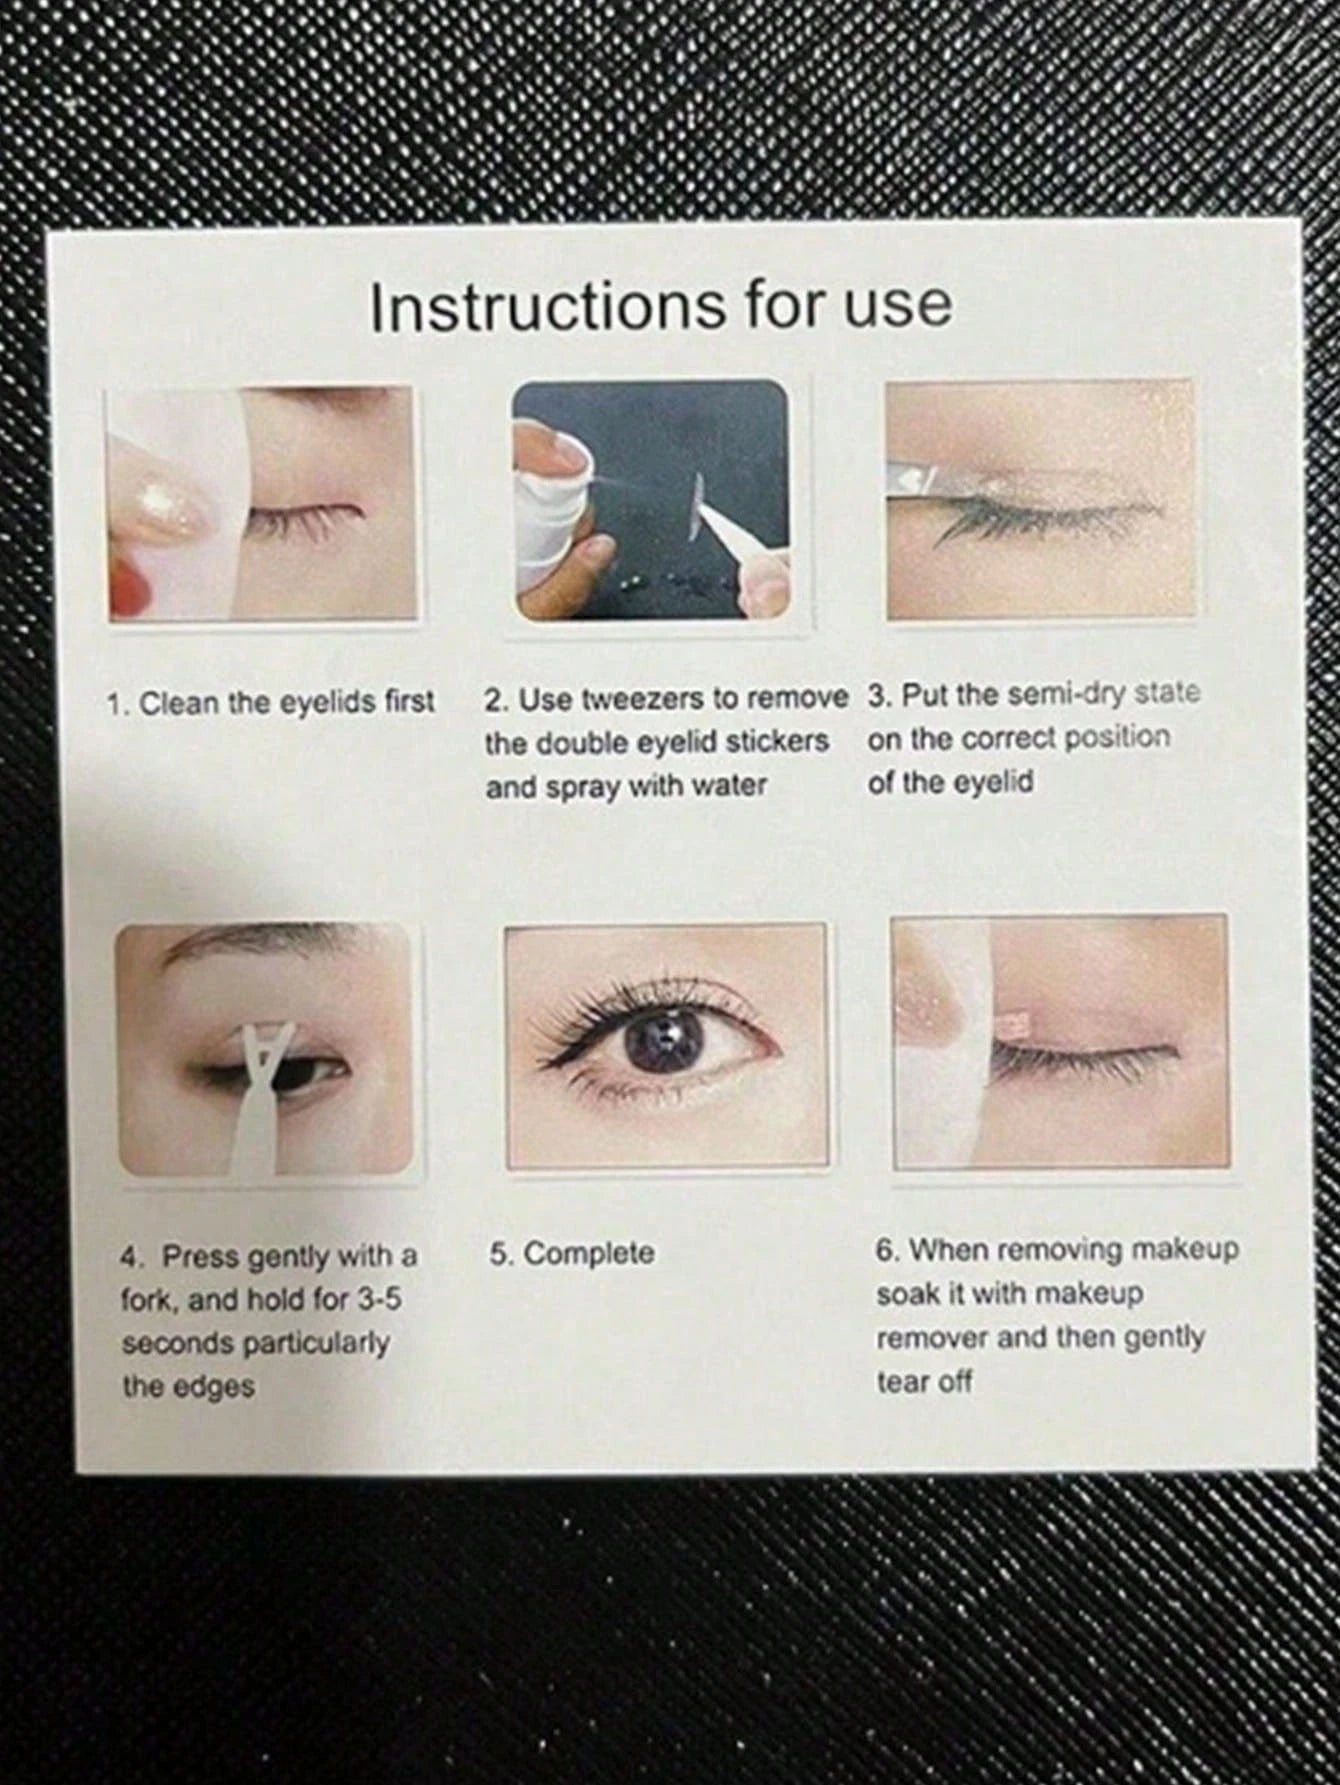
How to Use Eyelid Tape (Step-by-Step Tutorial)
Step 1: Clean and Prep Your Eyelids
Start with clean, dry eyelids free from oils and makeup. A clean surface dramatically improves how long the tape stays in place.
Step 2: Find Your Natural Crease Line
Use a Y-tool to gently press different areas of the eyelid until you find a comfortable crease position. Most natural-looking results occur when the crease follows your eye's natural contour.
Step 3: Test Eyelid Tape Placement
Before removing the backing, hold the tape against your eyelid and verify the crease height. This simple test can prevent uneven results.
Step 4: Position the Eyelid Tape
Place the tape evenly along the intended crease line. Using tweezers improves precision and prevents oils from your fingers affecting the adhesive.
Step 5: Press and Create the Fold
Use the Y-tool to press the eyelid into the adhesive while keeping your eye partially open. Apply gentle pressure rather than forcing the fold.
Step 6: Open and Close Your Eyes Naturally
Check comfort, symmetry, and visibility. Blink several times and make small adjustments if needed.
Step 7: Blend With Makeup
Apply eyeshadow and eyeliner carefully to camouflage the tape and create a more natural appearance. Soft matte shades usually hide tape better than highly reflective shimmer products.
Applying double eyelid tape made simple — try these eyelid tape instructions today.
Eyelid Tape Placement for Different Eye Shapes
Learning how to apply eyelid tape correctly often depends on your eye shape. Small placement adjustments can dramatically improve comfort and appearance.
How to Apply Eyelid Tape for Monolids
For monolids, place the tape slightly higher above the lash line to create a visible crease while maintaining a natural appearance. Starting with a low crease often produces the most realistic result.
How to Use Eyelid Tape for Hooded Eyes
If you have hooded eyelids, position the tape just above the natural fold rather than directly on it. This helps create definition while minimizing visibility. You may also benefit from hooded-eye makeup techniques that complement the new crease.
How to Apply Eyelid Tape on Uneven Eyelids
Apply the tape slightly higher on the eye with the lower crease. Gradual adjustments usually create better symmetry than dramatic repositioning.
Placement Guide for Deep-Set Eyes
People with deep-set eyes generally achieve the best results with lower crease placement. Excessively high placement can look unnatural and become more visible during blinking.
Before-and-After Placement Examples
Low Crease Placement
Produces the most natural appearance and is often easiest for beginners.
Medium Crease Placement
Balances visibility and eye-opening effect while remaining realistic.
High Crease Placement
Creates a dramatic fold but may increase tape visibility and discomfort.
Insert before-and-after photos or illustrations in this section.
Detailed Eyelid Tape Application Tips
Choosing the Right Tape Shape
Eyelid tapes come in curved, straight, oval, and fiber-strip designs. Curved strips often provide the most beginner-friendly experience because they follow the eyelid's natural contour.
Angle and Placement Tricks
Placing tape at a slight angle instead of perfectly horizontal can help create a softer, more natural crease, especially on hooded or asymmetrical eyelids.
Making Eyelid Tape Invisible
Apply a thin layer of matte eyeshadow over the tape to reduce shine and blend the edges. Matching the eyeshadow to your skin tone usually delivers the most natural finish.
For additional concealment techniques, see our eyeshadow application guides and eye makeup tutorials.
How to Apply Makeup Over Eyelid Tape
Wait a few minutes after applying the tape before using makeup. Use light layers of eyeshadow and avoid heavy cream products that may weaken adhesion.
Common Eyelid Tape Problems (And Fixes)
Why Eyelid Tape Won’t Stick
Oil, moisturizer, sweat, or leftover makeup can prevent proper adhesion. Clean and dry the eyelid thoroughly before reapplying.
Tape Showing Through Makeup
If the tape is visible, switch to thinner strips or use matte eyeshadow to camouflage the edges.
Eyelid Tape Folding or Peeling
This commonly occurs when the tape is placed too low or the wrong size is used. Repositioning the strip slightly higher often solves the issue.
Creases Look Uneven
Check symmetry before fully pressing the tape into place. Small adjustments during application are easier than correcting a finished crease.
Tape Feels Uncomfortable
Discomfort often indicates the crease has been placed too high. Lowering the placement slightly can improve comfort and appearance.
Common Mistakes to Avoid
Applying Tape on Oily Skin
Even small amounts of oil can reduce adhesion and shorten wear time.
Creating an Unrealistically High Crease
Overly high placement often causes discomfort and visible tape edges.
Using the Wrong Tape Size
Oversized tape can wrinkle, peel, or become visible during blinking.
Applying Makeup Too Early
Allow the tape to settle before applying eyeshadow or eyeliner.
How to Remove Eyelid Tape Safely
Step-by-Step Removal
- Wash your hands.
- Loosen the adhesive with warm water or makeup remover.
- Peel slowly from one side.
- Clean away any residue.
Preventing Irritation
Avoid pulling the tape off forcefully. Gentle removal reduces stress on the delicate eyelid skin and helps prevent redness.
Eyelid Tape vs. Alternatives
Compared with eyelid glue and surgical procedures, eyelid tape offers a simple, affordable, and reversible solution.
| Method | Cost | Effect | Longevity |
|---|---|---|---|
| Eyelid Tape | Low | Instant lift, customizable | One day |
| Eyelid Glue | Low | Similar effect, stronger hold | One day |
| Surgery (Blepharoplasty) | High | Permanent crease | Years |
Eyelid Glue
Eyelid glue uses a liquid adhesive to create a crease. It can provide a stronger hold but may require more practice to apply and remove properly. Beginners may prefer tape before experimenting with glue-based methods.
Eyelid Fiber Strips
Fiber strips are extremely thin strands stretched across the eyelid to form a crease. They are discreet but often require greater application skill.
Surgical Options
Blepharoplasty permanently reshapes the eyelid crease. While effective, it involves higher costs, recovery time, and medical considerations.
Which Option Is Best for Beginners
Most beginners find eyelid tape the easiest option because it allows quick adjustments and removal without committing to a permanent change.
Pro Tips for Long-Lasting Results
How to Make Tape Last All Day
- Apply on completely dry skin.
- Use blotting paper throughout the day.
- Avoid rubbing your eyes.
- Choose the correct tape size.
Wearing Eyelid Tape in Humid Weather
Humidity can weaken adhesion. Oil-control products, lightweight eye makeup, and regular blotting can help maintain wear time.
Discover the beauty of applying double eyelid tape — confidence in every glance.
Frequently Asked Questions
Does eyelid tape damage skin?
When used properly, eyelid tape is generally safe. Removing the tape gently and avoiding excessive pulling helps protect delicate eyelid skin.
How long can I wear eyelid tape?
Most people wear eyelid tape for several hours during the day. It is best to remove it before sleeping.
Can I apply makeup over eyelid tape?
Yes. Light eyeshadow and eyeliner can help blend the tape and make it less visible.
Is eyelid tape reusable?
Most eyelid tapes are designed for single use, although some thicker strips may be reused once if they remain clean and sticky.
Can beginners use double eyelid tape?
Yes. Many beginners start with curved or pre-cut strips because they are easier to position.
How do you hide eyelid tape under eyeshadow?
Use matte shades and blend gently over the tape. Avoid heavy shimmer, which may highlight the edges.
Can eyelid tape create permanent creases?
No. Eyelid tape creates temporary folds that disappear after removal.
Why does eyelid tape stop working after a few hours?
Oil, sweat, incorrect placement, or poor adhesion are the most common causes. Additional troubleshooting tips can be found in our eyelid tape guides.
Can I sleep with eyelid tape on?
Most manufacturers recommend removing eyelid tape before sleeping to reduce irritation and adhesive buildup.
Explore more beauty hacks in our Eye Care Blog or Beauty & Self-Care Blog .
Final Thoughts
Learning how to apply eyelid tape becomes much easier once you understand crease placement, eye shape differences, and proper preparation. Start with a natural crease height, practice placement carefully, and make small adjustments until you find the most comfortable and realistic result. With consistent practice, eyelid tape can become a quick and effective addition to your daily beauty routine.
Related Articles:
- Does Eyelid Tape Help Ptosis? What Experts Say
- Eyelid Lifter Strips Tutorial: Lift and Shape Your Eyes Instantly
- Applying Double Eyelid Tape: Quick Tips for Beginners
- Eyelid Tape Instructions: Avoid These Common Mistakes
Pillar Articles:


