

❓ Why is my moisture meter not working?
A moisture meter often malfunctions due to low batteries, dirty sensors, damaged probes, incorrect settings, or calibration drift. Before replacing it, check power levels, inspect and clean the probes, verify measurement mode, and test calibration. These simple troubleshooting steps resolve most moisture meter problems in just a few minutes.
Moisture Meter Not Working? Diagnose and Fix It Before Replacing It
Is your moisture meter not working or showing inconsistent readings? Before replacing it, run a quick diagnosis. Most issues come from battery problems, dirty probes, incorrect settings, calibration drift, or sensor contamination. In many cases, a simple cleaning, calibration check, or battery replacement can restore accurate readings within minutes.
⏱ 6 min read
Moisture Meter Not Working? Start With This 5-Minute Diagnosis Checklist
Before replacing your moisture meter, perform these quick checks. Most moisture meter problems are caused by battery issues, dirty probes, incorrect settings, calibration drift, or poor testing technique rather than complete device failure.
Symptom-Based Quick Diagnosis Table
- Won't turn on → Check batteries, contacts, and power switch.
- Always reads dry → Inspect probes, calibration status, and test surface.
- Always reads wet → Check sensor contamination and calibration drift.
- Readings jump constantly → Clean probes and verify material settings.
- Blank display → Check battery voltage and screen damage.
- Soil moisture meter not working → Clean probe and verify soil contact.
The Fastest Tests Before You Open the Device
- Install fresh batteries.
- Inspect battery contacts for corrosion.
- Clean probes with a soft cloth.
- Verify the correct measurement mode.
- Test on a known dry and known damp sample.
When a Moisture Meter Can Be Fixed in Minutes
If the problem is caused by dirty probes, weak batteries, incorrect settings, or minor calibration drift, the meter can often be restored within a few minutes without professional repair.
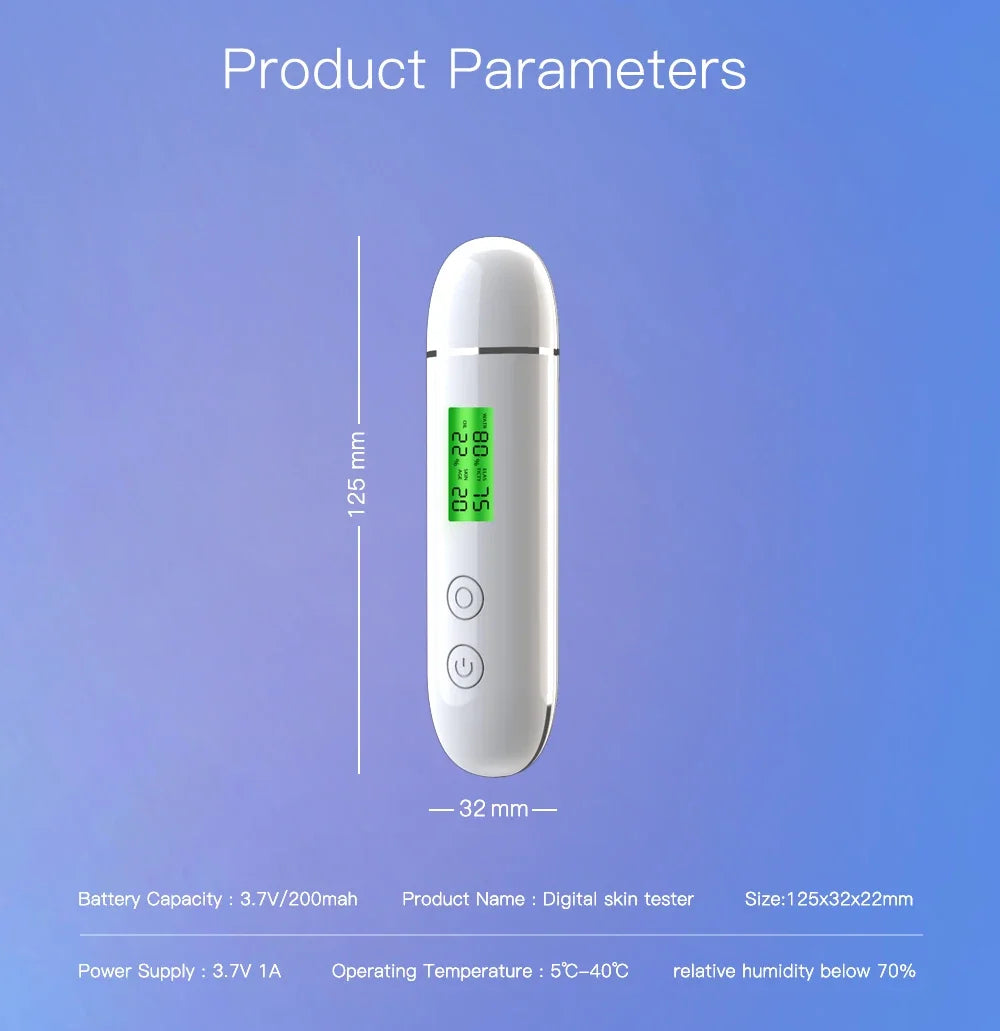
See it in action — moisture meter not working? Here's what fixes it fast.
Why Is My Moisture Meter Not Working? (Symptoms, Causes, and Solutions)
If your moisture meter suddenly stops working or produces unusual readings, the cause is often easy to identify. Most problems fall into categories such as power issues, sensor contamination, calibration drift, display faults, or improper use.
Moisture Meter Won't Turn On
The most common causes are depleted batteries, corroded battery terminals, damaged power switches, or internal circuit failures. Always begin by installing fresh batteries and checking the battery compartment.
Readings Are Inaccurate, Fluctuating, or Jumping
Erratic readings are often caused by dirty probes, loose connections, calibration drift, electromagnetic interference, temperature changes, or incorrect material settings.
Moisture Meter Always Reads Dry
A meter that constantly reports dry conditions may have contaminated probes, damaged sensors, incorrect measurement settings, insufficient material contact, or calibration issues.
Moisture Meter Always Reads Wet
Persistent wet readings can indicate sensor contamination, internal moisture damage, electrical faults, residue buildup, or failed calibration.
Plant or Soil Moisture Meter Not Working
Soil residue buildup, probe corrosion, compacted soil, and improper insertion depth are among the most common causes of inaccurate soil moisture readings.
Display Errors, Blank Screens, and Missing Segments
Display problems may result from low battery voltage, damaged LCD components, loose internal connections, moisture intrusion, or electronic failure.
Quick Troubleshooting Checklist (Fix Most Moisture Meter Problems in Minutes)
Before replacing your moisture meter, follow this systematic troubleshooting process. These steps solve the majority of common moisture meter issues.
Step 1: Check Batteries, Voltage, and Power Contacts
Remove the batteries and inspect the contacts. Replace weak batteries, clean corrosion, and verify proper polarity. Low voltage can cause unstable readings even when the display still powers on.
Step 2: Inspect Probes, Sensor Plates, and Wiring
Check for bent probe pins, rust, dirt, oxidation, cracked housings, or loose wiring. Physical damage often affects measurement accuracy.
Step 3: Verify Settings, Material Selection, and Measurement Mode
Confirm that the meter is configured for the correct material type, such as wood, drywall, concrete, soil, or skin. Incorrect settings can create false readings.
Step 4: Test Against a Known Moisture Reference
Measure a known dry sample and a known damp sample. The readings should show a clear difference. If not, further diagnosis is needed.
Step 5: Determine Whether Calibration Is Required
If all other checks pass but readings remain inaccurate, calibration verification should be performed before recalibrating the device.

Calibrate and clean — moisture meter tester fixes most issues fast.
Common Moisture Meter Problems and Their Fixes
If basic troubleshooting doesn't solve the problem, one of these common hardware or calibration issues may be responsible.
Corroded Battery Contacts
Battery leakage can corrode contacts and prevent proper power delivery. Carefully cleaning the contacts often restores operation.
Bent, Dirty, or Oxidized Probe Pins
Pin-style moisture meters depend on clean electrical contact. Bent, dirty, or oxidized probes can produce inaccurate or inconsistent readings.
Calibration Drift
Electronic components naturally drift over time. Periodic calibration checks help maintain measurement accuracy.
Internal Sensor Failure
If cleaning, resetting, and recalibration do not resolve the issue, the internal sensor may be damaged and require repair or replacement.
Water Damage Inside the Meter
Although moisture meters measure moisture, many are not waterproof. Internal water intrusion can damage circuitry and sensors.
Damaged Display or Circuit Board
Dropped devices can suffer cracked screens, damaged LCD connections, or fractured circuit boards that affect functionality.
Moisture Meter Calibration Verification Before Recalibration
How to Tell if Calibration Is Actually the Problem
Many users assume calibration is responsible for inaccurate readings when the true cause is dirty probes, weak batteries, environmental interference, or incorrect settings. Eliminate those possibilities first.
Reference Testing Methods for Accuracy Checks
- Test a known dry sample.
- Test a known damp sample.
- Compare results against manufacturer specifications.
- Repeat measurements multiple times.
- Document any consistent deviation.
Common Calibration Mistakes
- Calibrating with dirty probes.
- Ignoring temperature compensation.
- Using the wrong material setting.
- Skipping manufacturer procedures.
- Calibrating on contaminated reference materials.
How to Calibrate a Moisture Meter Correctly
If your moisture meter powers on but readings appear inaccurate, proper calibration can restore measurement confidence.
Why Moisture Meter Calibration Matters
Calibration ensures readings remain accurate and consistent. Environmental conditions, wear, and electronic drift can affect measurement precision over time.
Digital Moisture Meter Calibration Procedure
- Install fresh batteries.
- Clean all probes and sensor surfaces.
- Allow the meter to stabilize at room temperature.
- Use the manufacturer-recommended calibration reference.
- Adjust calibration settings according to instructions.
- Verify accuracy using known moisture samples.
How to Calibrate Pin Moisture Meters
Pin moisture meters are typically calibrated using reference blocks or built-in calibration checks supplied by the manufacturer.
How to Calibrate Pinless Moisture Meters
Pinless meters often require a dedicated calibration plate and should be checked on a flat, stable reference surface.
How Often Moisture Meter Calibration Should Be Performed
Professional users should verify calibration regularly, while occasional users should perform calibration checks whenever readings appear inconsistent.
For more measurement tips, browse our Beauty & Self-Care Blog .
How Moisture Meters Work (and Why They Fail)
Understanding how moisture meters operate helps explain why inaccurate readings sometimes occur.
How Pin Moisture Meters Measure Moisture
Pin meters insert metal probes into a material and measure electrical resistance. As moisture content increases, resistance decreases.
How Pinless Moisture Meters Work
Pinless meters use electromagnetic sensors to scan moisture beneath the surface without penetrating the material.
Factors That Affect Accuracy
- Material density
- Temperature
- Surface contamination
- Surface moisture
- Improper sensor contact
- Incorrect material settings
Can Moisture Meters Be Wrong? Understanding False Readings
Yes. Even quality moisture meters can produce inaccurate results if testing conditions, calibration, or settings are incorrect.
Moisture Meter False Reading Causes
False readings may result from dirty probes, low batteries, calibration drift, damaged sensors, or incorrect material selection.
Environmental Factors That Affect Accuracy
Extreme temperatures, humidity fluctuations, electromagnetic interference, and surface contamination can influence measurements.
Surface Moisture vs Internal Moisture
Surface moisture can differ significantly from moisture deeper inside a material. Testing multiple locations improves reliability.
Material Density and Species Settings
Wood species, density variations, and material composition all affect readings. Always select the appropriate setting whenever available.
Plant and Soil Moisture Meter Not Working? Try These Fixes
Soil moisture meters operate under challenging conditions and frequently encounter contamination and corrosion issues.
Why Soil Moisture Meters Commonly Fail
Mineral buildup, fertilizer residue, corrosion, and compacted soil are common causes of poor performance.
Clean the Soil Sensor Probe Correctly
Remove soil residue after every use using a soft cloth. Avoid abrasive cleaning materials that may damage the probe surface.
Check Soil Contact and Insertion Depth
The probe should reach the root zone and maintain good contact with surrounding soil for accurate measurements.
Test in Wet and Dry Reference Soil
Compare readings between clearly wet and clearly dry soil. A functioning meter should show a noticeable difference.
When Soil Sensor Corrosion Causes Permanent Failure
Severely corroded probes may no longer conduct properly and often require replacement.
Moisture Meter Error Codes and Display Problems
Blank Screen Troubleshooting
Start by replacing the batteries and inspecting contacts. If the display remains blank, internal display damage may be present.
Flashing Readings and Overrange Errors
Flashing numbers often indicate readings beyond the device's measurement range or unstable sensor input.
Low Battery Warnings
Low battery indicators should be addressed immediately because voltage drops can affect measurement accuracy.
Manufacturer-Specific Error Messages
Consult the owner's manual for brand-specific error codes, as meanings vary among manufacturers.
Moisture Meter Repair vs Replacement: How to Decide
Most moisture meter issues can be solved through maintenance and calibration, but some failures justify replacement.
Problems Usually Worth Repairing
- Inconsistent readings caused by dirty probes
- Battery-related power issues
- Calibration drift
- Minor contact corrosion
Problems That Often Require Replacement
- Severe sensor failure
- Broken probes
- Major circuit board damage
- Extensive water intrusion
Estimated Repair Costs vs Replacement Costs
Basic repairs are usually inexpensive, while sensor or circuit board replacements may approach the cost of a new device.
Typical Moisture Meter Lifespan
Most consumer moisture meters last between 5 and 10 years with proper storage, maintenance, and occasional calibration checks.
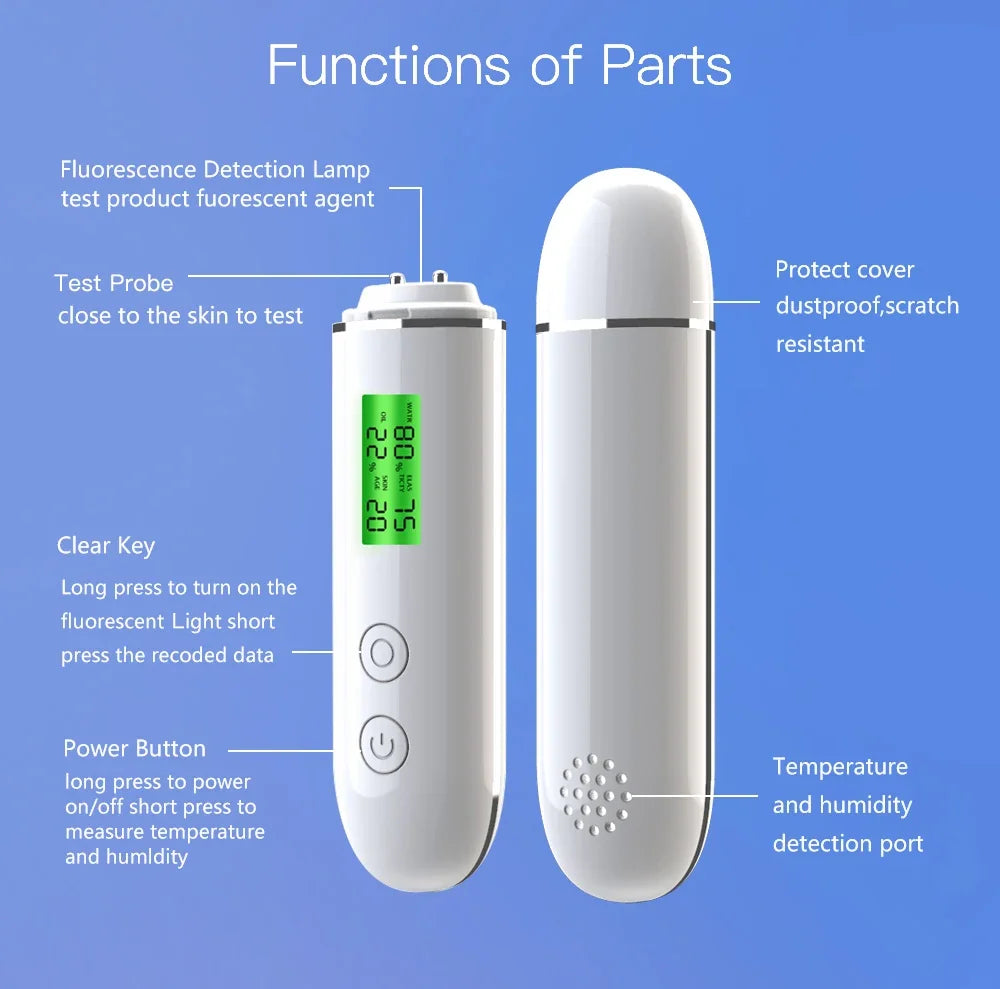
Still frustrated? KentDO offers precision skin + surface readings in seconds.
Preventive Maintenance Tips to Avoid Future Moisture Meter Problems
Cleaning Schedule for Probes and Sensors
Clean probes after every use and perform a thorough inspection monthly to prevent contamination-related inaccuracies.
Proper Storage Practices
Store the meter in a dry, temperature-controlled environment away from direct sunlight and excessive humidity.
Battery Maintenance Best Practices
Remove batteries during long-term storage to prevent leakage and corrosion inside the battery compartment.
Calibration Tracking and Inspection Schedule
Maintain a simple log of calibration checks, battery replacements, and inspections to identify developing problems early.
FAQ: Moisture Meter Troubleshooting and Calibration
How do I know if my moisture meter is accurate?
Test it against a calibration block or compare readings on known dry and wet materials. Consistent results indicate proper operation.
Why does my moisture meter read 0% or 99% all the time?
This usually indicates dirty sensors, low battery voltage, incorrect settings, damaged probes, or calibration issues.
Can moisture meters be wrong?
Yes. Environmental conditions, incorrect settings, poor sensor contact, and calibration drift can affect accuracy.
How do I calibrate my moisture meter?
Use a calibration block or manufacturer-approved reference and follow the device's calibration procedure.
Why is my soil moisture meter not working?
Poor soil contact, dirty probes, corrosion, or extremely dry soil conditions commonly cause problems.
Why does my moisture meter always read dry?
Check for dirty probes, incorrect settings, damaged sensors, insufficient contact, or calibration errors.
Can a moisture meter lose calibration over time?
Yes. Electronic components naturally drift with age and environmental exposure, making periodic calibration verification important.
Pillar Article: How to Use a Skin Analyzer Machine Like a Pro (Even at Home)
Other Related Articles:
- Voice Search How Do You Check Skin Moisture at Home?
- How to Read a Moisture Meter for Face (Without Misinterpreting It)
- Instant Skin Reader Scan—How It Works and Why It Matters
- Before You Scan: 5 Tips for Better Skin Analyzer Results
Explore More:













