

Composite Tray Setup: Complete Guide to Dental Composite Filling Tray Setup
A well-organized composite tray setup is essential for efficient restorative dentistry. Proper tray preparation ensures that all instruments and materials needed for a composite restoration are available and arranged in the correct sequence. When dental assistants prepare a structured dental composite tray setup, the dentist can perform the procedure smoothly without unnecessary interruptions.
Understanding the correct composite tray instruments and setup not only improves chairside efficiency but also helps maintain infection control standards and procedural consistency. This guide explains the instruments required, tray arrangement strategies, and the complete clinical workflow for composite restorations.
⏱ Reading time: 8 min read
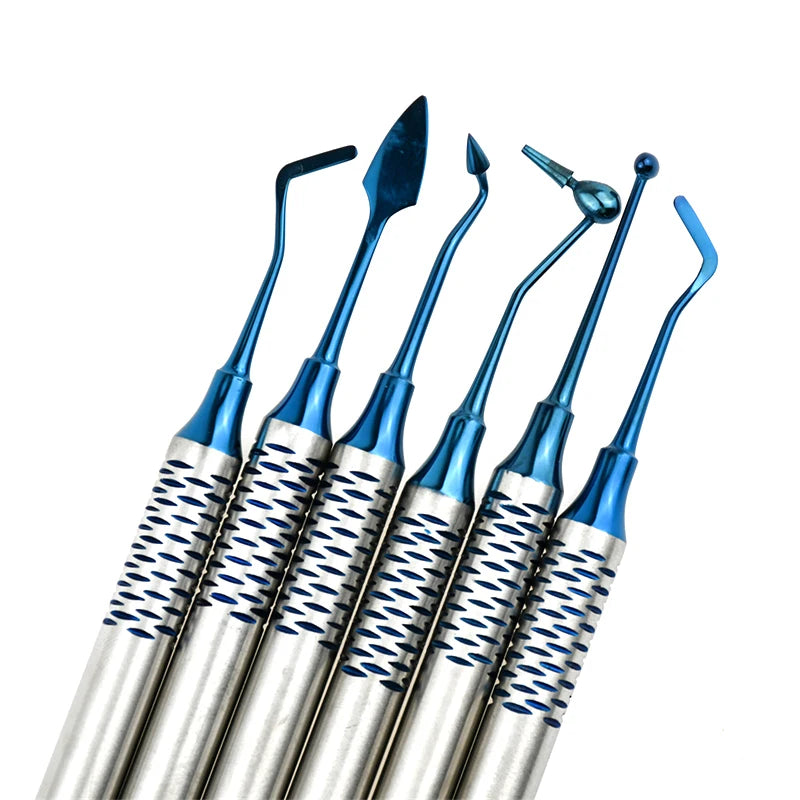
💡 Dental composite tray setup and instrument organization for precise restorative procedures
What Is a Composite Tray Setup in Dentistry?
A composite tray setup refers to the organized arrangement of instruments and materials required to perform a dental composite restoration. Dental assistants prepare this tray before the procedure so the dentist can complete the restoration efficiently without interrupting the workflow.
A properly prepared dental composite tray setup typically includes diagnostic tools, composite placement instruments, bonding materials, isolation supplies, and light-curing equipment. Each item is placed in a logical order so that instruments can be accessed quickly during the different stages of the procedure.
Learning the correct composite tray set up is an essential skill for dental assistants and students because it directly impacts clinical efficiency, infection control, and the overall success of the restoration.
Complete Composite Tray Setup List (Instruments & Materials)
A standard composite tray setup list includes diagnostic instruments, placement tools, bonding materials, and curing equipment. The exact items may vary slightly depending on the restoration, but most composite filling procedures require the following essentials.
Basic Diagnostic Instruments
- Dental mirror
- Explorer or probe
- Cotton pliers
Composite Placement Instruments
- Composite placement instrument
- Plastic filling instrument
- Condenser or plugger
- Burnisher
- Composite sculpting instrument
Adhesive & Bonding Materials
- Etching gel (phosphoric acid)
- Bonding agent
- Composite resin material
- Mixing well or dispensing pad
- Microbrush applicators
Isolation and Support Materials
- Cotton rolls
- Gauze
- Saliva ejector
- Air-water syringe tip
Light-Curing Equipment
- LED curing light
- Protective curing shield
Preparing all instruments in advance ensures the dental tray setup for composite restorations runs smoothly and allows the dentist to follow the correct procedural sequence.
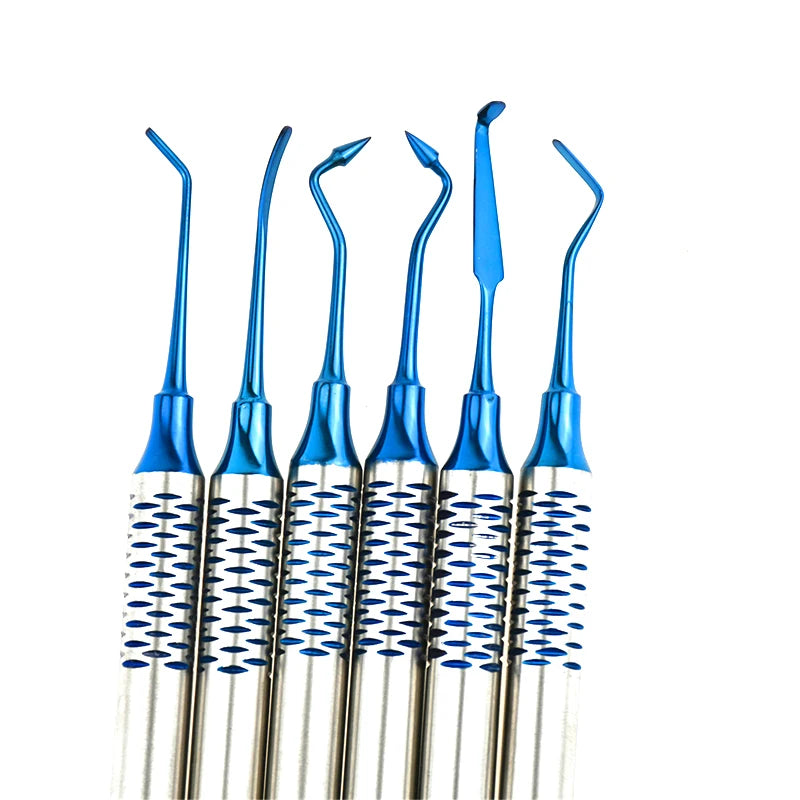
🔧 Composite tray instruments and dental filling tray setup — essential restorative tools
Dental Composite Tray Setup Arrangement (How to Organize the Tray)
In addition to knowing the instruments, dental assistants must understand how to organize them on the tray. A logical composite tray setup improves efficiency by keeping tools accessible in the order they will be used during the procedure.
Standard Dental Tray Layout
Most composite trays follow a simple layout pattern:
- Top section: diagnostic instruments such as mirror, explorer, and cotton pliers
- Middle section: composite placement instruments and sculpting tools
- Side section: bonding materials, etchant, and composite syringes
- Separate area: curing light and protective shield
Step-by-Step Tray Arrangement
- Place diagnostic instruments on the upper portion of the tray.
- Arrange composite placement instruments in the center.
- Position bonding materials and applicators on the side.
- Add isolation materials such as cotton rolls and gauze.
- Prepare the curing light and ensure it is fully charged.
This structured composite filling tray setup allows the dentist to move seamlessly from diagnosis to restoration.
Purpose of Each Instrument in a Composite Tray Setup
Understanding the role of each tool in a composite tray setup helps dental assistants anticipate the dentist’s needs during the procedure.
- Dental mirror: Provides indirect vision and illumination inside the oral cavity.
- Explorer: Detects caries and evaluates the prepared tooth surface.
- Cotton pliers: Transfers cotton rolls and small materials.
- Composite placement instrument: Places composite resin into the prepared cavity.
- Burnisher: Shapes and smooths the composite before curing.
- Microbrush: Applies etchant and bonding agent precisely.
- Curing light: Polymerizes the composite resin to harden the restoration.
Each instrument supports a specific stage of the composite restoration steps, ensuring precise placement, proper bonding, and long-lasting results.
Step-by-Step Composite Filling Procedure (After Tray Setup)
Once the composite tray setup is prepared, the dentist proceeds through a series of clinical steps to restore the tooth using composite resin.
1. Tooth Preparation
The dentist removes decayed tooth structure and shapes the cavity to receive the composite material.
2. Etching and Bonding
Phosphoric acid etchant is applied to roughen the enamel surface, followed by a bonding agent that allows the composite to adhere to the tooth.
3. Composite Placement
The dentist places composite resin in layers using composite instruments and shapes it to match the natural tooth anatomy.
4. Light Curing
A curing light hardens each layer of composite through a polymerization process.
5. Finishing and Polishing
The restoration is trimmed, adjusted, and polished to restore proper bite and smooth tooth surfaces.
These steps for composite filling ensure the restoration is durable, functional, and aesthetically natural.
| Step | Common Mistake | Pro Tip |
|---|---|---|
| Tray Setup | Random tool placement | Arrange instruments in procedural order |
| Layering | Applying thick composite layers | Use thin incremental layers |
| Finishing | Skipping final polishing | Polish to restore natural enamel shine |
Common Mistakes in Composite Tray Setup
Even small preparation errors can slow down a restorative procedure. Avoid these common mistakes when preparing a composite tray setup.
- Missing instruments: forgetting composite placement tools or microbrushes
- Poor tray organization: placing instruments out of sequence
- Unprepared curing light: low battery or missing protective shield
- Insufficient isolation materials: not including enough cotton rolls or gauze
Following a standardized dental composite tray setup checklist helps prevent interruptions and keeps the restorative procedure efficient.
Pro Tips for Efficient Composite Tray Preparation
- Follow a consistent tray layout for every composite procedure.
- Prepare bonding materials and microbrushes before the dentist begins.
- Always test the curing light before the patient arrives.
- Keep extra cotton rolls and gauze nearby for isolation.
- Review the procedure steps so you can anticipate instrument transfers.
With practice, dental assistants can prepare a composite filling set up in minutes and significantly improve chairside efficiency.
✨ Efficient dental composite tray setup supports precise restorative dentistry
FAQ: Composite Tray Setup
What instruments are included in a composite tray setup?
A composite tray setup typically includes diagnostic tools such as a mirror, explorer, and cotton pliers, along with composite placement instruments, bonding materials, microbrushes, isolation supplies, and a curing light.
How is a dental tray arranged for composite fillings?
The tray is usually organized in sections: diagnostic instruments at the top, placement instruments in the center, bonding materials on the side, and curing equipment placed separately for easy access.
What materials are used in composite restorations?
Common materials include phosphoric acid etchant, dental bonding agents, composite resin material, microbrush applicators, and polishing instruments.
What are the steps of a composite filling procedure?
The standard workflow includes tooth preparation, etching and bonding, composite placement in layers, light curing of each layer, and final finishing and polishing.
🔎 Explore more insights in our Oral Care Devices or visit the Oral Care Blog for expert guides and tutorials.
Pillar Article: How to Use a Dental Cavity Repair Kit Safely at Home (Step-by-Step)


