
15 Full Body Resistance Band Exercises for a Complete Home Workout
Building a balanced strength routine at home does not require bulky gym equipment, a large workout space, or a complicated exercise plan. Full body resistance band exercises can help you train your chest, back, shoulders, arms, legs, and core using compact equipment that fits into a home workout or travel routine.
This guide covers 15 resistance band exercises with step-by-step instructions, recommended sets and repetitions, beginner modifications, and progression options. You will also learn how to choose between traditional loop bands, tube resistance bands with handles, and pedal resistance trainers, followed by a practical 25-minute full-body workout.
Whether you are new to resistance training or looking for a more organized home workout, the goal is to build a routine around controlled movements, appropriate resistance, and consistent training rather than simply collecting exercise names.
What Are Full Body Resistance Band Exercises?
Full body resistance band exercises are strength-training movements that use elastic resistance to challenge muscles throughout the upper body, lower body, and core. By combining pushing, pulling, squatting, hip-hinging, and stabilization exercises, you can create a balanced workout without relying exclusively on traditional gym machines or free weights.
Resistance bands provide external tension as they stretch. Your muscles work against that tension during the movement, and the amount of resistance generally increases as the band elongates. Training effectiveness depends on selecting appropriate tension, controlling the movement, and progressing gradually as your strength improves.
How Resistance Bands Train Multiple Muscle Groups
Most full-body resistance band workouts combine five fundamental movement patterns:
- Pushing: Chest presses and shoulder presses train muscles involved in moving the arms away from the body.
- Pulling: Rows and pulldowns challenge the back, shoulders, and elbow-flexor muscles.
- Squatting: Squats train the quadriceps, glutes, and other muscles involved in lower-body movement.
- Hip hinging: Romanian deadlifts emphasize the glutes and hamstrings while requiring trunk control.
- Core stabilization: Pallof presses and controlled rotational exercises challenge the abdominal muscles and torso stability.
Resistance training can improve muscular strength and endurance when the workload is appropriate and progressively adjusted. The resistance does not need to come from a heavy weight, but it must provide enough challenge to make the exercise meaningful.
Important training concepts include range of motion, time under tension, eccentric control, and progressive overload. The eccentric phase is the portion of a movement in which the working muscles lengthen under resistance, such as slowly returning the handles after a curl.
Which Muscles Can You Train With Resistance Bands?
A well-designed routine can address the major muscle groups:
- Chest: Pectoralis major and supporting shoulder muscles during presses and fly movements.
- Back: Latissimus dorsi, rhomboids, and middle trapezius during rows and pulldowns.
- Shoulders: Deltoids during overhead presses and lateral raises.
- Arms: Biceps and brachialis during curls, and triceps during elbow-extension exercises.
- Legs and hips: Quadriceps, hamstrings, gluteus maximus, and hip stabilizers during squats, hinges, bridges, and lateral walks.
- Core: Rectus abdominis, obliques, and other trunk stabilizers during anti-rotation and controlled abdominal exercises.
Quick Navigation: 15 Exercises by Muscle Group
| Exercise | Muscle Group | Equipment |
| 1. Chest Press | Chest, shoulders, triceps | Tube band or compatible pedal trainer |
| 2. Chest Fly | Chest, anterior shoulders | Anchored tube band |
| 3. Seated Row | Back, biceps | Tube band or pedal trainer |
| 4. Lat Pulldown | Back, biceps | Anchored long band |
| 5. Shoulder Press | Shoulders, triceps | Tube band or pedal trainer |
| 6. Lateral Raise | Shoulders | Loop or tube band |
| 7. Biceps Curl | Biceps, brachialis | Tube band or pedal trainer |
| 8. Triceps Extension | Triceps | Anchored tube band |
| 9. Squat | Quadriceps, glutes | Loop or tube band |
| 10. Romanian Deadlift | Hamstrings, glutes | Long loop or tube band |
| 11. Glute Bridge | Glutes, hamstrings | Mini-loop band |
| 12. Lateral Walk | Hip stabilizers, glutes | Mini-loop band |
| 13. Pallof Press | Core, obliques | Anchored tube band |
| 14. Abdominal Crunch | Abdominals | Anchored tube band |
| 15. Standing Woodchop | Core, obliques | Anchored tube band |
Which Resistance Band Equipment Should You Use?
Choosing the right equipment depends on your preferred exercises, available space, resistance requirements, and whether you have a secure anchor point. Resistance loop bands, tube bands with handles, and pedal resistance trainers can all support strength training, but their designs are not interchangeable.
Resistance Loop Bands: Best for Lower Body and Mobility Exercises
Resistance loop bands are closed elastic loops available in different lengths and resistance levels. Mini-loop bands are commonly used around the thighs or ankles, while longer loops can support a wider range of exercises.
They are particularly useful for:
- Bodyweight squats with additional resistance.
- Glute bridges with a band positioned above the knees.
- Lateral walks that challenge hip stabilizers.
- Selected mobility and movement-control exercises.
Loop bands are compact and generally do not require a door anchor. However, their usefulness depends on their length, resistance, and placement. A mini-loop band is not a direct substitute for a long band used in chest presses or anchored rows.
Tube Resistance Bands With Handles: Best for Upper Body Training
Tube resistance bands typically feature elastic cords connected to handles. Some systems include door anchors or other attachment accessories, allowing the band to be secured at different heights.
This configuration supports a broad selection of upper-body movements, including chest presses, rows, biceps curls, shoulder presses, and triceps extensions.
Before using an anchor, verify that it is compatible with the band and securely positioned. The anchor should not move, slide, or release when tension is applied.
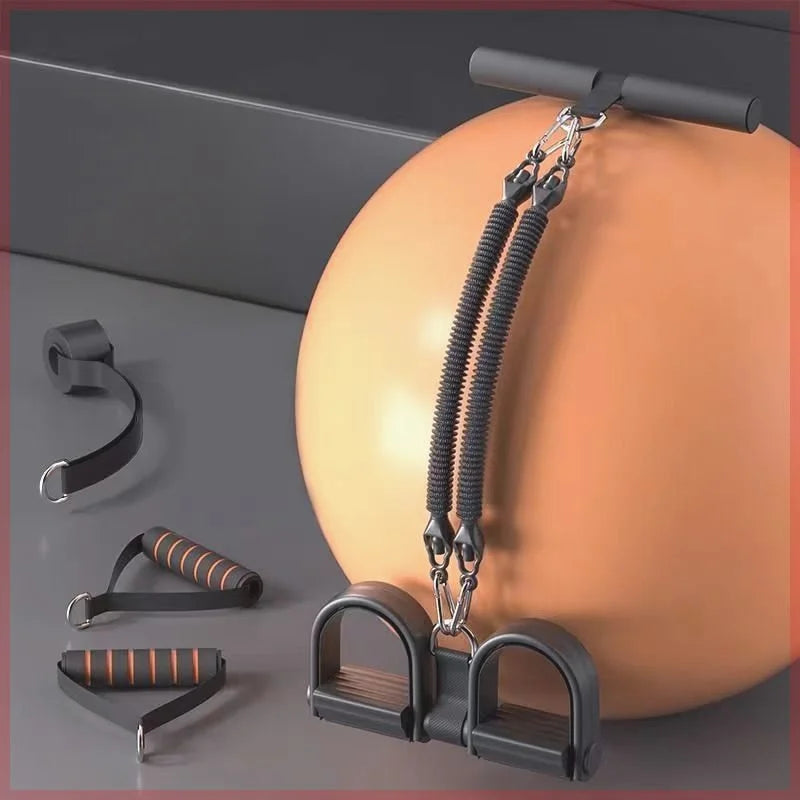
Pedal Resistance Trainers and Pedal Resistance Ropes
A pedal resistance trainer combines foot pedals, elastic resistance tubes, and handles. The feet provide a base for selected pulling or pressing movements, while the handles allow users to apply tension through the arms.
These compact trainers can be useful for seated rows, biceps curls, shoulder presses, and selected abdominal movements. Their lightweight construction also makes them practical for people who want to store workout equipment in a small space or carry it while traveling.
A four-tube pedal resistance system offers multiple elastic tubes for pulling and stretching exercises. The exact resistance and movement options depend on the trainer's construction, cord length, handle arrangement, and pedal design.
However, pedal resistance trainers have limitations. They do not automatically provide the same anchor options, resistance range, or movement versatility as a conventional resistance band system. Exercises such as anchored chest flyes, overhead pulldowns, and anti-rotation presses may require a separate secure anchor or a different movement.
Loop Bands vs. Tube Bands vs. Pedal Resistance Trainers
| Equipment Type | Best For | Common Exercises | Resistance Adjustment | Advantages | Limitations |
| Loop bands | Lower-body training | Squats, bridges, lateral walks | Band selection, placement, stretch | Compact, simple setup | Limited anchor-based movements |
| Tube bands with handles | Versatile upper-body training | Presses, rows, curls, extensions | Band selection, attachment, stretch | Flexible exercise positioning | May require secure anchors |
| Pedal resistance trainers | Compact pulling and pressing workouts | Rows, curls, selected presses | Available tubes and controlled stretch | Foot pedals and handles in one system | Fewer anchor configurations and exercise options |
For a compact home workout, a body care and health device collection provides a starting point for exploring fitness-related equipment. Choose equipment based on the movements you actually plan to perform rather than assuming one design supports every exercise.
How to Choose the Right Resistance Level
Resistance should allow you to complete the intended repetitions with stable posture and controlled movement. The band should challenge the working muscles without forcing you to swing, shorten the range excessively, or compensate with other body parts.
- Light resistance: Useful for learning technique, smaller movements, and exercises requiring careful control.
- Moderate resistance: A practical starting point for many general fitness exercises when the movement remains controlled.
- Higher resistance: Appropriate when you can maintain alignment and complete the intended repetitions without excessive strain.
Resistance is exercise-specific. A band that feels appropriate for a biceps curl may be too challenging for a lateral raise. The same band may also feel different depending on its starting length and how far it stretches.
After comparing the equipment types, consider whether you need traditional bands for anchor-based movements or a compact pedal trainer for selected pulling and pressing exercises. The lifestyle collection is another available place to explore compact equipment options.
15 Full Body Resistance Band Exercises to Try at Home
The following exercises are organized by muscle group. Start with a resistance level that allows you to learn the movement, then adjust the tension as your technique improves.
Recommended sets and repetitions are practical starting points rather than individualized prescriptions. Rest approximately 45–90 seconds between challenging sets when needed, and take additional time if you cannot maintain proper technique.
Chest Exercises
1. Resistance Band Chest Press
Target muscles: Pectoralis major, anterior deltoids, and triceps.
Equipment: Tube resistance band with handles and a secure anchor behind the body. A pedal trainer may provide a forward-pressing alternative if its design permits.
Setup: Position the band behind you around chest height. Hold the handles and step forward enough to create light tension. Stand with feet stable, elbows bent, and hands near the chest.
Execution: Press the handles forward until the arms approach extension. Keep the shoulders controlled and avoid locking the elbows aggressively. Return slowly to the starting position without allowing the band to pull your arms backward uncontrollably.
Breathing: Exhale while pressing and inhale during the return.
Sets and repetitions: 2–3 sets of 10–15 repetitions.
Beginner modification: Use lighter resistance and a shorter pressing range.
Progression: Increase resistance gradually or slow the lowering phase.
Common mistake: Allowing the shoulders to roll forward or the lower back to arch excessively.
2. Resistance Band Chest Fly
Target muscles: Pectoralis major and anterior deltoids.
Equipment: Tube resistance band with handles and a secure anchor behind the body.
Setup: Position the anchor around chest height. Hold the handles with arms open and elbows slightly bent.
Execution: Bring the hands forward in a controlled arc until they approach each other in front of the chest. Maintain the slight elbow bend throughout the movement. Slowly return to the starting position.
Breathing: Exhale while bringing the arms forward and inhale while opening them.
Sets and repetitions: 2 sets of 10–12 repetitions.
Beginner modification: Use lighter resistance and a smaller movement arc.
Progression: Increase time under tension while maintaining control.
Common mistake: Overextending the shoulders or allowing the band to pull the arms too far behind the body.
Back Exercises
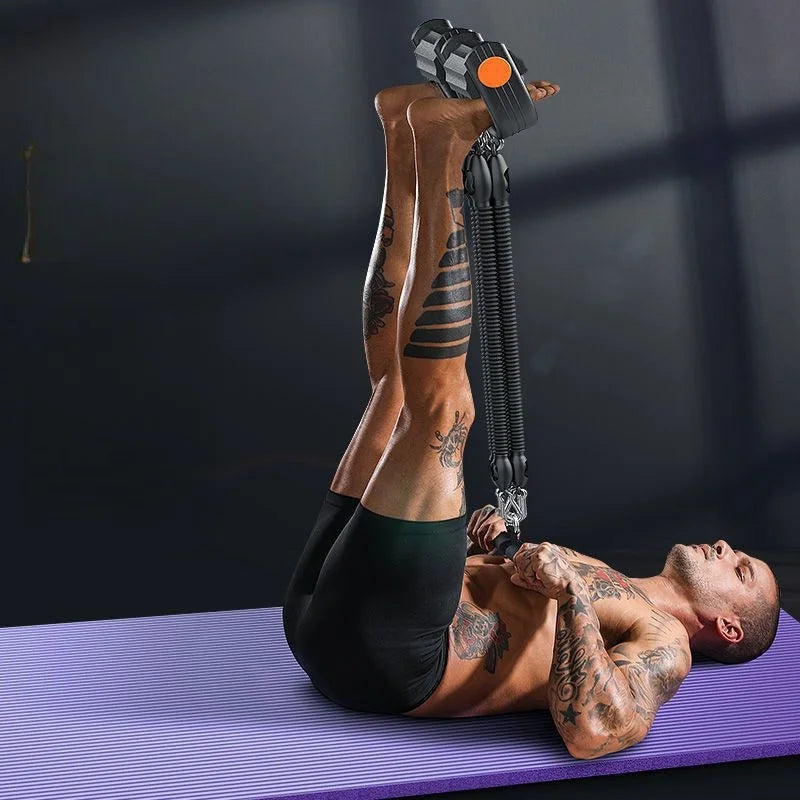
3. Seated Resistance Band Row
Target muscles: Latissimus dorsi, rhomboids, middle trapezius, and biceps.
Equipment: Tube band secured around the feet or a pedal resistance trainer.
Setup: Sit upright with the legs extended comfortably. Secure the band around the feet or position them in the trainer's pedals. Hold the handles with the arms extended.
Execution: Pull the handles toward the torso while keeping the elbows close to the body. Draw the shoulder blades back without excessively arching the spine. Pause briefly, then extend the arms slowly.
Breathing: Exhale while pulling and inhale during the return.
Sets and repetitions: 3 sets of 10–15 repetitions.
Beginner modification: Reduce resistance and maintain a comfortable upright position.
Progression: Pause for two seconds at the end of each pull.
Common mistake: Rounding the back, shrugging the shoulders, or using momentum.
4. Standing Resistance Band Lat Pulldown
Target muscles: Latissimus dorsi, teres major, and biceps.
Equipment: Long resistance band with a secure overhead anchor.
Setup: Attach the band above shoulder level. Stand or kneel facing the anchor and hold the handles with the arms extended upward.
Execution: Pull the handles toward the upper chest while keeping the torso stable. Allow the elbows to move downward without leaning excessively backward. Return slowly until the arms are extended.
Breathing: Exhale while pulling down.
Sets and repetitions: 2–3 sets of 10–12 repetitions.
Beginner modification: Use a lighter band and reduce the range of motion.
Progression: Increase resistance gradually or perform one arm at a time.
Common mistake: Leaning backward to compensate for excessive resistance.
Shoulder Exercises
5. Resistance Band Shoulder Press
Target muscles: Deltoids and triceps.
Equipment: Tube resistance band or compatible pedal resistance trainer.
Setup: Stand on the band or position your feet securely in the trainer pedals. Hold the handles near shoulder height with the elbows bent.
Execution: Press the handles overhead within a comfortable range. Keep the torso upright and avoid flaring the ribs. Lower the handles slowly to shoulder height.
Breathing: Exhale while pressing and inhale while lowering.
Sets and repetitions: 2–3 sets of 10–12 repetitions.
Beginner modification: Use light resistance and press only through a comfortable range.
Progression: Increase resistance gradually while maintaining alignment.
Common mistake: Arching the lower back or aggressively locking the elbows.
6. Resistance Band Lateral Raise
Target muscles: Middle deltoids and upper trapezius.
Equipment: Loop or tube resistance band.
Setup: Stand on the band with feet approximately hip-width apart. Hold the handles at your sides.
Execution: Raise the arms outward until they approach shoulder height. Keep a slight bend in the elbows and lower the handles slowly.
Breathing: Exhale while raising the arms and inhale while lowering.
Sets and repetitions: 2 sets of 10–15 repetitions.
Beginner modification: Use very light resistance and lift only as high as comfortable.
Progression: Slow the lowering phase.
Common mistake: Swinging the arms, shrugging excessively, or using resistance that prevents controlled movement.
Arm Exercises
7. Resistance Band Biceps Curl
Target muscles: Biceps brachii and brachialis.
Equipment: Tube band with handles or pedal resistance trainer.
Setup: Stand securely on the band or position your feet in the pedals. Hold the handles with palms facing forward and arms extended.
Execution: Curl the handles toward the shoulders while keeping the upper arms relatively still. Lower slowly until the elbows approach their starting position.
Breathing: Exhale while curling and inhale while lowering.
Sets and repetitions: 2–3 sets of 12–15 repetitions.
Beginner modification: Use lighter resistance.
Progression: Add a controlled three-second lowering phase.
Common mistake: Swinging the torso or moving the elbows excessively.
8. Resistance Band Triceps Extension
Target muscles: Triceps brachii.
Equipment: Tube resistance band with a secure overhead anchor or compatible pedal trainer.
Setup: Position the band above or behind the body according to the selected variation. Hold the handles and keep the upper arms relatively stable.
Execution: Extend the elbows against resistance without allowing the shoulders to take over. Return slowly to the starting position.
Breathing: Exhale during extension and inhale during the return.
Sets and repetitions: 2 sets of 10–15 repetitions.
Beginner modification: Reduce resistance and use a shorter range.
Progression: Increase resistance while maintaining elbow alignment.
Common mistake: Allowing the shoulders or torso to compensate for the triceps.
Leg and Glute Exercises
9. Resistance Band Squat
Target muscles: Quadriceps, gluteus maximus, and hamstrings.
Equipment: Loop band or tube resistance band.
Setup: Place the band under the feet or around the thighs, depending on the band design. Stand with feet approximately shoulder-width apart.
Execution: Lower the hips while keeping the feet stable and the torso controlled. Bend the knees and hips together. Stand by pressing through the feet and extending the hips and knees.
Breathing: Inhale while lowering and exhale while standing.
Sets and repetitions: 3 sets of 12–15 repetitions.
Beginner modification: Start with bodyweight squats or lighter resistance.
Progression: Add resistance or pause briefly at the bottom of a comfortable squat.
Common mistake: Allowing the knees to collapse inward or lifting the heels.
10. Resistance Band Romanian Deadlift
Target muscles: Hamstrings, gluteus maximus, and spinal erectors.
Equipment: Long loop band or tube resistance band.
Setup: Stand on the band with the feet approximately hip-width apart. Hold the handles and begin with the arms extended.
Execution: Push the hips backward while maintaining a neutral spine and slightly bent knees. Lower the torso as the hips move backward. Return to standing by extending the hips and keeping the band under control.
Breathing: Inhale during the lowering phase and exhale while standing.
Sets and repetitions: 3 sets of 10–12 repetitions.
Beginner modification: Reduce resistance and shorten the hip hinge.
Progression: Increase band tension while maintaining controlled movement.
Common mistake: Rounding the lower back or bending the knees excessively instead of hinging at the hips.
11. Resistance Band Glute Bridge
Target muscles: Gluteus maximus, hamstrings, and core stabilizers.
Equipment: Mini-loop resistance band.
Setup: Lie on your back with knees bent and feet flat. Position the loop above the knees.
Execution: Press through the feet and raise the hips until the torso and thighs approach alignment. Keep the knees controlled against the band's tension. Lower the hips slowly.
Breathing: Exhale while raising the hips.
Sets and repetitions: 2–3 sets of 12–15 repetitions.
Beginner modification: Perform the bridge without a band.
Progression: Add a two-second hold at the top or try a carefully controlled unilateral variation.
Common mistake: Excessively arching the lower back to lift the hips higher.
12. Resistance Band Lateral Walk
Target muscles: Gluteus medius, gluteus minimus, and hip stabilizers.
Equipment: Mini-loop resistance band.
Setup: Place the band above the knees or around the ankles. Stand with feet approximately hip-width apart and adopt a comfortable partial squat.
Execution: Step sideways while maintaining tension in the band. Keep the torso stable and avoid allowing the trailing foot to pull the band completely slack.
Breathing: Breathe steadily throughout the movement.
Sets and repetitions: 2 sets of 10–12 steps in each direction.
Beginner modification: Place the band above the knees to make the movement more manageable.
Progression: Increase resistance or move the band closer to the ankles.
Common mistake: Bringing the feet completely together between steps or allowing the knees to collapse inward.
Core Exercises
13. Resistance Band Pallof Press
Target muscles: Obliques, transverse abdominis, and deep core stabilizers.
Equipment: Tube resistance band with a secure anchor.
Setup: Stand sideways to the anchor with feet stable. Hold the band at chest height using both hands.
Execution: Press the hands forward without allowing the torso to rotate toward the anchor. Pause briefly with the arms extended, then return the hands toward the chest.
Breathing: Exhale while extending the arms.
Sets and repetitions: 2–3 sets of 10–12 repetitions per side.
Beginner modification: Stand closer to the anchor to reduce tension.
Progression: Increase resistance or hold the extended position for a few seconds.
Common mistake: Allowing the torso to rotate or shifting the hips excessively.
14. Seated Resistance Band Abdominal Crunch
Target muscles: Rectus abdominis and abdominal stabilizers.
Equipment: Tube resistance band with a secure overhead anchor or compatible pedal trainer.
Setup: Sit or kneel facing away from the overhead anchor. Hold the handles near the shoulders.
Execution: Curl the torso forward through a controlled range of spinal flexion. Keep the movement focused on the abdominal contraction rather than pulling the handles down primarily with the arms. Return slowly.
Breathing: Exhale during the contraction.
Sets and repetitions: 2 sets of 10–12 repetitions.
Beginner modification: Use light resistance and a shorter range.
Progression: Increase tension gradually while maintaining controlled movement.
Common mistake: Pulling primarily with the arms or using momentum to move the torso.
15. Resistance Band Standing Woodchop
Target muscles: Obliques, rectus abdominis, and shoulder stabilizers.
Equipment: Tube resistance band with a secure low or high anchor.
Setup: Stand sideways to the anchor and hold the handles with both hands. Position the feet comfortably and keep the knees slightly bent.
Execution: Move the hands diagonally across the body through a comfortable range while rotating the torso under control. Return slowly without twisting forcefully through the lower back.
Breathing: Exhale during the pulling phase.
Sets and repetitions: 2 sets of 10–12 repetitions per side.
Beginner modification: Reduce resistance and use a smaller rotation range.
Progression: Increase tension gradually or extend the controlled movement time.
Common mistake: Rotating forcefully through the lower back or allowing the band to pull the body off balance.
How to Adapt the Same Movement to Different Equipment
The same broad movement pattern can sometimes be performed using different resistance equipment. However, the setup, resistance direction, range of motion, and loading characteristics may change.
| Movement | Traditional Band Option | Pedal Trainer Option |
| Chest press | Tube band anchored behind the body | Forward press if the trainer's configuration permits |
| Seated row | Band secured around the feet | Seated pull using handles and pedals |
| Biceps curl | Tube band under the feet | Curl using the trainer's handles |
| Shoulder press | Tube band under the feet | Overhead press if the trainer supports it |
| Squat | Loop or tube band | Bodyweight squat alongside trainer use |
| Core anti-rotation | Anchored tube band | Alternative core exercise if no stable lateral anchor exists |
A pedal trainer should not automatically be treated as a substitute for an anchored resistance band. For example, a chest press may be possible with a compatible pedal system, but a Pallof press requires resistance that pulls sideways while the torso resists rotation. Without a suitable anchor, choose a different core movement.
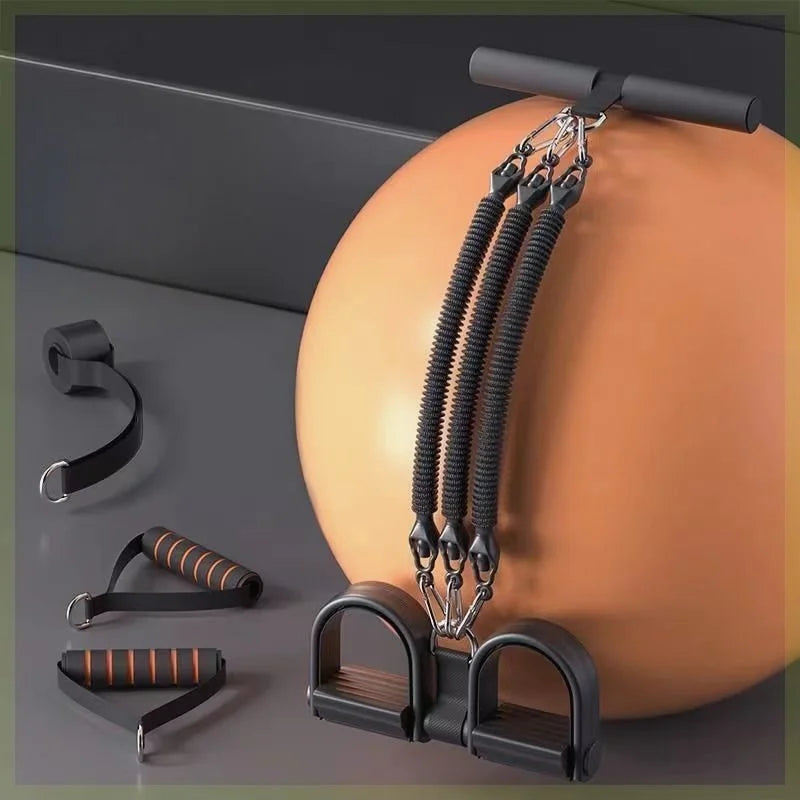
For readers who prefer a compact setup, a four-tube pedal resistance band trainer combines elastic tubes, foot pedals, and foam-covered handles. Its configuration supports selected pulling, stretching, and pressing movements, although it does not provide every anchor-based exercise in this guide.
Your Complete 25-Minute Full Body Resistance Band Workout
This routine combines seven exercises into a structured home workout. It covers major upper-body and lower-body movement patterns and includes a core stabilization exercise.
The timing is approximate. Move at a controlled pace, allow enough time for transitions, and extend rest periods whenever necessary to maintain good technique.
Step 1: Warm Up for 3 Minutes
Begin with gentle movements that gradually increase activity:
- March in place for approximately 30 seconds.
- Perform comfortable shoulder circles for 30 seconds.
- Practice controlled hip hinges for 30 seconds.
- Perform bodyweight squats for 30 seconds.
- Complete light band pull-aparts or gentle arm movements for 60 seconds.
The warm-up should prepare you for the movements without causing fatigue. Use light resistance if you include a band.
Step 2: Complete the Full Body Resistance Band Circuit
Perform the exercises in the following order. Complete two sets of each movement, resting approximately 20 seconds between sets when appropriate.
| Exercise | Sets | Repetitions | Rest |
| Resistance Band Squat | 2 | 12 | 20 seconds |
| Resistance Band Chest Press | 2 | 12 | 20 seconds |
| Seated Resistance Band Row | 2 | 12 | 20 seconds |
| Resistance Band Romanian Deadlift | 2 | 12 | 20 seconds |
| Resistance Band Shoulder Press | 2 | 10 | 20 seconds |
| Resistance Band Biceps Curl | 2 | 12 | 20 seconds |
| Resistance Band Pallof Press | 2 | 10 per side | 20 seconds |
Allow approximately 18 minutes for the main circuit, including transitions and rest. If you need longer breaks, reduce the pace rather than rushing through the exercises.
For the Pallof press, complete the repetitions on both sides. Keep the resistance light enough to maintain a stable torso.
Step 3: Cool Down for 4 Minutes
Finish with comfortable stretches for the chest, back, hips, quadriceps, and hamstrings. Move gently and breathe normally.
Stretching should not be forced. Avoid bouncing or pushing into a painful range, particularly if you have limited mobility or an existing injury.
How to Adjust the Workout for Beginners and Advanced Users
Beginners: Start with one set of each exercise, lighter resistance, and longer rest periods. Focus on learning the setup and controlling the return phase.
Intermediate users: Complete two sets of the listed exercises and increase resistance when the intended repetitions become manageable.
Advanced users: Consider adding a third set, increasing resistance, slowing the eccentric phase, or using unilateral variations. Maintain control throughout the exercise rather than increasing difficulty at the expense of technique.
You do not need to make every exercise harder at the same time. Progress one variable at a time so you can evaluate how the change affects movement quality.
How Often Should You Do Full Body Resistance Band Workouts?
For many beginners, approximately two to three nonconsecutive full-body strength sessions per week is a practical starting point. The appropriate frequency depends on exercise difficulty, recovery, training experience, and individual tolerance.
The US Physical Activity Guidelines recommend that adults include muscle-strengthening activity involving all major muscle groups on at least two days each week. This is a general public-health recommendation, not a personalized resistance-training prescription.
Beginner Weekly Resistance Band Training Schedule
| Day | Activity |
| Monday | Full-body resistance band workout |
| Tuesday | Walking or light mobility |
| Wednesday | Full-body resistance band workout |
| Thursday | Active recovery |
| Friday | Full-body resistance band workout |
| Saturday | Optional light cardio or mobility |
| Sunday | Rest |
This schedule separates challenging full-body sessions with recovery days. If three sessions are too demanding, begin with two and adjust based on how you feel and perform.
How to Apply Progressive Overload With Resistance Bands
Progressive overload means gradually increasing the training challenge as your body adapts. With resistance bands, you can adjust several variables:
- Resistance: Use a stronger band or a compatible configuration that provides more tension.
- Repetitions: Increase repetitions while maintaining the intended movement quality.
- Sets: Add a set when your current workload becomes manageable.
- Range of motion: Work through a larger comfortable range when appropriate.
- Eccentric control: Slow the return phase without allowing the band to recoil.
- Unilateral training: Perform selected exercises one side at a time to change the movement challenge.
- Time under tension: Use controlled pauses or slower repetitions rather than rushing.
Change one variable at a time when practical. If you increase resistance, keep the repetitions and exercise setup familiar until you know you can maintain control.
How Much Recovery Do Your Muscles Need?
Recovery depends on the intensity and volume of training, your experience, sleep, nutrition, and other physical activity. Challenging full-body sessions should generally be separated by enough time for the muscles to recover before another demanding session.
Recovery days can include walking, comfortable mobility work, or other light activity. They do not need to involve complete inactivity unless rest is appropriate for your circumstances.
If soreness is severe, movement quality declines, or fatigue persists, reduce the training workload and allow more recovery time.
How to Know When to Increase Resistance
Consider increasing resistance when you can complete the intended repetitions with stable posture, controlled movement, and a manageable effort.
Before progressing, check that:
- You can complete the current repetitions without swinging or using momentum.
- You maintain control during the eccentric phase.
- You can use the intended range of motion comfortably.
- The band remains securely attached and does not show signs of damage.
If increasing resistance causes you to lose alignment or shorten the movement substantially, return to the previous level.
How to Make Resistance Band Training Safer and More Effective
Resistance bands are compact, but their elastic tension creates specific equipment and setup considerations. A damaged band, unstable anchor, or uncontrolled return can make an exercise unsafe.
Inspect Your Resistance Bands Before Every Workout
Check the band, handles, connectors, and attachment points before applying tension.
- Look for cracks, tears, thinning material, or visible deterioration.
- Check whether handles are loose or damaged.
- Inspect connectors and attachment points for wear.
- Replace compromised equipment rather than continuing to use it.
- Keep the band away from sharp edges and surfaces that could damage the material.
Do not continue exercising with a band that shows signs of structural damage.
Use Secure Anchors and Stable Foot Positions
When using a door anchor, follow the manufacturer's instructions for its placement and compatibility. Verify that the door and anchor remain stable before applying resistance.
Do not attach bands to unstable furniture, loose handles, or unverified anchor points. Keep your body and face out of the direct path of a band that could release.
For pedal resistance trainers, check that the pedals are positioned securely and that the feet remain stable during the movement. Do not assume that a trainer is designed for every exercise simply because it includes foot pedals.
Control the Eccentric Phase and Avoid Excessive Stretching
Return the band to its starting position slowly. The elastic material should remain under control rather than snapping back toward the anchor or body.
Avoid stretching the band beyond its recommended range. Excessive stretch can increase the chance of equipment failure and may make it difficult to control the movement.
Common Resistance Band Training Mistakes
- Using excessive resistance: Reduce tension if the exercise causes swinging, poor alignment, or uncontrolled movement.
- Rushing repetitions: Slow down to maintain control during both phases.
- Ignoring posture: Keep the torso stable and avoid excessive arching or rounding.
- Using an unstable anchor: Verify the attachment before beginning the exercise.
- Shortening the movement unnecessarily: Use a comfortable range that allows the intended muscles to work.
- Neglecting recovery: Adjust the schedule when fatigue interferes with technique.
When to Modify or Avoid an Exercise
Modify an exercise if you cannot maintain stable posture, control the resistance, or move through a comfortable range.
People with existing injuries, persistent pain, recent surgery, or relevant medical restrictions should seek individualized guidance from a qualified healthcare professional before beginning or modifying resistance training.
Stop an exercise if it causes sharp pain, unusual symptoms, or discomfort that worsens as you continue. This article provides general fitness information and does not replace medical diagnosis, treatment, or rehabilitation instructions.
How to Choose the Best Full Body Resistance Trainer for Home
The best equipment for home strength training depends on the exercises you want to perform, the resistance you need, and the amount of space available.
For a broad range of full-body movements, conventional tube bands with handles and secure anchors offer flexible positioning. Pedal resistance trainers provide a more compact arrangement for selected pulling, pressing, and stretching exercises.
Best Equipment for Versatile Full Body Resistance Training
Traditional long resistance bands can support chest presses, rows, pulldowns, curls, triceps extensions, and rotational exercises when the appropriate setup is available.
Look for:
- Resistance options suited to your current training level.
- Comfortable handles and secure connectors.
- Compatible anchor accessories.
- Band lengths that support your intended movements.
- Material and construction that can be inspected for wear.
For people building a small home workout space, the body care and health devices collection offers a relevant equipment category to explore.
When a Full Body Resistance Trainer With Pedals Makes Sense
A pedal resistance trainer can be a practical option when you want a compact system with handles, elastic cords, and foot pedals in one piece of equipment.
Depending on its construction, it may support:
- Seated rows using the handles and pedals.
- Biceps curls with the feet providing a stable base.
- Selected shoulder presses.
- Pulling and stretching movements.
- Some abdominal exercises when the setup supports the movement.
Its suitability depends on the cord length, handle arrangement, available resistance, and pedal stability. It should not be treated as a universal replacement for long resistance bands or a secure anchor system.
What to Check Before Buying a Pedal Resistance Rope
Evaluate the equipment according to practical features rather than promotional claims.
- Pedal stability: Check whether the pedals provide a secure foot position during intended movements.
- Cord construction: Inspect the elastic tubes and connectors for quality and compatibility.
- Handle comfort: Consider grip size, cushioning, and the ability to maintain control.
- Resistance options: Determine whether the available tension suits your exercises.
- Exercise compatibility: Verify that the trainer supports the movements you plan to perform.
- Storage: Consider its dimensions and whether it fits your available space.
Choosing Between Traditional Bands and Pedal-Based Equipment
Traditional bands are generally the more flexible option for users who want multiple anchor positions and a broad selection of pushing, pulling, and rotational exercises.
Pedal-based trainers may suit people who prefer a compact system for selected seated or standing movements and want equipment that is easy to store.
Neither option is automatically better for every user. Consider your preferred exercises, training experience, available space, budget, and the resistance range you need.
Pedal Resistance Band – 4-Tube Full Body Workout Trainer
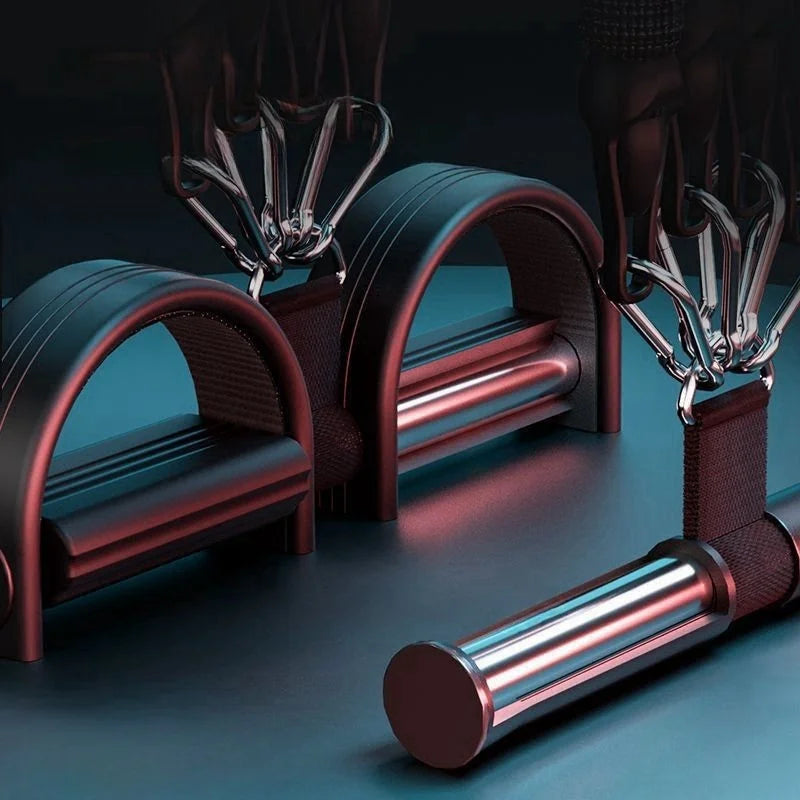
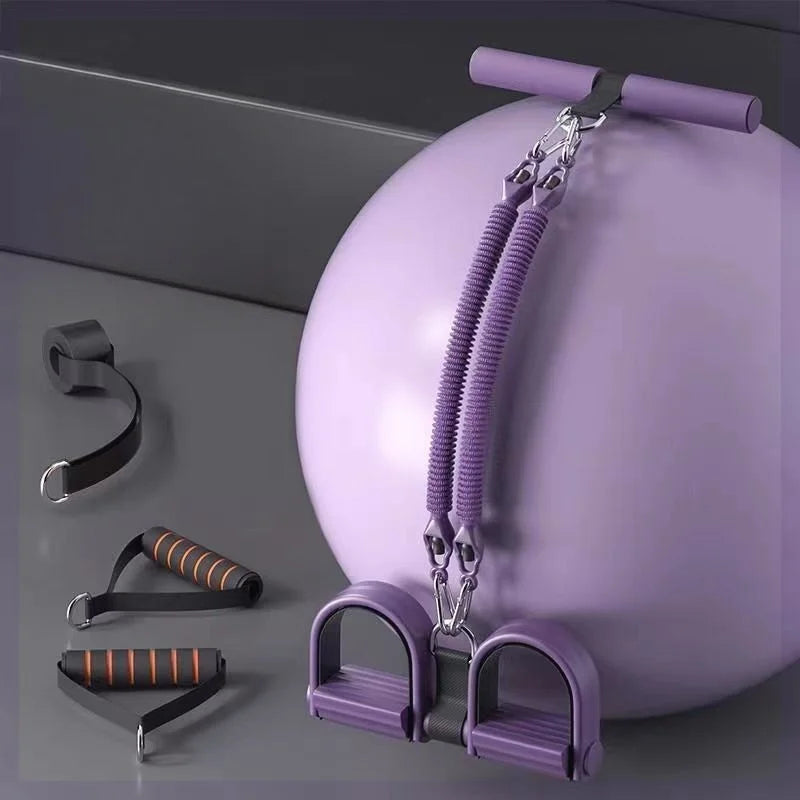
The Pedal Resistance Band – 4-Tube Full Body Workout Trainer combines four elastic tubes, foot pedals, and foam-covered handles for compact resistance training.
Its listed specifications include:
- Material: TPE, elastic material, and foam.
- Size: Approximately 52 × 26.5 cm.
- Design: Four-tube pedal resistance system.
- Colors: Black and purple.
- Training areas: Arms, shoulders, waist, abdomen, and legs.
- Package: One pedal tension rope, two handles, and one door anchor.
The trainer is designed for convenient resistance exercises at home or while traveling. Its handles and pedals can support selected pulling, stretching, and pressing movements, depending on the exercise configuration.
It may be useful for people who want a compact option for seated rows, curls, and selected full-body exercises. However, the product description does not establish a specific resistance measurement, maximum stretch, or equivalence to traditional resistance bands. Choose movements that match the equipment's design and follow the manufacturer's setup instructions.
For a home workout, the trainer can complement a bodyweight routine or traditional bands rather than replacing every piece of resistance equipment.
Frequently Asked Questions About Full Body Resistance Band Exercises
What Are the Best Full Body Resistance Band Exercises for Beginners?
Some practical beginner exercises include resistance band squats, chest presses, seated rows, biceps curls, glute bridges, and Pallof presses. These movements introduce pushing, pulling, lower-body training, and core stabilization. Start with light resistance, learn the setup, and increase difficulty only when you can complete the intended repetitions with controlled technique.
Can You Get a Full Body Workout With Resistance Bands Alone?
Yes. A balanced selection of resistance band exercises can train the major muscle groups through pushing, pulling, squatting, hip hinging, and core stabilization. Choose appropriate resistance, maintain controlled repetitions, and gradually progress the workload. Your exercise selection should cover the chest, back, shoulders, arms, legs, and core rather than focusing exclusively on one area.
How Do You Use a Full Body Resistance Trainer With Pedals?
Secure your feet in the pedals according to the manufacturer's instructions, hold the handles, and maintain a stable posture. Perform compatible pulling, curling, pressing, or selected core movements with controlled tension. Check the pedal position, cord condition, and resistance before each session. Do not use the trainer for exercises that its construction or attachment system cannot safely support.
Are Pedal Resistance Ropes as Effective as Traditional Resistance Bands?
Both can provide resistance training, but their exercise versatility, resistance profiles, anchor options, and movement patterns differ. Traditional bands generally offer more flexible anchor-based exercises, while pedal trainers combine foot pedals and handles for selected movements. Training effectiveness depends on appropriate resistance, exercise selection, technique, and progressive overload rather than equipment type alone.
How Many Times a Week Should You Do Full Body Resistance Band Workouts?
Approximately two to three nonconsecutive full-body strength sessions per week is a practical starting point for many beginners. Allow adequate recovery between challenging sessions and adjust the frequency according to training experience, workload, and individual tolerance. Adults should also aim to include muscle-strengthening activity involving all major muscle groups on at least two days each week.
Conclusion: Build a Balanced Home Workout With Resistance Bands
Full body resistance band exercises provide a practical way to organize strength training at home without relying on bulky gym equipment. A balanced routine can include chest presses, rows, shoulder exercises, arm movements, squats, hip hinges, glute bridges, and core stabilization.
Start with a manageable resistance level, learn each movement, and progress gradually through additional repetitions, resistance, sets, or controlled time under tension. Allow enough recovery between challenging workouts and inspect your equipment before every session.
Traditional resistance bands and pedal resistance trainers can support different parts of a home workout, but their capabilities are not identical. Choose the equipment that matches your preferred movements, available space, and training needs.
If you want a compact setup, explore the four-tube pedal resistance trainer as one option for selected pulling and pressing exercises. Begin with the 25-minute routine, focus on controlled technique, and build your training schedule consistently.
Pillar Article: Adjustable Pedal Resistance Workout Equipment: Buying Guide & Exercises