
15 Pedal Resistance Band Workouts for a Full-Body Home Workout
Building a balanced home workout routine does not require bulky gym equipment, expensive machines, or a dedicated exercise room. Foot pedal resistance bands offer a compact way to perform strength-training movements for your upper body, lower body, and core using elastic resistance, integrated foot pedals, and comfortable handles.
Whether you are new to resistance training or looking for convenient ways to exercise at home, pedal resistance band workouts can help you practice controlled pulling, pushing, and stretching movements while targeting multiple muscle groups. Their lightweight construction also makes them practical for small apartments and travel workouts.
This guide explains how to use a pedal resistance band correctly and introduces 15 exercises with starting positions, movement instructions, breathing guidance, recommended sets and repetitions, and common mistakes. You will also find three workout routines, seated and standing variations, progression tips, and equipment comparisons to help you build a practical full-body training plan.
What Is a Pedal Resistance Band and How Does It Work?
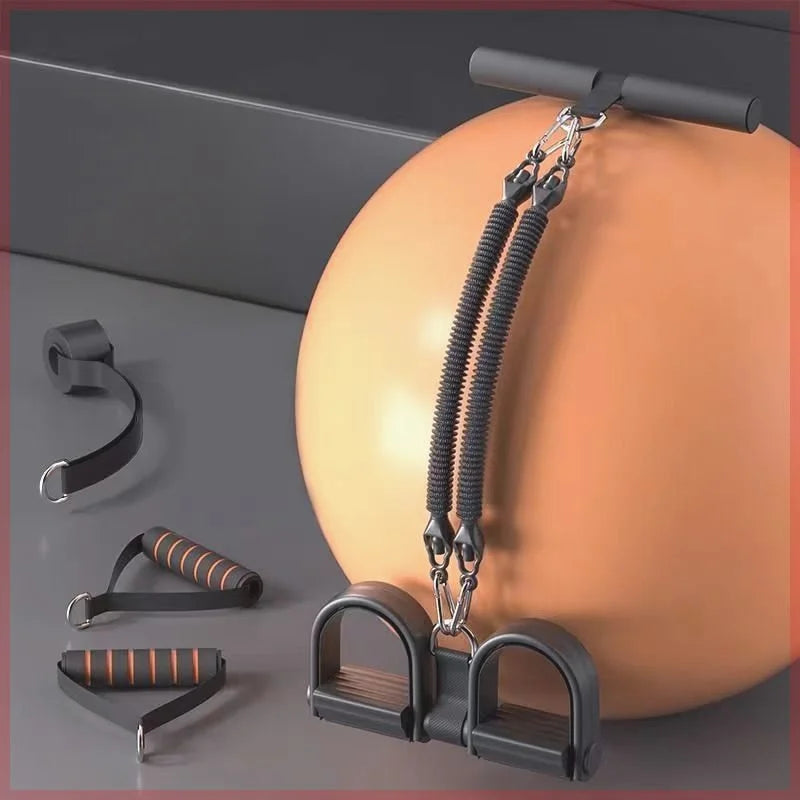
A pedal resistance band is a compact exercise tool that combines elastic resistance tubes, foot pedals, and hand grips. By securing your feet in the pedals and pulling the handles, you create tension that provides resistance during different upper-body and core movements. Depending on the exercise and equipment configuration, you can also use the system for selected lower-body movements.
Unlike traditional weights, elastic resistance increases as the tubes stretch. The amount of tension depends on the equipment's construction, starting position, stretching distance, and movement. This makes controlled positioning especially important when performing pedal resistance band exercises.
Understanding the Pedal, Elastic Tubes, and Handles
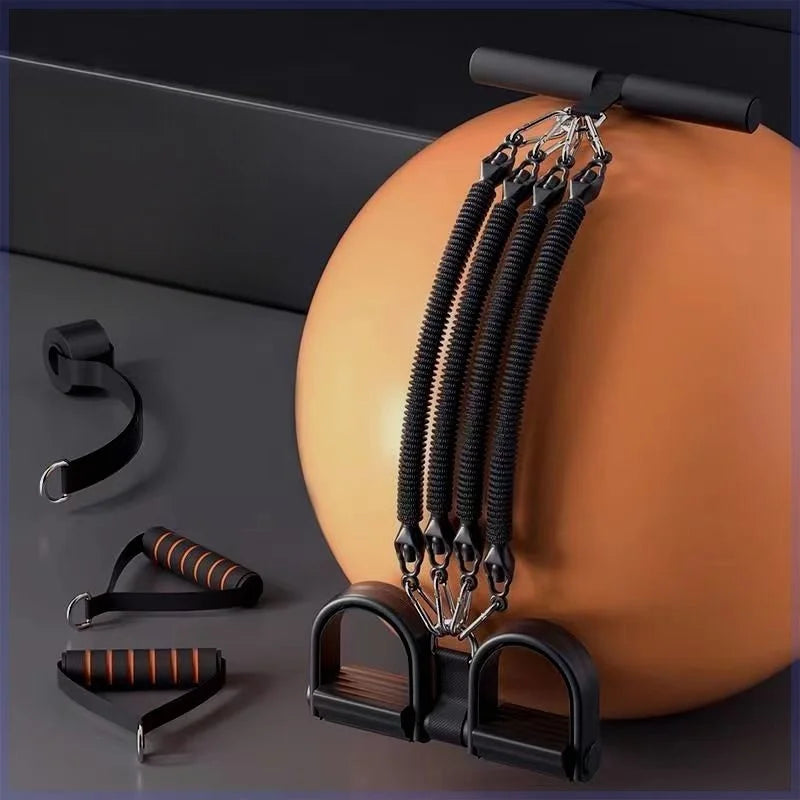
Most pedal resistance trainers contain several connected components:
- Foot pedals: Provide a base for positioning your feet and applying tension during seated and standing movements.
- Elastic resistance tubes: Stretch under tension to create resistance during pulling, pressing, and stretching exercises.
- Hand handles: Provide gripping points for upper-body movements such as curls, presses, and rows.
- Connecting points: Hold the resistance components together and should be inspected regularly for signs of wear or damage.
A four-tube configuration provides multiple elastic resistance elements within one compact system. However, four tubes do not automatically indicate a particular resistance level. Actual tension depends on the manufacturer's specifications and the way the equipment is constructed.
Pedal Resistance Bands vs. Regular Resistance Bands
Pedal resistance bands, loop bands, and conventional resistance tubes all use elastic tension, but their configurations serve somewhat different exercise preferences.
- Pedal resistance bands: Combine foot pedals and handles for exercises such as seated presses, curls, rows, and selected leg movements.
- Loop resistance bands: Form continuous elastic loops that are commonly used for glute activation, lateral steps, squats, and lower-body exercises.
- Traditional resistance tubes: Usually feature handles and may require a separate anchor or different positioning arrangements.
- Bulky home gym equipment: Can provide more structured resistance options and greater loading capacity but generally requires more storage space.
Muscle Groups You Can Train
With suitable positioning and controlled resistance, pedal resistance band workouts can target several major muscle groups.
- Chest: Seated chest presses and chest fly movements.
- Shoulders: Shoulder presses and lateral raises.
- Arms: Biceps curls and triceps extensions.
- Back: Seated resistance rows and bent-over rows.
- Legs: Leg extensions, squats, and calf raises.
- Glutes and hips: Selected hip abduction and squat variations.
- Core: Controlled abdominal crunches, rotational movements, and stabilization exercises.
How to Use a Pedal Resistance Band Correctly
To use a pedal resistance band, inspect the elastic tubes and connections, position your feet securely in the pedals, hold the handles firmly, and perform controlled movements against comfortable tension. Return slowly to the starting position rather than allowing the elastic tubes to recoil suddenly.
Step 1: Check the Equipment Before Starting
Before each session, examine the resistance tubes, handles, pedals, and connecting points. Look for cracks, thinning areas, tears, loose connections, or other visible signs of deterioration.
Check that both pedals are intact and that the handles are securely connected. If any component appears damaged, discontinue use rather than attempting to repair it with improvised materials.
Step 2: Position Your Feet and Hands Correctly
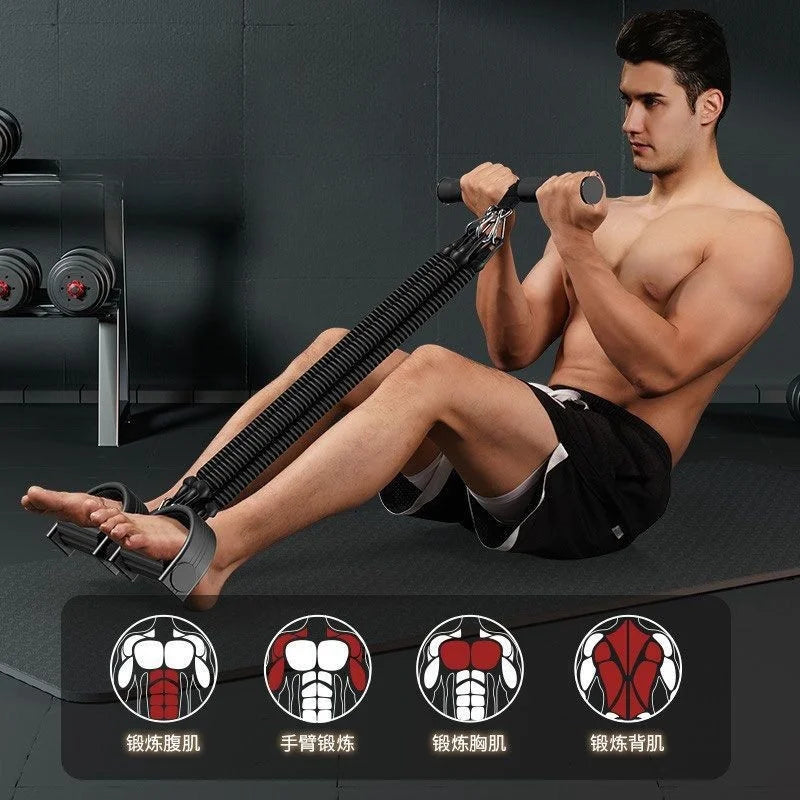
For seated exercises, sit on a stable chair or exercise surface with enough room to extend your legs. Position your feet securely in the pedals and hold the handles with a comfortable grip.
For standing movements, place your feet securely on the pedals according to the equipment design. Keep your feet approximately hip-width apart when appropriate, maintain a stable stance, and avoid positioning the tubes where they could slip against your body.
Step 3: Control Resistance and Movement
Begin with a comfortable range of motion and moderate tension. Pull smoothly, avoid jerking the handles, and return gradually. The elastic tubes should remain under controlled tension throughout the movement.
Coordinate breathing with each repetition. Generally, exhale during the effort phase and inhale while returning to the starting position. Avoid holding your breath or forcing a movement beyond your comfortable range.
Beginner Setup and Form Checklist
- Inspect all tubes, pedals, handles, and connecting points.
- Choose a stable chair or standing position.
- Keep your feet securely positioned inside the pedals.
- Maintain a neutral spine and relaxed shoulders.
- Start with manageable elastic tension.
- Move smoothly without using excessive momentum.
- Return slowly and maintain control of the resistance.
- Stop if you experience pain or equipment instability.
15 Pedal Resistance Band Workouts for a Full-Body Home Workout
The following 15 exercises cover chest, shoulders, arms, back, legs, glutes, and core. They are organized by muscle group so beginners can select movements according to their training objectives.
The recommended sets and repetitions are general starting points rather than manufacturer-prescribed limits. Adjust them according to your fitness level, the equipment's resistance, and your ability to maintain proper technique.
Chest and Upper-Body Exercises
1. Seated Chest Press
Target muscles: Chest, triceps, and front shoulders.
Starting position: Sit upright with your legs extended and the pedals secured beneath your feet. Hold both handles near chest height with your elbows bent.
How to perform:
- Position your hands slightly wider than shoulder-width.
- Press both handles forward until your arms approach extension.
- Pause briefly without locking your elbows.
- Return slowly to the starting position.
Breathing: Exhale while pressing forward and inhale while returning.
Recommended volume: 2–3 sets of 10–12 repetitions.
Common mistake: Arching your lower back or locking your elbows at the end of each repetition.
2. Seated Chest Fly
Target muscles: Chest and front shoulders.
Starting position: Sit upright with a stable pedal position. Arrange the resistance tubes behind your upper body only if the equipment configuration permits a secure and comfortable setup. Hold the handles at chest height.
How to perform:
- Begin with your arms extended outward and elbows slightly bent.
- Bring both hands toward the center of your chest in a controlled arc.
- Pause briefly as your hands approach each other.
- Open your arms gradually without forcing your shoulders backward.
Breathing: Exhale as your hands move together and inhale as they separate.
Recommended volume: 2 sets of 10–12 repetitions.
Common mistake: Using excessive tension or allowing the shoulders to move too far behind the torso.
Shoulder and Arm Exercises
3. Seated Shoulder Press
Target muscles: Shoulders and triceps.
Starting position: Sit with your feet secured beneath the pedals. Hold the handles at shoulder level with your palms facing forward or slightly inward.
How to perform:
- Keep your torso upright and your abdomen gently engaged.
- Press both handles upward toward the ceiling.
- Stop before your elbows lock completely.
- Lower the handles slowly to shoulder height.
Breathing: Exhale while pressing upward and inhale while lowering.
Recommended volume: 2–3 sets of 10–12 repetitions.
Common mistake: Leaning backward or arching the lower back to complete the press.
4. Standing Biceps Curl
Target muscles: Biceps and forearms.
Starting position: Stand securely on the pedals with your feet approximately hip-width apart. Hold the handles at your sides with palms facing forward.
How to perform:
- Keep your elbows close to your torso.
- Bend both elbows to bring the handles toward your shoulders.
- Pause briefly at the top without moving your upper arms excessively.
- Lower your hands slowly.
Breathing: Exhale while curling and inhale while lowering.
Recommended volume: 2–3 sets of 12 repetitions.
Common mistake: Swinging your upper body or using momentum to lift the handles.
5. Standing Overhead Triceps Extension
Target muscles: Triceps.
Starting position: Secure the pedals beneath your feet. Hold the handles overhead with your elbows bent, using a comfortable range of motion.
How to perform:
- Keep your upper arms close to your head.
- Extend your elbows to raise your hands upward.
- Pause briefly without locking your elbows.
- Bend your elbows gradually to return.
Breathing: Exhale during extension and inhale during the return.
Recommended volume: 2 sets of 10–12 repetitions.
Common mistake: Flaring the elbows outward or arching the lower back.
6. Standing Lateral Raise
Target muscles: Middle deltoids and shoulders.
Starting position: Stand securely on the pedals with your arms resting at your sides and handles held comfortably.
How to perform:
- Keep a slight bend in both elbows.
- Raise your arms outward to a comfortable height.
- Pause briefly without shrugging your shoulders.
- Lower your arms slowly to the starting position.
Breathing: Exhale as you raise your arms and inhale as you lower them.
Recommended volume: 2 sets of 10–12 repetitions.
Common mistake: Raising the arms too high or using momentum to overcome excessive resistance.
Back Exercises
7. Seated Resistance Row
Target muscles: Upper back, latissimus dorsi, and biceps.
Starting position: Sit upright with your legs extended and the pedals secured beneath your feet. Hold the handles with your arms extended forward.
How to perform:
- Keep your chest lifted and spine neutral.
- Pull both elbows backward toward your torso.
- Gently bring your shoulder blades toward each other.
- Extend your arms forward slowly.
Breathing: Exhale while pulling and inhale while extending your arms.
Recommended volume: 2–3 sets of 12 repetitions.
Common mistake: Rounding your back or pulling with your shoulders raised toward your ears.
8. Standing Bent-Over Row
Target muscles: Latissimus dorsi, rhomboids, and rear shoulders.
Starting position: Stand on the pedals with your feet securely positioned. Hinge forward at the hips while maintaining a neutral spine and holding the handles.
How to perform:
- Keep your knees slightly bent.
- Allow your arms to extend naturally toward the floor.
- Pull the handles toward your waist.
- Pause briefly and lower your hands under control.
Breathing: Exhale while pulling and inhale while lowering.
Recommended volume: 2 sets of 10–12 repetitions.
Common mistake: Rounding your lower back or using excessive torso movement.
Lower-Body and Glute Exercises
9. Seated Leg Extension
Target muscles: Quadriceps.
Starting position: Sit upright on a stable chair. Position the resistance pedal securely against one foot using a configuration that keeps the tube and pedal stable.
How to perform:
- Begin with your knee comfortably bent.
- Extend your knee against the elastic resistance.
- Pause briefly near the end of your comfortable range.
- Bend your knee slowly to return.
- Complete the repetitions before switching legs.
Breathing: Exhale while extending and inhale while returning.
Recommended volume: 2 sets of 10–12 repetitions per leg.
Common mistake: Kicking the leg rapidly or allowing the resistance to pull the foot back suddenly.
10. Standing Squat with Pedal Resistance
Target muscles: Quadriceps, glutes, and hamstrings.
Starting position: Stand with both feet securely positioned on the pedals and hold the handles near shoulder height. Use only a resistance configuration that allows a stable squat.
How to perform:
- Position your feet approximately shoulder-width apart.
- Push your hips backward and bend your knees.
- Lower into a comfortable squat while keeping your chest lifted.
- Press through your feet to return to standing.
Breathing: Inhale while lowering and exhale while standing.
Recommended volume: 2–3 sets of 10–12 repetitions.
Common mistake: Allowing the knees to collapse inward or using an unstable foot position.
11. Seated Hip Abduction
Target muscles: Outer hips and gluteus medius.
Starting position: Sit upright with your feet supported. Use a suitable resistance configuration around the legs only if the equipment design securely supports this movement.
How to perform:
- Begin with your knees in a comfortable starting position.
- Move your knees outward against resistance.
- Pause briefly while maintaining an upright torso.
- Bring your knees inward slowly.
Breathing: Exhale while moving outward and inhale during the return.
Recommended volume: 2 sets of 12 repetitions.
Common mistake: Twisting your torso or forcing your knees outward beyond a comfortable range.
12. Standing Calf Raise
Target muscles: Calves.
Starting position: Stand securely on the pedals with your feet positioned comfortably. Hold the handles for additional balance if the setup permits.
How to perform:
- Stand upright with your knees slightly relaxed.
- Raise your heels and shift your weight toward the balls of your feet.
- Pause briefly at the top.
- Lower your heels slowly.
Breathing: Exhale while raising your heels and inhale while lowering.
Recommended volume: 2 sets of 12–15 repetitions.
Common mistake: Bouncing rapidly or allowing the pedals to become unstable.
Core Strengthening Exercises
13. Seated Resistance Band Crunch
Target muscles: Abdominal muscles.
Starting position: Sit upright with your feet secured in the pedals and hold the handles near chest level.
How to perform:
- Engage your abdominal muscles gently.
- Lean your torso backward through a comfortable range against the resistance.
- Pause briefly while maintaining control.
- Return to an upright seated position.
Breathing: Exhale during the controlled return to upright and inhale while leaning backward.
Recommended volume: 2 sets of 10–12 repetitions.
Common mistake: Pulling excessively with your arms instead of controlling the movement through your trunk.
14. Seated Russian Twist with Resistance
Target muscles: Obliques and abdominal muscles.
Starting position: Sit upright with a stable base. Hold the handles together in front of your chest using a comfortable resistance configuration.
How to perform:
- Keep your spine neutral and abdominal muscles engaged.
- Rotate your torso gently toward one side.
- Return to the center before rotating toward the opposite side.
- Continue alternating sides without forcing the rotation.
Breathing: Exhale during each rotation and inhale while returning toward the center.
Recommended volume: 2 sets of 8–10 repetitions per side.
Common mistake: Twisting too quickly or allowing the hips and lower back to move excessively.
15. Standing Anti-Rotation Hold
Target muscles: Core stabilizers and obliques.
Starting position: This exercise requires a secure resistance anchor positioned to one side. Use the supplied door anchor only if its placement and the manufacturer's instructions support this setup. Do not substitute an unsecured door or improvised anchor.
How to perform:
- Stand with your feet comfortably apart and maintain a stable posture.
- Hold the handles in front of your chest.
- Resist the gentle rotational pull from the anchor.
- Maintain a stable torso without leaning or twisting.
- Repeat on the opposite side if the setup permits.
Breathing: Breathe normally while maintaining the hold.
Recommended volume: 2 sets of 15–20 seconds per side.
Common mistake: Using an unstable anchor or allowing the resistance to rotate the torso uncontrollably.
Pedal Resistance Band Exercise Summary: Sets, Reps, and Muscle Groups
Use this quick reference to choose exercises according to your available workout time and training objectives.
- Chest: Seated Chest Press (2–3 × 10–12); Seated Chest Fly (2 × 10–12).
- Shoulders and arms: Seated Shoulder Press (2–3 × 10–12); Standing Biceps Curl (2–3 × 12); Overhead Triceps Extension (2 × 10–12); Standing Lateral Raise (2 × 10–12).
- Back: Seated Resistance Row (2–3 × 12); Standing Bent-Over Row (2 × 10–12).
- Legs and glutes: Seated Leg Extension (2 × 10–12 per leg); Standing Squat (2–3 × 10–12); Seated Hip Abduction (2 × 12); Standing Calf Raise (2 × 12–15).
- Core: Seated Resistance Band Crunch (2 × 10–12); Seated Russian Twist (2 × 8–10 per side); Standing Anti-Rotation Hold (2 × 15–20 seconds per side).
Beginners can start with one set of selected exercises and gradually increase to the suggested volume as technique and exercise tolerance improve. Not every movement needs to be included in every session.
If you are building a compact home fitness setup, you can also explore the available body care and health devices collection for additional equipment options.
Three Pedal Resistance Band Workout Routines to Follow at Home
Individual exercises become easier to follow when organized into a simple workout plan. The following routines provide different training durations and difficulty levels. Warm up for several minutes before starting, and rest as needed between movements.
10-Minute Beginner Pedal Resistance Band Routine
This short routine introduces five basic movements for beginners who want to practice resistance training without complicated equipment changes.
- Seated Chest Press: 10 repetitions.
- Seated Resistance Row: 10 repetitions.
- Standing Biceps Curl: 10 repetitions.
- Seated Leg Extension: 10 repetitions per leg.
- Seated Resistance Band Crunch: 10 repetitions.
Begin with a brief warm-up involving shoulder rolls, gentle marching, and comfortable joint movements. Complete one round with short transitions. If you are comfortable with the movements and have enough time, complete a second round with appropriate rest.
Prioritize controlled movement rather than trying to finish as quickly as possible. Your actual workout duration will depend on rest periods, exercise setup, and fitness level.
15–20-Minute Full-Body Home Workout
This routine includes movements for the chest, back, shoulders, arms, legs, and core. It is suitable for people who already understand the basic exercise positions.
- Seated Chest Press: 10–12 repetitions.
- Seated Resistance Row: 10–12 repetitions.
- Standing Biceps Curl: 12 repetitions.
- Seated Shoulder Press: 10 repetitions.
- Standing Squat with Pedal Resistance: 10 repetitions.
- Seated Leg Extension: 10 repetitions per leg.
- Seated Resistance Band Crunch: 10 repetitions.
Complete two rounds when appropriate, resting briefly between exercises and longer when needed. If the routine takes longer than 20 minutes because of rest periods or equipment adjustments, maintain good technique rather than rushing.
Intermediate Progressive Resistance Routine
Once you can complete the beginner movements comfortably, you can make your training more challenging without immediately increasing resistance.
- Perform 2–3 sets of selected compound movements.
- Increase repetitions gradually within a manageable range.
- Use a slower lowering phase to improve movement control.
- Add a brief pause at the most challenging point of selected exercises.
- Include additional exercises for muscle groups that need more attention.
- Increase elastic tension only when the equipment allows a safe adjustment.
For example, you can perform a seated row with a controlled two-second pull and a three-second return. This creates a more deliberate training tempo without requiring faster or more forceful movements.
How to Adjust Workout Duration and Rest
Rest periods should reflect the difficulty of the exercise and your ability to recover. Beginners may need 30–90 seconds between sets, while more demanding movements may require longer recovery.
Allow enough time to reposition the pedals and handles safely when switching exercises. If your technique deteriorates, reduce repetitions, increase rest, or end the set.
Seated vs. Standing Pedal Resistance Band Exercises
Seated and standing resistance exercises offer different positioning options. Choosing between them depends on balance, coordination, comfort, and the muscles you want to train.
Best Seated Exercises for Beginners
Seated exercises provide a supported position that can make it easier to focus on upper-body movement and resistance control.
- Seated Chest Press.
- Seated Resistance Row.
- Seated Shoulder Press.
- Seated Leg Extension.
- Seated Resistance Band Crunch.
Choose a stable chair with sufficient space for your legs. Keep your feet positioned securely and avoid leaning backward excessively during pressing or pulling movements.
Best Standing Exercises for Full-Body Training
Standing movements involve more whole-body coordination and require greater attention to balance and foot placement.
- Standing Biceps Curl.
- Standing Overhead Triceps Extension.
- Standing Lateral Raise.
- Standing Bent-Over Row.
- Standing Squat with Pedal Resistance.
- Standing Calf Raise.
Maintain a stable stance and avoid movements that cause the pedals to shift. Use a lighter or more comfortable resistance configuration when learning a new standing exercise.
How to Choose the Right Variation
Choose seated movements when you prefer a supported position or want to focus on upper-body technique. Standing movements may be appropriate when you are comfortable with the required balance and coordination.
Seated exercise is not automatically suitable for everyone, and standing exercise is not necessarily more effective. Select the variation that allows safe positioning and controlled movement.
How Often Should You Do Pedal Resistance Band Workouts?
For general beginner resistance training, two or three full-body sessions per week on nonconsecutive days can provide a practical starting schedule. Allow recovery between demanding sessions and adjust frequency according to your fitness level and overall activity.
Beginner Weekly Workout Schedule
- Monday: Full-body pedal resistance band workout.
- Tuesday: Rest or gentle walking.
- Wednesday: Full-body pedal resistance band workout.
- Thursday: Rest or light mobility exercises.
- Friday: Full-body pedal resistance band workout.
- Saturday: Optional light physical activity.
- Sunday: Rest and recovery.
This is a sample schedule rather than a fixed requirement. Beginners may prefer two weekly sessions initially, especially when adapting to resistance training.
Rest Days and Muscle Recovery
Muscles need time to recover after challenging resistance sessions. Rest days can help you maintain consistency while avoiding unnecessary training fatigue.
Gentle walking, comfortable mobility exercises, and normal daily movement can complement your training schedule. Avoid repeatedly training the same muscles at high intensity when they are still significantly sore.
How to Progress Without Increasing Resistance Too Quickly
Progressive resistance training does not require increasing elastic tension every session. You can gradually improve your workout through several manageable changes.
- Repetitions: Add one or two repetitions when the current volume becomes comfortable.
- Sets: Increase the number of sets gradually rather than immediately doubling your workload.
- Tempo: Slow down the movement to improve control.
- Range of motion: Expand your comfortable movement range when appropriate.
- Resistance: Adjust tension only within the equipment's safe operating limits.
Maintain your current difficulty when you cannot complete repetitions with consistent form. Progress should come from better control and manageable training demands, not from stretching the elastic tubes as far as possible.
Common Pedal Resistance Band Workout Mistakes and Safety Tips
Elastic resistance equipment requires careful handling because the tubes store energy while stretched. Incorrect positioning, damaged components, or sudden releases can create unnecessary injury risks.
Using Damaged or Overstretched Resistance Tubes
Inspect the tubes before every workout. Look for cracks, thinning, tears, discoloration associated with deterioration, and loose connections.
Do not continue exercising with damaged resistance components. Avoid stretching the tubes beyond the manufacturer's recommended limits, and replace worn parts according to the equipment instructions.
Incorrect Foot Placement and Unstable Pedals
Incorrect foot placement can cause the pedals to slip during an exercise. Position your feet securely and check that the pedals remain stable before applying tension.
For standing exercises, use a clear, nonslip exercise area. Avoid performing movements that require balancing on an unstable surface or placing the pedals in positions that could cause them to move unexpectedly.
Pulling Too Hard or Releasing Resistance Suddenly
Excessive stretching can increase tension beyond what the equipment is designed to handle. Sudden releases can also cause the handles or tubes to recoil unexpectedly.
Use a comfortable range of motion, maintain control throughout each repetition, and gradually return to the starting position.
Ignoring Posture and Breathing
Rounded shoulders, excessive lower-back arching, and breath-holding can interfere with proper exercise technique.
Maintain a neutral spine, keep your shoulders relaxed, and coordinate breathing with each movement. Avoid using momentum to complete difficult repetitions.
When to Stop an Exercise
Stop immediately if you experience sharp pain, unusual discomfort, dizziness, or equipment instability. Do not attempt to push through symptoms to finish a set.
If you have an existing injury, significant joint limitations, balance difficulties, or medical concerns that affect exercise participation, consult an appropriately qualified healthcare professional before beginning a new resistance-training program.
When Is a Pedal Resistance Band Better Than Other Home Workout Equipment?
Choosing home workout equipment depends on available space, exercise preferences, resistance requirements, and training objectives. A pedal resistance band can be convenient for compact workouts, but it does not replace every function of conventional strength-training equipment.
Pedal Resistance Band vs. Loop Resistance Bands
Pedal resistance bands combine handles and foot pedals in one system. They are useful for movements such as seated presses, rows, and curls that require a hand-gripping position and a foot-supported resistance base.
Loop resistance bands are continuous elastic bands that are commonly used for lateral steps, glute activation, squats, and other lower-body movements.
Choose a pedal trainer when you prefer integrated handles and foot pedals. Choose loop bands when your workout emphasizes movements around the thighs, knees, or ankles.
Pedal Resistance Band vs. Traditional Resistance Tubes with Handles
Both equipment types use elastic resistance tubes and handles. The main difference is the configuration.
Pedal resistance systems integrate foot supports into their design, making selected exercises easier to organize around a stable foot position. Conventional resistance tubes may use separate handles and require additional anchoring arrangements for certain movements.
Neither configuration is universally better. Consider the exercises you intend to perform and whether the equipment provides the necessary attachment points.
Pedal Resistance Band vs. Bulky Home Gym Equipment
Traditional home gym equipment may provide more structured loading, greater resistance options, and specialized exercise stations. However, it generally requires more storage space and a larger initial setup.
A pedal resistance trainer is a more compact alternative for general elastic-resistance exercises. It is convenient for small home workout areas, but its resistance range and exercise selection are more limited than those of a comprehensive gym setup.
Who Should Consider a Pedal Resistance Band?
This equipment may be worth considering for:
- Beginners learning basic resistance-training movements.
- People with limited space for home workout equipment.
- Individuals who prefer lightweight and portable fitness accessories.
- Travelers who want a compact exercise option.
- People who want to practice upper-body, lower-body, and core movements using elastic resistance.
For additional home fitness and everyday wellness equipment, the Lifestyle collection provides another place to explore compact equipment options.
Choosing a Pedal Resistance Band for Your Home Workout
Before buying a pedal resistance band, evaluate its construction, resistance configuration, comfort, and compatibility with the exercises you want to perform. A product's tube count alone does not establish its actual resistance strength or overall suitability.
Features to Check Before Buying
- Tube construction: Check the elastic material, number of tubes, connection points, and manufacturer information about resistance limits.
- Pedal design: Look for a foot-support configuration that allows secure positioning.
- Handle comfort: Foam-covered grips may provide a more comfortable holding surface during repeated movements.
- Attachment security: Inspect connectors and any supplied anchor accessories.
- Resistance information: Look for clearly stated resistance levels or tension specifications when available.
- Portability: Consider the product dimensions, weight, and available storage space.
- Maintenance: Check the manufacturer's cleaning, storage, and replacement recommendations.
Optional Pedal Resistance Training Equipment
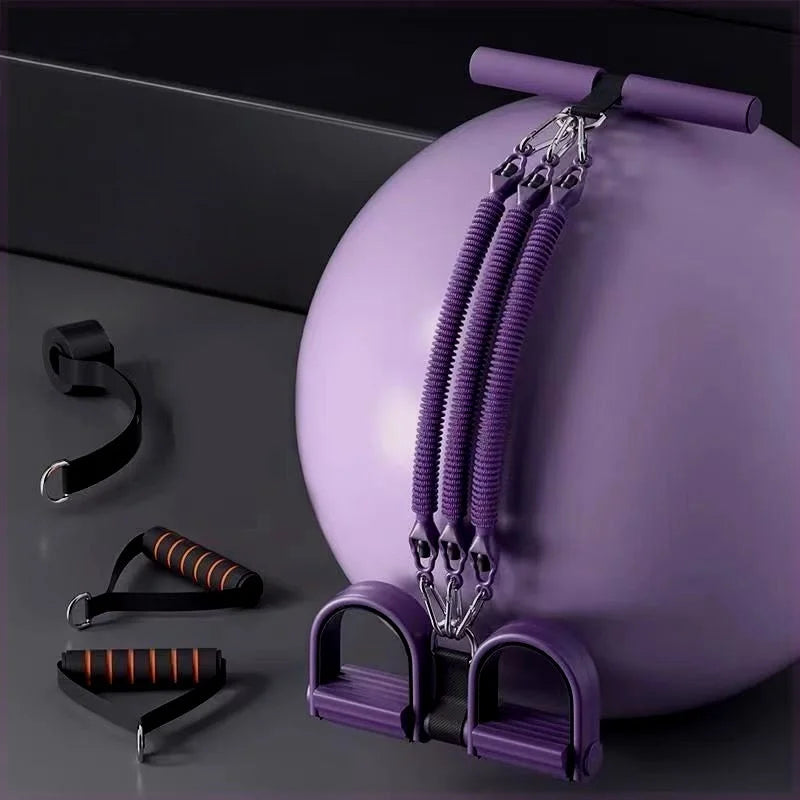
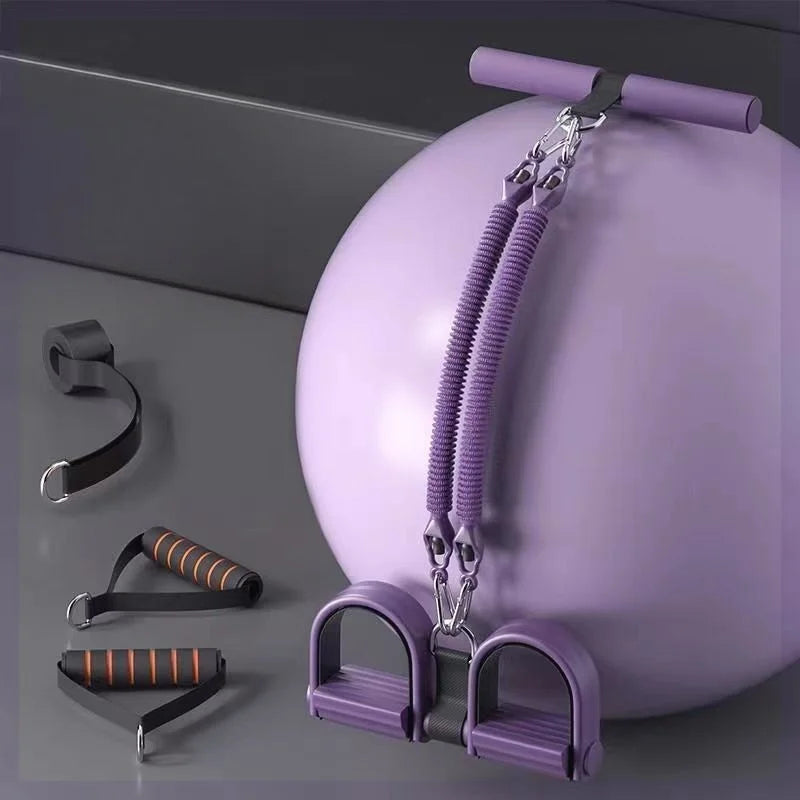
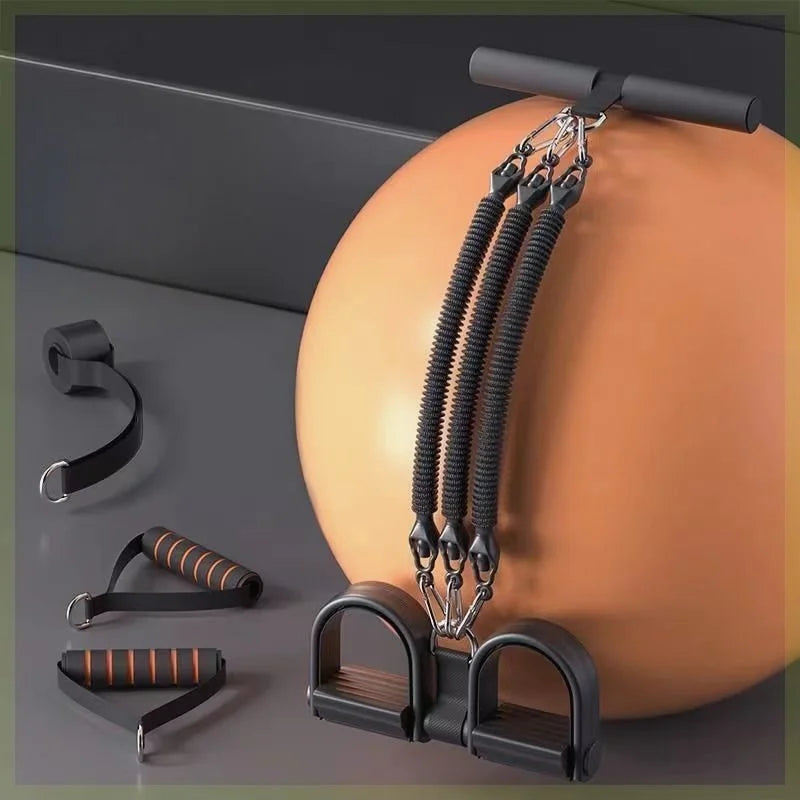
One example of this equipment configuration is the Pedal Resistance Band – 4-Tube Full Body Workout Trainer. It combines four elastic resistance tubes, foot pedals, and handles in a compact design intended for convenient resistance training at home or while traveling.
The product uses TPE, elastic material, and foam, with approximate dimensions of 52 × 26.5 cm. It is available in black and purple and is described for exercises targeting the arms, shoulders, waist, abdomen, and legs.
The package includes one pedal tension rope, two handles, and one door anchor. The door anchor should only be used with an appropriate secure setup and according to the manufacturer's instructions.
Its four-tube configuration and integrated pedal-and-handle design make it an example of the type of compact resistance trainer discussed in this guide. Review the available specifications and confirm that its configuration suits your intended exercises before choosing it.
If you are comparing compact resistance equipment for home training, you can review the four-tube pedal resistance trainer and its product specifications to see whether its design matches your workout preferences.
Explore More Home Fitness Equipment
A balanced home exercise setup can include different accessories for strength training, mobility, and general physical activity. Consider your available space and training objectives before adding more equipment.
- Explore body care and health devices for additional home wellness equipment.
- Browse lifestyle equipment for convenient everyday products.
Explore the available collections to compare equipment options and identify accessories that complement your home workout routine.
Conclusion: Build a Consistent Full-Body Home Workout
Pedal resistance band workouts offer a practical way to practice upper-body, lower-body, and core exercises without requiring bulky gym equipment. The combination of elastic tubes, foot pedals, and handles supports a variety of seated and standing movements that can be adapted to different training preferences.
Start with basic movements such as seated chest presses, resistance rows, biceps curls, leg extensions, and controlled abdominal exercises. As your technique improves, introduce additional exercises and organize them into a consistent 10-minute or 15–20-minute home workout routine.
Remember that correct positioning, equipment inspection, controlled elastic tension, and adequate recovery are more important than performing as many repetitions as possible. Progress gradually and choose movements that match your fitness level.
If you want to make your home workouts more convenient, explore compact resistance-training equipment such as the four-tube pedal resistance band trainer and consider how its pedals, handles, and elastic tubes fit your exercise preferences.
Pillar Article: Adjustable Pedal Resistance Workout Equipment: Buying Guide & Exercises