
Arm and Leg Workout at Home: 8 Resistance Band Exercises for Full-Body Strength
Building stronger arms and legs doesn't require an expensive gym membership, bulky exercise machines, or a room full of weights. With a resistance band, a little floor space, and a consistent routine, you can train multiple muscle groups at home while improving strength, movement control, and overall fitness.
An effective arm and leg workout at home combines upper-body exercises, lower-body movements, and core-stabilizing activities. Resistance band shoulder presses, biceps curls, squats, glute bridges, and lateral band walks provide a practical starting point for beginners and experienced exercisers alike.
This guide introduces eight resistance band exercises that work your arms, shoulders, legs, and glutes. You'll learn how to perform each movement, choose appropriate resistance, organize your training sessions, and gradually make your workouts more challenging. Most sessions take approximately 25–35 minutes, including a warm-up and cooldown.
How to Build an Effective Arm and Leg Workout at Home
An effective home strength workout combines exercises for the upper and lower body rather than concentrating exclusively on one muscle group. Resistance bands provide external tension during movements, while bodyweight exercises help develop coordination, stability, and movement control.
For a balanced routine, include four upper-body movements and four lower-body exercises. Perform two sets of each exercise initially, using approximately 10–15 repetitions for most movements. Rest for 30–60 seconds between sets, and complete the routine two or three times per week according to your fitness level and recovery.
What You Need for This 8-Exercise Home Workout
You don't need a dedicated home gym to begin. Gather a few practical accessories before your workout:
- Resistance bands: Choose bands with suitable resistance for shoulder presses, curls, squats, and other movements.
- Exercise mat: Provides a comfortable surface for glute bridges and floor-based stretching.
- Stable chair: Useful for supported squats, seated exercises, and balance assistance.
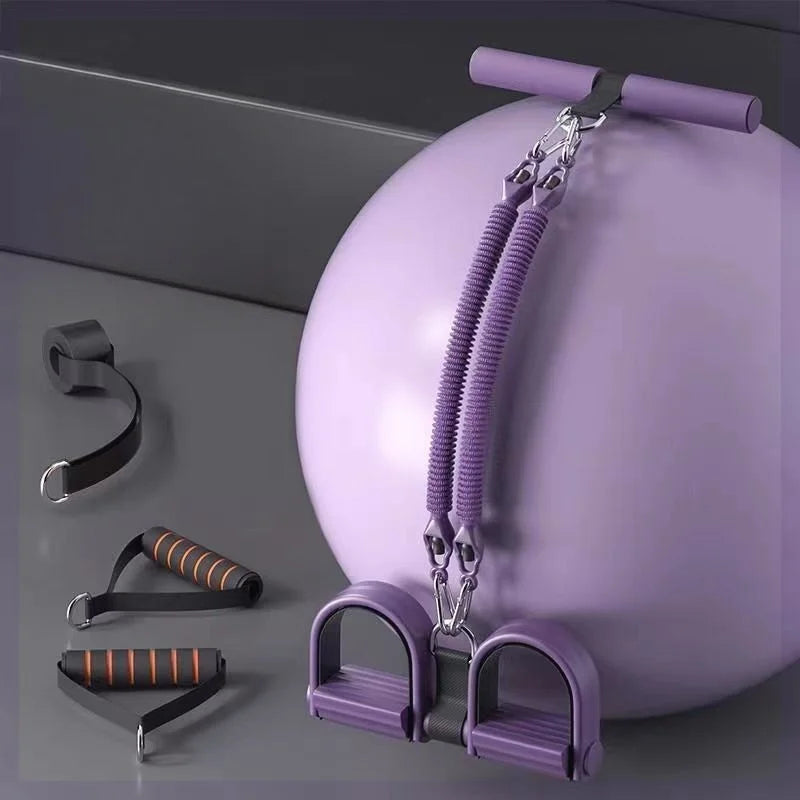
- Pedal resistance trainer: A compact option featuring foot pedals, elastic tubes, and handles for pulling and stretching exercises.
- Door anchor: Can support compatible resistance tube exercises when installed according to the manufacturer's instructions.
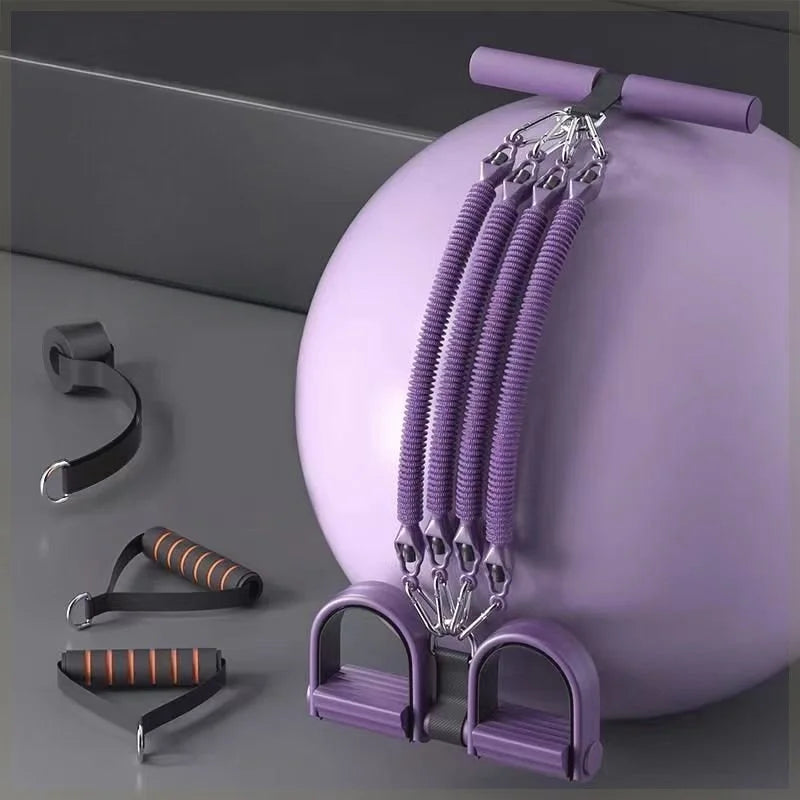
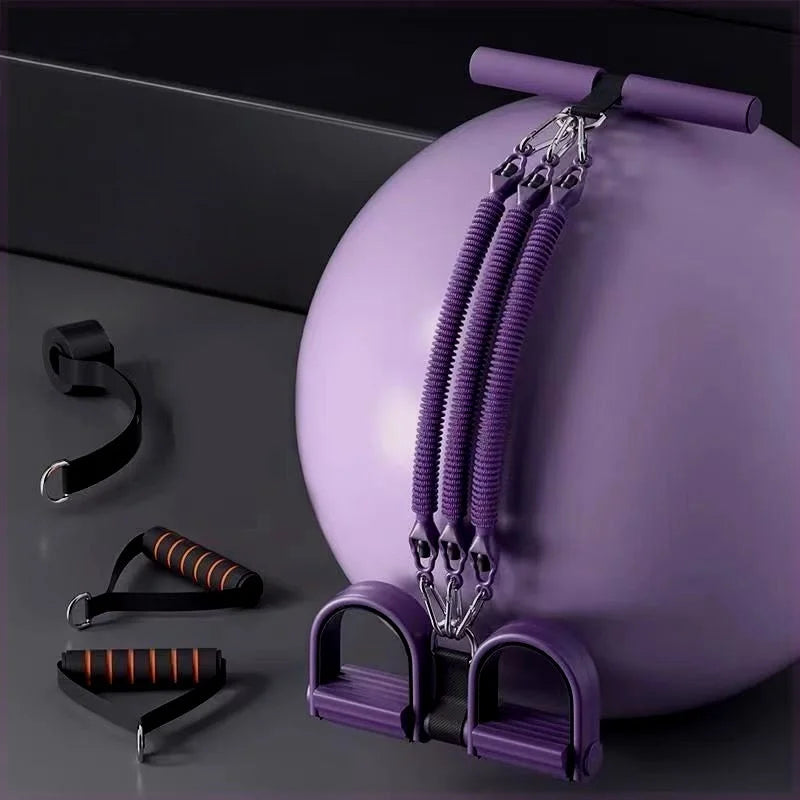
A four-tube pedal resistance system can be particularly convenient when storage space is limited. Its foot pedals and foam-covered handles provide different contact points for upper- and lower-body movements.
Quick-Start Arm and Leg Workout at a Glance
Use this beginner-friendly plan as your starting point. Adjust repetitions and resistance according to your ability to maintain proper technique.
- Shoulder press: 2 sets of 10–12 repetitions.
- Resistance band squats: 2 sets of 10–15 repetitions.
- Biceps curls: 2 sets of 10–15 repetitions.
- Glute bridges: 2 sets of 12–15 repetitions.
- Lateral raises: 2 sets of 10–15 repetitions.
- Lateral band walks: 2 sets of 10–12 steps in each direction.
- Triceps extensions: 2 sets of 10–12 repetitions.
- Leg extensions: 2 sets of 10–12 repetitions per leg.
Allow 30–60 seconds of rest between sets. Take additional recovery time when needed, particularly when learning unfamiliar movements.
How Long Does a Complete Workout Take?
A typical session takes approximately 25–35 minutes. Allow five minutes for warming up, around 18–25 minutes for the eight exercises, and another five minutes for gentle cooldown movements.
If you're new to resistance training, begin with one set of each movement. Gradually increase to two sets as your coordination and exercise tolerance improve.
Warm Up Before Your Arm and Leg Workout
A short dynamic warm-up prepares your muscles and joints for the movements ahead. It also gives you an opportunity to identify stiffness or discomfort before introducing resistance.
5-Minute Dynamic Warm-Up Routine
Try the following sequence before each workout:
- Arm circles – 30 seconds: Extend your arms and make small controlled circles, gradually increasing their size.
- Shoulder rolls – 30 seconds: Roll your shoulders forward and backward to prepare the upper body.
- Marching in place – 60 seconds: Lift your knees comfortably while swinging your arms naturally.
- Bodyweight squats – 60 seconds: Perform shallow, controlled squats without resistance.
- Gentle hip hinges – 60 seconds: Push your hips backward while keeping your spine neutral.
- Light mobility movements – 60 seconds: Move your hips, ankles, and shoulders through comfortable ranges of motion.
Keep the movements smooth rather than forcing your joints into uncomfortable positions.
How to Prepare Your Resistance Bands
Inspect your equipment before every session. Look for cracks, tears, thinning material, damaged handles, loose connections, or other signs of wear.
Check that the band sits securely beneath your feet or around the designated attachment point. Avoid placing elastic tubes against sharp edges, rough surfaces, or unstable objects. Never overstretch a band beyond its recommended limits.
When using a door anchor, follow the manufacturer's installation instructions and verify that the anchor is secure before applying tension.
4 Upper-Body Resistance Band Exercises for Stronger Arms and Shoulders
Upper-body resistance training can target the deltoids, biceps, triceps, and supporting shoulder muscles. These four exercises offer different movement patterns that can be combined into one practical home workout.
1. Resistance Band Shoulder Press
Target muscles: Deltoids, triceps, and supporting shoulder stabilizers.
The resistance band shoulder press develops overhead pushing strength without requiring traditional dumbbells. It is particularly useful for people who want to incorporate shoulder training into a compact home exercise routine.
How to perform it:
- Stand on the center of a suitable resistance band with your feet approximately shoulder-width apart.
- Hold the handles near shoulder height with your palms facing forward or slightly inward.
- Keep your abdomen engaged and your back in a comfortable neutral position.
- Press both hands upward without forcing your elbows into a locked position.
- Lower the handles slowly until they return to shoulder height.
Recommended training: 2–3 sets of 10–12 repetitions, resting 30–60 seconds between sets.
Beginner modification: Use lighter resistance or perform the movement while seated with your feet securely positioned.
Advanced modification: Increase resistance gradually or introduce a controlled pause near the top of each repetition.
Breathing tip: Exhale while pressing upward and inhale while lowering the handles.
2. Resistance Band Lateral Raises
Target muscles: Lateral deltoids and shoulder stabilizers.
Lateral raises emphasize the muscles along the sides of your shoulders. They complement pressing exercises by introducing a different movement direction.
How to perform it:
- Stand on the middle of the resistance band with your feet comfortably separated.
- Hold one handle in each hand with your arms beside your body.
- Maintain a slight bend in your elbows and keep your shoulders relaxed.
- Raise your arms outward until they approach shoulder height.
- Lower them slowly without allowing the band to pull your arms downward suddenly.
Recommended training: 2 sets of 10–15 repetitions.
Beginner modification: Choose lighter resistance and raise your arms through a smaller range of motion.
Advanced modification: Increase resistance slightly while maintaining a controlled tempo.
Avoid shrugging your shoulders or swinging your torso to lift the handles. The movement should remain smooth and controlled.
3. Resistance Band Biceps Curls
Target muscles: Biceps brachii and supporting forearm muscles.
Biceps curls are a straightforward way to strengthen the front of your upper arms. Resistance bands create tension throughout the movement, with resistance generally increasing as the elastic material stretches.
How to perform it:
- Stand on the resistance band with both feet placed securely on the floor.
- Hold the handles with your palms facing forward.
- Keep your elbows close to your torso and your upper arms relatively stationary.
- Bend your elbows to bring your hands toward your shoulders.
- Lower the handles slowly until your arms return to the starting position.
Recommended training: 2–3 sets of 10–15 repetitions.
Beginner modification: Use lighter resistance and perform the exercise with one arm at a time if coordination is difficult.
Advanced modification: Adjust your stance to increase band tension or use a slower lowering phase.
Breathing tip: Exhale as you curl upward and inhale as you return to the starting position.
4. Resistance Band Triceps Extensions
Target muscles: Triceps brachii.
The triceps contribute to elbow extension and are important for pushing movements. Overhead resistance band extensions provide a focused way to train these muscles at home.
How to perform it:
- Position a suitable resistance band securely beneath one foot or use an appropriate stable anchor according to the equipment instructions.
- Hold the handle and bring your working hand behind or above your head, depending on the variation.
- Keep your upper arm relatively stationary and your elbow pointing upward.
- Extend your elbow to move your hand upward.
- Return slowly to the starting position without allowing the band to snap back.
Recommended training: 2 sets of 10–12 repetitions.
Beginner modification: Choose lighter resistance and use a comfortable range of motion.
Advanced modification: Perform controlled single-arm repetitions with slightly greater resistance.
Upper-Body Exercise Technique Comparison
The four upper-body movements train different muscle groups and require slightly different resistance band positions.
| Exercise | Target muscles | Band positioning | Repetitions | Common mistake |
| Shoulder press | Deltoids, triceps | Under both feet | 10–12 | Overarching the back |
| Lateral raises | Lateral deltoids | Under both feet | 10–15 | Swinging the arms |
| Biceps curls | Biceps, forearms | Under both feet | 10–15 | Moving the elbows excessively |
| Triceps extensions | Triceps | Under one foot or suitable anchor | 10–12 | Flaring the elbows |
4 Lower-Body Resistance Band Exercises for Stronger Legs and Glutes
Lower-body exercises train some of the body's largest muscle groups. Combining squats, glute bridges, lateral movements, and knee extensions helps create a more balanced leg workout.
5. Resistance Band Squats
Target muscles: Quadriceps, gluteus maximus, and hamstrings.
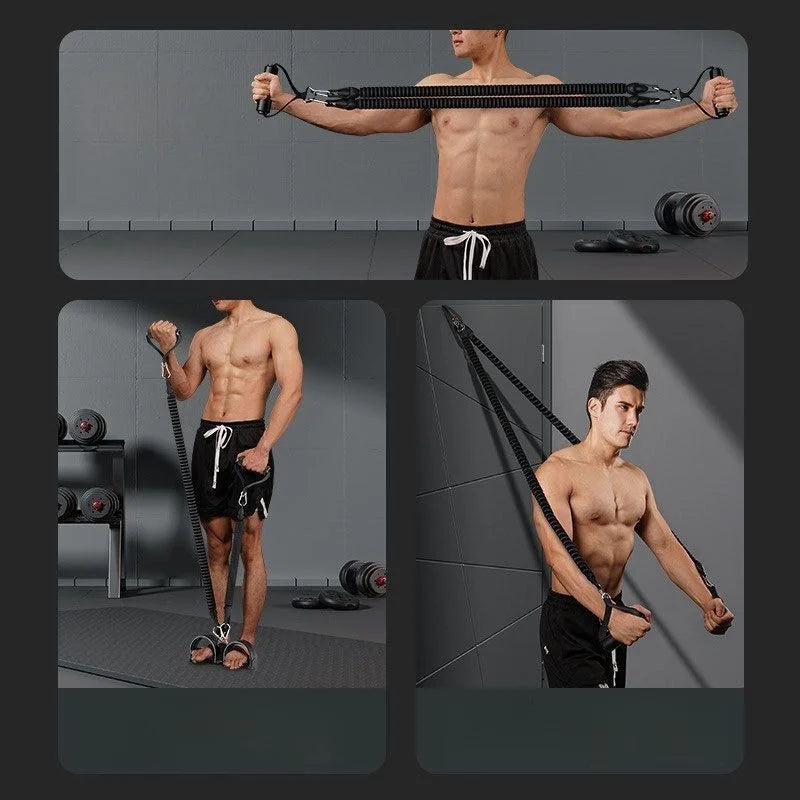
Resistance band squats combine a familiar bodyweight movement with additional elastic tension. They are suitable for home workouts because they require relatively little space and can be adjusted according to your strength level.
How to perform it:
- Stand on the middle of the band with your feet approximately shoulder-width apart.
- Hold the handles near your shoulders, keeping your wrists comfortable.
- Brace your abdomen and push your hips backward as you bend your knees.
- Lower yourself to a comfortable depth while keeping your heels on the floor.
- Push through your feet to return to standing.
Recommended training: 2–3 sets of 10–15 repetitions.
Beginner modification: Perform chair-assisted bodyweight squats before adding resistance.
Advanced modification: Use a stronger band or introduce a brief pause near the bottom of the squat.
6. Resistance Band Glute Bridges
Target muscles: Gluteus maximus, hamstrings, and hip stabilizers.
Glute bridges strengthen the muscles responsible for hip extension. They are particularly convenient for home workouts because they can be performed on an exercise mat without standing.
How to perform it:
- Lie on your back with your knees bent and feet flat on the floor.
- Position your feet approximately hip-width apart.
- If using a suitable loop band, place it above your knees.
- Engage your abdomen and squeeze your glutes.
- Lift your hips until your shoulders, hips, and knees form an approximately straight line.
- Lower your hips slowly without dropping them onto the floor.
Recommended training: 2–3 sets of 12–15 repetitions.
Beginner modification: Perform bodyweight glute bridges without additional resistance.
Advanced modification: Try a controlled single-leg variation once you can maintain stable hip alignment.
Do not excessively arch your lower back at the top of the movement. Focus on hip extension rather than lifting your torso as high as possible.
7. Lateral Band Walks
Target muscles: Gluteus medius, gluteus minimus, and hip abductors.
Lateral band walks introduce side-to-side movement into a routine that otherwise focuses mainly on forward and upward movement. They help train the muscles that support hip stability.
How to perform it:
- Place a compatible loop resistance band above your knees or around your ankles.
- Stand with your feet approximately hip-width apart.
- Bend your knees slightly and push your hips backward into a comfortable athletic stance.
- Take a controlled step sideways with one foot.
- Bring the other foot toward it without allowing the band to become completely slack.
- Continue for the prescribed number of steps, then change direction.
Recommended training: 2 sets of 10–12 steps in each direction.
Beginner modification: Use a lighter band positioned above the knees and take smaller steps.
Advanced modification: Use greater resistance or position the band lower around the ankles if your technique remains stable.
Keep your knees aligned with your feet and avoid rocking your torso from side to side.
8. Resistance Band Leg Extensions
Target muscles: Quadriceps.
Leg extensions isolate the quadriceps through knee extension. This exercise can complement squats by emphasizing the front of the thighs with a more focused movement.
How to perform it:
- Sit on a stable chair with your feet flat on the floor.
- Secure a suitable resistance band behind the chair or at another manufacturer-approved anchor point.
- Attach the band to the working foot or lower leg as directed for your equipment.
- Keep your thighs supported and your upper body upright.
- Slowly straighten your working knee against the resistance.
- Return your foot to the starting position without allowing the band to pull it backward suddenly.
- Complete the repetitions and switch legs.
Recommended training: 2 sets of 10–12 repetitions per leg.
Beginner modification: Use lighter resistance and a comfortable range of knee movement.
Advanced modification: Increase resistance gradually while keeping the movement controlled.
Avoid forcefully locking your knee at the end of each repetition.
Lower-Body Exercise Technique Comparison
| Exercise | Target muscles | Equipment setup | Repetitions | Difficulty |
| Resistance band squats | Quadriceps, glutes, hamstrings | Band beneath feet | 10–15 | Beginner to advanced |
| Glute bridges | Glutes, hamstrings | Mat and optional loop band | 12–15 | Beginner to advanced |
| Lateral band walks | Hip abductors, gluteal muscles | Loop band above knees or ankles | 10–12 steps per direction | Beginner to advanced |
| Leg extensions | Quadriceps | Secure resistance anchor | 10–12 per leg | Beginner to advanced |
How to Combine All 8 Exercises Into One Full-Body Workout
The eight movements work best when organized into a single routine that alternates upper- and lower-body exercises. This approach allows different muscle groups to take turns working while you prepare for the next movement.
Recommended Exercise Order and Training Sequence
Follow this sequence to organize your full-body workout:
- Resistance band shoulder press.
- Resistance band squats.
- Resistance band biceps curls.
- Resistance band glute bridges.
- Resistance band lateral raises.
- Lateral band walks.
- Resistance band triceps extensions.
- Resistance band leg extensions.
Alternating upper- and lower-body exercises helps distribute muscular effort throughout the session. It also makes equipment transitions more manageable in a small home workout area.
Sets, Repetitions, Rest Periods, and Breathing
Start with two sets of each exercise. Most movements work well with 10–15 repetitions, while shoulder presses, triceps extensions, and leg extensions can begin with 10–12 controlled repetitions.
- Sets: Begin with 1–2 sets and gradually progress to 2–3.
- Repetitions: Complete 10–15 repetitions for most exercises.
- Rest: Take 30–60 seconds between sets, extending the rest period when needed.
- Breathing: Exhale during the effort phase and inhale during the controlled return.
- Movement speed: Avoid jerking or bouncing the band.
Your final repetitions should feel challenging but manageable without compromising your posture.
Beginner, Intermediate, and Advanced Workout Modifications
Adjust the training routine according to your experience and current strength.
- Beginner: Use light resistance, perform 1–2 sets, and prioritize comfortable ranges of motion and correct technique.
- Intermediate: Progress toward 2–3 sets using moderate resistance and consistent movement control.
- Advanced: Introduce stronger bands, additional sets, slower repetitions, pauses, and unilateral variations where appropriate.
Moving to a higher training level should depend on your ability to complete the current exercises safely, not simply on how long you have been exercising.
How to Choose the Right Resistance Bands for Arms and Legs
Choosing appropriate resistance equipment makes home strength training easier to organize. The right option should provide enough tension to challenge your muscles without forcing you to sacrifice movement quality.
Understanding Light, Medium, and Heavy Resistance Levels
Resistance bands are commonly categorized as light, medium, or heavy. These descriptions help communicate general resistance levels, but actual tension varies between manufacturers, materials, and band designs.
Upper-body movements such as lateral raises often require less resistance than larger lower-body movements such as squats. However, your strength, exercise experience, and available range of motion also influence the appropriate resistance.
Choose a band that allows you to complete your target repetitions with stable posture and controlled movement. If you cannot finish the movement comfortably, reduce the resistance. If the exercise feels consistently effortless, consider increasing the challenge.
Loop Bands vs. Tube Bands With Handles
Loop bands and tube resistance systems offer different advantages for home workouts.
- Loop bands: Continuous elastic loops are useful for lateral walks, glute bridges, and lower-body activation exercises.
- Tube bands with handles: These provide grip points for pulling, curling, pressing, and stretching movements.
- Pedal resistance systems: Foot pedals and handles create different contact points for upper- and lower-body resistance exercises.
A tube trainer is particularly useful for people who prefer a compact piece of equipment that can be stored easily. Loop bands may still be necessary for exercises specifically designed around continuous circular resistance.
How to Position and Anchor Resistance Bands Safely
Correct positioning is essential for safe resistance training. A poorly secured band can slip or recoil unexpectedly.
- Place your feet securely on the designated pedal or band contact points.
- Check that handles and connections are firmly attached.
- Use only appropriate, stable anchor points approved for your equipment.
- Keep stretched bands away from your face and other people.
- Avoid placing bands over sharp corners or abrasive surfaces.
- Maintain controlled tension throughout each repetition.
What to Look for in a Home Resistance Band Set
Before choosing a resistance band set, consider the following characteristics:
- Resistance options suitable for different exercises.
- Elastic materials designed for repeated use.
- Comfortable foam handles or grips.
- Securely attached foot pedals and connectors.
- Suitable accessories, such as a compatible door anchor.
- Clear instructions for resistance limits and safe use.
- Compact storage and convenient portability.
A Compact Pedal Resistance Trainer for Home Workouts
For people who want a portable resistance system without bulky equipment, the Pedal Resistance Band – 4-Tube Full Body Workout Trainer offers a compact option for pulling and stretching exercises.
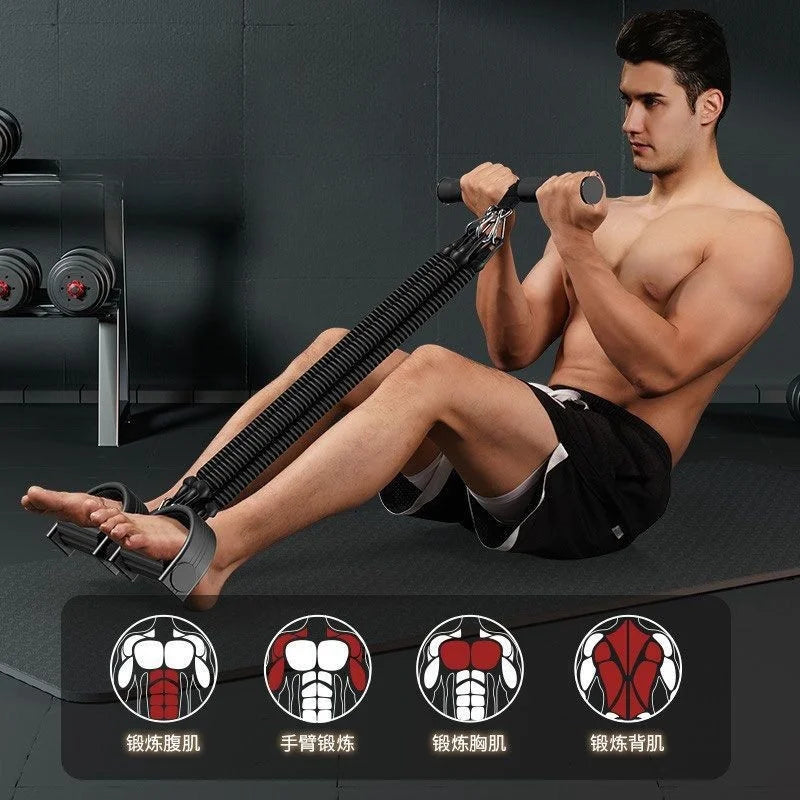
The product combines four elastic tubes, foot pedals, and foam-covered handles. Its design supports movements targeting the arms, shoulders, waist, abdomen, and legs.
Its listed specifications include:
- Material: TPE, elastic material, and foam.
- Approximate dimensions: 52 × 26.5 cm.
- Design: Four-tube pedal resistance system.
- Colors: Black and purple.
- Package: One pedal tension rope, two handles, and one door anchor.
- Intended users: Men and women.
The foam-covered handles provide a more comfortable grip, while the pedal design gives you another way to position your feet during resistance exercises. Its compact construction is convenient for people who want to exercise at home or while traveling.
Before purchasing, consider whether the included equipment matches your intended exercises. In particular, this four-tube pedal trainer should not be assumed to provide independently adjustable resistance levels unless the manufacturer specifies that feature. Loop-band exercises, such as lateral band walks, may require a separate compatible band.
If you're comparing equipment for a small workout area, you can also explore the Lifestyle collection for additional everyday products and accessories.
Resistance Bands vs. Bodyweight Exercises vs. Free Weights
Resistance bands, bodyweight movements, and free weights can all support home strength training. The most suitable approach depends on your available space, training experience, exercise preferences, and ability to progressively increase the challenge.
Which Training Method Is Best for Home Workouts?
| Comparison factor | Resistance bands | Bodyweight exercises | Free weights |
| Accessibility | Portable and lightweight | Usually requires minimal equipment | Requires purchasing and storing weights |
| Space requirements | Generally low | Generally low | Depends on the equipment |
| Resistance adjustment | Change band strength or stretch | Change leverage or exercise variation | Change weight used |
| Exercise versatility | Pulling, pressing, and stretching movements | Squats, push-ups, lunges, and core movements | Many targeted strength exercises |
| Progressive overload | Increase resistance, tension, or volume | Increase repetitions or difficulty | Increase weight or volume |
| Beginner suitability | Suitable with appropriate resistance | Suitable with appropriate modifications | Suitable with proper instruction |
None of these training methods is universally superior. Resistance bands offer portability and versatile tension, bodyweight exercises provide convenient movement practice, and free weights allow straightforward load adjustments.
Combining methods can also be useful. For example, you might perform bodyweight glute bridges, resistance band biceps curls, and chair-assisted squats during the same session.
Can Resistance Bands Build Strength Without Traditional Weights?
Yes. Resistance bands can support strength and muscle development when exercises provide an appropriate challenge and training volume increases gradually over time.
The key principles include:
- Choosing resistance that challenges the intended muscles.
- Maintaining proper technique throughout each repetition.
- Training consistently over an extended period.
- Increasing repetitions, sets, or resistance as your ability improves.
- Allowing adequate recovery between demanding sessions.
Results vary according to training experience, exercise intensity, nutrition, sleep, and individual circumstances. Resistance bands are a practical alternative to traditional weights, but they do not automatically produce the same training stimulus for every exercise.
How to Create a Weekly Arm and Leg Workout Schedule
A sustainable weekly schedule gives your muscles time to recover while helping you develop consistent exercise habits. Beginners generally benefit from starting with two nonconsecutive full-body strength sessions per week.
Beginner 2-Day Weekly Workout Schedule
This schedule is suitable for people who are new to resistance training or returning after a period of inactivity.
- Monday: Complete the eight-exercise arm and leg workout using light resistance.
- Tuesday: Rest or take a gentle walk.
- Wednesday: Perform optional mobility exercises.
- Thursday: Repeat the full-body resistance band routine.
- Friday: Rest or perform gentle stretching.
- Saturday: Enjoy light walking or another comfortable physical activity.
- Sunday: Recovery day.
This arrangement provides recovery time between strength sessions without requiring daily workouts.
Intermediate 3-Day Weekly Workout Schedule
People who already have some resistance training experience may prefer three weekly sessions, provided they recover adequately.
- Monday: Full-body workout with two or three sets per exercise.
- Tuesday: Walking or light mobility work.
- Wednesday: Full-body workout with controlled resistance progression.
- Thursday: Rest and recovery.
- Friday: Full-body workout with appropriate exercise variations.
- Saturday: Optional low-intensity physical activity.
- Sunday: Rest.
Avoid making every session an all-out effort. Adjust resistance and volume according to your recovery.
How Much Recovery Do Your Arms and Legs Need?
Muscles need time to recover and adapt after challenging exercise. Leave adequate recovery time between demanding full-body sessions, particularly when beginning a new routine.
Pay attention to persistent soreness, unusual fatigue, reduced exercise performance, and changes in movement quality. These signs may indicate that you need additional rest or a reduction in training intensity.
Consistent sleep, adequate hydration, balanced nutrition, and rest days all contribute to a sustainable strength-training routine.
How to Progressively Overload Your Home Workout
Progressive overload means gradually increasing the training challenge as your muscles adapt. You don't need to make every workout harder. Small, manageable changes can help you continue developing strength while maintaining good technique.
Increase Repetitions and Sets Gradually
If two sets of 10 repetitions become comfortable, gradually increase your repetitions toward 12–15. Once you can complete the upper end of the repetition range with good technique, consider adding another set.
For example, a beginner might progress from two sets of 10 biceps curls to two sets of 15 curls before considering a stronger band.
Move to a Stronger Resistance Band
When your current band no longer provides a meaningful challenge, consider moving to a stronger resistance option.
Make sure you can complete the intended repetitions without swinging, shortening the movement unnecessarily, or losing control of the band.
Improve Tempo, Control, and Exercise Variations
You can make familiar exercises more challenging without immediately increasing resistance.
- Slow down the lowering phase of each repetition.
- Pause briefly at the most demanding position.
- Increase your range of motion when appropriate.
- Introduce single-arm or single-leg variations when you have sufficient control.
- Reduce unnecessary momentum and maintain stable posture.
Track Your Strength Progress Over Time
Keep a simple workout record to monitor your development. Record the exercise, resistance level, number of sets, repetitions, rest periods, and perceived effort.
Reviewing your notes helps identify when you are ready to increase resistance or introduce a more challenging variation. It also makes it easier to recognize when your workload is increasing too quickly.
Common Mistakes to Avoid During Arm and Leg Band Workouts
Resistance bands are convenient, but incorrect positioning and excessive tension can reduce exercise quality. Avoid the following common mistakes.
Using Too Much or Too Little Resistance
Excessive resistance can force you to compensate with poor posture or momentum. Insufficient resistance may not provide enough challenge to stimulate continued improvement.
Choose a resistance level that allows you to complete the prescribed repetitions while maintaining control.
Rushing Repetitions and Using Momentum
Fast, uncontrolled movements can make it harder to maintain consistent tension and proper positioning. Move smoothly in both directions and avoid allowing the band to recoil suddenly.
Ignoring Band Condition and Anchor Safety
Never exercise with damaged elastic tubes, loose handles, or unstable anchors. Inspect the equipment regularly and replace worn components according to the manufacturer's guidance.
Do not attach resistance bands to furniture, doors, or other objects unless the setup is specifically suitable and secure.
Skipping Recovery or Progressing Too Quickly
Increasing resistance, training frequency, and exercise volume simultaneously can create an unnecessarily demanding routine.
Make one adjustment at a time and allow your body to adapt before adding another challenge.
Cool Down After Your Home Strength Workout
After completing your workout, spend a few minutes transitioning gradually from exercise to rest. Gentle stretching can help you relax and maintain comfortable movement after training.
5-Minute Post-Workout Stretching Routine
Perform each stretch gently, holding for approximately 15–30 seconds without bouncing or forcing your range of motion.
- Chest stretch: Place your arms comfortably behind your body and gently open your chest.
- Shoulder stretch: Bring one arm across your chest and support it with the opposite hand.
- Biceps stretch: Extend one arm comfortably behind you with the palm positioned outward.
- Quadriceps stretch: Stand with support and gently bring one heel toward your glutes.
- Hamstring stretch: Extend one leg slightly forward and hinge gently at your hips.
- Glute stretch: Lie on your back and bring one knee toward your chest.
Recovery Habits That Support Consistent Training
Exercise is only one part of a sustainable fitness routine. Support your training with adequate sleep, balanced meals, hydration, and appropriate rest days.
Return to normal activity gradually after demanding sessions. If soreness persists or affects your ability to move comfortably, reduce training intensity and allow additional recovery time.
Safety Guidelines for Beginners Training at Home
Home resistance training can be accessible and convenient, but correct exercise selection and equipment handling remain important. Beginners should prioritize controlled movement rather than attempting the highest possible resistance.
When to Modify or Stop an Exercise
Muscular effort and mild fatigue are common during strength training. However, sharp pain, numbness, dizziness, or unusual symptoms are reasons to stop the exercise.
Do not attempt to push through concerning pain. If symptoms persist or are severe, seek appropriate medical advice before resuming training.
Who Should Seek Professional Exercise Guidance?
Consult a qualified healthcare professional or fitness professional if you are managing an injury, chronic health condition, balance limitation, or pregnancy-related exercise considerations.
Professional guidance can help you identify appropriate movements, modify resistance levels, and determine whether a particular exercise is suitable for your circumstances.
Evidence-Based Strength Training Principles
Several established exercise principles can help guide a balanced home workout.
- Gradual progression: Increase exercise difficulty progressively rather than making sudden changes to resistance or training volume.
- Muscle-group balance: Include movements that train the upper body, lower body, and supporting muscle groups.
- Recovery: Allow adequate rest between demanding strength-training sessions.
- Movement quality: Prioritize controlled repetitions and appropriate exercise technique.
- Consistency: Follow a realistic schedule that you can maintain over time.
The Centers for Disease Control and Prevention (CDC) physical activity guidelines recommend that adults complete muscle-strengthening activities involving all major muscle groups on at least two days each week. These recommendations provide general physical activity guidance rather than a specific prescription for the eight exercises in this article.
The American College of Sports Medicine (ACSM) also provides established resistance-training guidance emphasizing appropriate exercise selection, progressive overload, and individual training needs. You can learn more through the American College of Sports Medicine.
These general principles support a practical approach to home fitness. Individual results depend on training experience, exercise intensity, consistency, and recovery.
Frequently Asked Questions About Arm and Leg Workouts at Home
Can You Train Your Arms and Legs Together in One Home Workout?
Yes. You can combine upper-body and lower-body movements in one full-body session. Shoulder presses, biceps curls, squats, glute bridges, and other resistance band exercises can be organized into a balanced routine. Start with manageable resistance and allow enough recovery between sessions.
What Are the Best Resistance Band Exercises for Arms and Legs?
Eight useful exercises include shoulder presses, lateral raises, biceps curls, triceps extensions, resistance band squats, glute bridges, lateral band walks, and resistance band leg extensions. Together, these movements target the shoulders, arms, quadriceps, glutes, hamstrings, and hip stabilizers.
How Many Days a Week Should Beginners Train Their Arms and Legs?
Beginners can start with two nonconsecutive full-body strength workouts per week. This provides time for recovery between sessions while allowing consistent practice. Training frequency can increase gradually as exercise experience and recovery improve.
Can You Build Muscle at Home Without Traditional Weights?
Yes. Resistance bands and bodyweight exercises can support muscle development when the exercises provide sufficient resistance and are progressively challenging. Training consistency, appropriate exercise volume, nutrition, and recovery all influence results.
How Do You Choose the Right Resistance Band for Upper-Body and Lower-Body Exercises?
Choose a resistance level that allows you to complete your target repetitions with controlled movement. Upper-body exercises often require lighter resistance than lower-body movements, although individual strength and exercise technique influence the appropriate selection.
Build a Consistent Arm and Leg Workout Routine at Home
Building strength at home doesn't have to involve complicated equipment or lengthy workouts. Combining four upper-body exercises with four lower-body movements creates a practical routine that addresses multiple muscle groups in one session.
Start with manageable resistance, focus on proper positioning, and complete two weekly sessions before gradually increasing your training volume. As your technique improves, you can introduce additional repetitions, stronger bands, slower movements, and more challenging exercise variations.
If you want to keep your home workout setup compact, consider a suitable four-tube pedal resistance band trainer for convenient pulling and stretching exercises. Its portable design, foam-covered handles, and foot pedals offer an additional option for training different muscle groups at home or while traveling.
You can also explore Body Care and Health Devices for other practical products that complement an everyday self-care routine.
Ultimately, the most effective home workout is one you can perform safely and consistently. Begin with the eight exercises in this guide, listen to your body, and build your strength one session at a time.
Pillar Article: Adjustable Pedal Resistance Workout Equipment: Buying Guide & Exercises