

Does a cat eyes nails tutorial really work?
A cat eyes nails tutorial shows how magnetic gel polish reacts to a small magnet to create a shifting, reflective line. With the right steps and tools, beginners can achieve salon-quality shine, depth, and long wear at home—often in under an hour.
Cat eyes nails tutorial: Step-by-step at home guide
⏱ 5 min read
Struggling to get that glossy, dimensional nail look you see all over social feeds? This cat eyes nails tutorial breaks down exactly how to create mesmerizing magnetic effects at home—no salon visit, no guesswork. If your polish chips fast or looks flat, you’re about to upgrade your routine with simple tools and a few pro techniques.
💡 See it in action - cat eyes nails tutorial / gel polish cat eye tutorial at home, step by step cat eye nails, DIY cat eye nail art guide
What are cat eye nails and why they look so luxurious
Cat eye nails use magnetic gel polish infused with metallic particles. When you hold a magnet near the nail, the particles shift into patterns that reflect light—creating a deep, glowing “cat eye” effect.
Which style suits you best? A soft diagonal shimmer or a bold galaxy stripe? Read on to find your signature look.
- ✨ Reflective depth that changes under light
- ✨ Salon-level shine without layering multiple colors
- ✨ Unique patterns on every nail
- ✨ Long-lasting gel durability
How this look saves time and boosts confidence instantly
If you’ve ever felt frustrated by flat polish or designs that take hours, this technique changes everything. Instead of complex nail art, you get instant dimension with one polish and a magnet.
- ✅ Faster than hand-painted nail art
- ✅ No advanced skills required
- ✅ Looks expensive and polished
- ❌ Regular polish lacks depth
- ❌ Traditional nail art takes longer
Many users report getting compliments within hours of trying it—especially when paired with darker shades like black, navy, or burgundy.
What you need for a gel polish cat eye tutorial at home
Before starting your DIY cat eye nail art guide, gather these essentials:
- Base coat and top coat
- Cat eye gel polish
- UV/LED lamp
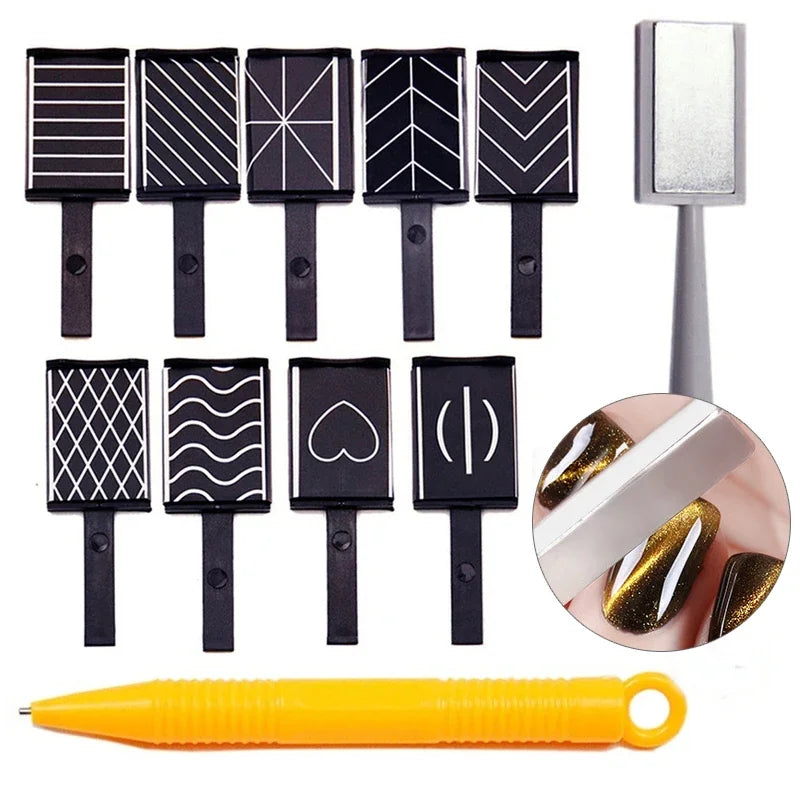
- Cat eye nail magnet set
- Nail file and buffer
For best results, explore tools in the Nail Care Devices collection to upgrade your setup.
Step by step cat eye nails: your complete guide
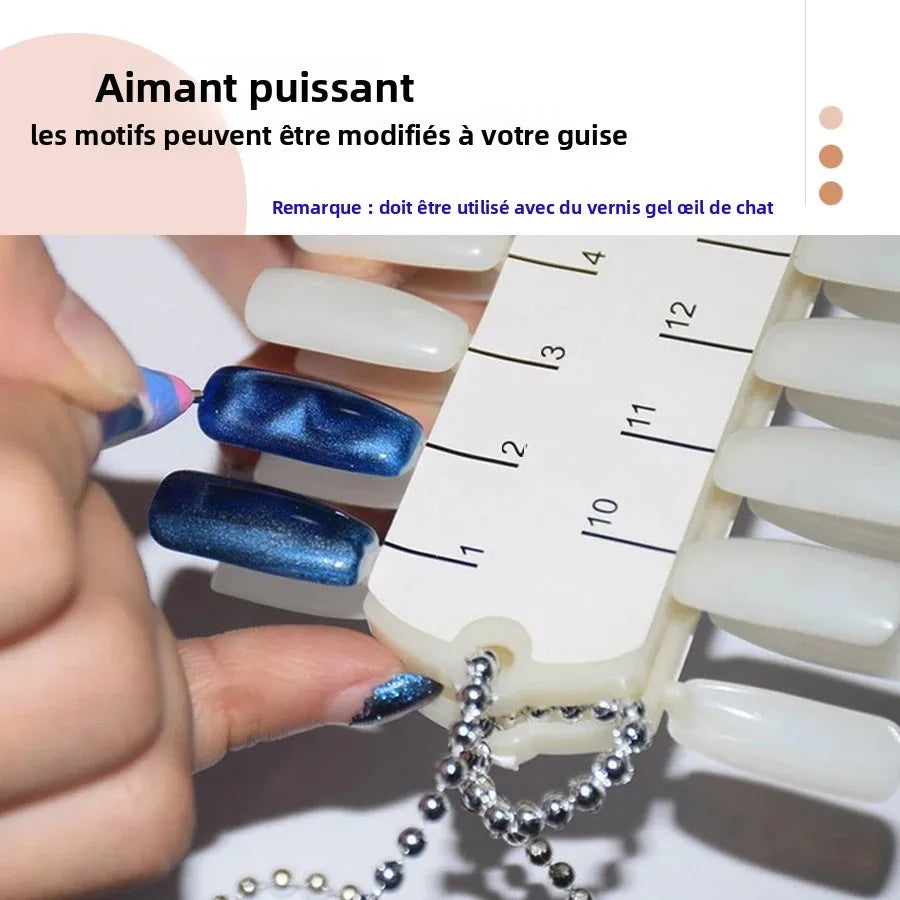
A cat eyes nails tutorial involves applying magnetic gel polish and shaping the particles using a magnet before curing. By controlling the magnet’s angle and distance, you can create lines, waves, or galaxy effects that stay locked in once cured.
- Prep your nails: Clean, file, and buff for a smooth base.
- Apply base coat: Cure under UV/LED lamp.
- Add black base (optional): Enhances magnetic effect.
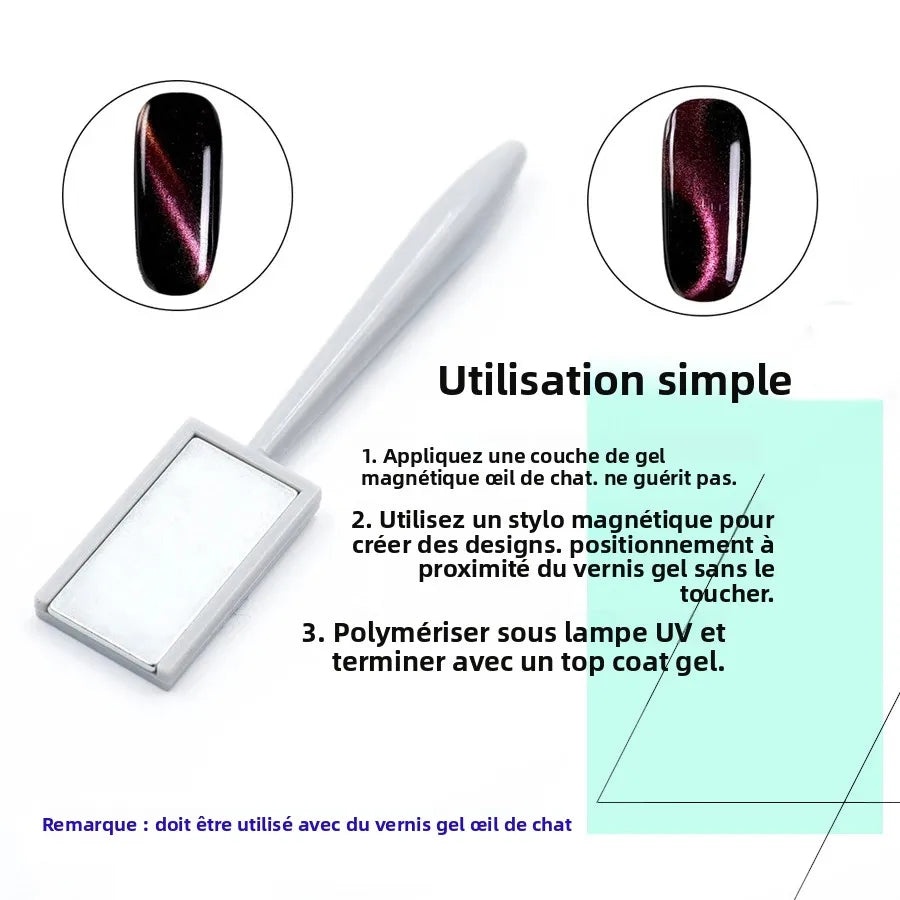
- Apply cat eye gel: Do not cure yet.
- Use magnet: Hold near nail for 5–10 seconds to form pattern.
- Cure immediately: Lock the design in place.
- Seal with top coat: Cure again for long-lasting shine.
💡 See it in action - cat eyes nails tutorial / gel polish cat eye tutorial at home, step by step cat eye nails, DIY cat eye nail art guide
How to create different magnetic patterns easily
The magic of this look is customization. With the same polish, you can create multiple designs:
| Pattern | How to create | Best for |
|---|---|---|
| Diagonal line | Hold magnet at one side | Elegant everyday look |
| Center glow | Hover magnet above center | Soft, subtle shine |
| Galaxy swirl | Move magnet in circular motion | Bold statement nails |
Using a quality cat eye nail magnet set gives you better control and sharper patterns.
Common mistakes and how to avoid them
Even beginners can get flawless results by avoiding these pitfalls:
- ❌ Curing too early → pattern won’t form
- ❌ Weak magnet → blurry effect
- ❌ Thick polish → uneven movement
- ❌ Skipping base prep → poor adhesion
Fix these, and your results improve instantly.
At-home vs salon: what’s the real difference?
| Factor | At Home | Salon |
|---|---|---|
| Cost | Low (one-time tools) | High (per visit) |
| Time | Flexible | Appointment needed |
| Customization | Unlimited | Depends on technician |
With practice, most users say they achieve nearly identical results at home.
Real user feedback
“I saved hundreds after switching to DIY cat eye nails. The magnet set made it so easy!”
“My nails look like glass—people keep asking where I got them done.”
💡 See it in action - cat eyes nails tutorial / gel polish cat eye tutorial at home, step by step cat eye nails, DIY cat eye nail art guide
Frequently asked questions
How long do cat eye nails last?
With proper application and sealing, they can last 2–3 weeks without chipping.
Do I need a special magnet?
Yes, a strong magnet designed for nail art ensures clean, defined patterns.
Can beginners do this at home?
Absolutely. This step by step cat eye nails method is beginner-friendly and easy to follow.
What colors work best?
Darker bases like black or navy enhance the reflective effect the most.
Pillar Article: How do cat eye nails work: Easy magnetic polish guide
Other Related Articles:
- Cat eye nail tool guide: How to use it correctly
- How to make cat eye nails with perfect magnetic lines
- How to use cat eye magnet for sharp salon results
Explore More:


