

How to make cat eye nails with perfect magnetic lines?
To learn how to make cat eye nails, apply a magnetic gel polish, then hold a nail magnet tool close to the wet polish to pull metallic particles into a sharp line or pattern. Cure immediately under a lamp to lock the effect. Precision timing and magnet placement are key for smooth, even results.
⏱ 7 min read
How to make cat eye nails with perfect magnetic lines
Struggling with blurry or uneven magnetic lines? You’re not alone—many at-home nail lovers find cat eye designs tricky at first. The good news: once you understand how to control the magnet and polish, you can create salon-quality results in minutes. This guide shows you exactly how to make cat eye nails, fix uneven patterns, and achieve flawless, eye-catching designs every time.
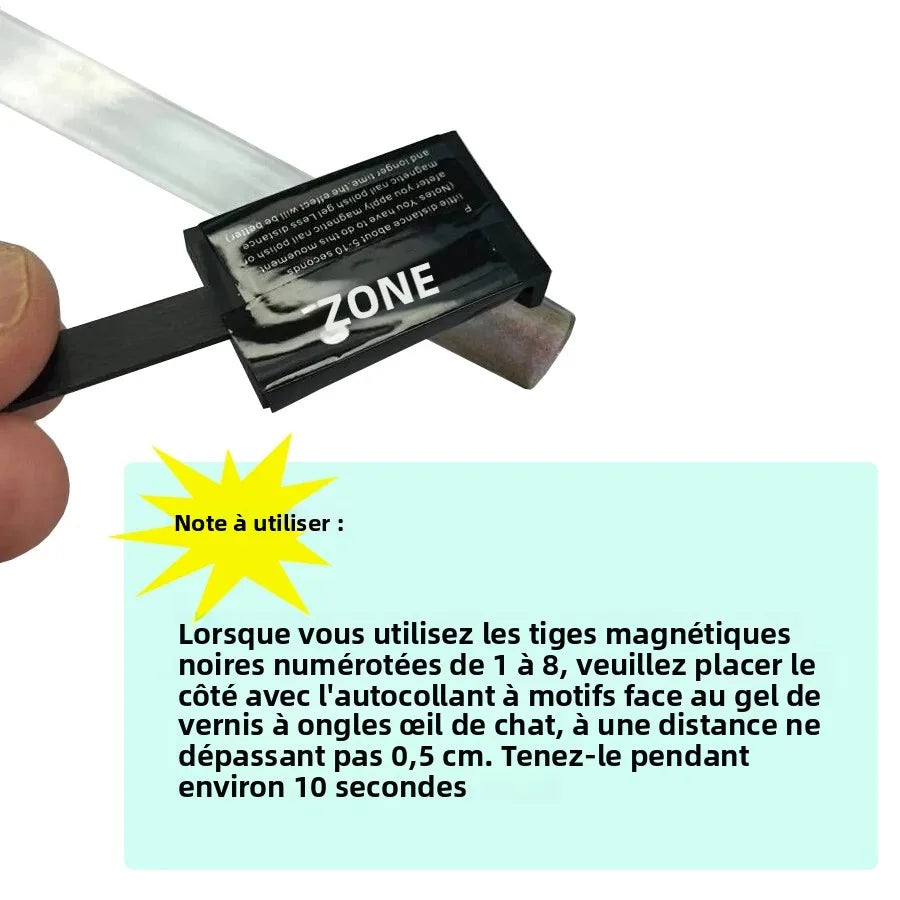
See it in action - how to make cat eye nails / how to fix uneven cat eye effect, uneven cat eye nail effect, tips for perfect magnetic nail design
How to make cat eye nails with perfect magnetic lines?
Learning how to make cat eye nails is easier than it looks once you understand how magnetic gel polish works. Tiny metallic particles inside the polish move toward a magnet before curing, creating the signature reflective stripe. The key is applying thin layers, positioning the magnet correctly, and curing immediately after achieving the desired effect.
What you'll need before you start
- Cat eye gel polish
- Base coat
- Top coat
- UV or LED nail lamp
- Cat eye magnet
- Nail cleanser
- Lint-free wipes
- Cuticle pusher and nail file
How does cat eye nail polish work?
Unlike regular gel polish, cat eye polish contains microscopic magnetic pigments. Holding a magnet close to uncured polish pulls these particles into concentrated patterns that reflect light differently from the surrounding color. Once cured, the design becomes permanently locked into place.
Step-by-step cat eye nails tutorial
- Prep and buff the nails.
- Apply a base coat and cure.
- Apply a thin coat of cat eye gel polish.
- Before curing, hold the magnet about 2–5 mm above the nail for 5–10 seconds.
- Watch the magnetic particles gather into your chosen pattern.
- Cure immediately once satisfied.
- Repeat for each nail individually.
- Seal with top coat and cure again.
When to cure the polish for the sharpest magnetic effect
Always cure immediately after creating the magnetic pattern. Waiting too long allows the metallic particles to spread naturally, producing softer and blurrier lines.
Why your cat eye nails look uneven—and how to fix it instantly
An uneven cat eye nail effect usually happens because the magnetic particles move before curing or because the polish layer is too thick. Fortunately, many issues can be corrected before placing the nail under the lamp.
Why the magnetic line becomes blurry
- Holding the magnet too far away
- Moving the magnet during positioning
- Applying thick polish layers
- Waiting too long before curing
- Using weak magnets
Common beginner mistakes
- Curing multiple nails before finishing the design
- Touching the nail with the magnet
- Applying uneven polish thickness
- Using expired magnetic gel polish
Quick fixes before curing
If the line looks uneven, simply move the magnet away and allow the particles to reset for a few seconds. Reapply the magnet from the desired angle before curing.
What can and cannot be fixed after curing
Once cured, the magnetic particles can no longer move. Minor imperfections can sometimes be hidden with another thin magnetic coat, but severe mistakes usually require filing or removal.
How to make cat eye nails with clean, defined lines at home
Nail preparation that improves magnetic definition
Remove oils, gently buff the nail plate, and apply thin, even coats. A smooth surface helps magnetic pigments move uniformly.
Correct magnet distance and angle
For the sharpest magnetic line, hold the magnet approximately 2–5 mm above the nail without touching the polish. Different angles create different designs.
Timing each nail individually
Complete one nail from magnetic positioning through curing before starting the next. This prevents the particles from drifting.
Best lighting for checking the magnetic effect
Bright overhead lighting makes reflective lines easier to evaluate before curing, allowing quick adjustments while the polish remains movable.
How the right tools give you salon-quality magnetic lines
Essential tools
- High-quality cat eye gel polish
- Strong neodymium magnet
- LED or UV curing lamp
- Base and top coats
- Lint-free wipes
Choosing the right magnet
Different magnets create different patterns. Bar magnets produce classic stripes, while specialty magnets create velvet, halo, and multidimensional effects.
Choosing quality cat eye gel polish
Well-formulated magnetic gels contain higher concentrations of metallic particles, producing brighter and more defined reflective lines.
UV vs LED curing lamps
Both work effectively when compatible with the polish. Follow the manufacturer's curing recommendations for best durability.
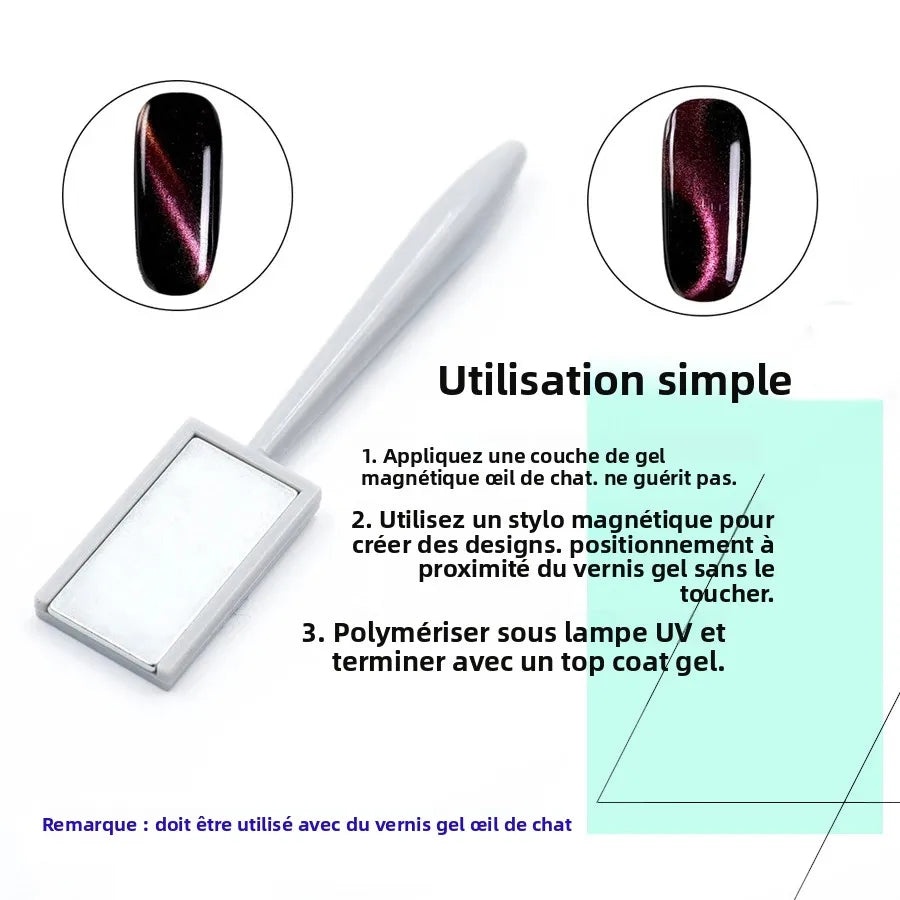
See it in action - how to make cat eye nails / how to fix uneven cat eye effect, uneven cat eye nail effect, tips for perfect magnetic nail design
How to create different cat eye nail effects
Changing the magnet position allows you to create several popular cat eye nail designs without changing the polish.
Classic straight line
Hold the magnet parallel to the nail for a crisp central stripe.
Diagonal line
Tilt the magnet diagonally to create an elegant angled reflection.
Velvet cat eye
Position the magnet above the center to pull particles evenly across the nail for a soft velvet appearance.
Halo effect
Move the magnet around the perimeter to concentrate particles toward the middle.
Galaxy effect
Use multiple magnet angles before curing to create multidirectional reflections.
French cat eye tips
Concentrate the magnetic effect near the nail tip while leaving the base more subtle.
Double magnetic line
Carefully reposition the magnet twice before curing to create two reflective bands.
How to fix uneven cat eye effect without starting over
Repositioning the magnetic particles before curing
Move the magnet away, allow the particles to relax briefly, then recreate the pattern.
Applying another thin magnetic layer
If already cured, apply another thin coat of cat eye gel polish and repeat the magnetic process.
Fixing one nail without redoing the whole manicure
You can repair a single nail independently without affecting the remaining manicure.
When complete removal is the better option
If multiple thick coats have accumulated or the surface becomes uneven, removing and restarting often produces cleaner results.
Tips for perfect magnetic nail design that looks professional
Magnetic gel nail tips professionals use
- Apply thin layers.
- Work one nail at a time.
- Keep the magnet steady.
- Cure immediately.
Preventing streaks and patchiness
Use smooth, even brush strokes and avoid overworking the polish.
Getting brighter reflective lines
Darker base colors often create stronger contrast with magnetic pigments.
Making your manicure last longer
Seal the free edge with top coat and avoid exposing fresh nails to harsh chemicals for the first 24 hours.
Magnet techniques comparison: which one works best?
Comparison table of magnetic techniques
- Classic stripe — easiest for beginners
- Diagonal — elegant everyday look
- Velvet — soft luxury finish
- Halo — dramatic reflective center
- Galaxy — artistic multidimensional effect
- French tip — modern minimalist style
Which technique is easiest for beginners?
The classic straight stripe requires the least precision and is the best starting point.
Which design creates the strongest cat eye effect?
Velvet and halo techniques usually produce the most noticeable light-shifting appearance under direct lighting.
Frequently asked questions
Why is my cat eye nail effect blurry?
Blurry lines usually result from thick polish, delayed curing, or holding the magnet too far away.
Can I redo the design after curing?
No. Once cured, the particles are locked into place. Apply another magnetic layer if you want to redesign the nail.
What is the best way to get sharp lines?
Use thin coats, a strong magnet, hold it 2–5 mm above the nail, and cure immediately.
Can you use a regular magnet?
Some strong household magnets can move magnetic pigments, but purpose-built nail magnets provide much more consistent designs.
Why isn't my cat eye polish working?
Possible causes include incompatible polish, weak magnets, thick application, or curing before positioning the particles.
Can you use cat eye polish without gel?
Most cat eye polishes are gel formulas that require curing. Traditional magnetic nail polish exists but produces a different result.
How long should I hold the magnet?
Generally 5–10 seconds is enough to create a defined magnetic effect before curing.
How do you make cat eye nails at home without mistakes?
Work one nail at a time, keep layers thin, use quality magnetic gel polish, and cure immediately after creating the desired pattern.
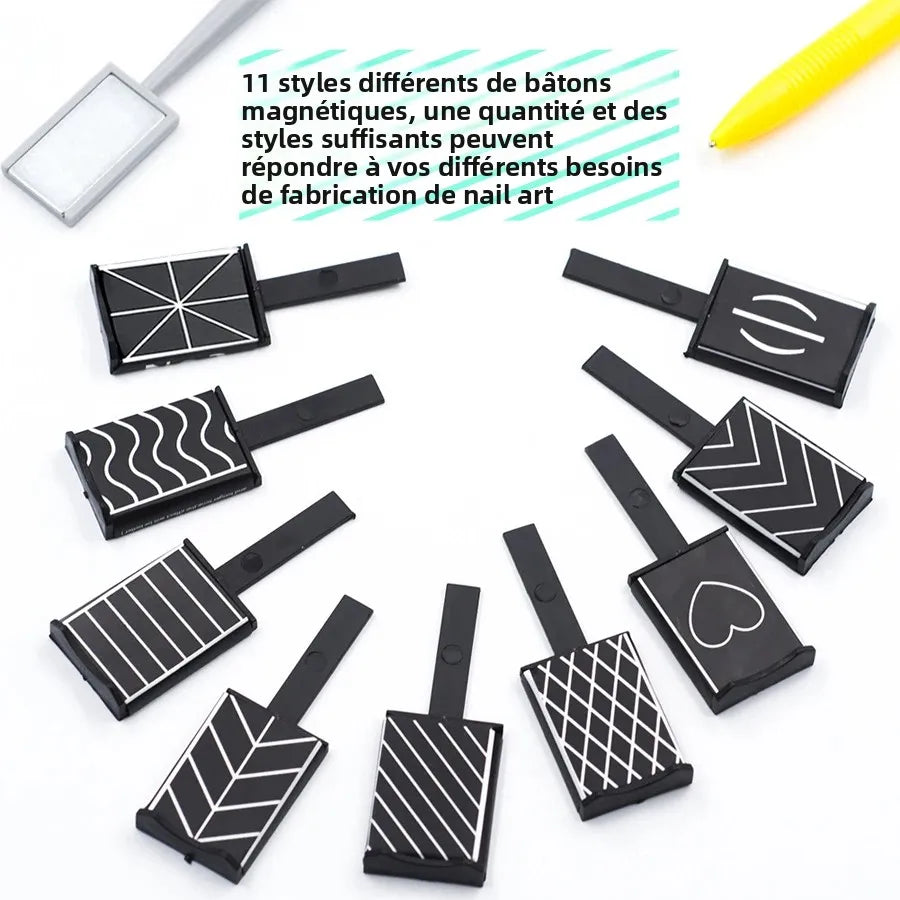
See it in action - how to make cat eye nails / how to fix uneven cat eye effect, uneven cat eye nail effect, tips for perfect magnetic nail design
Pillar Article: How do cat eye nails work: Easy magnetic polish guide
Other Related Articles:
- Cat eye nail tool guide: How to use it correctly
- Cat eyes nails tutorial: Step-by-step at home guide
- How to use cat eye magnet for sharp salon results
Explore More:













