
How to Use Pedal Resistance Bands: 8 Easy Exercises for Beginners
Learning how to use pedal resistance bands correctly can make home strength training easier, especially if you have limited space or prefer exercising without bulky gym equipment. However, beginners often have questions about where to position their feet, how to hold the handles, and how much resistance to use.
A pedal resistance band combines elastic resistance tubes, foot pedals, and hand grips to support different pulling, pressing, and stretching movements. With the right setup and controlled technique, you can use this compact equipment to train your arms, shoulders, back, core, and legs. This guide explains how to set up your equipment, perform eight beginner-friendly exercises, and build a practical 15-minute workout.
What Are Pedal Resistance Bands and How Do They Work?
Pedal resistance bands are compact exercise devices that use elastic tubes connected to foot supports and handles. You place your feet against the pedals, hold the handles, and create resistance by pulling or extending your arms and legs. The elastic material stretches during movement and provides opposing force that your muscles work against.
Unlike free weights, resistance changes as the elastic tubes stretch. This makes controlled movement, appropriate starting tension, and correct positioning particularly important.
Main Components of a Pedal Resistance Band
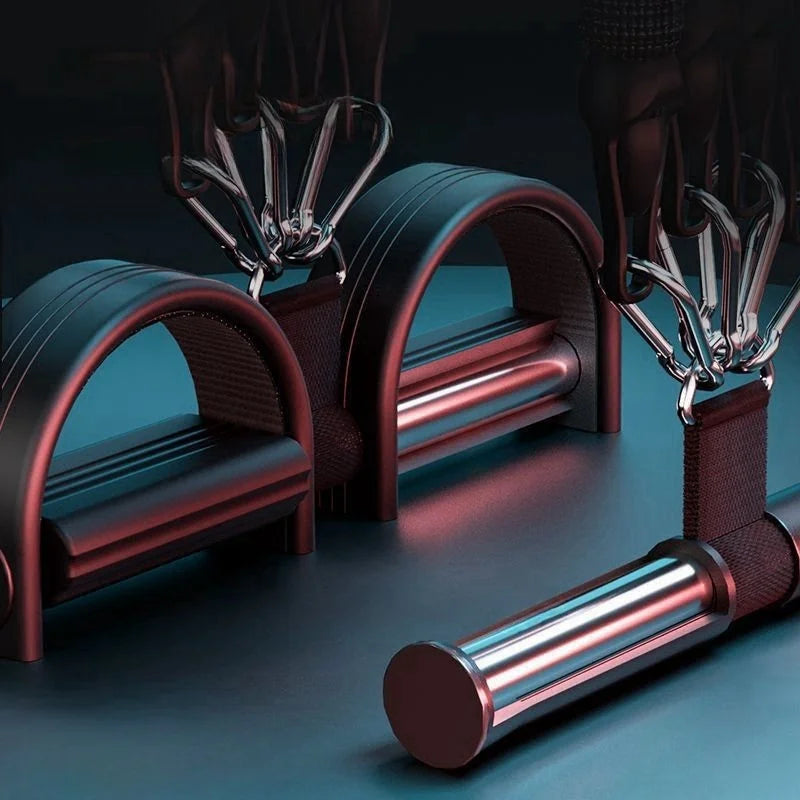
Before exercising, identify the main parts of your equipment:
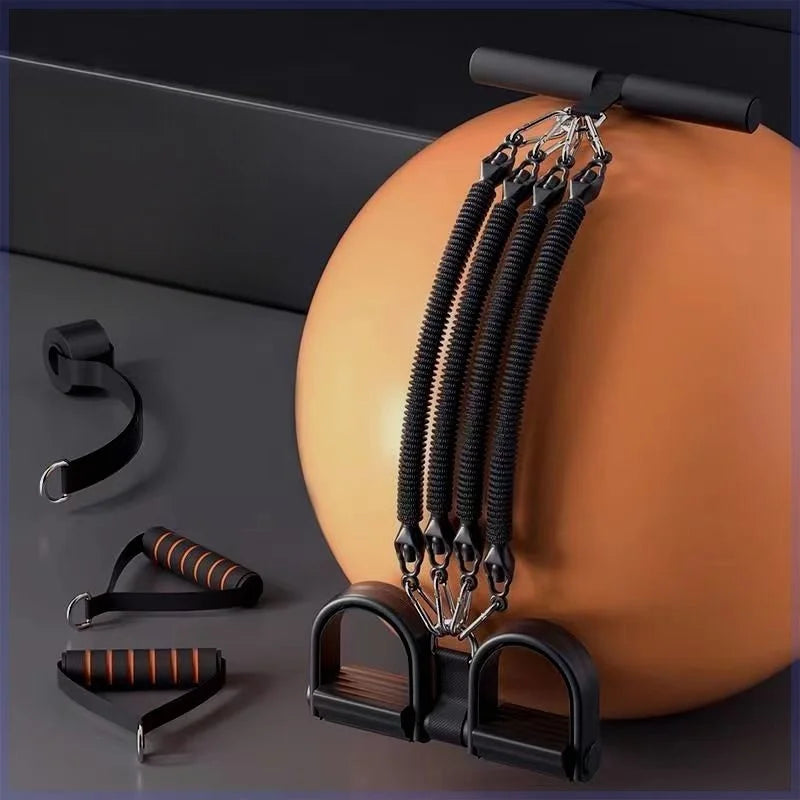
- Elastic resistance tubes: These flexible components create tension when stretched. A four-tube system provides multiple elastic elements for resistance-based pulling and stretching movements.
- Foot pedals: These supports provide contact points for your feet during seated exercises and help stabilize the equipment.
- Hand grips: Handles allow you to hold and pull the resistance system. Foam-covered grips can make extended exercise sessions more comfortable.
- Connectors: These components join the elastic tubes, handles, and pedals. Their condition should be checked before every workout.
- Door anchor: Some models include an attachment intended for compatible door-anchor exercises. Use it only according to the manufacturer's installation and safety instructions.
How Elastic Resistance Creates Muscle Tension
Elastic resistance works by opposing the direction in which you stretch the tubes. When you pull the handles away from the starting position, the elastic material stretches and creates tension.
Three factors influence the resistance you experience:
- Tube characteristics: The elastic material and tube configuration influence the available resistance.
- Stretch distance: Greater stretching generally increases elastic tension, within the equipment's permitted range.
- Exercise position: Your foot placement, grip position, and starting posture change the effective working length of the tubes.
For beginners, the objective is not to stretch the tubes as far as possible. Instead, choose a comfortable range that allows smooth repetitions without losing posture or control.
Pedal Resistance Bands vs. Traditional Loop Bands vs. Resistance Tubes
These three types of resistance equipment use elastic tension, but their construction and typical applications differ.
| Feature | Pedal Resistance Bands | Loop Resistance Bands | Resistance Tubes |
| Structure | Elastic tubes with foot pedals and handles | Continuous elastic loops | Elastic tubes, sometimes with handles |
| Grip options | Built-in hand grips | Usually held directly or placed around the body | Varies by model |
| Foot positioning | Dedicated foot supports | Feet contact the band directly when needed | Depends on the exercise setup |
| Typical applications | Seated pulling, pressing, and leg movements | Glute, hip, and mobility exercises | Pulling, rowing, and pressing movements |
| Portability | Compact and lightweight | Very lightweight | Generally portable |
| Beginner usability | Convenient integrated handles and pedals | Simple construction but requires positioning knowledge | Depends on attachments and setup |
A pedal resistance band is particularly useful when you want integrated foot supports and handles in one compact system. Traditional loop bands are often better suited to movements around the thighs, hips, and ankles, while resistance tubes offer flexibility in attachment and grip configurations.
How to Set Up Pedal Resistance Bands Correctly Before Exercising
Correct setup is essential for comfortable and controlled resistance training. Before beginning, place your equipment on a stable surface, identify the intended attachment points, and make sure the elastic tubes are not twisted or damaged.
Step 1: Inspect the Resistance Tubes, Handles, and Foot Pedals
Examine the entire resistance system before each workout. Look for cracks, tears, thinning areas, unusual discoloration, loose connections, and damaged foam grips.
Pay particular attention to the points where the tubes connect to the handles and pedals. These areas experience repeated tension during exercise.
- Check that all tubes are intact and evenly connected.
- Inspect the pedals for damage or loose components.
- Make sure the handles are securely attached.
- Replace damaged equipment rather than attempting to exercise with weakened elastic material.
Step 2: Position Your Feet Securely on the Pedals
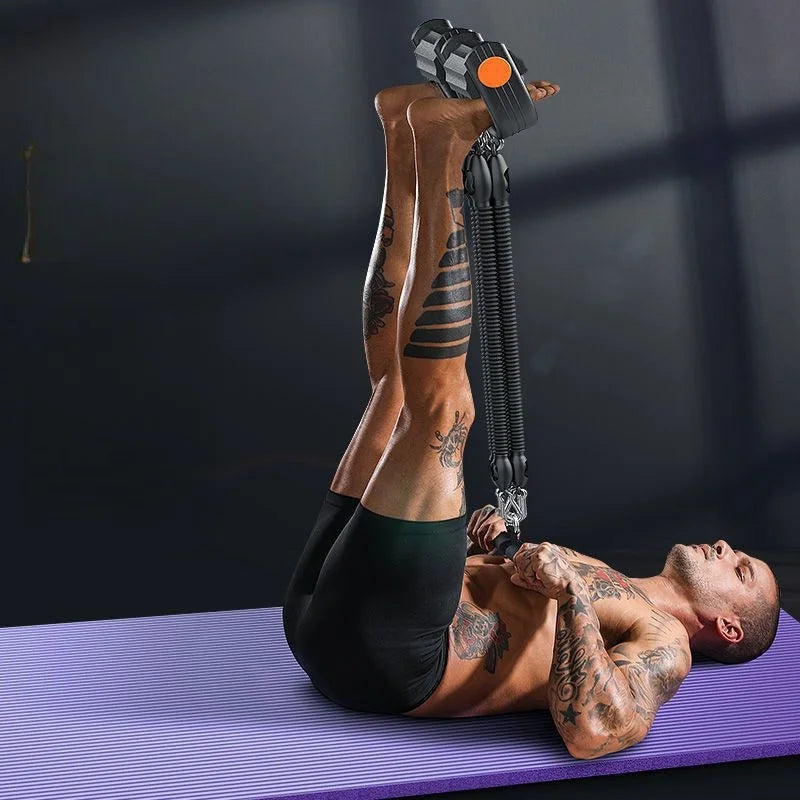
Sit on a stable chair or on the floor, depending on the exercise. Place your feet securely against the designated pedal supports, keeping them balanced and comfortably aligned.
Avoid positioning your feet unevenly or allowing the pedals to slide during movement. Your feet should remain stable throughout the repetition.
Step 3: Grip the Handles and Check Your Starting Position
Hold one handle in each hand using a comfortable grip. Keep your wrists relatively straight rather than bending them sharply forward or backward.
Relax your shoulders, maintain a comfortable spine position, and avoid leaning excessively to compensate for the resistance. Your starting posture should feel balanced before you begin pulling.
Step 4: Choose the Appropriate Resistance Level
Resistance should be manageable enough to complete each repetition with consistent control. If you need to jerk your arms, arch your back, or hold your breath to move the handles, reduce the tension or movement range.
Remember that resistance depends on the elastic tubes, how far they stretch, and your exercise position. A longer stretch does not automatically mean a better workout.
Step 5: Test the Range of Motion Before Starting
Perform one slow practice repetition without trying to reach your maximum range. Check that:
- The pedals remain securely positioned.
- The handles feel comfortable in your hands.
- The tubes do not rub against sharp edges.
- The resistance feels manageable throughout the movement.
- You can return to the starting position without the tubes snapping back.
If you are looking for equipment for this type of routine, the KentDO four-tube pedal resistance band combines elastic resistance tubes, foot pedals, foam-covered handles, and a door anchor in one compact exercise system.
How to Use Pedal Resistance Bands: 8 Easy Exercises for Beginners
Once your equipment is ready, you can begin with simple movements that target different muscle groups. The following exercises are starting-point variations. Use only configurations supported by your specific equipment and its manufacturer's instructions. In particular, do not assume that a pedal system can be used for every anchored or isolated movement.
1. Seated Bicep Curl for Stronger Arms
Target muscles: Biceps and supporting forearm muscles.
The seated bicep curl is one of the easiest ways to learn how to use pedal resistance bands for upper-body training.
Starting position:
- Sit upright with your knees comfortably bent or legs extended.
- Position the pedals securely under your feet as instructed for the equipment.
- Hold both handles with your palms facing upward.
- Keep your elbows close to your sides.
Movement:
- Begin with your arms extended comfortably without locking your elbows.
- Slowly curl both handles toward your shoulders.
- Keep your upper arms relatively stationary.
- Lower the handles gradually until you return to the starting position.
Breathing: Exhale while curling upward and inhale while lowering.
Recommended volume: 2 sets of 10–12 repetitions.
Common mistake: Swinging the upper body or bending the wrists to move the handles. Keep your torso stable and wrists neutral.
2. Seated Shoulder Press for Shoulder Strength
Target muscles: Deltoids and triceps.
The seated shoulder press introduces an overhead movement that challenges the shoulders and supporting upper-body muscles.
Starting position:
- Sit upright with the pedals securely positioned.
- Hold the handles around shoulder height.
- Position your elbows comfortably below or beside your hands.
- Keep your abdominal muscles gently engaged.
Movement:
- Press both handles upward in a controlled motion.
- Stop before locking your elbows.
- Keep your shoulders away from your ears.
- Lower the handles slowly to shoulder height.
Breathing: Exhale while pressing upward and inhale during the return.
Recommended volume: 2 sets of 8–10 repetitions.
Common mistake: Arching the lower back or shrugging the shoulders. Use lighter tension and maintain a comfortable spine position.
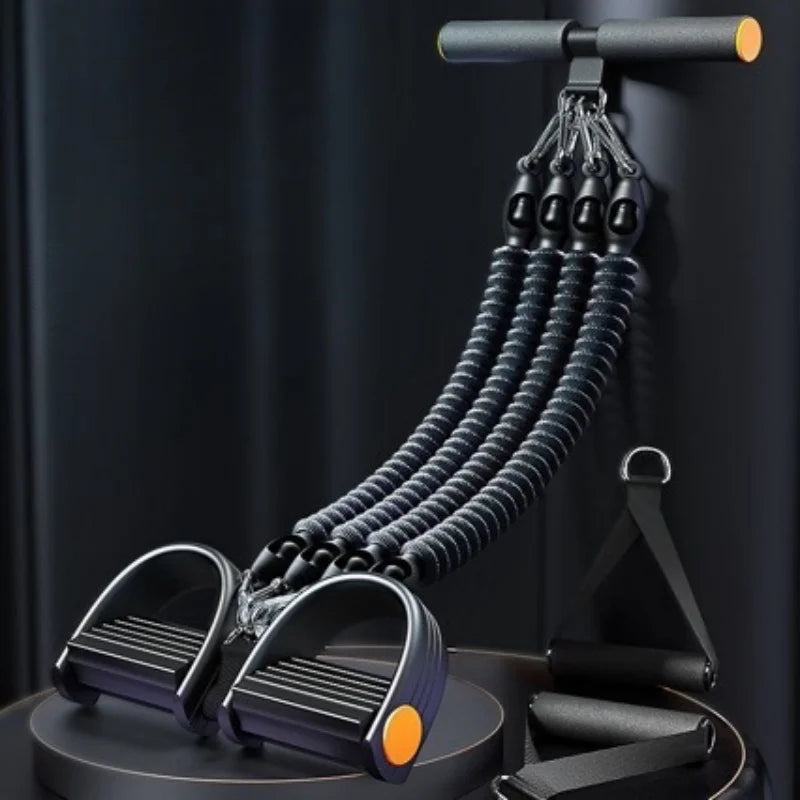
3. Seated Row for Back and Upper-Body Training
Target muscles: Latissimus dorsi, rhomboids, and middle trapezius.
A seated row is a useful pulling movement for beginners who want to incorporate back training into a home resistance routine.
Starting position:
- Sit upright with your legs extended comfortably.
- Position both feet securely against the pedals.
- Hold the handles in front of your body.
- Extend your arms without rounding your shoulders.
Movement:
- Pull both handles toward your torso.
- Move your elbows backward while keeping them relatively close to your sides.
- Squeeze your shoulder blades gently together.
- Extend your arms slowly to return to the starting position.
Breathing: Exhale while pulling and inhale while extending your arms.
Recommended volume: 2 sets of 10–12 repetitions.
Common mistake: Rounding the shoulders or leaning backward excessively. Keep your torso stable and let your arms and back perform the movement.
4. Standing Chest Press for Upper-Body Activation
Target muscles: Pectoral muscles, anterior deltoids, and triceps.
A standing chest press is an optional variation that requires a suitable resistance configuration. It is not automatically possible with every pedal resistance system.
Starting position:
- Use a manufacturer-approved door-anchor configuration if the equipment instructions permit this exercise.
- Confirm that the anchor is correctly installed in a suitable, secure door.
- Stand in a balanced position with your feet approximately hip-width apart.
- Hold the handles around chest height.
Movement:
- Begin with your elbows bent comfortably.
- Press both handles forward until your arms are nearly extended.
- Keep your torso upright and avoid leaning forward.
- Return slowly without allowing the tubes to snap backward.
Breathing: Exhale while pressing and inhale while returning.
Recommended volume: 2 sets of 8–10 repetitions.
Common mistake: Using an unsecured door anchor or allowing the shoulders to move excessively forward. Never improvise an attachment point.
5. Seated Bicycle-Style Leg Extension for Quadriceps
Target muscles: Quadriceps at the front of the thighs.
Controlled leg extensions help beginners practice lower-body resistance movements while maintaining a stable seated position.
Starting position:
- Sit upright on a stable chair or on the floor.
- Position your feet securely against the pedals.
- Keep your knees slightly bent.
- Maintain a comfortable upright posture.
Movement:
- Extend one knee gradually against the resistance.
- Stop before fully locking the knee.
- Return the foot slowly to the starting position.
- Repeat with the opposite leg.
Breathing: Exhale during extension and inhale while returning.
Recommended volume: 2 sets of 10 repetitions per leg.
Common mistake: Using momentum or locking the knee. Keep the movement smooth and within a comfortable range.
6. Seated Leg Curl for Hamstrings
Target muscles: Hamstrings at the back of the thighs.
Leg curls involve bending the knee against resistance. However, the standard pedal-and-handle arrangement may not provide the correct resistance direction for this exercise.
Starting position:
- Use a manufacturer-approved configuration that provides resistance during knee flexion.
- Position your body securely on a stable surface.
- Keep your hips stable and maintain a comfortable knee position.
Movement:
- Bend the working knee gradually against the elastic resistance.
- Move only through a comfortable range.
- Pause briefly without forcing the contraction.
- Return slowly to the starting position.
Breathing: Exhale while bending the knee and inhale during the return.
Recommended volume: 2 sets of 10 repetitions per leg.
Common mistake: Using an incompatible attachment or excessive tension. If your equipment does not support this movement safely, substitute controlled seated leg extensions.
7. Seated Core Crunch for Abdominal Engagement
Target muscles: Rectus abdominis and supporting abdominal muscles.
Core training does not always require large movements. Beginners can start with controlled abdominal engagement and comfortable trunk movement rather than forcing a deep crunch.
Starting position:
- Sit upright on a stable surface.
- Place your feet securely and comfortably.
- Keep your hands resting on your thighs if the resistance configuration does not support a dedicated crunch movement.
- Maintain a comfortable spinal position.
Movement:
- Gently tighten your abdominal muscles.
- Make a small forward trunk movement only if comfortable.
- Avoid pulling your head or neck forward.
- Return to an upright seated position slowly.
Breathing: Exhale during abdominal engagement and inhale while returning.
Recommended volume: 2 sets of 10 repetitions.
Common mistake: Pulling forcefully with the arms or rounding the spine excessively. Keep the movement small and controlled.
8. Seated Alternating Foot Press for Lower-Body and Core Control
Target muscles: Quadriceps, hip flexors, and supporting core muscles.
Alternating foot presses help beginners practice controlled leg movements while maintaining a stable upper body.
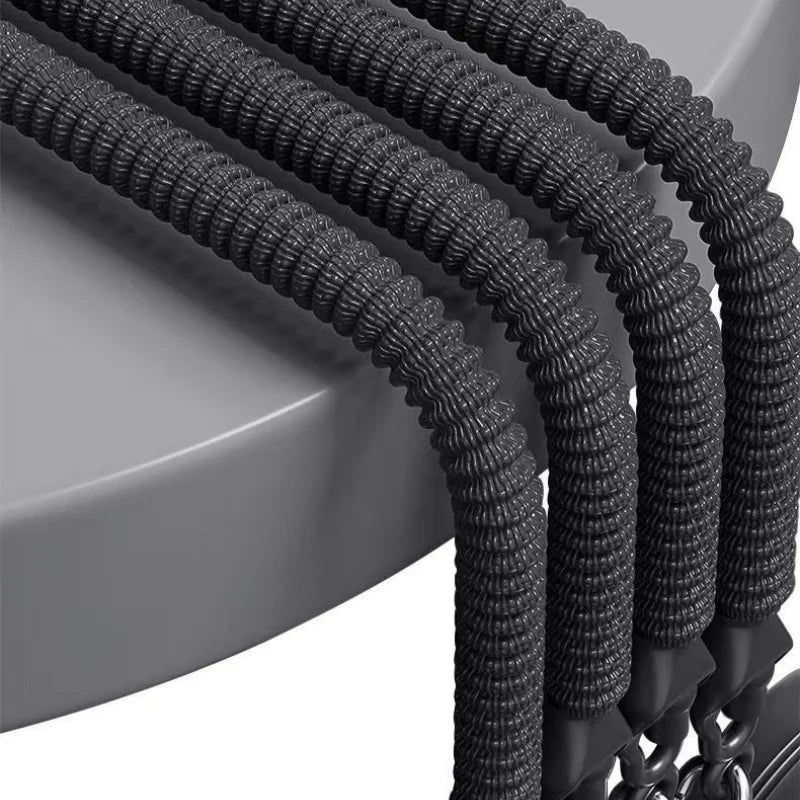
Starting position:
- Sit comfortably with your back upright.
- Place both feet securely against the pedal supports.
- Hold the handles if needed to stabilize the equipment.
- Keep your pelvis level and shoulders relaxed.
Movement:
- Press one foot forward against manageable resistance.
- Return that foot slowly to the starting position.
- Repeat the movement with the opposite foot.
- Continue alternating while keeping your torso stable.
Breathing: Exhale during each press and inhale during the return.
Recommended volume: 2 sets of 10 repetitions per leg.
Common mistake: Pressing unevenly or moving through an unnecessarily large range. Keep both movements controlled and comfortable.
A Simple 15-Minute Pedal Resistance Band Workout for Beginners
After learning the basic movements, you can combine several exercises into a short full-body workout. The following routine prioritizes simple movements that can be performed with a conventional pedal-and-handle configuration.
Minutes 0–3: Warm Up and Check Your Equipment
Begin with three minutes of gentle movement to prepare for exercise.
- March gently in place for 30 seconds.
- Perform relaxed shoulder rolls for 30 seconds.
- Complete comfortable arm circles for 30 seconds.
- Perform gentle seated leg extensions for 30 seconds.
- Repeat gentle shoulder and leg movements for the remaining minute.
Before using the resistance band, make one final check of the tubes, connectors, pedals, and handles.
Minutes 3–11: Complete the Beginner Full-Body Circuit
Choose four basic exercises that cover different muscle groups. Perform each movement with manageable resistance and take approximately 30–45 seconds of rest between exercises.
- Seated bicep curls: Complete 10–12 controlled repetitions.
- Seated rows: Complete 10–12 repetitions while keeping your torso upright.
- Seated leg extensions: Complete 10 repetitions per leg.
- Alternating foot presses: Complete 10 repetitions per leg.
Adjust the number of rounds and recovery periods to fit your fitness level. Beginners can start with one round and use the remaining time for additional recovery or gentle practice rather than rushing through repetitions.
Minutes 11–15: Cool Down and Recover
Finish with gentle movements and relaxed breathing.
- Stretch your arms and shoulders gently.
- Perform comfortable seated hamstring stretches.
- Relax your neck and upper back without forcing the movement.
- Take several slow, comfortable breaths.
- Inspect the equipment briefly before putting it away.
If you feel fatigued, shorten the session or take longer breaks. A consistent, manageable routine is a better starting point than trying to complete every exercise at maximum intensity.
Beginner Workout Schedule at a Glance
| Exercise | Target area | Repetitions | Sets | Rest |
| Seated bicep curl | Arms | 10–12 | 1–2 | 30–45 seconds |
| Seated row | Back | 10–12 | 1–2 | 30–45 seconds |
| Seated leg extension | Quadriceps | 10 per leg | 1–2 | 30–45 seconds |
| Alternating foot press | Legs and core control | 10 per leg | 1–2 | 30–45 seconds |
If you want to expand your home exercise setup beyond resistance training, you can also explore KentDO lifestyle products for additional everyday equipment.
How to Choose the Right Resistance and Progress Your Workouts
One of the most important parts of resistance training is choosing an appropriate starting level. Beginners should focus on movement quality before increasing the difficulty of their workouts.
Start With Comfortable Resistance and Controlled Repetitions
Choose tension that allows you to complete the planned repetitions without jerking, twisting, or changing your posture. Your final repetitions may feel more challenging than the first few, but you should still be able to control the movement.
If the tubes feel excessively tight, reduce the stretch distance or select a less demanding exercise position. Do not compensate for excessive resistance by leaning backward or using momentum.
Increase Repetitions Before Increasing Resistance
A gradual progression method is easier to manage than immediately increasing resistance. For example:
- Start with 8–10 controlled repetitions.
- Work toward 10–12 repetitions while maintaining good form.
- When the movement becomes consistently comfortable, consider a modest increase in resistance if your equipment allows it.
- Return to a lower repetition target when the exercise becomes more challenging.
Only progress when you can maintain stable positioning and comfortable movement throughout the exercise.
Adjust Your Training Frequency and Recovery Time
For beginners, two or three nonconsecutive resistance-training sessions per week can be a practical starting schedule. Allow recovery between sessions and adjust your routine according to your experience, fitness level, and how your body responds.
There is no need to train every muscle group intensely every day. Consistency and appropriate recovery are important parts of a sustainable exercise routine.
Track Your Exercise Progress
Keeping a simple workout record can help you understand whether your routine is becoming more manageable.
- Record which exercises you completed.
- Note the resistance configuration and movement range.
- Track your repetitions and sets.
- Record how difficult each exercise felt.
- Make a note of any movement that caused discomfort or affected your technique.
Common Pedal Resistance Band Mistakes and How to Avoid Them
Although pedal resistance bands are relatively simple exercise tools, small setup and technique mistakes can make workouts less comfortable and harder to control.
Choosing Resistance That Is Too Strong
Excessive tension can make it difficult to complete movements with proper posture. It may also encourage you to shorten your range of motion or rely on momentum.
Better approach: Begin with comfortable tension and gradually increase repetitions before considering stronger resistance.
Using Incorrect Foot and Hand Positioning
Unstable pedals, loose grips, and uneven foot placement can affect your balance and exercise control.
Better approach: Check both pedals before starting, hold the handles securely, and maintain symmetrical positioning when performing two-sided movements.
Moving Too Quickly or Using Momentum
Fast, uncontrolled repetitions can make it harder to maintain consistent elastic tension. Allowing the handles to snap back can also create unnecessary equipment and movement risks.
Better approach: Move slowly in both directions. Pause briefly when appropriate and return to the starting position under control.
Holding Your Breath and Losing Proper Posture
Some beginners unintentionally hold their breath when a movement becomes difficult. Others arch their backs or shrug their shoulders to complete a repetition.
Better approach: Exhale during the effort and inhale during the return. Keep your shoulders relaxed, wrists neutral, and spine comfortably aligned.
Ignoring Equipment Wear and Maintenance
Repeated stretching can gradually affect elastic materials. Using damaged tubes or loose attachments can compromise equipment stability.
Better approach: Inspect the resistance system regularly, avoid overstretching, and follow the manufacturer's storage and maintenance instructions. Keep the equipment away from excessive heat and direct sunlight when storing it.
Pedal Resistance Band Safety: What Beginners Should Know
Resistance training should be performed with equipment that is in good condition and movements appropriate for your current ability. A few simple precautions can help you establish safer exercise habits.
Inspect Tubes, Pedals, and Connections Before Every Workout
Use this quick checklist before exercising:
- Check the elastic tubes for cracks, tears, and thinning.
- Inspect the handles for loose or damaged connections.
- Make sure both pedals are intact.
- Confirm that all connectors are secure.
- Check that any optional door anchor is correctly installed according to the manufacturer's instructions.
Do not use the equipment if any component appears damaged or unstable.
Avoid Overstretching and Uncontrolled Band Release
Elastic tubes store energy when stretched. If you release them suddenly, they can snap back toward your body.
Maintain control throughout the movement and avoid stretching beyond the manufacturer's recommended limits. Never release a handle abruptly while the tubes are under tension.
Maintain a Stable Exercise Position
Choose a nonslip exercise surface and make sure your chair or seated position is stable. Keep your feet securely positioned and avoid movements that pull your body off balance.
For standing exercises, use only an approved configuration that provides secure resistance and appropriate anchoring.
When to Stop or Modify an Exercise
Stop exercising if you experience sharp pain, dizziness, unusual discomfort, or equipment instability. Do not attempt to push through symptoms simply to complete a set.
If you have an existing injury, mobility limitation, or health concern that may affect exercise suitability, seek guidance from a qualified healthcare professional before beginning a new resistance-training routine.
How to Choose Pedal Resistance Bands for Home Workouts
Choosing suitable equipment involves more than looking at the number of elastic tubes. Consider the construction, comfort, positioning options, and movements you actually intend to perform.
Check Tube Material and Resistance Options
Look for clearly described elastic materials and a resistance configuration appropriate for your experience level. TPE and other elastic materials are commonly used in compact resistance equipment.
Remember that a four-tube design does not automatically establish a specific resistance rating. Check the manufacturer's specifications rather than assuming that every four-tube model provides the same tension.
Look for Comfortable Handles and Secure Foot Pedals
Handles and pedals influence how comfortably you can perform repeated movements.
- Handles: Foam-covered grips can provide a more comfortable contact surface.
- Foot pedals: Look for supports that allow stable and comfortable foot positioning.
- Connections: Check that the elastic tubes connect securely to the handles and pedals.
- Dimensions: Consider whether the equipment size suits your exercise space and body positioning.
Consider Exercise Versatility and Portability
A compact pedal resistance system can support different upper-body and lower-body movements without requiring a full home gym. However, exercise versatility depends on the actual construction and manufacturer-approved configurations.
If you travel frequently or exercise in a small apartment, consider the equipment's dimensions, weight, storage requirements, and ease of setup.
Explore Pedal Resistance Bands and Home Fitness Equipment
For people looking for a compact resistance-training option, the Pedal Resistance Band – 4-Tube Full Body Workout Trainer is designed around four elastic tubes, foot pedals, and two foam-covered handles.
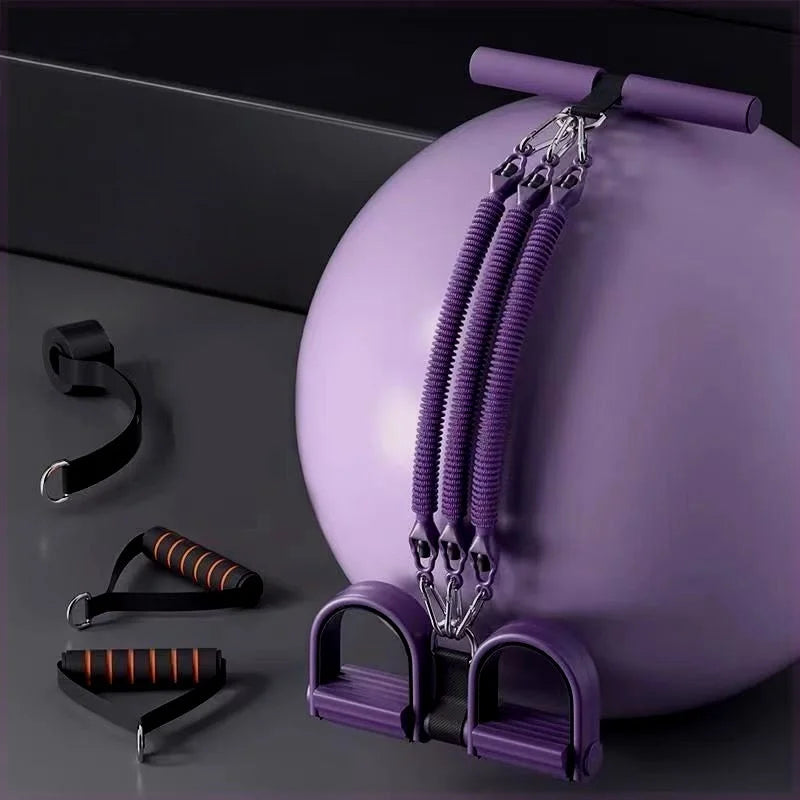
Its listed specifications include:
- Material: TPE, elastic material, and foam.
- Dimensions: Approximately 52 × 26.5 cm.
- Resistance design: Four-tube pedal resistance system.
- Available colors: Black and purple.
- Training areas: Arms, shoulders, waist, abdomen, and legs.
- Package contents: One pedal tension rope, two handles, and one door anchor.
The integrated pedals and handles provide a straightforward starting point for seated pulling and stretching exercises. The included door anchor offers an additional attachment option, but users should follow the product's instructions to determine which anchored movements are appropriate.
You can review the four-tube pedal resistance band specifications and features before deciding whether its configuration matches your workout needs.
For other personal-care and home wellness equipment, the Body Care and Health Devices collection provides additional equipment options to explore.
Conclusion: Build a Consistent Routine With Pedal Resistance Bands
Learning how to use pedal resistance bands begins with understanding the equipment, checking its condition, positioning your feet securely, and choosing manageable resistance. Once you are comfortable with the setup, you can introduce exercises for your biceps, shoulders, back, quadriceps, hamstrings, and core.
The eight exercises in this guide provide a practical starting point, while the 15-minute beginner workout shows how to combine several movements into a manageable home training session. Focus on controlled repetitions, coordinated breathing, stable posture, and gradual progression rather than trying to stretch the tubes as far as possible.
With consistent practice and appropriate recovery, a compact resistance system can become a useful part of your home exercise routine. If you are considering adding one to your setup, explore the KentDO pedal resistance band and choose equipment that suits your preferred movements, available space, and fitness experience.
Pillar Article: Adjustable Pedal Resistance Workout Equipment: Buying Guide & Exercises