
Inversion Yoga Poses: 15 Exercises from Beginner to Advanced
When people think about yoga inversions, headstands and handstands often come to mind. However, not every inversion requires advanced strength, exceptional flexibility, or balancing your entire body upside down. Some of the most accessible inversion yoga poses include Legs-Up-the-Wall, Standing Forward Fold, and Downward-Facing Dog.
Yoga inversions describe positions in which the head is positioned below the heart or the body is oriented differently from its usual upright alignment. Depending on the pose, your weight may be supported by your legs, hands, forearms, shoulders, or a combination of these contact points.
Whether you want to improve flexibility, develop core strength, explore anti-gravity yoga, or build confidence with balance exercises, choosing appropriate inversion exercises is essential. Beginners should prioritize comfortable positioning and controlled movement before progressing toward demanding weight-bearing poses.
This guide explores 15 inversion yoga poses organized into four difficulty levels. You will learn their Sanskrit names, starting positions, execution techniques, alignment considerations, modifications, and safety precautions. It also explains aerial hammock inversions, preparation exercises, and how yoga inversions differ from spinal traction and inversion-table exercises.
Important: This article provides general educational information, not individualized medical advice or a substitute for qualified yoga instruction. Advanced inversions and aerial techniques should be learned under appropriate professional supervision.
What Are Inversion Yoga Poses? Understanding the Four Difficulty Levels
What Qualifies as a Yoga Inversion?
An inversion yoga pose is generally a position in which the head moves below the heart or the body becomes partially or completely inverted relative to its normal standing orientation.
Inversions vary considerably in their physical demands. A gentle forward fold changes the relationship between the head and heart without requiring the practitioner to balance upside down. A handstand, by comparison, requires substantial upper-body strength, wrist tolerance, coordination, and balance.
Some inversions are restorative and supported by walls or props. Others require considerable strength and technical control. The most important distinction is understanding where your body weight is supported and how much balance and mobility each position requires.
The Four Inversion Categories
- Gentle inversions: Accessible positions such as Legs-Up-the-Wall, Standing Forward Fold, Wide-Legged Forward Fold, and Downward-Facing Dog. These generally involve limited balance demands.
- Beginner-supported inversions: Modified positions using appropriate props, walls, or instructor assistance. They help practitioners develop body awareness and positioning.
- Intermediate inversions: More demanding supported positions that require shoulder stability, flexibility, and controlled entry and exit techniques.
- Advanced weight-bearing inversions: Headstands, Forearm Stands, Handstands, and advanced inversion transitions. These require progressive preparation and qualified instruction.
These categories are practical learning guidelines rather than universal medical classifications. Individual ability, previous injuries, and instructor assessment should influence pose selection.
Yoga Inversions Versus Anti-Gravity Yoga and Inversion Therapy
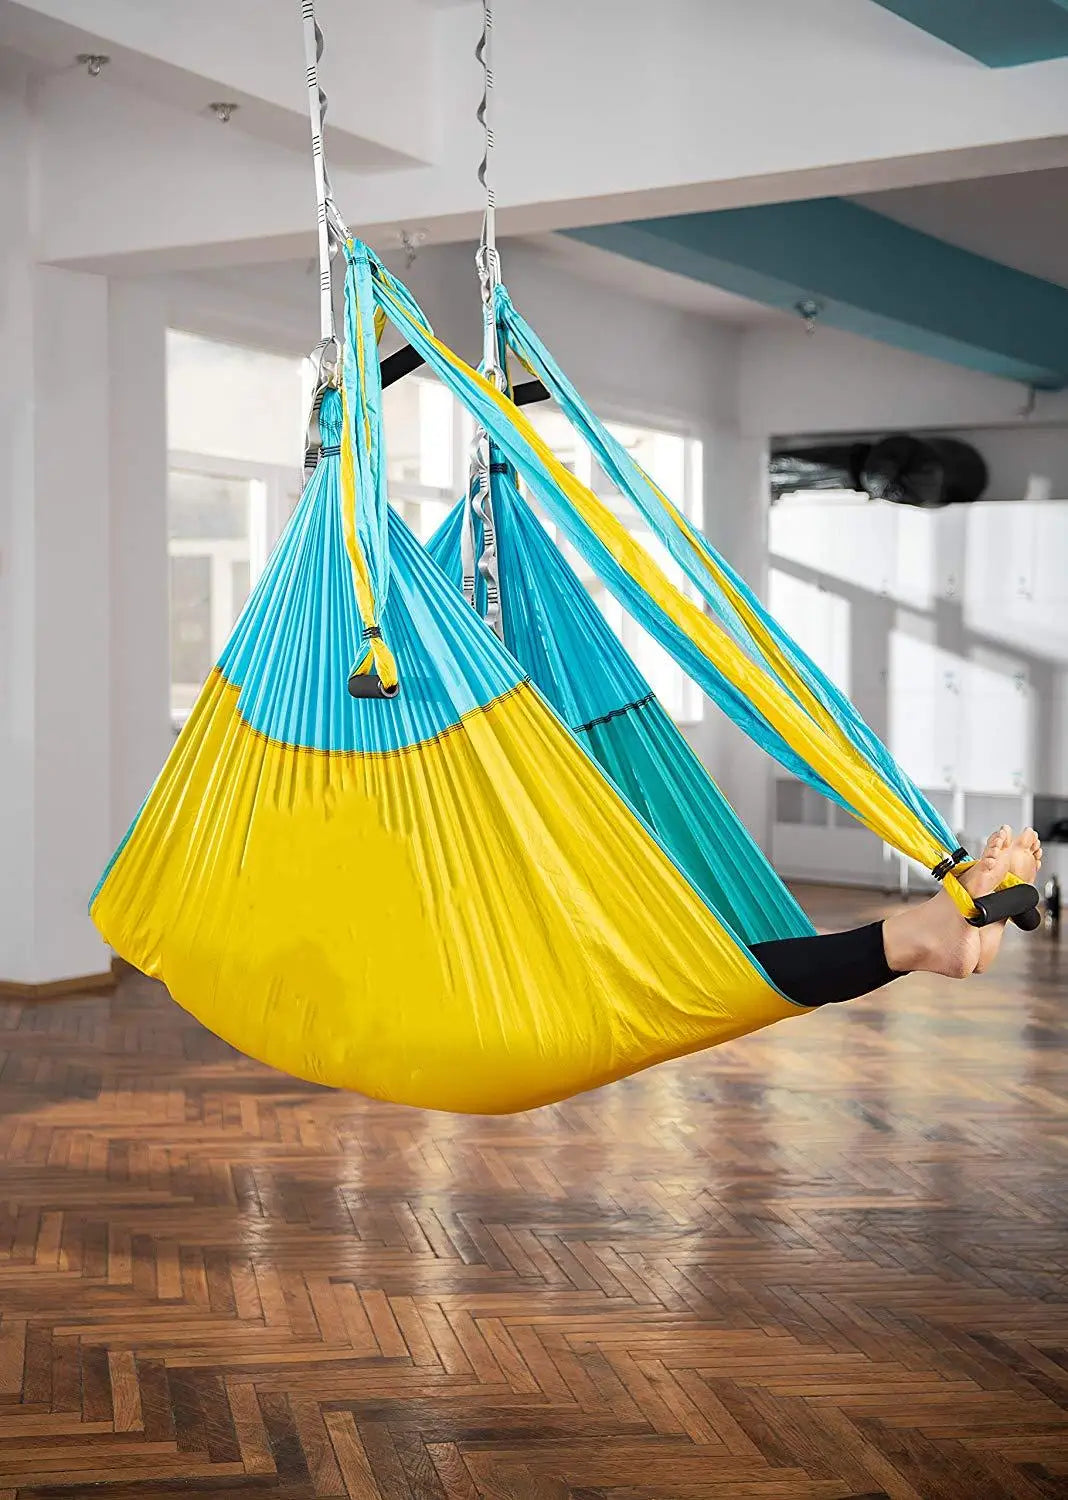
Traditional yoga inversions are performed on a yoga mat or with conventional props. Aerial yoga introduces a suspended fabric hammock that supports selected body positions and changes the way practitioners distribute their weight.
Anti-gravity yoga is commonly associated with aerial yoga techniques. Depending on the exercise, the hammock may support the hips, torso, or legs while the practitioner explores stretching, balance, and suspended positioning.
Inversion therapy is different. It generally involves specialized equipment, such as an inversion table, that tilts or suspends the body at an angle. It should not be considered interchangeable with yoga inversions or aerial yoga.
Which Body Parts Support Your Weight During Different Inversions?
Understanding support points helps you select appropriate exercises and recognize potentially demanding positions.
- Hand-supported: Downward-Facing Dog and Handstand distribute substantial weight through the palms and upper extremities.
- Forearm-supported: Dolphin Pose and Forearm Stand involve the forearms and shoulders.
- Leg-supported: Forward folds primarily use the feet and legs for stability.
- Prop-supported: Legs-Up-the-Wall and supported inversions use walls, blankets, blocks, or other appropriate supports.
- Head-and-neck-loaded: Traditional Headstand and some Shoulder Stand variations require particular caution because cervical structures may experience substantial loading.
Not every pose with an inverted orientation places weight on the head. This distinction is particularly important for beginners who want to explore inversion exercises without immediately attempting advanced neck-loading positions.
15 Inversion Yoga Poses: Difficulty, Support Points, and Experience Levels
Complete Inversion Yoga Poses Comparison Matrix
The following comparison helps you identify the differences between 15 inversion-related exercises, including their Sanskrit names, difficulty levels, support points, and recommended experience.
| Pose and Sanskrit Name | Difficulty | Primary Support Points | Balance Requirements | Experience Level |
| Viparita Karani (Legs-Up-the-Wall) | Gentle | Back, pelvis, wall | Low | Beginner |
| Uttanasana (Standing Forward Fold) | Gentle | Feet and legs | Low | Beginner |
| Prasarita Padottanasana (Wide-Legged Forward Fold) | Gentle | Feet and legs | Low to moderate | Beginner |
| Adho Mukha Svanasana (Downward-Facing Dog) | Gentle | Hands and feet | Moderate | Beginner |
| Setu Bandha Sarvangasana (Bridge Pose) | Beginner-supported | Feet, shoulders, upper back | Low | Beginner |
| Supported Dolphin Pose | Beginner-supported | Forearms and feet | Moderate | Beginner to intermediate |
| Sasangasana (Supported Rabbit Pose) | Beginner-supported | Knees and supported upper body | Low | Beginner with instruction |
| Supported Sarvangasana (Shoulder Stand) | Intermediate | Shoulders and upper arms | Moderate | Experienced practitioner |
| Supported Halasana (Plow Pose) | Intermediate | Shoulders and upper arms | Moderate | Experienced practitioner |
| Forearm Dolphin Preparation | Intermediate | Forearms and feet | Moderate | Developing practitioner |
| Sirsasana (Headstand) | Advanced | Forearms and head | High | Advanced |
| Pincha Mayurasana (Forearm Stand) | Advanced | Forearms and shoulders | Very high | Advanced |
| Adho Mukha Vrksasana (Handstand) | Advanced | Hands and shoulders | Very high | Advanced |
| Unsupported Sarvangasana (Shoulder Stand) | Advanced | Shoulders and upper arms | High | Advanced |
| Advanced Inversion Transitions | Advanced | Varies by transition | Very high | Advanced |
Gentle Inversions: 4 Accessible Positions
1. Viparita Karani (Legs-Up-the-Wall Pose)
Legs-Up-the-Wall is one of the most accessible restorative inversion positions. It allows you to position your legs above your torso while your back and pelvis remain supported by the floor.
How to perform it:
- Sit sideways beside a clear wall with your hips relatively close to it.
- Carefully rotate your torso onto your back while bringing your legs up the wall.
- Allow your arms to rest comfortably beside your body.
- Adjust your distance from the wall to avoid excessive hamstring tension.
- Breathe naturally and maintain a comfortable position.
- To exit, bend your knees, roll gently onto your side, and return to sitting slowly.
Alignment and breathing: Keep your neck comfortable and avoid forcing your hips toward the wall. Breathe steadily rather than holding your breath.
Modification: Place a folded blanket beneath your head for comfort or move your hips farther from the wall if your hamstrings feel tight.
Common mistake: Forcing the legs completely straight or remaining in the position despite discomfort.
Safety: People with relevant medical conditions, including certain cardiovascular or eye conditions, should seek individualized guidance before practicing inversion positions.
2. Uttanasana (Standing Forward Fold)
Standing Forward Fold is a partial inversion that emphasizes hip movement and posterior-chain flexibility. It can be modified to accommodate different hamstring flexibility levels.
How to perform it:
- Stand with your feet approximately hip-width apart.
- Soften your knees and engage your abdominal muscles gently.
- Hinge forward from your hips instead of forcing your spine into a rounded position.
- Allow your upper body to move toward your thighs.
- Rest your hands on the floor, blocks, or lower legs as comfortable.
- To exit, bend your knees and return to standing gradually.
Alignment: Keep your weight distributed across your feet and avoid locking your knees.
Modification: Bend your knees more deeply or place your hands on yoga blocks.
Common mistake: Pulling your torso toward your legs by force rather than allowing the hips to hinge naturally.
Safety: Avoid sudden movements, especially if you experience dizziness when bending forward.
3. Prasarita Padottanasana (Wide-Legged Forward Fold)
This standing inversion variation uses a wider stance to create space for the torso to fold between the legs. It can be useful for exploring hip mobility and controlled forward bending.
How to perform it:
- Stand with your feet comfortably wider than shoulder-width apart.
- Turn your toes slightly inward or maintain a neutral position that feels stable.
- Place your hands on your hips and lengthen your spine.
- Hinge forward from your hips while maintaining a comfortable knee position.
- Place your hands on the floor or on yoga blocks.
- Keep your head relaxed without forcing it toward the floor.
- Return to standing slowly, using your legs and core for control.
Alignment: Keep both feet grounded and avoid shifting your weight excessively toward the toes.
Modification: Reduce the width of your stance or use blocks to bring the floor closer.
Common mistake: Rounding the back excessively or forcing the head downward.
Safety: Choose a stance that does not cause discomfort in your hips, knees, or lower back.
4. Adho Mukha Svanasana (Downward-Facing Dog)
Downward-Facing Dog is a foundational yoga position that combines shoulder engagement, arm support, and posterior-chain stretching. It is a useful starting point for developing familiarity with partial inversions.
How to perform it:
- Begin on your hands and knees.
- Position your hands approximately shoulder-width apart and spread your fingers.
- Tuck your toes under and lift your hips upward.
- Move your chest gently toward your thighs while maintaining a comfortable spine position.
- Keep your knees bent if necessary.
- Allow your head to remain relaxed between your upper arms.
- Return to your hands and knees with control.
Alignment: Distribute weight through your hands, maintain active shoulders, and avoid forcing your heels toward the floor.
Modification: Bend your knees or place your hands on a stable elevated surface if wrist loading is uncomfortable.
Common mistake: Trying to straighten the legs at the expense of spinal alignment.
Safety: Stop if you experience wrist pain, shoulder discomfort, or dizziness.
Beginner-Supported Inversions: 3 Positions to Develop Control
5. Setu Bandha Sarvangasana (Bridge Pose)
Bridge Pose is technically a preparatory backbend rather than a full inversion. It is included because it develops familiarity with shoulder positioning, hip extension, and controlled weight distribution.
How to perform it:
- Lie on your back with your knees bent.
- Place your feet flat on the floor approximately hip-width apart.
- Rest your arms beside your body.
- Press through your feet and lift your hips gradually.
- Keep your shoulders grounded and your neck neutral.
- Lower your spine and hips slowly.
Alignment: Keep your knees tracking forward rather than allowing them to fall outward.
Modification: Use a comfortable, lower lift instead of attempting maximum hip elevation.
Common mistake: Turning the head while the shoulders and upper back remain loaded.
Safety: Avoid placing pressure on the neck and exit immediately if you experience discomfort.
6. Supported Dolphin Pose
Dolphin Pose is a forearm-supported position that develops shoulder endurance and core awareness. It is particularly relevant for people preparing for forearm-based inversion skills.
How to perform it:
- Start on your hands and knees.
- Lower your forearms to the floor, keeping them approximately shoulder-width apart.
- Spread your fingers and press your forearms into the mat.
- Tuck your toes and lift your hips.
- Walk your feet forward only as far as comfortable.
- Keep your shoulders active and your neck relaxed.
- Return to your knees slowly.
Alignment: Avoid collapsing between your shoulders or allowing your elbows to slide outward.
Modification: Keep your knees bent or practice with your forearms supported on an appropriate elevated surface.
Common mistake: Moving the feet too close to the head before developing sufficient shoulder stability.
Safety: This is a preparation exercise, not an invitation to kick into a Forearm Stand.
7. Sasangasana (Supported Rabbit Pose)
Rabbit Pose involves a forward-rounded body position and requires particular care around the cervical spine. It should not be treated as a beginner inversion simply because it does not require balancing upside down.
How to approach a supported variation:
- Begin in a comfortable kneeling position.
- Place your hands on a stable support if needed.
- Practice a gentle forward movement while keeping your neck in a comfortable position.
- Do not deliberately transfer body weight onto the crown of your head.
- Return upright slowly.
Alignment: Maintain awareness of your neck and avoid forced cervical flexion.
Modification: Use a folded blanket beneath the knees and practice a smaller forward movement without loading the head.
Common mistake: Treating head contact with the floor as a requirement or pushing into a deeper position.
Safety: Anyone with neck problems should avoid experimenting with head-loaded variations without professional assessment.
Intermediate Inversions: 3 Positions Requiring Greater Control
8. Supported Sarvangasana (Shoulder Stand)
Shoulder Stand is traditionally considered a full inversion. Even supported variations require considerable care because of the relationship between the shoulders, upper arms, and cervical spine.
Preparation considerations:
- Learn the basic positioning under the supervision of a qualified yoga instructor.
- Use only appropriate, instructor-approved supports.
- Maintain the head and neck in a neutral position without turning the head.
- Understand how the shoulders and upper arms provide support.
- Practice controlled entry and exit techniques before attempting a full position.
Alignment: The cervical spine should not be forced into an extreme position. Blanket placement and shoulder positioning require proper instruction.
Modification: Choose Legs-Up-the-Wall instead if you want a gentler inversion without traditional Shoulder Stand positioning.
Common mistake: Attempting to lift the torso without sufficient shoulder control.
Safety: Shoulder Stand is not a default beginner exercise. It can involve meaningful neck loading and is unsuitable for some practitioners.
9. Supported Halasana (Plow Pose)
Halasana involves moving the legs overhead while the shoulders and upper arms support the body. The position requires substantial flexibility and careful cervical alignment.
How to approach the pose:
- Learn the entry technique with a qualified instructor before attempting the full position.
- Use appropriate shoulder support when recommended by the instructor.
- Move the legs gradually rather than throwing them overhead.
- Maintain a stable upper-body position.
- Never force the feet toward the floor.
- Exit slowly using an instructor-taught technique.
Alignment: Avoid turning your head or forcing the neck into additional flexion.
Modification: Choose a supported alternative that does not require moving the legs behind the head.
Common mistake: Using momentum to move the legs overhead.
Safety: This is not an appropriate unsupervised beginner exercise. People with cervical or spinal conditions should seek individualized guidance.
10. Forearm Dolphin Inversion Preparation
Forearm Dolphin preparation builds the strength and control needed for more demanding forearm-supported inversions without requiring the practitioner to balance vertically.
How to perform it:
- Start in Dolphin Pose with your forearms grounded.
- Spread your fingers and keep your elbows stable.
- Engage your abdominal muscles gently.
- Shift your shoulders slightly forward while maintaining control.
- Return to your starting position without collapsing through the shoulders.
- Repeat only while you can maintain steady breathing and alignment.
Alignment: Keep the forearms grounded and the shoulders active.
Modification: Perform the movement with your knees resting on the floor.
Common mistake: Trying to lift the feet before developing the required shoulder and core control.
Safety: Avoid kicking into an inversion during this preparation exercise.
Advanced Weight-Bearing Inversions: 5 Demanding Variations
11. Sirsasana (Headstand)
Headstand is one of the best-known yoga inversions. It requires coordination between the shoulders, arms, trunk, and lower body. However, it also introduces cervical loading that makes it unsuitable for many beginners.
Preparation before learning:
- Develop shoulder stability through appropriately modified Dolphin exercises.
- Improve core control through plank and other foundational exercises.
- Learn balance awareness and controlled movement.
- Work with an instructor who can assess your technique.
- Understand the risks associated with supporting body weight through the head and neck.
Learning considerations: Traditional Headstand requires careful positioning of the forearms, hands, head, and shoulders. The practitioner must understand how to control weight distribution rather than simply placing body weight onto the skull.
Modification: Practice Dolphin Pose or Legs-Up-the-Wall instead. These positions allow inversion-related practice without requiring a traditional headstand.
Common mistake: Assuming that the head should carry most of the body's weight or attempting to kick upward without control.
Safety: Learn Headstand only with qualified supervision. Do not attempt it if you have neck discomfort or relevant medical contraindications without professional assessment.
12. Pincha Mayurasana (Forearm Stand)
Forearm Stand is an advanced balance pose in which the body is inverted while supported primarily by the forearms and shoulders.
Preparation: Build shoulder mobility, forearm stability, core strength, and controlled balance through appropriate foundational exercises.
Learning considerations:
- Establish a stable forearm position with appropriate spacing.
- Practice wall-supported shoulder and balance drills under instruction.
- Develop awareness of the body's vertical alignment.
- Learn how to enter and exit without uncontrolled kicking.
Modification: Return to Dolphin Pose for shoulder conditioning and balance preparation.
Common mistake: Allowing the lower back to arch excessively or collapsing through the shoulders.
Safety: Avoid practicing unsupported Forearm Stand without sufficient preparation and an appropriate environment.
13. Adho Mukha Vrksasana (Handstand)
Handstand requires the practitioner to support the body through the hands while maintaining shoulder alignment and whole-body control.
Preparation: Wrist conditioning, shoulder mobility, scapular stability, and core strength are essential components of a progressive training approach.
Learning considerations:
- Begin with comfortable wrist mobility exercises.
- Develop hand-supported strength through appropriately modified plank variations.
- Learn shoulder stacking and controlled weight shifts.
- Practice wall-assisted preparation with qualified instruction.
- Develop a controlled exit technique before attempting unsupported balance.
Modification: Use Downward-Facing Dog and wall-supported strength exercises to develop foundational control.
Common mistake: Kicking forcefully into the air before understanding hand placement and balance.
Safety: Handstands can result in falls and wrist or shoulder injuries. Use an appropriate practice environment and supervision.
14. Unsupported Sarvangasana (Shoulder Stand)
An unsupported Shoulder Stand removes some of the assistance provided by props and requires greater control of body alignment.
Learning considerations:
- Develop experience with appropriate foundational yoga positions.
- Understand shoulder and upper-arm support.
- Learn how to control the movement of the legs and torso.
- Maintain a neutral head position.
- Practice only after an instructor determines that the variation is appropriate.
Modification: Use a less demanding restorative inversion rather than progressing toward an unsupported Shoulder Stand.
Common mistake: Treating unsupported execution as a necessary improvement over supported variations.
Safety: The removal of props does not make this pose appropriate for everyone. Cervical loading remains an important consideration.
15. Advanced Inversion Transitions and Balance Variations
Advanced inversion transitions involve moving between established positions while maintaining control of body weight, momentum, and alignment.
Examples include transitions between supported forearm balances, controlled handstand variations, and advanced aerial yoga sequences.
Learning considerations:
- Master the individual positions before attempting transitions.
- Develop consistent entry and exit control.
- Practice with appropriate supervision and adequate clearance.
- Maintain steady breathing and avoid rushed movements.
- Stop when technique deteriorates or fatigue affects control.
Modification: Practice the individual foundational positions separately.
Common mistake: Attempting complex transitions before developing reliable balance and strength.
Safety: These movements are advanced skills, not beginner exercises or necessary milestones for a complete yoga practice.
How to Prepare Your Body Before Practicing Yoga Inversions
Preparation is an important part of inversion training. Rather than immediately attempting advanced poses, develop the physical abilities that support stable and controlled movement.
Wrist Conditioning and Hand-Supported Strength
Hand-supported inversions place considerable demands on the wrists. Gradual conditioning can help you become familiar with these loading patterns.
- Perform gentle wrist circles in both directions.
- Practice comfortable palm movements while keeping your forearms relaxed.
- Use controlled weight shifts on your hands.
- Practice modified plank positions only when comfortable.
- Rest if you experience persistent wrist discomfort.
Do not force your wrists into extreme extension or continue exercises through pain.
Shoulder Mobility and Scapular Stability
Shoulder stability is important for Dolphin Pose, Forearm Stand, and Handstand preparation. The shoulder blades should move in a controlled manner as your arms support your body.
Useful preparation exercises include:
- Wall slides for comfortable overhead shoulder movement.
- Controlled shoulder circles.
- Scapular movements in modified plank positions.
- Gentle overhead mobility exercises.
- Modified Dolphin Pose for progressive forearm-supported conditioning.
Avoid forcing your shoulders into positions that cause pinching or instability.
Core Activation and Balance Development
Core strength contributes to body awareness and alignment during inversion preparation. Exercises such as dead bugs, bird dogs, and modified planks can develop controlled trunk movement.
- Dead bugs: Practice coordinated arm and leg movements while maintaining a comfortable trunk position.
- Bird dogs: Extend opposite arms and legs while maintaining balance on your hands and knees.
- Modified planks: Develop shoulder and abdominal engagement with an appropriate level of difficulty.
- Standing balance drills: Practice controlled weight shifts while maintaining a stable base.
Hip Mobility and Hamstring Flexibility
Hip mobility affects how comfortably you perform forward folds and Downward-Facing Dog. Limited hamstring flexibility may make it difficult to straighten your legs without compromising spinal positioning.
Start with gentle hamstring movements, supported forward folds, and comfortable hip mobility exercises. Avoid forcing a deeper range of motion simply to imitate a demonstration.
Breathing, Body Awareness, and Warm-Up Principles
Controlled breathing helps you monitor your physical effort and avoid rushing through difficult movements.
- Begin with gentle movement to prepare your body.
- Increase exercise intensity gradually.
- Maintain comfortable breathing throughout practice.
- Avoid holding your breath during demanding movements.
- Rest when your balance or technique deteriorates.
Essential Yoga Props and Beginner Equipment
Basic yoga equipment can make supported practice more comfortable and adaptable.
- Yoga mats: Provide a stable practice surface.
- Yoga blocks: Bring the floor closer during forward folds and modified positions.
- Yoga straps: Help practitioners explore controlled stretching without forcing joint movement.
- Blankets: Provide cushioning when used appropriately under instructor guidance.
Explore the Lifestyle collection for equipment and accessories that may complement a home wellness routine. Choose each item according to its intended use rather than assuming that additional equipment automatically improves inversion safety.
For beginners, a mat and suitable blocks may be sufficient. Advanced inversion equipment should only be introduced when there is a clear training purpose and appropriate instruction.
A Beginner-to-Advanced Yoga Inversion Progression Roadmap
A progression roadmap helps you develop skills in a logical order. You do not need to achieve every advanced inversion to benefit from a consistent yoga practice.
Stage 1: Develop Comfort With Gentle Inversions
Begin with comfortable positions that require limited balance demands.
- Practice Legs-Up-the-Wall.
- Explore supported Standing Forward Fold.
- Learn modified Downward-Facing Dog.
- Develop awareness of comfortable head and neck positioning.
The objective is to become familiar with inverted body orientation without introducing unnecessary difficulty.
Stage 2: Build Shoulder and Core Stability
Once comfortable with gentle positions, introduce foundational strength exercises.
- Practice modified Dolphin Pose.
- Develop core control through dead bugs and bird dogs.
- Practice controlled shoulder movements.
- Improve balance through stable standing exercises.
Prioritize consistent technique rather than increasing exercise intensity too quickly.
Stage 3: Develop Controlled Weight Shifting and Balance
This stage introduces more demanding hand- and forearm-supported movements. Practice controlled weight shifting and appropriate wall-assisted preparation under qualified instruction.
Work on wrist tolerance, shoulder stability, and safe exit strategies before attempting vertical balances.
Stage 4: Learn Advanced Inversions With Qualified Instruction
Headstands, Forearm Stands, Handstands, and advanced inversion transitions require technical knowledge and appropriate physical preparation.
Before progressing, consider whether you can maintain stable shoulders, control your trunk, understand your exit strategy, and practice in an appropriate environment.
Headstands are not a mandatory milestone. You can develop strength, mobility, balance, and inversion awareness through other positions that do not require substantial cervical loading.
How Often Should Beginners Practice Inversion Exercises?
A conservative starting framework is two or three short sessions per week, depending on the exercises, recovery needs, and individual tolerance.
Gentle positions may be incorporated into a regular yoga routine, while demanding shoulder and wrist exercises require more attention to recovery. Avoid repeating challenging movements when your muscles are fatigued or your technique has deteriorated.
How to Practice Aerial Hammock Inversions and Anti-Gravity Yoga
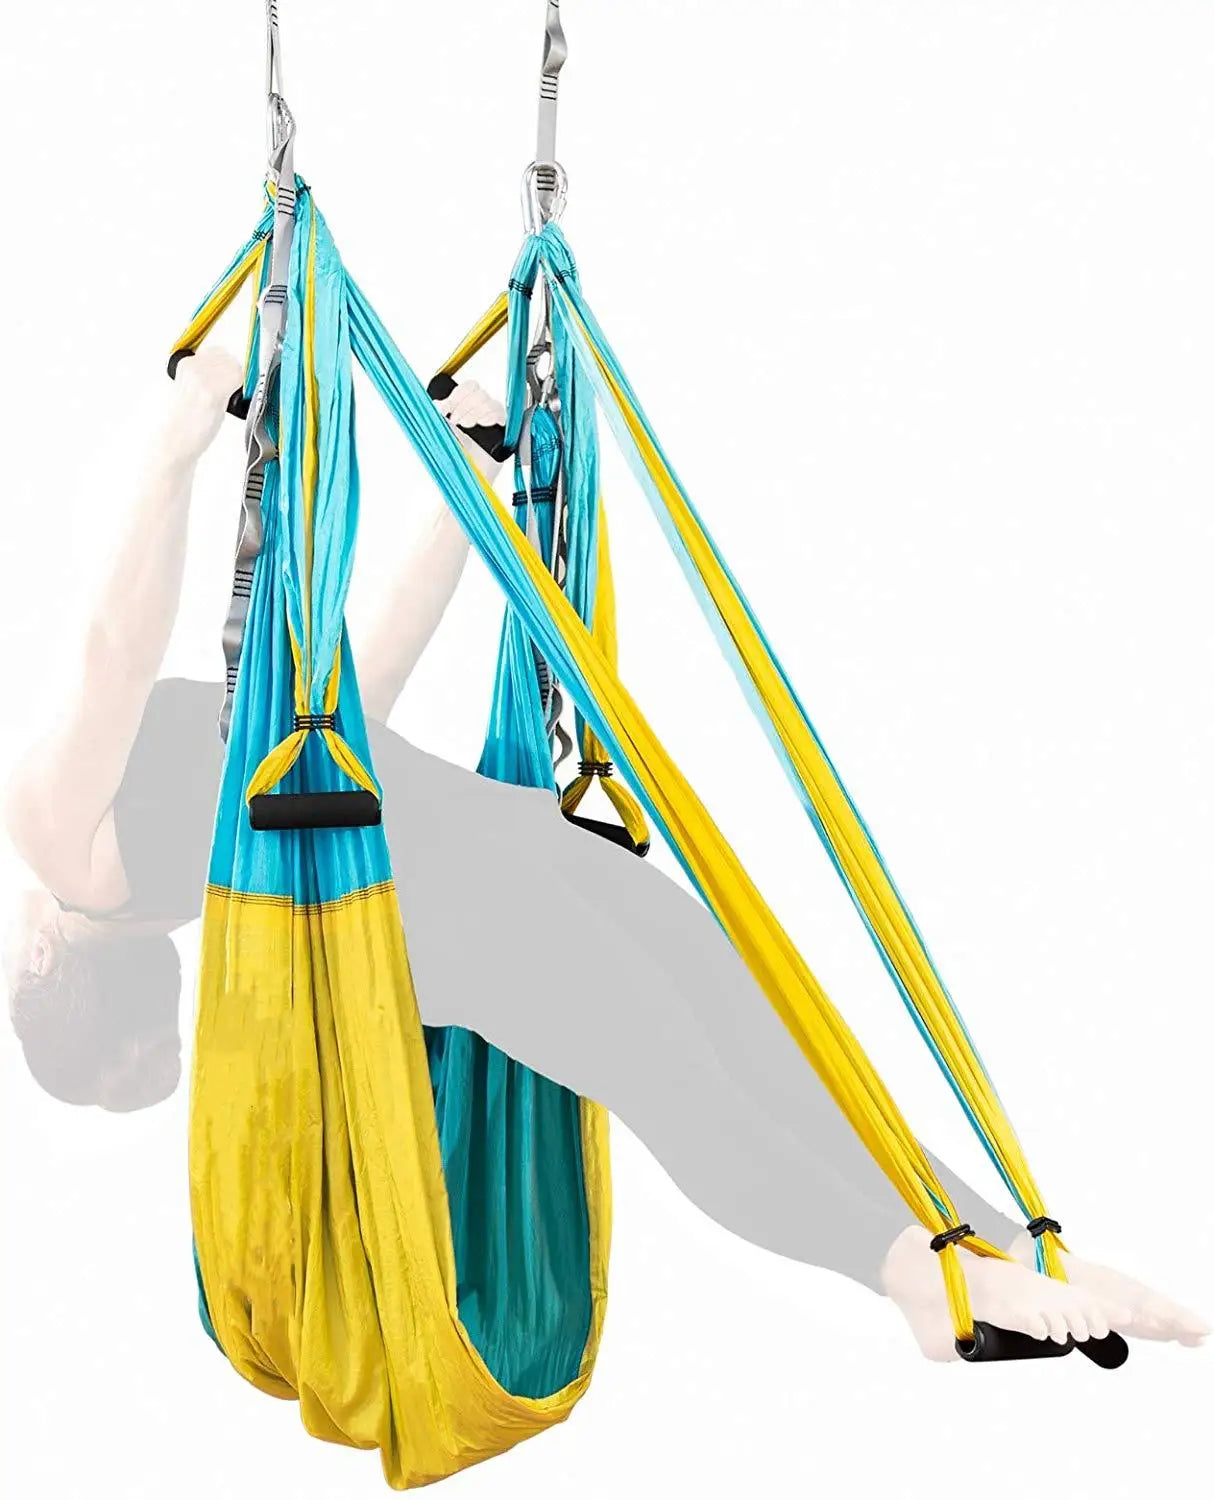
Aerial yoga introduces a different approach to inversion practice by using suspended fabric to support selected body positions. Instead of relying exclusively on the floor, practitioners interact with a fabric hammock that changes their balance and support points.
What Makes an Aerial Hammock Inversion Different From a Floor Inversion?
Floor-based inversions use the mat, hands, forearms, legs, or other body contact points to maintain a position. Aerial hammock inversions introduce fabric support that may hold the hips, torso, or legs during selected exercises.
This changes several aspects of the practice:
- Support distribution: The fabric supports selected areas of the body rather than relying exclusively on the floor.
- Balance requirements: The suspended fabric can move, requiring additional body awareness and coordination.
- Movement range: Some stretching positions can be explored differently because the body is partially supported.
- Pressure points: Fabric contact may create pressure in areas such as the hips, waist, or legs.
- Entry and exit: Practitioners need to understand how to enter and leave suspended positions in a controlled manner.
A hammock does not automatically make an inversion safer. Equipment compatibility, installation quality, instructor supervision, and individual physical ability remain essential.
Essential Preparation Before Attempting Aerial Inversions
Before practicing suspended positions, become familiar with the equipment and develop the physical awareness required to work with fabric support.
- Understand how to maintain a comfortable grip when required.
- Develop basic shoulder and core control.
- Learn how the fabric should contact the body during instructor-approved exercises.
- Practice basic mounting and dismounting techniques under supervision.
- Understand how the hammock moves when your weight shifts.
- Learn an appropriate exit strategy before attempting more demanding movements.
Basic Aerial Hammock Inversion Preparation
Beginners should start with instructor-led familiarization rather than attempting complex suspended inversions independently.
- Inspect the setup: Confirm that the hammock, hardware, and structural installation have been appropriately checked.
- Learn fabric positioning: Have an experienced instructor demonstrate how the fabric should contact your body for the selected exercise.
- Understand support points: Identify which areas of your body are supported before changing position.
- Practice controlled movement: Learn how small weight shifts affect the suspended fabric.
- Establish an exit strategy: Understand how to return to a stable position before beginning.
- Progress gradually: Move toward more demanding positions only after demonstrating consistent control.
Do not interpret these introductory principles as instructions for performing unsupported aerial drops, deep inversions, or complex suspension techniques.
Aerial Hammock Equipment Inspection and Installation Safety
Installation safety is one of the most important considerations when choosing aerial yoga equipment for home use.
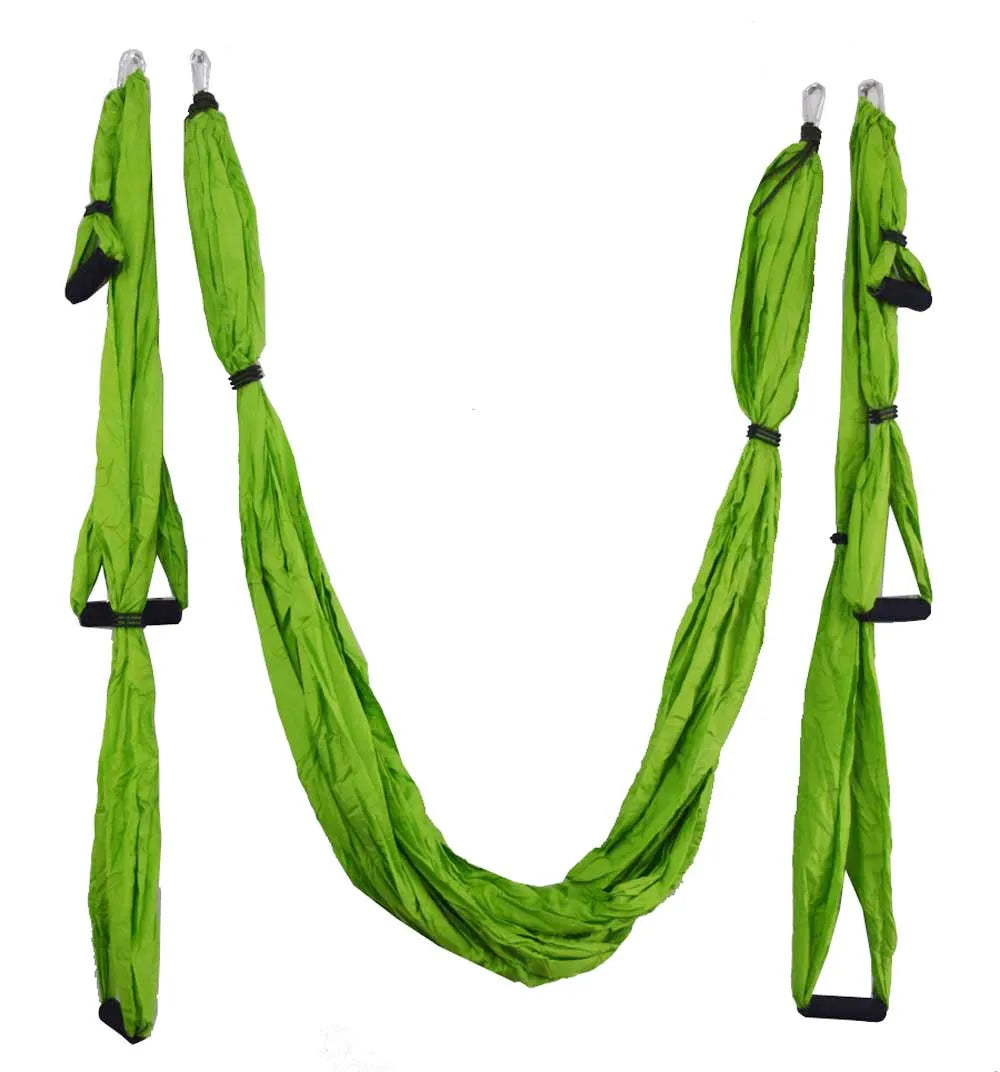
A hammock's advertised fabric capacity does not establish the working-load capacity of the entire suspension system. The complete setup includes the fabric, connectors, mounting hardware, anchors, and the building structure supporting the installation.
Before using an aerial hammock, consider the following:
- Verified working-load ratings: Check the specifications for every component and confirm compatibility across the complete system.
- Dynamic loading: Movement, swinging, and sudden weight shifts can create forces that differ from static body weight.
- Structural anchors: Use suitable structural attachment points rather than relying on decorative ceiling fixtures or unsupported drywall.
- Professional installation: Have the ceiling structure and mounting system assessed by an appropriately qualified professional when necessary.
- Compatible hardware: Ensure that connectors, buckles, extension straps, and mounting components are suitable for the intended installation.
- Fabric inspection: Check for fraying, tears, damaged stitching, discoloration, or other signs of deterioration before each session.
- Clearance: Maintain adequate space around the equipment and remove objects that could cause injury.
Do not use the equipment if any component appears damaged or its specifications cannot be verified.
When Should Beginners Learn Aerial Yoga Inversions?
Beginners should first become comfortable with basic yoga movement and learn how aerial equipment behaves during supervised exercises.
An introductory aerial yoga class provides an opportunity to learn fabric positioning, controlled mounting, and safe dismounting. An experienced instructor can also help determine whether a particular suspended exercise is suitable for your mobility, balance, and strength.
Do not assume that previous experience with traditional yoga automatically prepares you for aerial inversion techniques.
Choosing an Aerial Yoga Hammock and Supporting Accessories
For people interested in exploring anti-gravity yoga at home, the Aerial Yoga Hammock – 200KG Heavy-Duty Support Swing is one equipment option to consider.
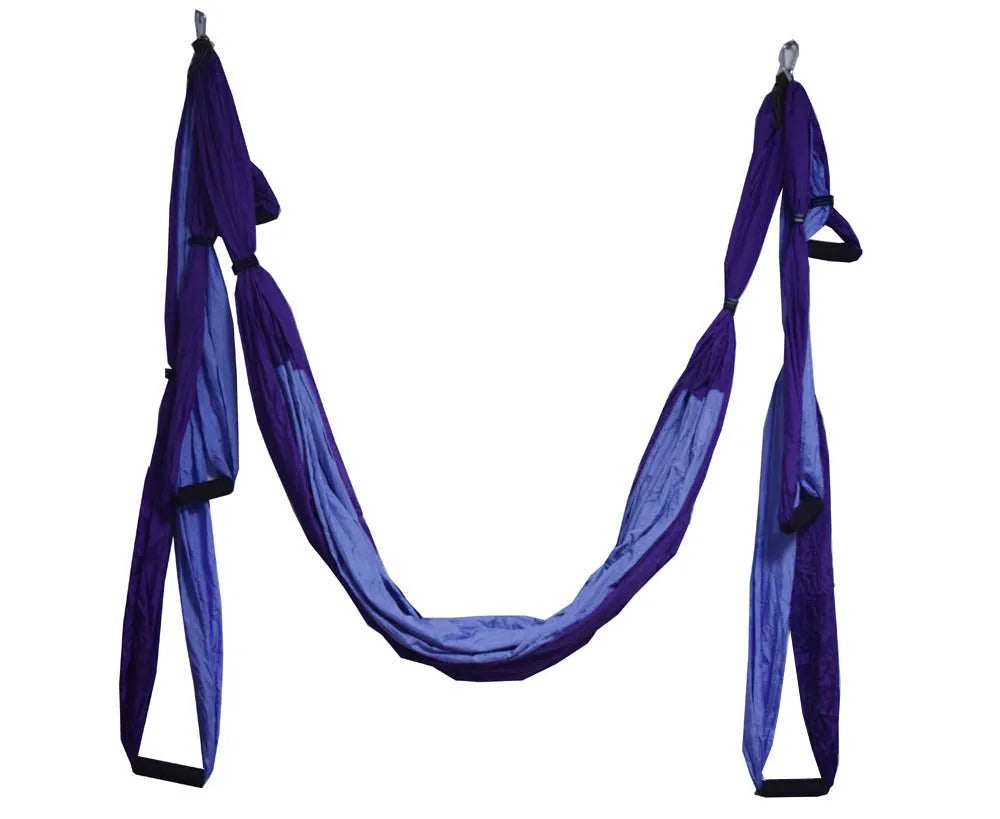
Its listed specifications include:
- Material: Non-elastic 210T nylon parachute fabric.
- Main hammock dimensions: 250 × 150 cm.
- Handle lengths: 30 cm, 85 cm, and 135 cm.
- Stated load capacity: Up to 200 kg (440 lbs).
- Weight: Approximately 1.2 kg (2.65 lbs).
- Model: YGYB04SET.
- Color options: 20 options.
- Package: Hammock, handles, four metal buckles, telescopic buckles, and carry bag.
The non-elastic fabric is designed to provide firm support rather than the stretch associated with elastic exercise materials. Its portable construction and included carry bag may also be useful for storage and transport.
However, the stated 200 kg capacity should not be interpreted as certification of the complete installed suspension system. The load ratings of the mounting hardware, anchors, connectors, and supporting structure must also be verified independently.
Important equipment note: Extension straps and ceiling hanging trays are not included in the listed package and must be purchased separately. Confirm compatibility and installation requirements before purchasing additional hardware.
If you are interested in aerial yoga equipment, review the complete product specifications and installation requirements before deciding whether it is appropriate for your intended practice.
Yoga Inversions vs. Spinal Traction and Spinal Decompression
Inversion yoga poses are sometimes discussed alongside spinal decompression because certain positions create a noticeable stretching or unloading sensation. However, these concepts should not be treated as equivalent.
What Is the Difference Between an Inversion and Spinal Traction?
An inversion describes body orientation. The head may move below the heart, or the body may be positioned upside down or at an angle.
Spinal traction refers to the application of a pulling force intended to create separation or unloading between spinal structures. It may involve specialized equipment or clinical techniques.
These concepts have different mechanisms. Simply positioning your body upside down does not establish that measurable spinal traction is occurring.
Can Yoga Inversions Decompress the Spine?
Some practitioners report a subjective sense of stretching, relaxation, or reduced pressure during certain yoga positions. However, these sensations do not prove that an exercise produces measurable spinal decompression or treats a specific spinal condition.
Yoga can be part of a broader movement and flexibility routine, but claims that inversion poses cure back pain, reverse spinal degeneration, or guarantee decompression should be approached cautiously.
Yoga Inversions Versus Inversion-Table Exercises
Although both practices involve changing the body's orientation, their methods and equipment differ.
- Yoga inversions: Use body positioning, muscle engagement, and controlled movement on a mat or with yoga props.
- Aerial yoga: Uses suspended fabric to provide additional support during selected exercises.
- Inversion-table exercises: Use specialized equipment to tilt the body at different angles.
- Clinical traction: Uses specific techniques and equipment under appropriate professional guidance.
These approaches are not interchangeable treatments. The suitability of any exercise or equipment depends on the individual's health circumstances.
Are Inversions Appropriate for People With Back Discomfort?
Not every inversion is appropriate for someone experiencing back discomfort. Forward folds, deep backbends, and suspended movements can affect individuals differently.
If a position increases pain, causes numbness, or produces unusual symptoms, stop practicing it. Persistent or unexplained discomfort should be evaluated by a qualified healthcare professional before attempting demanding inversion exercises.
Who Should Avoid Certain Yoga Inversions? Contraindications and Safety
Inversion safety depends on the specific pose, the amount of physical loading involved, and the practitioner's medical circumstances. A gentle supported position should not automatically be treated as equivalent to a full Headstand or Shoulder Stand.
Health Conditions That Require Medical Guidance Before Inversion Practice
People with certain health conditions may need individualized guidance before practicing inversion exercises.
- Uncontrolled high blood pressure.
- Glaucoma or other relevant eye conditions.
- Cardiovascular disease.
- Balance disorders or a history of significant dizziness.
- Significant neck or spinal conditions.
- Recent surgery or injuries affecting movement and stability.
- Pregnancy-related considerations, particularly when attempting unfamiliar or demanding inversions.
This is not a universal list of contraindications for every yoga pose. Different positions have different physical demands, and a qualified healthcare professional can help assess individual circumstances.
Why Headstands and Shoulder Stands Require Additional Caution
Headstands and Shoulder Stands involve more complex body positioning than gentle inversions. Depending on the technique, they can place substantial forces through the cervical spine and surrounding structures.
Incorrect alignment, uncontrolled movement, or excessive loading may increase the risk of injury.
For this reason:
- Do not use Headstand as your first inversion exercise.
- Avoid turning your head while supporting an inverted position.
- Do not force your neck into a deeper position.
- Learn advanced techniques through qualified instruction.
- Choose alternative inversions if neck loading is inappropriate for you.
There is no requirement to master these poses to develop a complete yoga practice.
When to Stop an Inversion Immediately
Stop an exercise if you experience:
- Neck pain or unusual pressure.
- Dizziness or significant lightheadedness.
- Visual disturbances.
- Numbness or tingling.
- Chest discomfort.
- Unusual headache or pressure sensations.
- Loss of balance or inability to maintain control.
Seek urgent medical assessment for serious or sudden symptoms, including chest pain, fainting, sudden visual changes, or neurological symptoms. Do not attempt to push through warning signs.
How to Create a Safer Inversion Practice Environment
A suitable environment is important for both floor-based and aerial inversion exercises.
- Choose stable, nonslip flooring.
- Remove nearby furniture and obstacles.
- Ensure sufficient overhead and surrounding clearance.
- Use appropriate props for the selected exercise.
- Practice demanding skills with qualified supervision.
- Avoid practicing when exhausted or impaired.
- Check all equipment before every session.
- Progress gradually rather than attempting movements beyond your current ability.
Medical Guidance and Professional Instruction
Educational yoga instructions cannot replace individualized medical assessment. People with relevant health concerns should discuss their intended activities with a qualified healthcare professional.
Advanced yoga inversions and aerial techniques also benefit from in-person instruction. A qualified instructor can observe alignment, evaluate movement control, and recommend suitable modifications.
Common Inversion Yoga Problems and How to Troubleshoot Them
Fear of Falling or Losing Balance
Fear is common when learning new inversion exercises. Rather than forcing yourself into a difficult pose, begin with stable positions such as Legs-Up-the-Wall and modified Downward-Facing Dog.
When progressing toward more demanding skills, use appropriate wall-supported preparation and seek instructor supervision. Learning how to exit a position is just as important as learning how to enter it.
Wrist Discomfort During Downward Dog or Handstand Preparation
Wrist discomfort may indicate that an exercise is too demanding or that your current position is unsuitable.
- Reduce the amount of weight placed through your hands.
- Modify the exercise by bending your knees or using an appropriate elevated support.
- Develop wrist mobility gradually.
- Avoid forcing your wrists into uncomfortable angles.
- Seek assessment if pain persists.
Shoulder Instability or Difficulty Maintaining Alignment
Difficulty keeping your shoulders stable may indicate insufficient strength, mobility, or movement control.
Return to simpler exercises such as modified Dolphin Pose, wall slides, and controlled scapular movements. Avoid progressing toward Forearm Stand or Handstand until you can maintain comfortable shoulder positioning.
Neck Pressure During Headstand or Shoulder Stand
Neck pressure is a reason to stop, not a sensation to overcome through repeated adjustments.
Exit the position using an appropriate technique and avoid further neck-loading exercises until the cause has been assessed. Choose gentle alternatives that do not place substantial weight through the cervical spine.
Poor Balance, Limited Flexibility, or Difficulty Entering a Pose
Limited flexibility does not prevent you from practicing every form of inversion yoga. You can use bent-knee modifications, blocks, walls, and comfortable supported positions.
Focus on improving foundational mobility and strength rather than forcing a full expression of the pose. Select a lower-difficulty variation whenever you cannot maintain stable alignment.
Beginner Inversion Yoga Practice Sequences
Once you understand the different inversion categories, a short practice sequence can help you incorporate suitable positions into your routine. These examples emphasize gentle movement and foundational control rather than advanced balancing skills.
10-Minute Gentle Inversion Routine for Beginners
This sequence combines simple movement and supported positions. Adjust the duration according to your comfort and health circumstances.
- Minute 1–2: Breathing preparation. Sit comfortably and practice steady, relaxed breathing.
- Minute 3–4: Modified Downward-Facing Dog. Explore a comfortable position with bent knees if needed.
- Minute 5–6: Standing Forward Fold. Hinge from your hips and use blocks if the floor is difficult to reach.
- Minute 7–9: Legs-Up-the-Wall. Rest in a comfortable position without forcing your hips or hamstrings.
- Minute 10: Controlled exit and recovery. Return to sitting slowly and allow your breathing to settle.
This is an illustrative routine rather than a required sequence. Skip any exercise that causes discomfort or is unsuitable for your health circumstances.
15-Minute Shoulder and Core Preparation Routine
This routine focuses on foundational strength and body awareness without requiring a Headstand or Handstand.
- Minutes 1–3: Wrist conditioning. Perform gentle wrist circles and comfortable hand movements.
- Minutes 4–6: Shoulder mobility. Practice controlled shoulder circles and wall slides.
- Minutes 7–9: Modified Dolphin Pose. Explore forearm support while maintaining stable shoulder positioning.
- Minutes 10–12: Dead bugs. Practice controlled opposite-arm and leg movements.
- Minutes 13–15: Bird dogs and recovery. Develop trunk control and finish with relaxed breathing.
Reduce the duration or intensity if you are new to these movements. Consistent technique is more valuable than completing every exercise at a predetermined pace.
How to Choose the Right Inversion Routine for Your Experience
Your starting routine should reflect your physical abilities, movement experience, and health considerations.
- New to yoga: Begin with supported forward folds, Legs-Up-the-Wall, and modified Downward-Facing Dog.
- Developing flexibility: Add comfortable hip mobility and hamstring exercises.
- Building strength: Introduce modified Dolphin Pose, dead bugs, and appropriate shoulder exercises.
- Experienced practitioner: Consider instructor-guided progression toward more demanding inversions.
- Interested in aerial yoga: Start with supervised introductory classes and properly assessed equipment.
For additional home wellness and self-care ideas, explore the Beauty and Self-Care Blog. You can also browse the Body Care and Health Devices collection for other wellness-related equipment.
If aerial practice is your preferred direction, the aerial yoga hammock with non-elastic 210T nylon fabric is another option to review after checking its specifications, compatible hardware, and installation requirements. Equipment selection should complement appropriate training, not replace it.
Frequently Asked Questions About Inversion Yoga Poses
Can Beginners Practice Inversion Yoga Poses Safely?
Yes, many beginners can start with gentle or appropriately supported inversion positions, such as Legs-Up-the-Wall, modified Downward-Facing Dog, and comfortable forward folds. However, advanced Headstands, Handstands, and suspended aerial inversions require additional preparation and qualified instruction. Individual medical considerations should also influence pose selection.
What Are the Easiest Yoga Inversion Poses for Beginners?
Legs-Up-the-Wall, modified Downward-Facing Dog, Standing Forward Fold, and Wide-Legged Forward Fold are accessible starting options for many practitioners. These exercises generally require less balance than full inversions. Beginners should use appropriate modifications, maintain comfortable breathing, and avoid forcing flexibility or entering positions that cause dizziness or pain.
How Long Should You Hold a Yoga Inversion, and How Often Should You Practice?
Hold duration depends on the pose, experience, and individual tolerance. Beginners should start with short, comfortable holds and prioritize steady breathing and controlled movement. Two or three short weekly sessions can be a conservative starting framework, although recovery needs and health circumstances may require adjustments.
Are Yoga Inversions Good for Spinal Decompression and Back Discomfort?
Some yoga inversions create stretching or unloading sensations, but these feelings do not establish measurable spinal decompression or prove that an exercise treats back conditions. Yoga may support general movement and flexibility, but it should not be presented as a guaranteed treatment for back pain. People with persistent discomfort should seek individualized healthcare guidance.
How Do You Practice Aerial Hammock Inversions Safely?
Start with supervised beginner instruction and learn fabric positioning, controlled entry, and exit techniques before attempting suspended inversions. Check the hammock, connectors, and structural anchors before every session. Verify the complete installation's working-load ratings and obtain professional installation assessment where necessary. A fabric capacity rating alone does not establish that the entire suspension system is safe.
Conclusion: Build Your Inversion Skills One Stage at a Time
Inversion yoga is a progressive practice that offers far more options than Headstands and Handstands. Gentle positions such as Legs-Up-the-Wall, Standing Forward Fold, and Downward-Facing Dog provide accessible starting points for exploring different body orientations and movement patterns.
As your experience develops, you can introduce supported positions, shoulder and core preparation, and more demanding balance exercises. Intermediate and advanced inversions require additional attention to alignment, strength, and safe movement techniques. Headstands and Shoulder Stands deserve particular caution because of their potential cervical loading.
Aerial yoga adds another dimension by using suspended fabric to support selected stretches and movement patterns. However, successful aerial practice depends on appropriate equipment, verified load ratings, structural installation, and qualified instruction.
Choose Your Starting Inversion and Practice Consistently
Rather than trying to master all 15 positions, choose one or two exercises that match your current experience. Develop comfortable movement, build foundational strength, and progress only when you can maintain control.
If you are interested in exploring suspended movement, consider learning through an instructor-led aerial yoga class before choosing home equipment. Review the 200KG Heavy-Duty Aerial Yoga Hammock as an optional equipment choice, paying particular attention to its non-elastic 210T nylon construction, listed dimensions, included accessories, and separate installation requirements.
The most valuable inversion practice is not the one that achieves the most difficult pose. It is the one that respects your current abilities, supports consistent learning, and allows you to move with confidence and control.
Pillar Article: Aerial Fitness Equipment: Complete Comparison & Buying Guide for Home Training