

Does a left or right bunion corrector really work?
A left vs right bunion corrector can help improve comfort and support better toe positioning when it matches the correct foot, fits properly, and is worn consistently. These devices work by applying gentle guidance around the big toe joint, helping reduce pressure points and supporting a more natural alignment pattern.
However, a bunion corrector is not a guaranteed cure or a replacement for professional treatment when bunions are severe. Most correctors are designed to provide alignment support, improve comfort, and help manage symptoms rather than permanently reshape the foot structure.
What bunion correctors can and cannot do
A toe alignment corrector works by applying controlled support to the big toe and surrounding areas. Depending on the design, it may help:
- Support a straighter big toe position during wear
- Reduce rubbing and pressure around the bunion area
- Improve comfort while walking or resting
- Encourage healthier toe alignment habits
What it cannot do is completely reverse an advanced bunion deformity overnight. Results vary depending on bunion severity, foot structure, consistency of use, and the type of support device selected.
Why correct foot orientation affects results
The difference between a left and right bunion corrector is more than the label on the package. Each version is designed around the natural anatomy of that specific foot. A left-foot corrector guides alignment from one direction, while a right-foot corrector mirrors that movement for the opposite side.
Using the wrong side may place pressure in an unnatural direction, reducing comfort and making the device less effective. Choosing the correct orientation is one of the most important steps when learning toe alignment corrector how it works in real-world use.
- Correct foot orientation: allows straps, hinges, and padding to work as designed
- Consistent wear: provides gradual support instead of short-term adjustment
- Proper sizing: prevents unnecessary pressure and irritation
When podiatrists recommend using one
Foot specialists may recommend bunion supports as part of a broader comfort and symptom-management approach, especially for people with mild to moderate bunion discomfort. They are often used alongside footwear changes, activity adjustments, and other conservative care methods.
If you experience persistent pain, significant toe deformity, swelling, or difficulty walking, a podiatrist can help determine whether a bunion corrector is appropriate for your situation.
In short, bunion correctors can be useful tools—but the best results come from choosing the correct left or right version, following proper fitting instructions, and using realistic expectations.
Left vs Right Bunion Corrector: Which One Do You Actually Need?
Choosing a left right foot bunion corrector is not about selecting the most popular option. It is about matching the device to your foot anatomy, comfort needs, and daily routine. If a previous corrector felt uncomfortable or ineffective, the issue may have been the wrong design, incorrect sizing, or incorrect foot orientation.
⏱ 5 min read
Have you ever noticed that one foot feels more uncomfortable than the other after standing or walking all day? That difference is why choosing a foot-specific solution matters. A properly matched bunion corrector can provide more comfortable support than a one-size-fits-all approach.
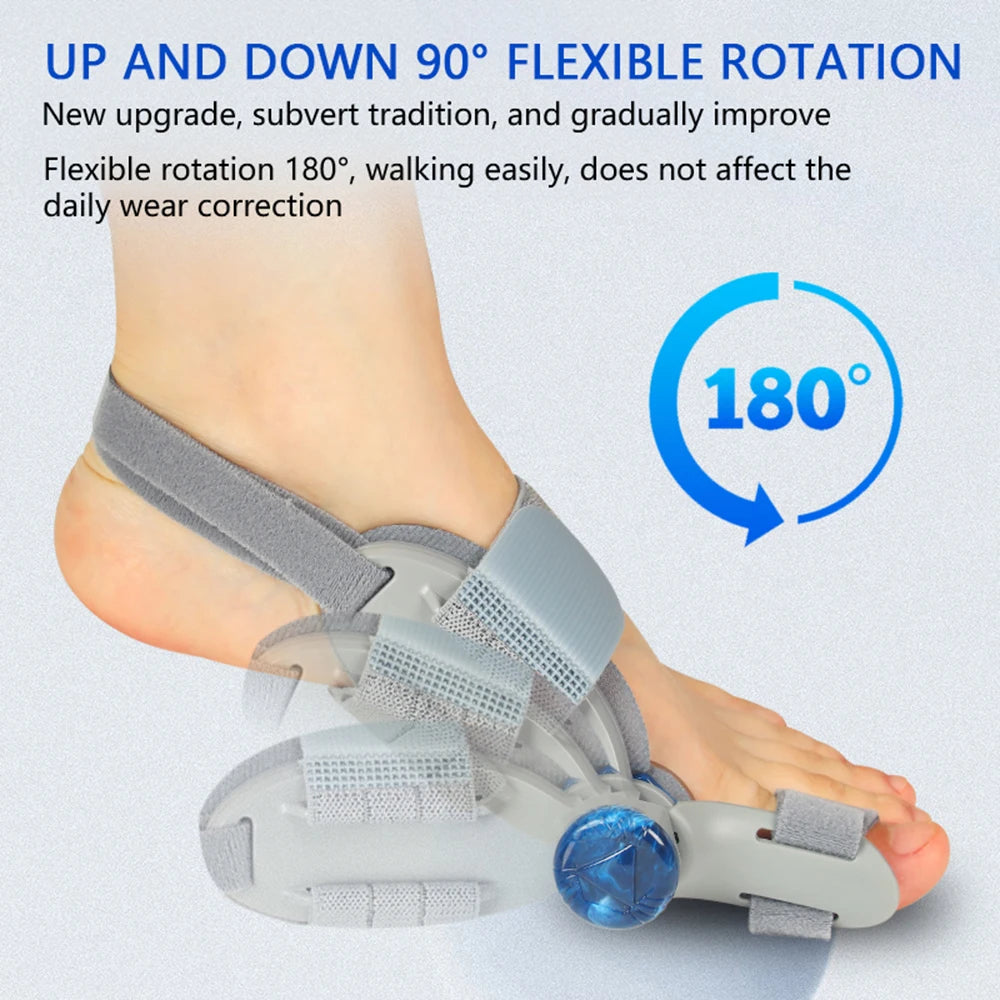
Left right foot bunion corrector design supports measuring toe alignment and daily comfort See it in action
Left vs Right Bunion Corrector Difference Explained (Simple Visual Guide)
What “left” and “right” actually mean
“Left” and “right” refer to the foot the corrector is designed for—not your dominant hand or preferred side. Each device is shaped to follow the natural curve of that foot and position the correction components in the correct direction.
Key design differences side-by-side
- Left corrector: Designed specifically for the left foot, guiding the big toe using the appropriate support direction.
- Right corrector: Mirrors the structure of the left version and applies support for the right foot.
- Strap direction: Positioned differently to create the intended alignment pathway.
- Padding placement: Located to protect sensitive areas based on each foot’s anatomy.
Are left and right bunion correctors interchangeable?
In most cases, left and right bunion correctors should not be swapped. A device designed for the opposite foot may place the hinge, strap tension, or corrective pressure in the wrong position.
While some universal sleeves are designed for either foot, dedicated left and right models generally provide a more customized fit. Always check the product design before purchasing to ensure you select the correct foot version.
Why using the wrong side reduces results
If you wear a right-foot corrector on your left foot, the alignment force may work against the natural direction of your toe. This can create unnecessary pressure, reduce comfort, and make consistent wear more difficult.
Matching the corrector to the correct foot is a simple step that can significantly improve overall comfort and support.
Why left and right specific design matters
A left right foot bunion corrector follows the natural curve, pressure points, and joint positioning of each foot. Unlike generic designs, side-specific correction helps distribute tension more evenly, allowing the big toe to receive gentle guidance without creating uncomfortable pressure.
- Supports the unique structure of each foot
- Helps reduce friction around sensitive bunion areas
- Improves comfort during longer wear periods
- Encourages gradual and consistent alignment support
This difference matters most for people who spend many hours standing, walk frequently, or wear shoes that place extra pressure on the front of the foot. Even small differences between left and right feet can affect how comfortable a corrector feels throughout the day.
How to Choose the Correct Bunion Corrector for Your Foot
Choosing the right bunion corrector starts with matching the device to your foot condition, comfort needs, and daily routine. The best option is not always the strongest correction device—it is the one that provides the right balance of support, fit, and wearability.
Identify the affected foot
The first step in learning how to choose bunion corrector left or right foot is identifying which foot needs support. A bunion develops at the base of the big toe, where the joint begins to angle outward.
Check both feet while standing naturally and determine whether the bunion appears on:
- Left foot only: Choose a left-foot bunion corrector
- Right foot only: Choose a right-foot bunion corrector
- Both feet: Consider a matched left and right pair
Selecting the correct side ensures that straps, hinges, and pressure points work in the intended direction. A properly matched device is more comfortable and easier to wear consistently.
Assess bunion severity
The level of support you need depends on how much the big toe has shifted and how much discomfort you experience. Mild bunions often benefit from flexible supports designed for daily comfort, while more advanced cases may require structured splints with stronger stabilization.
- Mild discomfort: Soft, adjustable correctors may provide gentle alignment support
- Moderate bunion changes: More structured designs may offer better positioning control
- Severe pain or major deformity: Consider consulting a podiatrist for personalized guidance
A bunion corrector should feel supportive, not painful. Excessive pressure does not necessarily mean better correction and may make regular use more difficult.
Choose single, pair, or universal design
Understanding whether you need a bunion corrector for each foot helps prevent unnecessary purchases and improves compatibility.
- One affected foot: A single left or right corrector is usually sufficient
- Both feet affected: A left and right pair provides balanced support
- Unsure about sizing or foot preference: Adjustable or universal designs may offer more flexibility
Dedicated left and right correctors typically provide a more customized fit, while universal sleeves focus more on convenience and simple daily support. Consider your foot shape, lifestyle, and how often you plan to wear the device before choosing.
Bunion Corrector Sizing Guide
Finding the correct size is just as important as selecting the correct foot orientation. Even the best bunion corrector will feel uncomfortable or provide limited support if it does not fit properly.
Measure foot length and width
Before purchasing, measure the dimensions that affect how the corrector sits on your foot. Focus on the forefoot area because this is where most bunion supports apply pressure.
- Measure the width of the widest part of your foot
- Check the circumference around the bunion area
- Consider your usual shoe size as an additional reference
A correct fit should hold the toe gently in position without creating sharp pressure, numbness, or excessive rubbing.
Match sizing charts
Always compare your measurements with the manufacturer’s sizing guide instead of choosing based only on shoe size. Different materials, strap systems, and brace designs can fit differently.
The best bunion corrector fit guide approach is to check:
- Foot measurements rather than guessing
- Adjustable strap range
- Material flexibility
- Whether the design is made for a left, right, or universal fit
Accurate sizing helps reduce returns, improves comfort, and makes it easier to build a consistent wearing routine.
Adjustable vs fixed sizing
Adjustable bunion correctors are often a practical choice for beginners because they allow small fit changes as you become accustomed to wearing them. They can also accommodate minor differences between feet.
- Adjustable designs: Better for flexibility, beginners, and changing comfort needs
- Fixed-size designs: Provide a more consistent fit when the correct size is already known
A properly fitted bunion corrector should stay securely in place while allowing normal movement. The right size combined with the correct left or right orientation creates the foundation for comfortable, effective use.
For broader wellness routines, users often combine foot care with recovery tools from the Body Care and Health Devices collection to support full-body comfort.
How to Wear a Bunion Corrector Properly
Knowing how to wear a bunion corrector properly is essential for comfort and consistent results. Even a high-quality device may feel ineffective if it is positioned incorrectly, worn too tightly, or used on the wrong foot.
Left vs right fitting checklist
Before putting on your bunion corrector, confirm that the device matches the foot you are treating. A left vs right bunion corrector is designed with different strap directions, support angles, and pressure points to follow each foot’s natural structure.
- Check the label: Confirm the corrector is marked for your left or right foot.
- Position the big toe support: The alignment component should sit comfortably along the big toe joint.
- Secure straps evenly: The corrector should stay in place without creating excessive pressure.
- Test movement: You should be able to move naturally without pinching or numbness.
If the corrector twists, slides, or creates discomfort, adjust the fit before increasing wear time. Proper positioning allows the device to provide gentle support instead of unnecessary stress.
Day vs night wear
The best wearing schedule depends on the design of your bunion corrector and your comfort level. Different styles are made for different situations.
- Daytime correctors: Usually lighter and more flexible, making them suitable for walking, daily activities, and use with appropriate footwear.
- Night splints: Often provide stronger stabilization and are designed to support alignment while the foot is resting.
When starting a new corrector, many users benefit from gradually increasing wear time rather than wearing it for long periods immediately. This helps the foot adapt and makes consistent use easier.
With shoes vs barefoot
Whether you wear a bunion corrector with shoes depends on its thickness, structure, and design.
- Thin, flexible correctors: May fit inside wider shoes with enough toe space.
- Structured splints: Are often more comfortable when worn barefoot at home or during rest periods.
Avoid forcing a corrector into narrow footwear, as extra pressure can reduce comfort and make it harder to maintain regular use.
Common mistakes that reduce effectiveness
- Wearing the wrong side: A left corrector should stay on the left foot, and a right corrector should stay on the right foot.
- Over-tightening straps: More pressure does not always mean better support and may cause irritation.
- Using it inconsistently: Occasional wear makes it harder to evaluate comfort improvements.
- Ignoring discomfort: Pain, rubbing, or numbness usually means the fit needs adjustment.
Correct placement, gradual wear, and proper adjustment help improve comfort and support better long-term use.
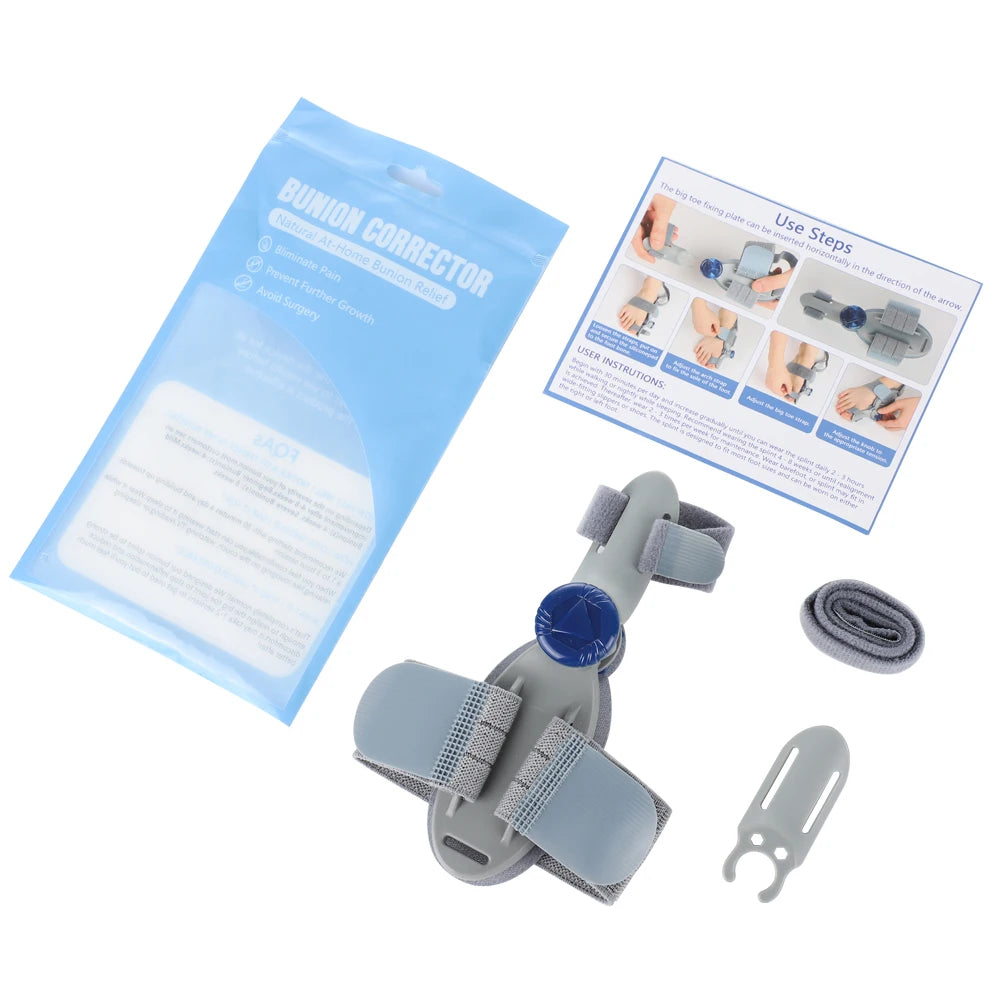
Toe alignment adjustment with a left right foot bunion corrector See it in action
Real-Life Use Cases: One Foot vs Both Feet Correction
Single bunion vs dual bunions
If only one foot has a bunion, choosing a single foot-specific corrector can provide targeted support without purchasing unnecessary accessories.
For people with bunions on both feet, a matched left and right pair may provide more balanced support because each device is designed for the anatomy of its corresponding foot.
Preventive use vs corrective use
Some users choose to wear support on both feet even when only one bunion causes noticeable discomfort. This may help maintain balance between both feet during daily activities.
However, the ideal approach depends on individual foot structure, comfort needs, and professional guidance when symptoms are significant.
Mild vs advanced bunions
Mild bunions often pair well with flexible correctors designed for comfort and everyday support. More advanced bunions may require stronger stabilization options or evaluation from a foot specialist.
A bunion corrector should support your routine—not create additional discomfort. Selecting the right design for your situation improves the chance of consistent use.
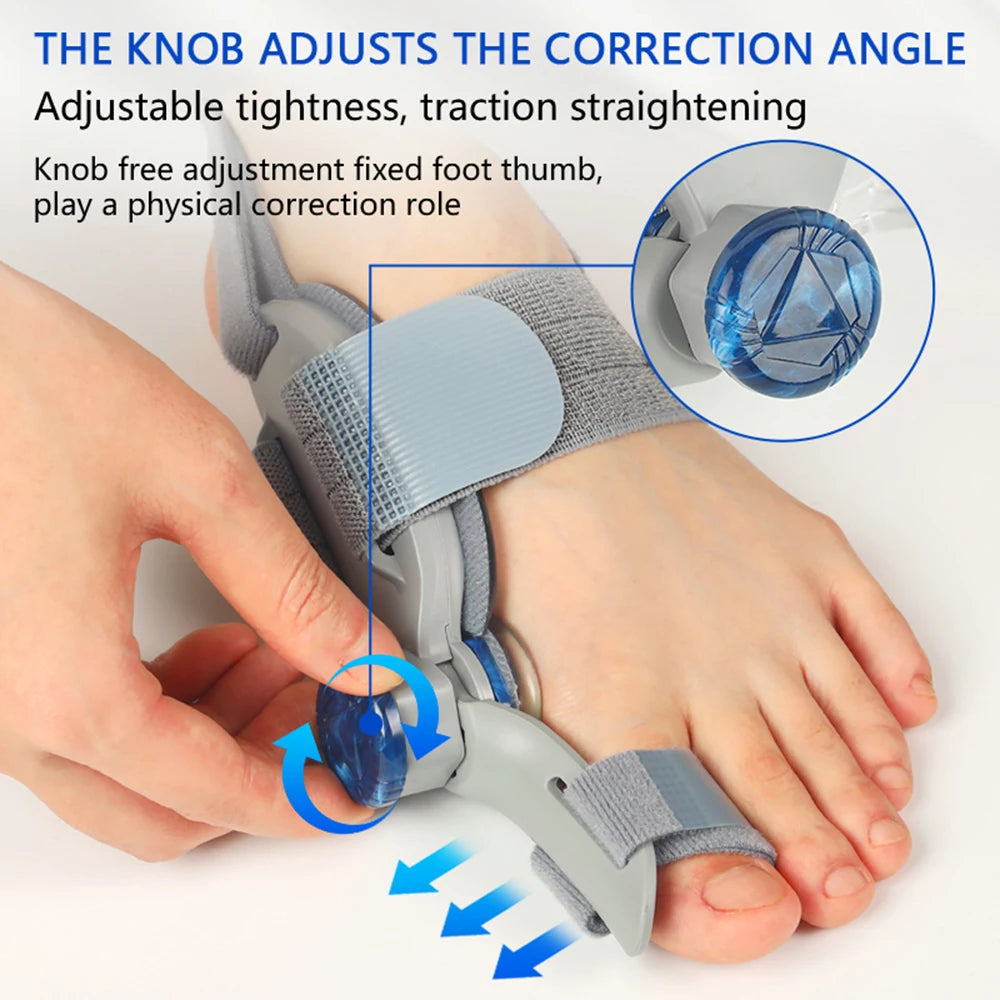
Left right foot bunion corrector for confident daily wear See it in action
Quick Decision Guide: Which Bunion Corrector Should You Choose?
Choosing the right bunion corrector becomes much easier when you match the device to your foot condition, support needs, and daily routine. Use this quick checklist to narrow down the best option before purchasing.
Decision matrix by foot and severity
- Left foot bunion: Choose a left-foot bunion corrector designed for that side’s alignment direction.
- Right foot bunion: Choose a right-foot bunion corrector with the matching support structure.
- Bunions on both feet: Select a left and right pair for balanced support.
- Mild discomfort: Consider a flexible or adjustable corrector for everyday comfort.
- More advanced alignment concerns: A structured splint may provide stronger positioning support.
Left vs right cheat sheet
| Situation | Recommended Choice | Why |
|---|---|---|
| Bunion on left foot only | Left bunion corrector | Matches the foot-specific alignment direction |
| Bunion on right foot only | Right bunion corrector | Provides the correct support angle and positioning |
| Bunions on both feet | Left + right pair | Allows each foot to receive customized support |
| Unsure about fit | Adjustable design | Provides more flexibility when selecting size and comfort level |
The most important buying decision is choosing a device that matches your foot. The correct orientation, proper sizing, and consistent wear schedule all work together for better comfort.
Frequently Asked Questions
Can left and right bunion correctors be swapped?
No. Left and right bunion correctors are usually designed differently to match the natural shape and movement direction of each foot. Swapping sides may place straps, hinges, or pressure points incorrectly and reduce comfort.
Are all bunion correctors foot-specific?
No. Some universal bunion correctors are designed to fit either foot, while others are made specifically for the left or right side. Foot-specific designs often provide a more customized fit because they follow the anatomy of each foot.
Should I buy one bunion corrector or a pair?
If only one foot has a bunion, a single corrector may be enough. If both feet experience bunion discomfort or alignment concerns, a matched pair can provide more balanced support.
How do I measure my foot for the correct size?
Measure the width of your forefoot, check the bunion area circumference, and compare your measurements with the manufacturer’s sizing guide. A proper fit should feel secure without creating excessive pressure or irritation.
Do universal bunion correctors work as well as left- and right-specific models?
Universal designs can be convenient and may work well for some users, especially when flexibility is the priority. However, left- and right-specific correctors are designed to match each foot’s structure and may provide a more personalized fit.
Can I wear a bunion corrector while walking or sleeping?
It depends on the design. Flexible correctors may be suitable for walking with comfortable footwear, while structured splints are often preferred during rest or sleep. Always follow the product instructions and adjust wear time based on comfort.
What happens if I order the wrong foot?
A wrong-foot corrector may feel uncomfortable, sit incorrectly, or apply pressure in the wrong direction. Check the product label before use and choose the correct left or right version whenever possible.
How long should I wear a bunion corrector each day?
Wear time depends on the device type and your comfort level. Many users start with shorter periods and gradually increase usage as their feet adjust. Consistency is usually more important than wearing the corrector for long periods immediately.
Related Guide: Hallux valgus toe corrector for different lifestyles













