

Why Is My Camping Stove Boiling Slowly? (Quick Diagnosis Framework)
If you're wondering, "Why is my camping stove boiling slowly?" , the answer is usually a combination of reduced heat output, lost heat, or poor heat transfer instead of a single mechanical failure. Before replacing your stove, identify whether the problem comes from the fuel system, your cooking setup, or outdoor conditions. A quick diagnosis can often restore normal boil times in just a few minutes.
Most slow-boiling camping stove problems fall into four categories:
- Fuel-related issues: Low canister pressure, incorrect fuel, nearly empty fuel canister, or poor cold-weather performance.
- Environmental factors: Wind, freezing temperatures, rain, or high altitude reducing combustion efficiency.
- Stove condition: Dirty burner ports, clogged jets, worn seals, or neglected maintenance restricting gas flow.
- Cookware efficiency: Thin pots, warped bases, oversized cookware, or cooking without a lid causing unnecessary heat loss.
Understanding which category matches your symptoms makes camping stove troubleshooting much faster and helps you avoid replacing parts that are still working properly.
Quick Symptom → Likely Cause → Fast Fix
| Symptom | Most Likely Cause | Try This First |
|---|---|---|
| Weak blue flame | Low fuel pressure or cold canister | Warm the canister safely or replace it with a full one. |
| Yellow or uneven flame | Dirty burner ports or clogged jet | Clean the burner and inspect for debris. |
| Strong flame but slow boiling | Wind or poor cookware efficiency | Use a windshield, lid, and flat-bottom pot. |
| Poor performance only in winter | Cold-weather fuel limitations | Use fuel designed for low temperatures or warm the canister before use. |
| Slow boiling at high elevation | Reduced oxygen for combustion | Shield the flame and allow extra cooking time. |
Where Should You Start Troubleshooting?
- Look at the flame. A steady blue flame usually indicates proper combustion, while a weak, yellow, or sputtering flame points to fuel delivery or burner issues.
- Check for wind. Even a moderate breeze can dramatically increase boil times by carrying heat away from the cookware.
- Inspect your fuel. Confirm the canister isn't nearly empty and is appropriate for the current temperature.
- Examine the burner for dirt, grease, or blocked ports.
- Finally, evaluate your cookware to ensure it transfers and retains heat efficiently.
Slow Boiling Camping Stove Fixes to Cook Faster Anywhere
⏱ 6 min read — Waiting 10 minutes or more for water to boil can quickly turn an enjoyable camping trip into a frustrating one. Fortunately, most slow boiling camping stove issues are easy to solve with better setup, simple maintenance, and smarter cooking techniques. This guide shows you how to diagnose the problem quickly and improve stove efficiency almost anywhere.
Does your stove look hot, yet your food barely cooks? That's often a sign that valuable heat is escaping before it reaches the pot. Wind, dirty burners, low fuel pressure, and inefficient cookware can all increase boil time even when the flame appears normal.
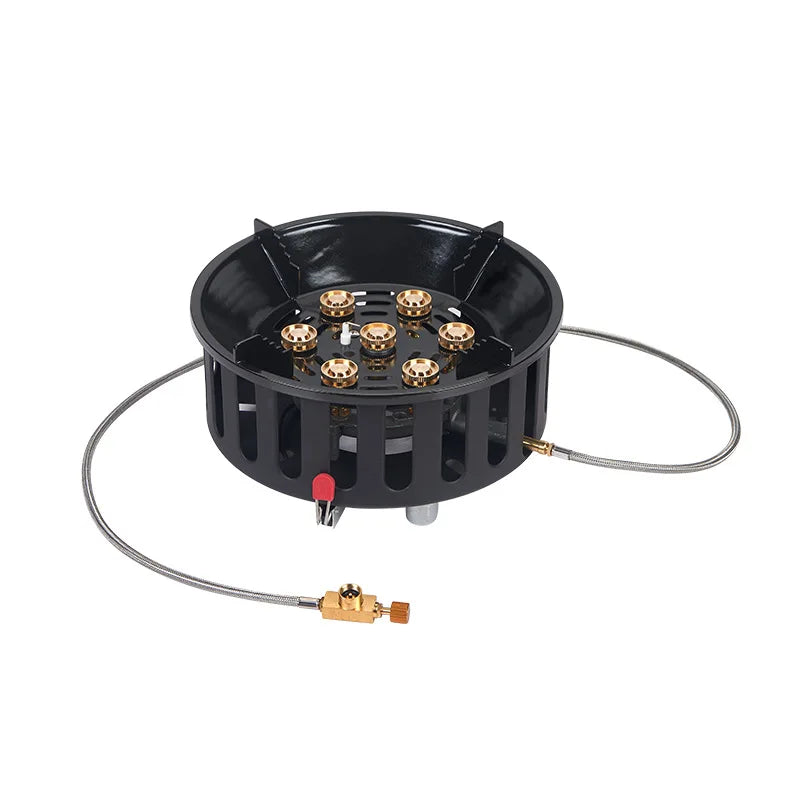
Slow boiling camping stove problems solved for fast camping meals — See it in action
Common Reasons Your Camping Stove Has a Weak Flame or Low Heat Output
A slow boiling camping stove is rarely caused by a single issue. The most effective approach is to eliminate the most common causes first before assuming the stove needs repair or replacement.
1. Low Fuel Pressure or Incorrect Fuel Type
Fuel pressure has the greatest influence on flame strength. Canister stoves naturally lose pressure in cold weather, while liquid fuel stoves require proper priming to reach full output. Using the wrong fuel or a nearly empty canister can also reduce combustion efficiency.
Common signs:
weak flame, slow boil times in cold weather, inconsistent heat output.
Quick fix:
use a full canister, warm the fuel safely, or switch to fuel designed for colder conditions.
2. Wind Exposure Reduces Effective Heat
Wind doesn't just push the flame sideways—it strips heat away before it reaches the cookware. Even a light breeze can noticeably increase fuel consumption and boil time.
Common signs:
flame appears normal but water heats slowly outdoors.
Quick fix:
use a windshield or position the stove behind a natural windbreak while maintaining adequate ventilation.
3. Clogged Burner or Poor Maintenance
Dust, soot, grease, insects, and corrosion can partially block burner ports or jets, reducing airflow and producing uneven combustion. Regular cleaning helps maintain consistent heat output throughout the camping season.
Common signs:
yellow flames, sputtering, uneven burner pattern.
Quick fix:
clean burner ports carefully and inspect the jet for obstructions.
4. Cold Weather and Altitude Effects
Cold temperatures reduce fuel vaporization inside gas canisters, while high altitude decreases available oxygen for combustion. Both conditions can make an otherwise healthy stove feel underpowered.
Common signs:
performance drops only during winter trips or mountain camping.
Quick fix:
keep fuel warmer before use, protect the flame from wind, and expect slightly longer boil times at elevation.
5. Inefficient Cookware and Heat Loss
Cookware affects cooking efficiency as much as burner output. Thin aluminum pots, warped bases, oversized cookware, and cooking without a lid allow valuable heat to escape instead of transferring into the water.
Common signs:
strong flame with disappointing cooking performance.
Quick fix:
choose a flat-bottom pot that matches the burner diameter and always cook with a lid when boiling water.
6. Regulator, Valve, or Seal Problems
If fuel pressure, weather, cookware, and burner cleanliness all check out, inspect the stove's regulator, control valve, and seals. Worn O-rings, damaged regulators, or small gas leaks can restrict fuel flow and produce a permanently weak flame.
Common signs:
consistently low heat despite a full fuel canister and clean burner.
Quick fix:
inspect seals for wear, verify valve operation, and replace damaged components according to the manufacturer's recommendations.
How to Make a Camping Stove Boil Faster (Proven Fixes That Work)
If your stove lights normally but takes far too long to boil water, the goal is to improve combustion efficiency while minimizing heat loss. The following field-tested techniques are listed from the quickest improvements to the changes that provide the biggest long-term gains.
1. Block Wind Around the Flame
Wind is one of the biggest reasons a camping stove performs poorly outdoors. Even a light breeze can push the flame away from the cookware and carry heat into the surrounding air instead of the pot.
Use a purpose-built windshield or position the stove behind a natural barrier such as a rock or log while maintaining proper ventilation. Shielding the burner often produces the fastest improvement in boil time. Learn more about wind protection strategies .
2. Optimize Fuel Pressure and Warm the Fuel
Cold fuel canisters generate lower pressure, resulting in a weaker flame. Before cooking, keep the canister in a jacket pocket or sleeping bag so it reaches a moderate temperature. Never expose fuel to direct flame or excessive heat.
If you regularly camp in freezing conditions, consider a liquid-fuel stove or cold-weather gas blend designed for low temperatures. See a fuel type comparison guide for more information.
3. Adjust Flame to Match the Pot Size
More flame does not always mean faster cooking. Flames extending beyond the sides of the pot waste fuel instead of heating the water. Adjust the burner until the flame remains concentrated beneath the cookware for the best balance of speed and efficiency.
4. Choose Heat-Efficient Cookware
Cookware plays a major role in cooking performance. Flat-bottom pots with good thermal conductivity distribute heat more evenly than thin or warped cookware. A pot that closely matches the burner diameter also captures more usable heat.
For maximum efficiency, use clean cookware with a dry exterior and explore additional recommendations in this camping cookware guide .
5. Reduce Heat Loss with Lid Usage
Cooking with a lid traps steam and reduces the amount of heat escaping into the air. This simple habit can noticeably shorten boil times while lowering fuel consumption, especially when heating water for coffee, dehydrated meals, or pasta.
For even better results, combine a lid with wind protection and properly sized cookware instead of relying on higher flame settings alone.
Step-by-Step Method to Fix a Slow Boiling Camping Stove
Follow this troubleshooting process one step at a time instead of changing multiple variables at once. After completing each step, boil the same amount of water again to see whether performance improves before moving to the next check.
Step 1: Check Flame Quality
Start by observing the burner while the stove is running. A healthy flame should be steady, mostly blue, and evenly distributed around the burner.
- Strong blue flame: Fuel delivery is likely working correctly.
- Weak or sputtering flame: Suspect low fuel pressure, a clogged burner, or regulator issues.
- Yellow flame: Check for dirty burner ports or restricted airflow.
Step 2: Test Fuel and Pressure
Next, verify that the fuel system is not limiting performance. Replace nearly empty canisters, confirm you're using the correct fuel for your stove, and consider ambient temperature if you're camping in cold weather.
If conditions are below freezing, allow the canister to warm gradually before cooking and test the stove again.
Step 3: Eliminate Wind
Before assuming there's a mechanical problem, shield the burner from wind. Even a properly functioning stove can lose a significant amount of heat when exposed to moving air.
Position a windshield or natural barrier around the stove while leaving enough space for safe airflow and ventilation. Retest the boil time after making this single change.
Step 4: Clean Burner and Jet
If the flame remains weak or uneven, inspect the burner for dirt, soot, grease, or blocked ports. Clean the burner according to the manufacturer's instructions and make sure the jet is free from debris.
Routine maintenance helps prevent recurring performance problems. For additional care instructions, see this maintenance guide .
Step 5: Test with Efficient Cookware
Finally, test the stove using a clean, flat-bottom pot with a properly fitting lid. Ensure the cookware is centered over the burner so the flame contacts the base evenly instead of extending around the sides.
If boil times improve with different cookware, the original pot—not the stove—was reducing cooking efficiency.
Camping Stove Maintenance Checklist Before Replacing the Stove
Before purchasing a new camping stove, complete this maintenance checklist. Many low-heat problems can be solved with basic cleaning, proper fuel selection, or minor component inspection.
- Check whether the fuel canister is full and appropriate for current weather conditions.
- Inspect the burner ports and jet for dirt, grease, or carbon buildup.
- Confirm the flame burns steadily and appears mostly blue.
- Inspect seals, O-rings, and fuel connections for wear or damage.
- Verify the control valve opens and adjusts smoothly.
- Ensure cookware sits flat and is correctly centered over the burner.
- Use wind protection whenever cooking in exposed locations.
- Clean the stove after trips to prevent debris from affecting future performance.
If you've completed every item on this checklist and your stove still produces consistently weak heat with a full fuel supply, it may be time to replace worn components or consider a new stove designed for your typical camping conditions.
Expected Boil Times by Stove Setup and Outdoor Conditions
Actual boil times vary depending on stove design, weather, fuel type, altitude, and cookware. The comparison below provides realistic benchmarks to help you determine whether your camping stove is operating normally or losing efficiency.
Poor Setup Example
| Condition | Typical Boil Time (1 L Water) | Primary Reason |
|---|---|---|
| Windy campsite with no windshield | 8–12 minutes | Significant heat loss around the pot |
| Cold fuel canister | 7–10 minutes | Reduced gas pressure and weaker flame |
| Dirty burner | 6–10 minutes | Restricted airflow and uneven combustion |
| Thin pot without lid | 7–11 minutes | Poor heat retention and transfer |
Optimized Setup Example
| Condition | Typical Boil Time (1 L Water) | Efficiency Advantage |
|---|---|---|
| Windshield in place | 3–5 minutes | More heat reaches the cookware |
| Properly pressurized fuel | 3–5 minutes | Stable, consistent flame output |
| Clean burner and jet | 3–5 minutes | Maximum combustion efficiency |
| Flat-bottom pot with lid | 3–5 minutes | Improved heat transfer and reduced heat loss |
Best Way to Boil Water Faster While Camping (Field-Tested Setup Tips)
Position the Stove on a Stable, Sheltered Surface
Choose firm, level ground whenever possible and avoid exposed ridges or open areas where wind is strongest. A stable setup keeps the cookware centered over the flame and minimizes unnecessary heat loss.
Use a Compact Windshield Correctly
A lightweight windshield can dramatically improve camping stove efficiency by directing more heat toward the pot. Leave enough space around the burner for adequate airflow and never completely enclose the fuel canister on gas stoves.
Match the Pot to the Burner Size
The most efficient setup pairs the cookware with the burner diameter. Pots that are much larger than the flame waste heat around the edges, while very small pots fail to capture the burner's full heat output.
Warm the Fuel System in Cold Weather
If temperatures are near or below freezing, allow the fuel canister to warm gradually before cooking. Starting with properly pressurized fuel helps maintain a stronger, steadier flame throughout the cooking process.
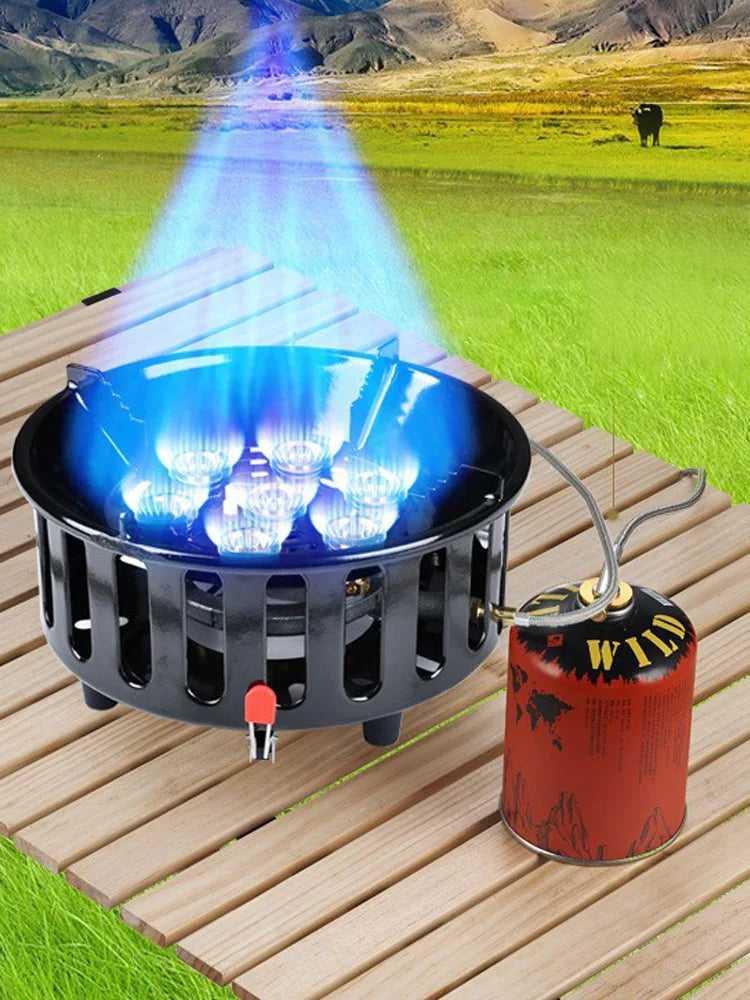
Eliminate uneven heat distribution for faster boiling — See it in action
Mini FAQ — Fast Answers for Frustrated Camp Cooks
Why does my camping stove boil slowly in cold weather?
Cold temperatures reduce pressure inside gas canisters, resulting in a weaker flame and longer boil times. Warming the fuel canister to a moderate temperature before use, protecting the stove from wind, and using fuel designed for cold-weather camping can noticeably improve performance.
Does altitude make water boil faster or slower on a camping stove?
Water reaches its boiling point at a lower temperature as elevation increases, but camping stoves also have less oxygen available for combustion. In practice, water may begin boiling sooner while food often requires longer cooking times because the boiling temperature is lower.
How often should I clean a camping stove burner?
Inspect the burner before every trip and clean it whenever you notice soot, debris, uneven flames, or reduced heat output. For frequent campers, a thorough cleaning every few outings helps maintain reliable performance and reduces the chance of clogged burner ports.
When should I replace my camping stove instead of repairing it?
Consider replacement if the stove continues producing weak heat after cleaning the burner, confirming fuel quality, inspecting seals and valves, and eliminating environmental factors such as wind. Persistent regulator failures, damaged fuel connections, or unavailable replacement parts are also good reasons to upgrade.
Can wind double camping stove boil time?
Yes. A moderate breeze can dramatically reduce heat reaching the cookware, especially when cooking without a windshield. Using proper wind protection is one of the simplest ways to improve camping stove efficiency and reduce fuel consumption.
Why is my camping stove flame weak even with a full fuel canister?
A full canister does not always guarantee strong performance. Cold temperatures, clogged burner ports, faulty regulators, damaged seals, or an incorrect fuel blend can all reduce flame strength despite having plenty of fuel available.
How do I know if my burner is clogged?
Common signs include yellow or uneven flames, sputtering, reduced heat output, or flames that burn unevenly around the burner head. Cleaning the burner and jet usually restores normal airflow if debris is the cause.
Does pot material affect boiling speed?
Yes. Flat-bottom cookware made from materials with good thermal conductivity transfers heat more efficiently than thin or warped pots. Using a properly fitting lid further improves performance by reducing heat loss.
Related Guide: Safe Outdoor Gas Stove Use Step by Step for Worry-Free Cooking













