
Adhesive UV Light Buying Guide: Wavelengths, Power & Best Uses
Choosing an adhesive UV light based only on advertised wattage or price is one of the most common purchasing mistakes. A powerful lamp cannot reliably cure an adhesive if its emitted wavelength does not activate the adhesive's photoinitiator system. Meanwhile, a lower-powered UV LED device with the correct wavelength and sufficient delivered irradiance may produce more consistent results.
Whether you are evaluating UV adhesive curing equipment for glass bonding, electronics assembly, plastic components, industrial manufacturing, or professional eyelash extensions, the same fundamental principle applies: the curing light must match the adhesive formulation and application requirements.
Five technical factors determine whether a curing system is suitable:
- Wavelength compatibility, typically expressed in nanometers (nm).
- Irradiance at the adhesive surface, measured in mW/cm².
- Total curing dose, measured in mJ/cm².
- Working distance and uniformity of light distribution.
- Adhesive chemistry, thickness, and substrate characteristics.
This buying guide explains how UV adhesive curing works, compares 365nm, 385nm, 395nm, and 405nm curing lights, evaluates UV LED technology against traditional mercury lamps, and provides practical selection criteria for different applications. It also covers troubleshooting, exposure safety, and the specifications worth verifying before purchasing.
What Is an Adhesive UV Light and How Does It Work?
An adhesive UV light is a specialized light source designed to initiate curing in compatible light-reactive adhesive formulations. These systems emit ultraviolet or near-violet light at wavelengths that activate chemical compounds called photoinitiators.
When photoinitiators absorb suitable light energy, they initiate chemical reactions that transform a liquid adhesive into a solid or crosslinked bonding material. Depending on the formulation, this process can occur rapidly under controlled exposure conditions.
Unlike conventional adhesives that rely primarily on moisture, heat, solvent evaporation, or chemical mixing, UV-curable adhesives require an appropriate light source to initiate their specified curing reaction.
How UV Light Activates Adhesive Photoinitiators
Photoinitiators are compounds incorporated into light-curable adhesives to initiate polymerization when exposed to suitable wavelengths.
The general process involves three stages:
- Light absorption: The photoinitiator absorbs photons within its effective absorption range.
- Reaction initiation: The activated photoinitiator generates reactive species, such as free radicals or cations, depending on the chemistry.
- Polymerization and curing: Reactive components form polymer chains or crosslinked networks that develop the adhesive's intended properties.
The critical distinction is that not every photoinitiator responds equally to every wavelength. An adhesive optimized for 365nm exposure may cure poorly under a 405nm source unless its formulation also responds adequately at that wavelength.
Successful UV adhesive curing therefore depends on matching the light source's spectral output to the adhesive manufacturer's specified activation requirements.
UV Adhesive Light vs. Conventional Adhesive Curing
UV-curable adhesives offer several advantages over traditional curing methods, particularly when controlled processing speed and precise exposure are important.
| Adhesive curing method | Activation mechanism | Primary advantage | Important limitation |
| UV light curing | Photoinitiator activation | Controlled, potentially rapid curing | Requires compatible chemistry and light access |
| Moisture curing | Reaction with environmental or surface moisture | No dedicated light source required | Humidity and bond geometry affect curing |
| Heat curing | Thermal activation | Suitable for selected structural formulations | May expose components to elevated temperatures |
| Two-part curing | Reaction between mixed components | Can cure without optical access | Mixing accuracy and working time matter |
UV curing is especially attractive when the bonding area can be illuminated consistently. However, opaque components, deep adhesive layers, and shadowed interfaces can limit the effectiveness of light-only curing.
Common Applications of UV Adhesive Curing Lights
UV curing technology supports a wide range of specialized applications:
- Glass bonding: Joining transparent glass components using compatible optical adhesives.
- Electronics assembly: Precision bonding, coating, and encapsulation where controlled exposure is required.
- Plastic bonding: Joining compatible polymer substrates when adequate light transmission is available.
- Industrial manufacturing: Automated bonding and coating processes requiring repeatable curing conditions.
- Precision repairs: Small-scale applications using purpose-formulated UV-curable adhesives.
- Professional eyelash extensions: Specialized UV-assisted systems using compatible lash adhesive formulations and manufacturer-approved equipment.
These applications do not share identical equipment requirements. An industrial curing lamp suitable for electronics must not be assumed appropriate for use near a person's eyes.
365nm vs. 385nm vs. 395nm vs. 405nm: Which UV Wavelength Should You Choose?
The best UV wavelength for adhesive curing is the wavelength specified by the adhesive manufacturer. There is no universally superior choice among 365nm, 385nm, 395nm, and 405nm.
Each wavelength can support effective curing when paired with a compatible photoinitiator system and sufficient irradiance.
365nm UV Wavelength: Short-Wavelength UV LED Curing
365nm falls within the UVA spectrum and is commonly associated with UV-sensitive adhesive formulations and specialized industrial curing systems.
Its shorter wavelength can be useful for adhesives formulated to absorb effectively around 365nm. However, suitability depends on the complete formulation, not simply the presence of ultraviolet light.
When comparing 365nm equipment, verify spectral output, measured irradiance, working distance, and the adhesive's recommended curing schedule.
385nm UV Wavelength: An Alternative for Compatible Formulations
385nm UV LEDs are used in curing equipment designed for formulations that respond to this region of the UVA spectrum.
These systems can offer controlled light delivery and practical integration into manufacturing equipment.
However, a formulation specified for 365nm should not automatically be treated as compatible with 385nm. The manufacturer's technical data sheet should confirm the acceptable wavelength range.
395nm UV Wavelength: Common Commercial UV LED Applications
395nm LEDs appear in numerous commercial UV light products because the technology is widely available and can be incorporated into compact equipment.
Nevertheless, commercial popularity does not establish adhesive compatibility.
A 395nm lamp may deliver substantial optical output while failing to initiate adequate curing in an adhesive that requires a different spectral range.
Buyers should prioritize documented compatibility and measured curing performance over advertised brightness or wattage.
405nm UV Wavelength: Near-Violet LED Curing Systems
405nm is generally classified as violet visible light rather than ultraviolet light, although it is frequently marketed alongside UV LED curing equipment.
Some photoinitiator systems are specifically formulated to respond to 405nm exposure.
These systems may be appropriate for selected adhesives and industrial processes, but 405nm should never be assumed interchangeable with shorter UVA wavelengths.
Visible violet emission also does not establish that a lamp is safe to look at directly.
UV Wavelength Comparison Matrix: 365nm, 385nm, 395nm, and 405nm
| Wavelength | Spectrum position | Potential applications | Compatibility considerations | Buying guidance |
| 365nm | UVA | Selected industrial adhesives, glass bonding, precision curing | Requires compatible photoinitiator absorption | Verify irradiance and specified curing dose |
| 385nm | UVA | Compatible UV LED adhesive systems | Not automatically interchangeable with 365nm | Check the adhesive's approved spectral range |
| 395nm | UVA | Selected commercial UV LED curing applications | Common availability does not guarantee compatibility | Request wavelength and irradiance documentation |
| 405nm | Violet visible light | Adhesives formulated for near-violet activation | Requires an appropriate photoinitiator system | Confirm explicit 405nm compatibility |
Actual curing performance depends on the adhesive formulation, light-source spectrum, irradiance, exposure duration, optical access, and substrate characteristics. The matrix identifies selection considerations rather than guaranteed compatibility.
How to Match UV Wavelength to Your Adhesive
Before selecting equipment, obtain the adhesive's technical data sheet (TDS) and, where available, its recommended curing instructions.
- Identify the specified activation wavelength or wavelength range.
- Check whether the manufacturer recommends UV LED, broadband UV, or another light source.
- Review required irradiance and exposure conditions.
- Confirm the recommended adhesive thickness and bonding geometry.
- Verify that the proposed lamp can deliver the necessary light at the actual working distance.
If the documentation does not identify a compatible wavelength, request clarification from the adhesive manufacturer instead of choosing a lamp based on assumptions.
For professional lash applications, this compatibility check is particularly important because specialized UV eyelash adhesives require application-specific equipment and protective procedures.
UV Light Power Explained: Irradiance, Curing Dose, and Exposure Time
Advertised electrical wattage is not a reliable standalone measurement of UV curing capability. The more useful parameters are the optical energy reaching the adhesive and the duration of exposure.
What Is UV Irradiance (mW/cm²)?
Irradiance describes the optical power received per unit area, commonly expressed in milliwatts per square centimeter (mW/cm²).
For example, a measured irradiance of 100 mW/cm² means that each square centimeter of the measurement area receives 100 milliwatts of radiant power under the specified conditions.
Actual irradiance depends on the lamp's optical design, distance, beam profile, operating condition, and measurement method.
Measurements should be made using a calibrated radiometer appropriate for the light source's wavelength range.
What Is UV Curing Dose (mJ/cm²)?
UV curing dose, also called radiant exposure, represents the total optical energy delivered per unit area over time.
For constant irradiance, the calculation is:
UV dose (mJ/cm²) = Irradiance (mW/cm²) × Exposure time (seconds)
If irradiance varies during exposure, the total dose must instead be determined by integrating irradiance over time.
Although dose is important, an identical dose delivered at different irradiances does not necessarily produce identical curing results. Adhesive reaction kinetics, oxygen inhibition, temperature, and manufacturer-defined process limits can affect performance.
How to Calculate UV Adhesive Exposure Time
Consider a hypothetical adhesive requiring a radiant exposure of 1,000 mJ/cm² under specified conditions.
If the measured irradiance at the bonding surface is 100 mW/cm²:
Exposure time = 1,000 mJ/cm² ÷ 100 mW/cm² = 10 seconds
This is an illustrative mathematical example, not a universal curing-time recommendation.
Actual curing schedules must follow the adhesive manufacturer's specifications and be validated for the complete bonding process.
Why Working Distance Changes UV Curing Performance
Working distance is the separation between the light source and the adhesive surface.
Changing this distance can alter irradiance, beam diameter, and exposure uniformity.
Moving a lamp closer does not automatically improve results. Some optical systems have a designed focal distance or illumination pattern, and positioning outside that range can create uneven exposure.
Always evaluate irradiance at the actual adhesive position using the manufacturer's recommended setup.
Why Advertised Wattage Does Not Guarantee Faster Curing
Electrical input power, LED optical output, and irradiance at the adhesive are different measurements.
A lamp advertised at 50 watts does not necessarily deliver more usable curing energy than a lower-wattage device.
Optical efficiency, wavelength compatibility, thermal management, beam distribution, and working distance all influence usable output.
Buying takeaway: Compare measured irradiance at a documented distance, not wattage alone. A product with transparent optical specifications is easier to evaluate than one advertising only high electrical power.
UV LED Adhesive Curing Lights vs. Traditional Mercury UV Lamps
UV LED systems and conventional mercury vapor lamps both support light-activated curing, but their operating characteristics differ significantly.
UV LED Curing Technology: Advantages and Limitations
UV LEDs generally produce output concentrated within a narrower spectral region than traditional broadband mercury lamps.
They can switch on rapidly, support precise exposure control, and offer efficient operation when appropriately designed.
UV LED equipment may also require less routine lamp replacement, although optical output can decline over time.
Advantages include:
- Relatively narrow spectral output for compatible adhesives.
- Rapid switching and controlled exposure cycles.
- Potentially lower energy consumption.
- Compact equipment designs.
- Reduced unwanted heat compared with some conventional lamp systems.
Limitations include:
- Restricted wavelength compatibility.
- Potentially inadequate coverage for large bonding areas.
- Dependence on proper thermal management.
- Possible output degradation with extended operation.
Mercury Vapor UV Lamps: Advantages and Limitations
Traditional mercury UV lamps emit multiple spectral lines and, depending on their design, can provide broader wavelength coverage than a single-wavelength LED system.
This can be useful for certain adhesive formulations and established industrial processes.
However, these lamps may require warm-up periods, generate substantial heat, consume more energy, and need periodic replacement.
Mercury-containing equipment also requires appropriate handling and disposal procedures.
UV LED vs. Mercury UV Lamp: Buying Comparison Table
| Feature | UV LED curing light | Mercury UV lamp |
| Spectral output | Relatively narrow wavelength range | Multiple spectral lines or broader output |
| Startup | Typically rapid switching | May require warm-up |
| Energy efficiency | Potentially higher for matched applications | Depends on lamp and system design |
| Heat generation | Often lower unwanted radiant heat | Can generate substantial heat |
| Maintenance | Monitor LED output and cooling | Lamp replacement and reflector maintenance |
| Service life | Depends on manufacturer rating and operating conditions | Depends on lamp type and replacement schedule |
| Environmental considerations | No mercury in the LED emitter | Mercury handling and disposal requirements |
| Best suited for | Compatible, wavelength-specific processes | Processes requiring supported broadband or specialized output |
Which UV Curing Technology Is Better for Your Application?
Choose a UV LED system when the adhesive manufacturer confirms wavelength compatibility and the equipment provides sufficient irradiance, coverage, and exposure control.
Consider broadband or specialized industrial equipment when the adhesive requires a spectral distribution or production configuration that a compact LED device cannot provide.
Neither technology is universally superior. The correct choice depends on the complete curing process.
How to Choose an Adhesive UV Light for Different Applications
Different applications introduce distinct bonding, positioning, and safety requirements. A suitable curing light must support the actual working environment rather than simply provide UV emission.
UV Adhesive Lights for Eyelash Extensions
Professional UV-assisted eyelash extension systems are a specialized category of light-curing equipment.
These systems require compatible eyelash adhesive formulations, controlled illumination, appropriate client protection, and professional training.
Traditional eyelash extension adhesives often use moisture-reactive cyanoacrylate chemistry. They should not be assumed to cure properly under UV light. UV-assisted systems require formulations specifically approved for the relevant light-curing procedure.
A professional setup should prioritize:
- Documented adhesive and curing-light compatibility.
- Manufacturer-approved exposure procedures.
- Controlled light positioning.
- Proper natural-lash isolation.
- Appropriate eye shielding and skin protection.
- Professional training and manufacturer safety documentation.
Precision tweezers can support accurate extension handling, but they do not replace proper adhesive selection or curing validation.
Professionals researching related equipment and application techniques can explore the beauty and self-care educational guides.
Important: Industrial UV curing lamps are not appropriate substitutes for manufacturer-approved equipment intended for procedures near the eyes.
UV Lights for Glass Bonding
Glass bonding frequently uses transparent substrates that allow light to reach the adhesive interface.
However, different glass compositions, coatings, thicknesses, and treatments can change UV transmission.
Before purchasing a curing light, verify the glass transmission properties at the selected wavelength and confirm that the adhesive can cure throughout the bonding area.
Complex joints may require multiple exposure directions or specialized optical arrangements.
UV Adhesive Curing for Electronics Assembly
Electronics applications often require precise curing without exposing sensitive components to unnecessary heat or radiation.
Important purchasing criteria include beam uniformity, measurable irradiance, positioning accuracy, temperature control, and repeatability.
Shadowed areas beneath components can prevent complete curing. Where necessary, manufacturers may specify dual-cure adhesives that incorporate an additional curing mechanism.
UV Adhesive Lights for Plastics
Plastic substrates differ considerably in their optical transmission and chemical resistance.
Some plastics block substantial portions of UVA radiation, while others transmit selected wavelengths.
UV exposure may also contribute to discoloration or material degradation under certain conditions.
Evaluate the adhesive and plastic as a complete bonding system, including optical transmission, surface preparation, bond strength, and long-term material compatibility.
Industrial and Professional UV Adhesive Curing
Industrial curing systems must support consistent processing across repeated production cycles.
Equipment selection may involve:
- Production throughput and exposure cycle requirements.
- Uniform irradiance across the bonding area.
- Automated positioning and exposure controls.
- Calibration and output monitoring.
- Equipment shielding and operator protection.
- Documented process validation.
Industrial buyers should request detailed performance data and confirm that the proposed equipment meets their manufacturing requirements.
Hobbyist vs. Professional UV Adhesive Curing Equipment
Hobbyist equipment may be appropriate for small, noncritical projects when the adhesive manufacturer explicitly approves the light source and safe operating conditions.
Professional systems generally require stronger documentation, reliable controls, repeatable optical output, and application-specific validation.
For users exploring other consumer-oriented beauty technologies, the skin and beauty care devices collection provides a separate category of specialized equipment. Such devices should not be treated as substitutes for adhesive curing systems.
Professional lash artists evaluating UV-assisted workflows should compare dedicated equipment only after confirming the adhesive manufacturer's specified wavelength, exposure conditions, and safety requirements.
Adhesive UV Light Buying Guide: Specifications to Check Before Purchasing
A reliable purchasing decision begins with documented specifications. Marketing claims such as “high power,” “instant curing,” or “professional strength” are insufficient without supporting technical information.
1. Confirm the Compatible UV Wavelength
Match the curing light's emission spectrum to the adhesive manufacturer's recommended wavelength range.
Check whether the product identifies a specific wavelength, such as 365nm, 385nm, 395nm, or 405nm.
If the listing states only “UV LED,” the exact spectral output remains unverified.
2. Check Measured Irradiance and Optical Output
Look for measured irradiance in mW/cm² and documentation explaining where and how the measurement was obtained.
Useful information includes measurement distance, beam area, operating settings, and equipment calibration conditions.
A device with a clearly documented optical output is easier to assess than one listing only electrical wattage.
3. Evaluate Curing Area and Working Distance
Consider the size and geometry of the adhesive joint.
A narrow, focused beam may suit precision applications, while larger bonding areas may require broader or more uniform illumination.
Check the manufacturer's specified working distance and whether the device can maintain consistent positioning during use.
4. Choose the Right Power Source and Equipment Design
UV curing equipment may use USB power, rechargeable batteries, or mains electricity.
Portable designs can be convenient for small workstations, while production environments may require stable continuous power and automated controls.
Evaluate operating duration, output stability, charging requirements, and maintenance needs before selecting a system.
5. Review Build Quality, Controls, and Product Documentation
Useful equipment features may include exposure timers, adjustable positioning, output monitoring, protective shielding, and reliable heat management.
Request manufacturer documentation covering operating instructions, safety precautions, warranty terms, and any applicable equipment testing or certification.
Do not assume that a general certification or marketing label establishes compatibility with a particular adhesive.
Adhesive UV Light Commercial Comparison Table
The following matrix illustrates the specifications buyers should compare across equipment categories. It does not represent independently tested products.
| Equipment category | Wavelength | Irradiance | Power source | Working distance and curing area | Primary purchasing consideration |
| 365nm UV LED curing system | 365nm nominal | Verify model-specific measurement | Varies by model | Verify optical coverage and distance | Compatibility with 365nm-responsive adhesive |
| 385nm UV LED curing system | 385nm nominal | Verify model-specific measurement | Varies by model | Verify optical coverage and distance | Manufacturer-approved wavelength range |
| 395nm UV LED curing system | 395nm nominal | Verify model-specific measurement | Varies by model | Verify optical coverage and distance | Documented optical performance |
| 405nm LED curing system | 405nm nominal | Verify model-specific measurement | Varies by model | Verify optical coverage and distance | Explicit 405nm adhesive compatibility |
| Traditional mercury UV system | Multiple spectral lines, model-dependent | Verify spectral irradiance | Typically mains-powered | Depends on lamp and reflector design | Spectral coverage, heat, maintenance |
| Professional UV LED eyelash curing kit, TL02 | Not specified in supplied product information | Not specified | Not specified | Not specified | Verify adhesive compatibility and professional eye-safety requirements |
UV Adhesive Compatibility Checklist Before Buying
Use this checklist when comparing curing equipment:
- Confirm the adhesive's recommended wavelength range.
- Verify photoinitiator compatibility where documented.
- Identify the required curing dose and irradiance.
- Check the manufacturer's recommended exposure schedule.
- Confirm acceptable adhesive thickness.
- Evaluate substrate transparency and optical access.
- Check the required working distance and curing area.
- Request documented equipment output specifications.
- Review temperature limits and application-specific safety requirements.
- Confirm manufacturer support, maintenance guidance, and warranty coverage.
If a critical specification is unavailable, treat compatibility as unconfirmed rather than assuming that the equipment will work.
When to Choose a UV LED Adhesive Curing Light Kit
For professional lash technicians, a dedicated UV LED eyelash curing kit may offer a more application-focused setup than general-purpose industrial curing equipment.
One example is the Professional UV LED Eyelash Glue Curing Light Kit, listed under the Pinky Leem name with model designation TL02.
The supplied product information identifies the following features:
- Technology: UV LED.
- Intended application: Professional eyelash extension procedures.
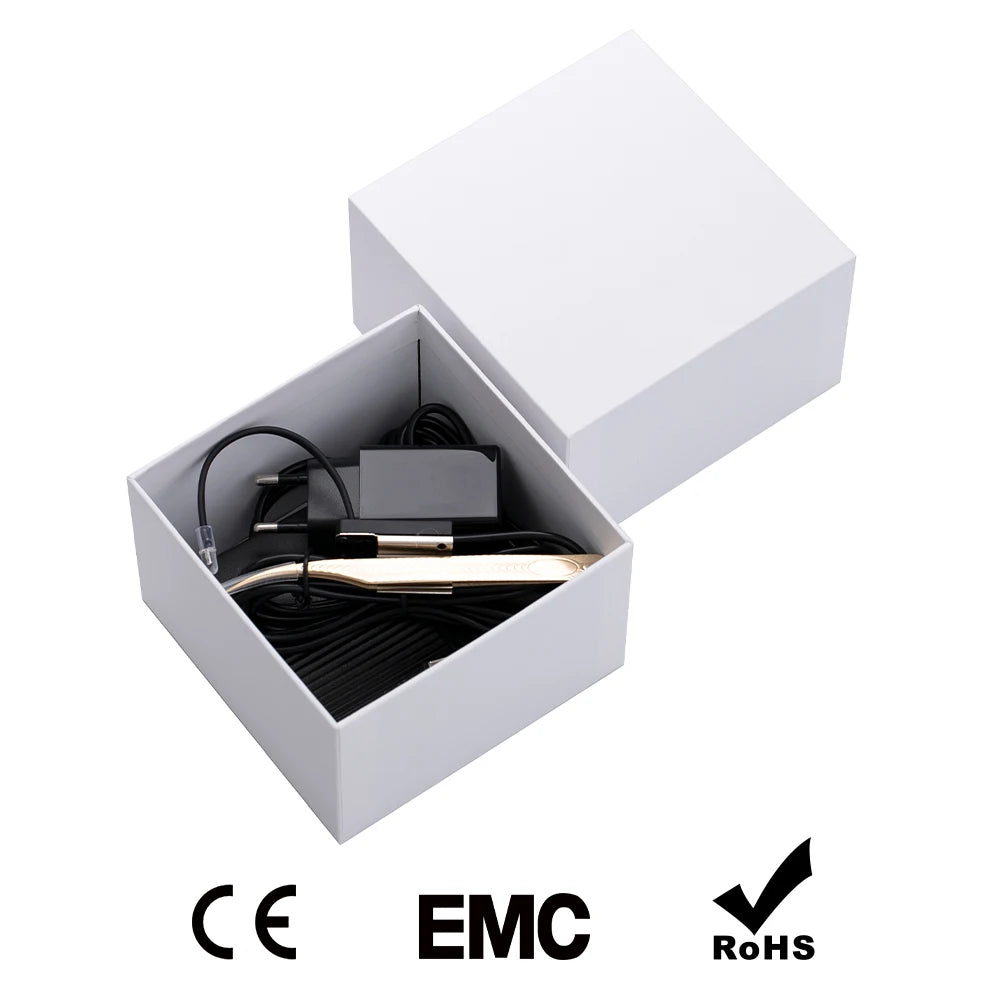
- Included tools: UV LED curing light system and precision tweezers, as described in the listing.
- Material: Plastic.
- Listed product weight: 0.5 kg.
- Quantity: One kit.
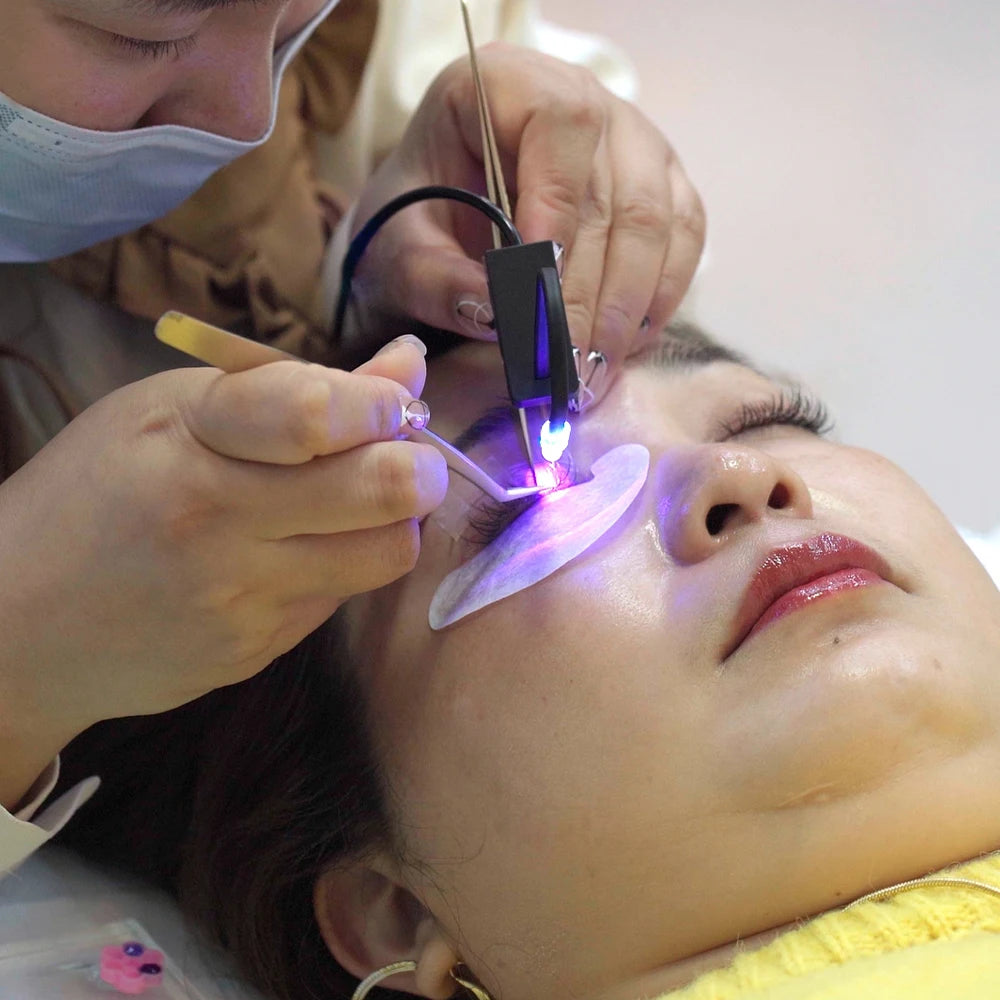
The kit is marketed to support controlled extension placement and a more efficient professional workflow. However, the supplied product description does not specify its exact emission wavelength, measured irradiance, curing dose, working distance, or detailed eye-protection requirements.
These missing specifications are important. Buyers should obtain the relevant technical and safety information and confirm compatibility with their chosen UV-curable eyelash adhesive before purchasing or using the equipment.
Review the UV LED lash curing kit and its listed accessories to determine whether it merits further compatibility evaluation for your professional setup.
How to Use an Adhesive UV Light for Reliable Curing
Even a compatible curing lamp can produce inconsistent results if the application process is poorly controlled.
The following workflow applies to general industrial and workshop bonding. Procedures near the eyes require separate, manufacturer-approved professional protocols and must not be improvised from industrial curing instructions.
Step 1: Read the Adhesive Technical Data Sheet
Identify the adhesive manufacturer's specified wavelength, irradiance, curing dose, exposure conditions, substrate requirements, and safety precautions.
Consult the safety data sheet (SDS) for chemical handling and exposure precautions.
If the technical data sheet does not provide sufficient curing information, request guidance from the manufacturer before proceeding.
Step 2: Prepare the Bonding Surface
Clean and prepare the bonding surfaces according to the adhesive manufacturer's instructions.
Remove incompatible contaminants, allow appropriate drying, and apply the recommended adhesive quantity.
Excessive adhesive thickness can reduce light penetration and compromise curing consistency.
Step 3: Position the UV LED Light Correctly
Set the light source at the manufacturer's recommended working distance and align the beam with the bonding interface.
Ensure that the intended curing area receives adequate exposure without relying on reflected or indirect light unless the process has been validated for those conditions.
Use appropriate shielding and exposure controls before activating the lamp.
Step 4: Perform a Controlled Exposure Test
For general bonding applications, test the curing process on representative samples before using it in production or critical assemblies.
Record the wavelength, measured irradiance, working distance, exposure time, adhesive thickness, and substrate configuration.
Evaluate the resulting cure using the manufacturer's recommended verification method.
For professional eyelash applications, follow the approved training and equipment protocol rather than adapting generic industrial exposure tests to a client.
Step 5: Inspect the Cured Adhesive
Inspect the bond for visible defects, incomplete coverage, unusual surface conditions, or other application-specific problems.
Where required, perform manufacturer-approved mechanical, chemical, or other cure-verification tests.
A surface that appears hard or dry does not necessarily prove that the adhesive has cured completely throughout its thickness.
Why UV Adhesives Sometimes Fail to Cure Properly
UV adhesive curing failures generally arise from incompatible chemistry, inadequate delivered light energy, poor optical access, unsuitable processing conditions, or a combination of these factors.
Opaque Substrates and Shadowed Bonding Areas
Light-curable adhesives require sufficient light to reach the reactive material.
Opaque substrates and shadowed joints can prevent adequate exposure, leaving some adhesive regions incompletely cured.
Possible solutions include changing the bonding geometry, illuminating from an accessible direction, or selecting a manufacturer-approved dual-cure formulation.
Adhesive Thickness and Uneven Light Distribution
Thick adhesive layers can absorb or scatter light before it reaches deeper regions.
Nonuniform illumination can also produce uneven curing across a joint.
Follow the specified bond-line thickness and confirm that the lamp delivers sufficient irradiance across the entire required area.
Oxygen Inhibition and Tacky Adhesive Surfaces
Some free-radical UV-curable formulations experience oxygen inhibition, in which atmospheric oxygen interferes with polymerization near the exposed surface.
This can produce a tacky surface even when portions of the adhesive have cured.
However, tackiness can also indicate inadequate exposure, an incompatible wavelength, or another formulation-specific issue.
Do not automatically increase exposure without identifying the cause and checking the manufacturer's instructions.
Why Higher UV Power Does Not Always Solve Curing Problems
Increasing lamp power cannot reliably correct a fundamentally incompatible wavelength or a bonding interface that light cannot reach.
Excessive exposure may also create unwanted heat or damage sensitive substrates.
Correct the underlying compatibility or process problem before considering changes to optical intensity.
UV Adhesive Light Troubleshooting: Common Problems and Practical Fixes
UV Adhesive Is Still Tacky After Curing
Check whether the adhesive is compatible with the lamp's wavelength and whether sufficient irradiance reaches the surface.
Review the specified exposure schedule and determine whether oxygen inhibition is relevant to the formulation.
Do not assume that additional exposure is always the correct solution.
The Adhesive Surface Cures but the Inside Remains Liquid
This may indicate excessive adhesive thickness, limited light penetration, substrate opacity, or inadequate exposure at the internal bonding interface.
Verify the manufacturer's permitted bond-line thickness and consider whether the application requires a specialized dual-cure adhesive.
UV Adhesive Bond Is Weak After Exposure
Weak bonding may result from poor surface preparation, unsuitable substrate compatibility, inadequate curing, incorrect joint geometry, or mechanical loading beyond the adhesive's intended capability.
Review the complete bonding process and validate bond strength using the appropriate manufacturer-recommended procedure.
UV Light Causes Excessive Heat
Investigate prolonged exposure, high irradiance, inadequate equipment cooling, and the thermal sensitivity of the adhesive and substrates.
Stop the process if unsafe temperatures or equipment behavior occur. Consult the equipment and adhesive manufacturers before changing operating conditions.
Curing Results Are Inconsistent
Check for changes in working distance, beam alignment, adhesive quantity, lamp condition, exposure timing, and surface preparation.
For repeatable professional processes, document the operating parameters and periodically verify optical output using appropriate measurement equipment.
UV Adhesive Curing Safety: Protecting Your Eyes and Skin
UV adhesive curing equipment must be treated as a potential optical radiation hazard. The level of risk depends on wavelength, irradiance, exposure duration, beam geometry, and the effectiveness of protective measures.
Can UV Adhesive Lights Damage Your Eyes or Skin?
Yes. UV exposure can harm the eyes and skin under certain conditions. UVA exposure is not inherently harmless, and intense violet light can also present optical hazards.
Direct viewing, reflected exposure, prolonged operation, and inadequate shielding can increase risk.
Do not stare into an active curing lamp or direct its beam toward unprotected people.
Choosing Appropriate UV Protective Equipment
Protective measures should be selected according to the equipment's documented emission spectrum and exposure characteristics.
- Use protective eyewear with documented spectral protection appropriate to the lamp.
- Install suitable shielding or barriers where required.
- Cover exposed skin and use compatible protective gloves when appropriate.
- Prevent unintended activation and accidental beam exposure.
- Follow the equipment manufacturer's operating and maintenance instructions.
Ordinary tinted glasses or unspecified safety glasses should not be assumed to provide adequate UV protection.
For general information about eye-focused beauty equipment, readers can explore the eye care educational blog and eye care devices collection. These resources are not substitutes for the curing equipment manufacturer's protective-equipment instructions.
Special Safety Precautions for UV Eyelash Adhesive Systems
UV-assisted eyelash extension procedures require particularly careful risk assessment because the equipment operates close to sensitive eye structures.
UV light must never be directed into a client's eyes. Appropriate manufacturer-approved eye shielding, controlled beam positioning, professional training, and adherence to the complete system instructions are essential.
Eye closure alone should not be assumed to provide sufficient protection.
Professionals must also consider adhesive-related irritation, sensitization, and other hazards identified in the adhesive's safety documentation.
The supplied information for the TL02 eyelash curing kit does not establish a particular optical safety classification or protective protocol. Those details should be obtained from the manufacturer before use.
Follow Manufacturer Safety Standards and Exposure Guidance
Relevant safety references include the American Conference of Governmental Industrial Hygienists (ACGIH) ultraviolet radiation exposure guidance, applicable occupational safety requirements, and IEC 62471 photobiological safety assessment principles for lamps and lamp systems.
IEC 62471 provides a framework for evaluating photobiological hazards; it does not automatically certify a particular device as safe.
For professional installations, a qualified safety specialist may be needed to assess exposure conditions and determine suitable controls.
Always consult current manufacturer documentation, applicable standards, and safety data sheets rather than relying on generic assumptions about UV LED equipment.
Frequently Asked Questions About Adhesive UV Lights
What wavelength UV light is best for curing adhesives: 365nm, 385nm, 395nm, or 405nm?
The best wavelength is the one compatible with the adhesive's photoinitiator system. 365nm, 385nm, and 395nm fall within the UVA spectrum, while 405nm is near-violet visible light. All can support curing in appropriately formulated adhesives. Verify the manufacturer's specified wavelength, irradiance, and exposure conditions before purchasing equipment.
How long does it take an adhesive UV light to cure UV-sensitive adhesive?
Curing time depends on wavelength compatibility, irradiance, required dose, adhesive thickness, substrate transmission, and working distance. For constant irradiance, dose equals irradiance multiplied by exposure time. This relationship supports exposure calculations but does not replace the manufacturer's validated curing schedule. Never assume a universal curing time for different adhesives.
Can any UV LED light cure UV adhesive, or does wavelength compatibility matter?
No. UV LED curing lights are not universally interchangeable. The light must emit wavelengths that activate the adhesive's photoinitiator system and deliver sufficient optical energy under the required conditions. A powerful but incompatible lamp may produce incomplete curing. Always verify the adhesive's technical data sheet before selecting equipment.
How long do UV LED adhesive curing lights last compared with traditional UV lamps?
UV LED systems can offer longer operating life and less frequent emitter replacement than some traditional mercury UV lamps. However, actual service life depends on thermal management, operating conditions, equipment design, and manufacturer ratings. Optical output may decline before the device stops functioning, so professional systems should be monitored and maintained appropriately.
Are adhesive UV lights safe for your eyes and skin, and what protective equipment should you use?
UV curing lights can present eye and skin hazards depending on exposure conditions. Use wavelength-appropriate protective eyewear, suitable shielding, and skin protection as required by the manufacturer. Professional eyelash curing systems require additional application-specific safeguards. Never assume that ordinary glasses, closed eyelids, or a compact lamp design guarantee adequate protection.
What should I check before buying an adhesive UV light?
Check the adhesive's recommended wavelength, measured irradiance, curing dose, working distance, beam coverage, power source, equipment controls, and manufacturer documentation. Evaluate substrate compatibility and application-specific safety requirements. For professional eyelash systems, confirm adhesive compatibility and approved protective procedures before choosing a curing kit.
Final Verdict: Choosing the Right Adhesive UV Light
The best adhesive UV light is not necessarily the most expensive model or the one advertising the highest wattage. It is the system that delivers the correct wavelength, sufficient measured irradiance, appropriate curing dose, and consistent exposure for the adhesive and application.
When comparing 365nm, 385nm, 395nm, and 405nm curing systems, prioritize the adhesive manufacturer's technical specifications rather than assuming one wavelength works for every formulation.
UV LED equipment can provide efficient, controlled curing for compatible applications, while traditional mercury UV systems remain relevant where broader spectral output or specialized industrial configurations are required.
Before purchasing, verify the adhesive's curing requirements, request missing optical specifications, assess working distance and beam coverage, and review the applicable safety documentation.
For professional lash artists considering a dedicated setup, the UV LED eyelash glue curing light kit with precision tweezers is an application-specific option worth evaluating, provided the manufacturer confirms compatibility with the intended adhesive and supplies adequate safety instructions.
Readers interested in broader professional beauty equipment and application guidance can also explore the hair, skin, and nail educational articles.
Bottom line: Choose adhesive UV curing equipment based on verified compatibility and measured performance—not marketing claims. The correct light, adhesive, exposure conditions, and protective procedures work together to support a reliable curing process.
Pillar Article: Eyelash Adhesive Curing Lamp: Professional UV LED Buying Guide