
Eyelash Extension Application: A Professional Step-by-Step Workflow
Professional eyelash extension application requires more than attaching extensions to natural lashes. Lash artists must balance accurate isolation, controlled adhesive application, consistent placement, client comfort, and natural lash protection. When these elements are not coordinated, technicians may experience slow application times, adhesive stickies, uneven styling, poor attachment, and inconsistent retention.
The solution is a repeatable application workflow built around one principle: Quality Before Speed. Rather than rushing through individual steps, professional lash artists can improve efficiency by organizing their workstation, selecting appropriate tools, refining isolation techniques, and minimizing unnecessary hand movements.
This guide explains how to apply eyelash extensions step by step, compare classic, hybrid, and volume techniques, understand conventional versus UV/LED-assisted adhesive curing, troubleshoot common application problems, and improve professional workflow without compromising safety.
Whether you are developing foundational lash skills or refining an established professional technique, the goal is to achieve predictable, comfortable, and consistent results through careful application.
What Is Professional Eyelash Extension Application?
Professional eyelash extension application is the process of attaching individual synthetic extensions or professionally created lash fans to suitable natural eyelashes using an appropriate professional adhesive. Each extension is selected according to the client's natural lash characteristics and desired appearance, then isolated, positioned, attached, and inspected to create a balanced result.
Unlike temporary strip lashes, which attach along the eyelid margin as one removable strip, individual eyelash extensions are attached to separate natural lashes. This requires specialized tools, professional training, appropriate adhesive handling, and careful attention to eye-area hygiene.
How Professional Eyelash Extension Application Works
A typical application involves the following sequence:
- Consult with the client and assess natural lash condition.
- Cleanse and prepare the natural eyelashes.
- Choose an appropriate extension style and create a lash map.
- Isolate one suitable natural eyelash.
- Pick up an individual extension or volume fan.
- Collect a controlled amount of compatible adhesive.
- Position and attach the extension to the isolated natural lash.
- Release the extension without disturbing the attachment.
- Inspect separation, direction, and bonding quality.
- Repeat systematically and perform a final quality inspection.
The Three Priorities of Quality Before Speed
A reliable professional workflow depends on three essential priorities.
1. Accurate isolation: Separate one suitable natural lash from surrounding lashes before attachment. Poor isolation can create stickies, discomfort, and unwanted tension on neighboring natural eyelashes.
2. Controlled adhesive attachment: Use an appropriate amount of adhesive for the selected formulation and application technique. Excessive adhesive can create buildup, while insufficient adhesive or poor contact can compromise attachment.
3. Consistent placement: Maintain suitable attachment positioning, direction, spacing, and extension weight. Consistency helps create balanced styling while protecting natural lash integrity.
What Defines a Consistent Professional Result?
A successful application should demonstrate clean individual attachments, appropriate extension weight, balanced direction, even styling, and comfortable separation between natural lashes.
Professional quality is not determined solely by how quickly an appointment is completed. It also depends on whether the extensions are suitable for the client's natural lashes, whether the application is comfortable, and whether the technician has completed the necessary final checks.
Professional Eyelash Extension Application Tools and Materials Checklist
Preparing the workstation before beginning reduces interruptions and unnecessary movements. A professional lash setup should include application instruments, preparation products, disposable supplies, appropriate lighting, and adhesive storage equipment.
Essential Lash Application Tools
| Tool or material | Primary purpose | Selection considerations |
| Isolation tweezers | Separate individual natural lashes. | Precise tips, comfortable grip, and controlled tension. |
| Pickup tweezers | Handle individual extensions or volume fans. | Tip alignment and suitability for the chosen technique. |
| Lash trays | Organize extension lengths, curls, and diameters. | Clear labeling and convenient access. |
| Lash adhesive | Attach extensions to natural eyelashes. | Professional suitability and manufacturer specifications. |
| Lash palette | Organize extensions during application. | Stable positioning and easy visibility. |
| Under-eye pads | Protect and separate lower lashes. | Appropriate fit and comfortable placement. |
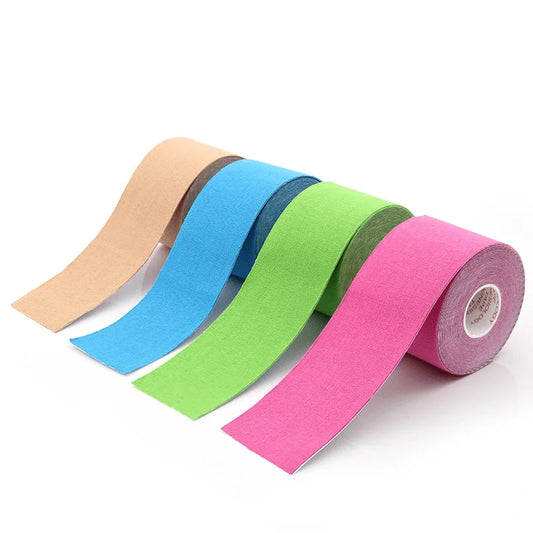
| Protective tape | Support lower-lash isolation when appropriate. | Skin compatibility and safe positioning. |
| Microbrushes | Apply preparation or removal products when indicated. | Single-client disposable use. |
| Lash cleanser | Remove makeup, oils, and surface residue. | Suitable for professional lash preparation. |
| Lint-free applicators | Support controlled product application. | Low-lint construction and disposable use. |
| Professional lighting | Improve visibility during isolation and placement. | Adjustable positioning and comfortable illumination. |
Choosing Professional Lash Extension Tweezers
Different tweezer shapes support different application techniques. Selecting an instrument that matches the technician's hand position and preferred working method can improve control.
| Tweezer type | Typical application | Advantages | Potential limitations |
| Straight | Natural lash isolation and separation. | Direct visibility and straightforward handling. | May feel less convenient for certain hand positions. |
| Curved | Extension pickup and placement. | Can provide convenient access to different lash angles. | Requires appropriate tip alignment and practice. |
| Boot | Volume fan pickup. | Broad contact area can support fan handling. | Not every design suits every fan technique. |
| Volume | Handmade or premade fan handling. | Designed for controlled fan pickup. | Requires suitable tension and precise grip. |
Before using a new tweezer, check that the tips close evenly, grip extensions securely, and do not require excessive hand pressure. Comfortable handling is especially important during longer appointments.
Understanding Eyelash Extension Adhesive
Many conventional professional lash adhesives use cyanoacrylate-based formulations. These adhesives bond through moisture-related polymerization, and their working characteristics vary according to formulation and environmental conditions.
Important selection factors include:
- Viscosity: Determines how the adhesive flows and how easily the technician controls pickup.
- Working characteristics: Influence how much time is available for positioning an extension.
- Environmental compatibility: Humidity and temperature can affect curing behavior.
- Professional suitability: Products should be specifically intended for the application and used according to their instructions.
- Storage requirements: Follow the manufacturer's guidance for temperature, container handling, and expiration.
Optional Equipment: UV/LED Lash Curing Systems
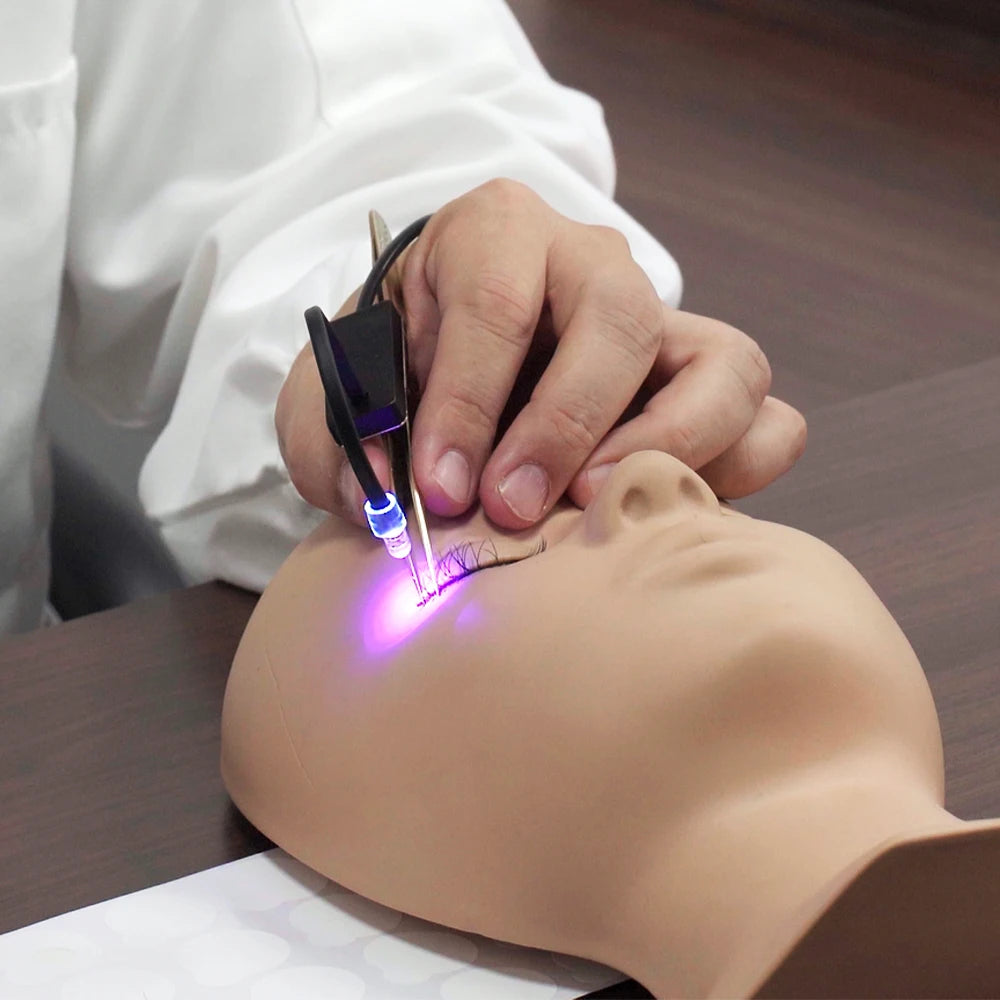
UV/LED-assisted lash application uses a compatible light-curable adhesive and a designated curing system. Unlike conventional cyanoacrylate adhesives, which generally rely on moisture-related curing, light-curable formulations require the specified light source and exposure conditions.
These systems are not interchangeable with conventional lash adhesives. Technicians must verify the adhesive's wavelength requirements, equipment compatibility, curing instructions, exposure protocol, and eye-protection requirements before use.
Consumables and Workstation Preparation Checklist
- Clean and disinfect reusable tools according to applicable requirements.
- Prepare fresh disposable applicators for the client.
- Check adhesive condition and expiration information.
- Arrange extension trays by length and curl.
- Prepare suitable under-eye protection.
- Confirm adequate lighting and ventilation.
- Keep clean and used equipment physically separated.
- Position frequently used tools within comfortable reach.
Technicians upgrading their workstation can explore professional eye care devices and related equipment when evaluating tools for their broader beauty setup.
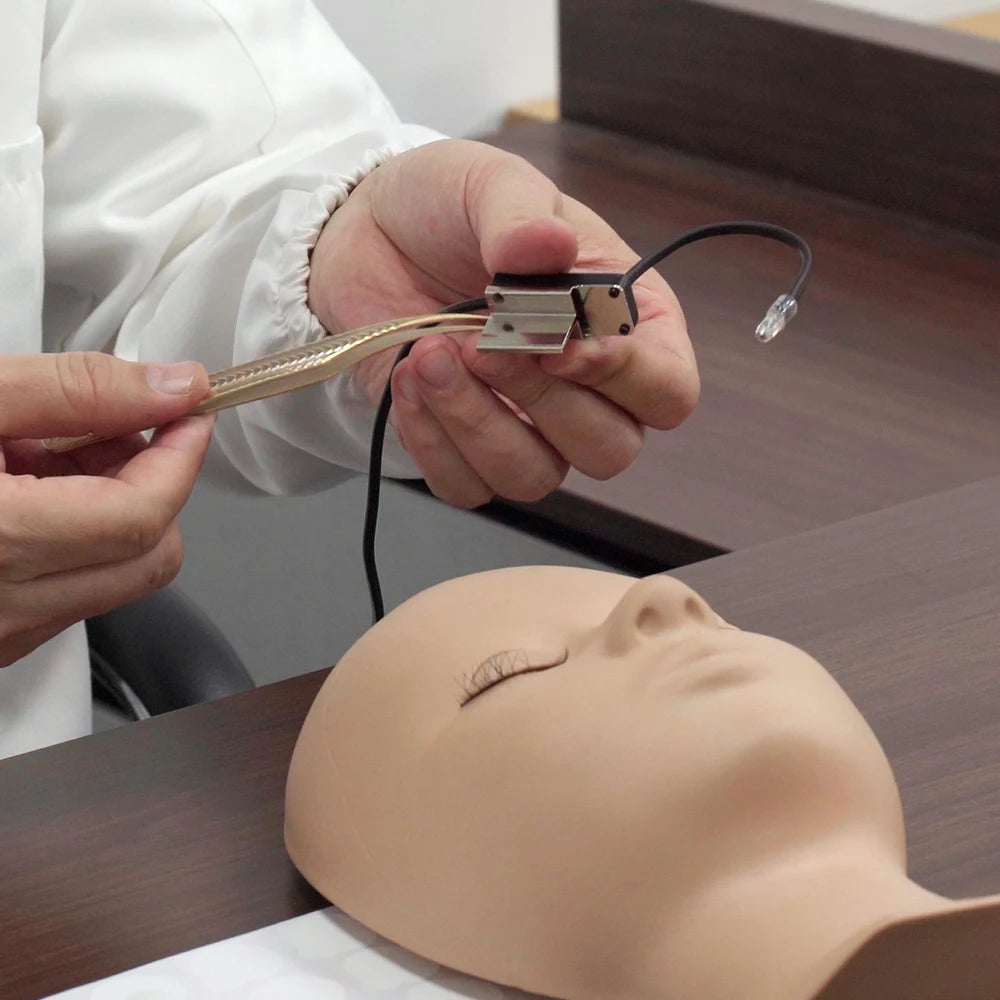
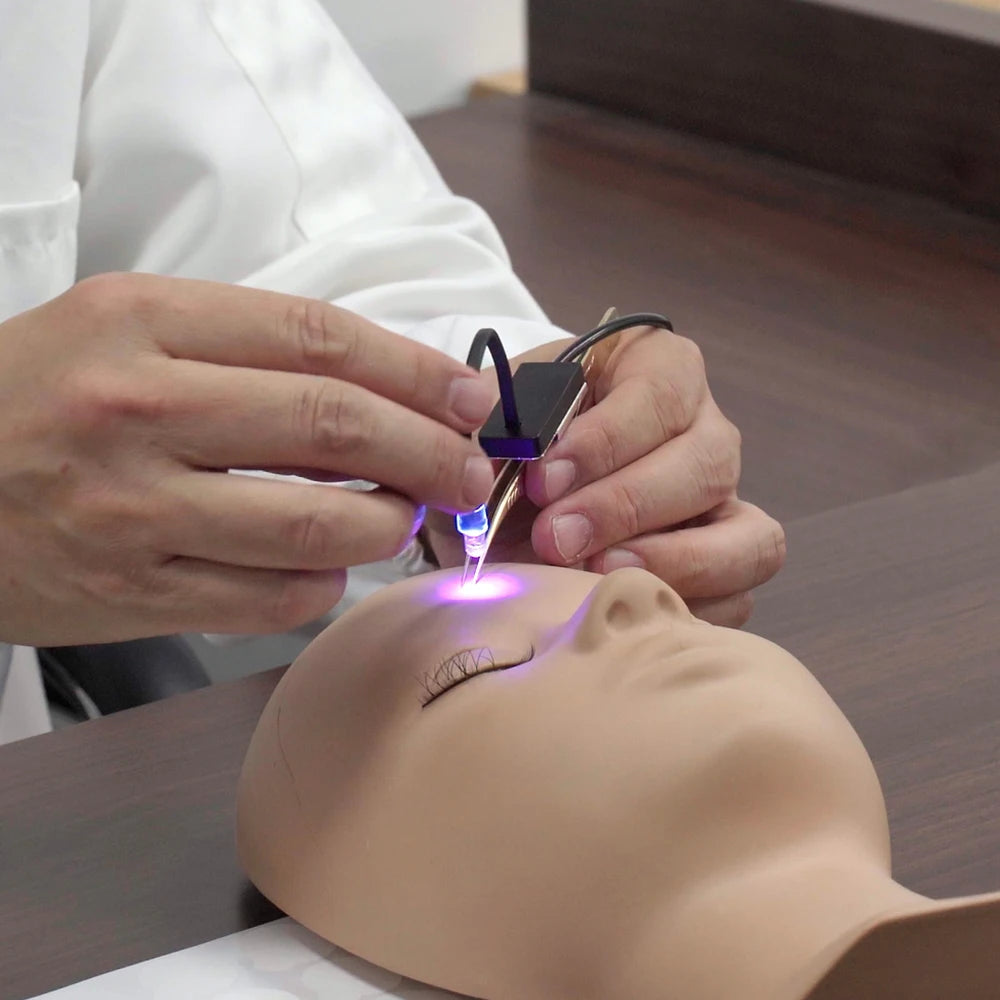
For technicians considering an alternative curing workflow, the Professional UV LED Eyelash Glue Curing Light Kit is one equipment option. Its listed specifications identify UV LED technology, model TL02, plastic construction, precision tweezers, and a listed weight of 0.5 kg. Confirm compatible adhesive requirements and appropriate eye-safety documentation before incorporating any curing system into professional services.
Client Consultation and Natural Lash Assessment Before Application
Professional application begins before the first extension is picked up. A consultation helps determine whether the service is appropriate and which styling approach is suitable for the individual client.
Reviewing Client Preferences and Eye Shape
Discuss the client's preferred appearance, previous extension experience, daily routine, and expectations. Some clients prefer subtle enhancement, while others want a more textured or fuller appearance.
Consider the overall eye area, natural lash direction, visible density, and styling preferences. Avoid assuming that one particular eye shape always requires the same lash map.
Assessing Natural Lash Health and Growth Cycle
Examine natural lash length, density, direction, and apparent condition. Natural eyelashes grow and shed through a biological cycle, so individual lashes may be at different stages of development.
Extension length, diameter, and weight should be appropriate for the individual natural lash. An extension that is too heavy or unsuitable can create unnecessary mechanical stress.
Contraindications, Sensitivities, and Patch-Test Policies
Postpone application when the client has an active eye infection, significant irritation, damaged eyelid skin, or another condition that makes the procedure unsuitable. Clients with known adhesive sensitivities or relevant allergies should discuss the risks before treatment.
Follow the adhesive manufacturer's instructions and applicable professional standards regarding sensitivity testing. A negative patch test does not guarantee that an allergic or irritant reaction will not occur during or after the service.
When a client reports persistent eye symptoms or has an uncertain medical concern, recommend appropriate medical advice rather than attempting to diagnose the problem.
Selecting an Appropriate Lash Style and Extension Weight
Choose the application technique according to natural lash characteristics, styling preferences, and technician proficiency.
- Classic extensions can provide a defined, relatively natural enhancement.
- Hybrid extensions combine classic extensions and volume fans for textured fullness.
- Volume extensions use multiple lightweight extensions in carefully constructed fans.
The desired appearance should never override the need to select a suitable weight and length for the natural lashes.
Client Consent and Pre-Application Documentation
Record the agreed style, relevant sensitivities, previous reactions, and important consultation findings. Explain the procedure, expected appearance, maintenance requirements, and potential risks before obtaining informed consent.
How to Prepare Natural Lashes Before Eyelash Extension Application
Preparation creates a clean and organized foundation for professional attachment. A basic preparation workflow includes cleansing, rinsing, drying, lower-lash positioning, and natural lash organization.
Step 1: Cleanse Natural Lashes Thoroughly
Remove makeup, oils, debris, and other surface residue using an appropriate professional lash cleanser. Pay attention to the lash line and surrounding areas without allowing cleansing products to enter the eyes.
Step 2: Rinse and Dry the Natural Lashes
Remove cleanser residue according to the product instructions. Allow the natural lashes to dry sufficiently before beginning adhesive application. Remaining moisture or residue may affect the behavior of some adhesives.
Step 3: Position Under-Eye Pads and Protective Tape
Place under-eye pads to separate and protect the lower lashes. Use suitable tape when necessary, making sure that it does not pull the eyelid or contact the ocular surface.
Ask the client to report discomfort immediately. Reposition any protective material that creates pressure, irritation, or an unsafe position.
Step 4: Brush and Organize Natural Lashes
Gently brush the natural eyelashes to improve visibility and identify their direction. Organize the working area so the technician can identify suitable individual lashes without repeatedly searching through the entire lash line.
Preparation Quality-Control Checkpoint
Before application, confirm that:
- Natural lashes are clean and sufficiently dry.
- There is no obstructive makeup or cleanser residue.
- Under-eye protection is comfortable and correctly positioned.
- Natural lashes are visible and reasonably organized.
- The client is comfortable and ready to proceed.
Lash Mapping and Styling: Planning Consistent Extension Placement
Lash mapping is the process of dividing the lash line into sections and assigning extension lengths and styling transitions to create a planned appearance. It helps technicians organize placement, maintain symmetry, and avoid random length selection.
What Is Lash Mapping and Why Does It Matter?
A lash map identifies the intended extension lengths across different sections of the eye. It also considers curl, direction, and the transition between shorter and longer extensions.
Mapping provides a visual reference that helps technicians maintain consistency between both eyes while allowing adjustments for individual natural lash characteristics.
Popular Lash Mapping Styles for Beginners
| Mapping style | General placement concept | Visual effect | Considerations |
| Natural | Gradual length changes that follow the natural lash line. | Subtle enhancement. | Useful when the client prefers understated styling. |
| Doll-eye | Greater length emphasis toward the central area. | More open-looking appearance. | Adjust central lengths to natural lash suitability. |
| Kitten | Length gradually increases toward the outer-middle area before transitioning shorter. | Soft elongated effect. | Requires balanced transitions. |
| Cat-eye | Greater length emphasis toward the outer sections. | Elongated styling. | May not suit every natural lash direction or client preference. |
How to Choose Extension Length, Curl, and Diameter
Extension specifications should be selected as a complete styling decision rather than independently.
- Length: Consider the natural lash length and the intended visual effect.
- Curl: Select an appropriate curve for the desired appearance and natural lash direction.
- Diameter: Consider the weight of the extension and whether the natural lash can reasonably support it.
- Structure: Determine whether a single extension or volume fan is appropriate.
There is no universal specification that suits every client. Professional training and assessment should guide final selection.
Lash Mapping Examples for Different Eye Shapes
For clients who prefer a natural appearance, a gradual map may follow their existing lash pattern. A client seeking a more open-looking effect may prefer central length emphasis, while another may prefer an elongated outer section.
However, mapping must also account for natural lash density and direction. If the outer lashes are shorter or weaker, increasing extension length in that area may not be appropriate.
Lash Mapping Quality-Control Checkpoint
Review the map before application. Check that both eyes have balanced transitions, that the planned lengths are suitable for natural lashes, and that the design reflects the client's agreed preferences.
How to Apply Eyelash Extensions Step by Step: The Professional Workflow
The most reliable application process follows a consistent sequence. Each extension should be handled individually, with isolation and attachment quality checked continuously rather than only at the end.
Step 1: Organize the Lash Tray and Workstation
Arrange extensions according to the selected map. Keep frequently used lengths within easy reach and position the adhesive and tweezers conveniently.
This preparation minimizes unnecessary hand movements and helps maintain a predictable application rhythm.
Step 2: Isolate One Suitable Natural Eyelash
Use isolation tweezers to separate one natural eyelash from surrounding lashes. Check that neighboring lashes are not caught beneath or alongside the isolated lash.
Maintain a clear view of the attachment area and avoid touching the eyelid with the tweezer tips.
Quality checkpoint: Confirm that the selected natural lash is completely separated before proceeding.
Step 3: Pick Up the Extension or Create a Volume Fan
Use the appropriate pickup tweezers to handle the selected extension. For classic applications, pick up one individual extension. For volume applications, create or select a suitable fan with a controlled base.
Check that the extension or fan remains stable in the tweezers and that its base is suitable for attachment.
Step 4: Dip the Extension Into the Adhesive
Collect a controlled amount of adhesive according to the formulation's viscosity, working characteristics, and manufacturer instructions.
Too much adhesive may create visible buildup and unwanted contact between neighboring lashes. Too little may result in insufficient attachment. The correct amount depends on the product and application method rather than one universal measurement.
Step 5: Position and Attach the Extension
Bring the extension toward the isolated natural lash and position it with appropriate contact and alignment. Follow professional training for attachment distance and positioning.
The extension must attach to the natural eyelash rather than directly to the eyelid skin. Maintain consistent direction and avoid allowing adhesive to contact the ocular surface.
Step 6: Release the Extension Without Disturbing the Bond
Release the extension with controlled tweezer movement. Avoid pulling, twisting, or moving the extension unnecessarily before the adhesive has established the required attachment.
Premature movement can disturb placement and contribute to inconsistent bonding.
Step 7: Inspect Isolation and Attachment
Check the newly attached extension before moving to another natural lash.
Look for:
- Contact with neighboring natural eyelashes.
- Excessive adhesive buildup.
- Incorrect direction or alignment.
- Insufficient attachment contact.
- Unwanted contact with eyelid skin.
Correct problems using appropriate professional techniques before continuing.
Step 8: Repeat the Application Sequence Across Lash Sections
Continue working systematically across the inner, middle, and outer sections according to the lash map.
Maintain consistent isolation, pickup, adhesive control, placement, and release. Check coverage periodically so the finished appearance remains balanced rather than concentrating extensions in only one section.
Step 9: Perform a Final Separation and Quality Inspection
Once the application is complete, inspect the entire lash line. Separate any stickies using appropriate professional techniques and verify that extensions are positioned correctly.
Review symmetry, direction, attachment quality, and client comfort. Confirm that no extensions are attached to the eyelid and that neighboring natural lashes remain separated.
The Complete Application Sequence at a Glance
Consultation → Cleanse → Rinse and Dry → Position Protection → Map → Isolate → Pick Up → Dip → Attach → Release → Inspect → Repeat → Final Separation → Aftercare.
Isolation and inspection are continuous activities. They should not be postponed until the entire lash set has been completed.
Application Quality-Control Checkpoints
| Application stage | Pass criteria | Action if unsuccessful |
| Preparation | Clean, dry, organized natural lashes. | Repeat appropriate preparation. |
| Mapping | Balanced design and suitable specifications. | Adjust the map before attachment. |
| Isolation | One suitable natural lash is separated. | Improve separation and visibility. |
| Attachment | Controlled adhesive and appropriate contact. | Correct poor placement professionally. |
| Final inspection | No stickies, unsafe contact, or obvious placement problems. | Complete necessary corrections before release. |
Classic vs. Hybrid vs. Volume Eyelash Extension Application Techniques
Classic, hybrid, and volume extensions differ in their attachment structures, styling possibilities, and application complexity. Understanding these differences helps technicians select an appropriate technique for each client.
Classic Eyelash Extensions: One-to-One Application
Classic application uses one extension attached to one suitable natural eyelash. It emphasizes individual placement, isolation accuracy, and consistent direction.
Pros:
- Relatively straightforward application structure.
- Allows precise control over individual extension placement.
- Suitable for clients seeking defined, natural-looking enhancement.
Cons:
- Visual fullness depends substantially on natural lash density.
- Requires accurate one-to-one isolation.
- May not produce the fuller appearance some clients prefer.
Hybrid Eyelash Extensions: Combining Classic and Volume
Hybrid application combines individual classic extensions with volume fans. Technicians distribute both structures according to the lash map to create a textured appearance.
Pros:
- Offers flexibility between definition and fullness.
- Creates a textured appearance.
- Allows different styling distributions.
Cons:
- Requires control of two application structures.
- Needs careful distribution to avoid uneven density.
- Involves additional planning compared with a simple classic set.
Volume Eyelash Extensions: Fan Creation and Placement
Volume application uses multiple lightweight extensions arranged into a fan and attached to one suitable natural eyelash. Fan symmetry, base control, and overall weight are important considerations.
Pros:
- Creates a fuller and more textured appearance.
- Provides flexibility in fan styling.
- Can be adapted to different density preferences.
Cons:
- Requires more advanced fan-handling skills.
- Fan bases must be controlled carefully.
- Incorrect fan weight can place excessive stress on natural lashes.
Choosing the Right Technique for Different Clients
The best method depends on the client's natural lash density, condition, desired fullness, and styling preferences. Technician proficiency is also important.
A beginner should develop consistent classic application skills before progressing to more complicated fan techniques. Experienced technicians can incorporate hybrid and volume structures when they have the appropriate training.
Technique Comparison: Application Complexity and Workflow
| Comparison factor | Classic | Hybrid | Volume |
| Application structure | One extension per natural lash. | Classic extensions and fans. | Multiple extensions in a fan. |
| Isolation demands | High. | High. | High. |
| Fan handling | Not required. | Required for volume sections. | Essential. |
| Workflow complexity | Foundational. | Intermediate to advanced. | Advanced. |
| Styling possibilities | Defined and natural. | Textured and flexible. | Full and customizable. |
| Primary quality check | Individual attachment and direction. | Balanced distribution of both structures. | Fan symmetry, base, and weight. |
Conventional Adhesive vs. UV/LED-Assisted Eyelash Extension Application
Conventional and UV/LED-assisted lash systems use different curing mechanisms. Understanding these differences is essential before introducing a new adhesive technology into a professional workstation.
How Conventional Cyanoacrylate Lash Adhesive Cures
Conventional cyanoacrylate lash adhesive generally cures through moisture-related polymerization. Environmental humidity, temperature, adhesive formulation, and application technique can influence its working characteristics.
Technicians should follow the adhesive manufacturer's environmental recommendations rather than assuming that every formulation behaves identically.
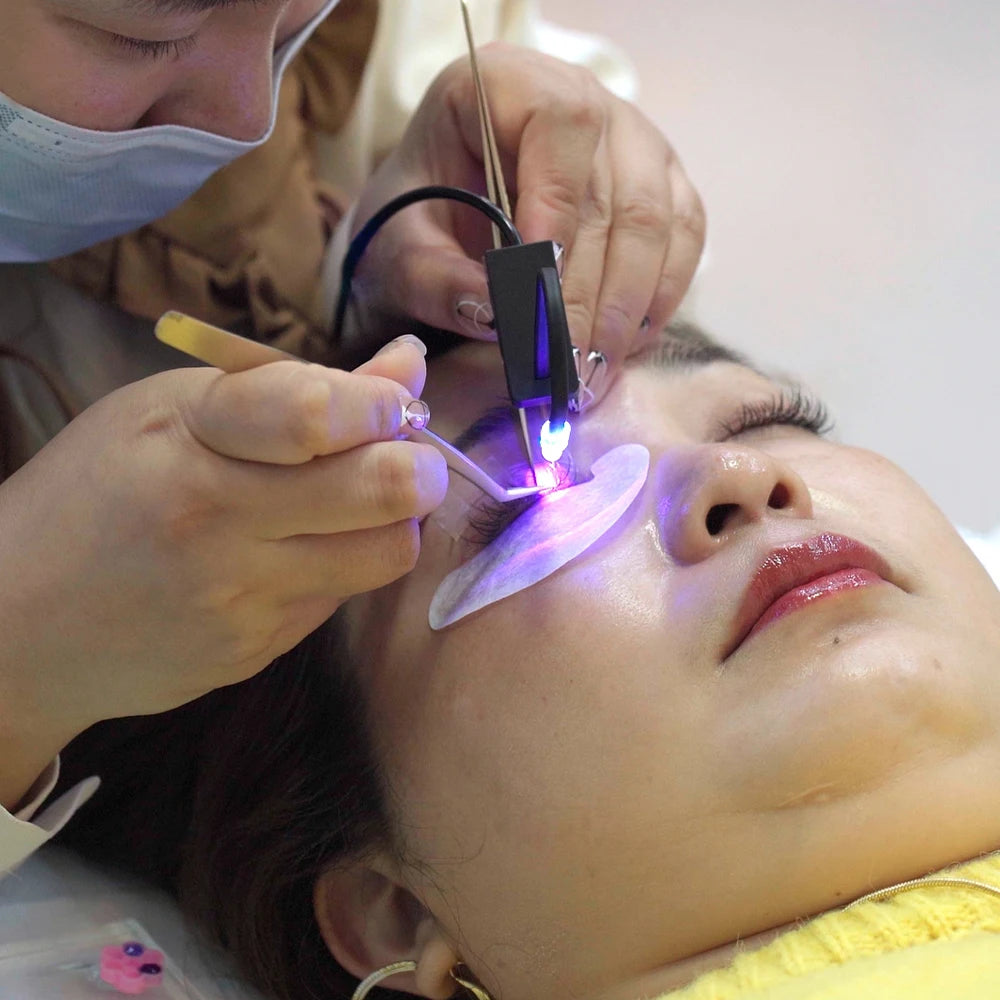
How UV/LED Lash Curing Systems Work
UV/LED-assisted systems use a compatible light-curable adhesive formulation. The designated light source activates the curing process according to the adhesive and equipment manufacturer's specifications.
The system requires compatibility between the adhesive, light wavelength, equipment, exposure conditions, and application procedure. A conventional adhesive should never be assumed to work with a UV/LED curing lamp.
Key Differences Between Conventional and UV/LED Application
| Factor | Conventional adhesive | UV/LED-assisted system |
| Adhesive type | Typically moisture-curing cyanoacrylate. | Compatible light-curable formulation. |
| Curing mechanism | Moisture-related polymerization. | Light-activated curing. |
| Equipment | Appropriate conventional application tools. | Compatible designated curing equipment. |
| Environmental considerations | Humidity and temperature influence behavior. | Follow the specific adhesive and equipment requirements. |
| Compatibility | Use according to conventional adhesive instructions. | Adhesive and light specifications must match. |
| Safety considerations | Manage adhesive exposure and ventilation. | Also consider light exposure and specified eye protection. |
How to Choose an Appropriate Curing System
Before choosing UV/LED equipment, professional technicians should evaluate:
- Documented adhesive and equipment compatibility.
- Manufacturer-specified wavelength and exposure requirements.
- Appropriate eye-protection procedures.
- Professional training and operating instructions.
- Equipment maintenance and safe positioning.
- Applicable local regulations and professional requirements.
UV/LED equipment should not automatically be considered safer or superior to conventional adhesive systems. Both require correct product selection, appropriate training, and careful application.
One available option is the Pinky Leem TL02 UV LED eyelash glue curing light kit. The product listing describes a professional kit combining UV LED curing technology and precision tweezers. Its listed material is plastic, with a stated product weight of 0.5 kg.

The listing does not establish compatibility with every UV lash adhesive or provide a universal wavelength and exposure protocol. Confirm these details directly with the relevant manufacturers before professional use.
How Adhesive Amount, Humidity, Temperature, and Curing Affect Retention
Adhesive behavior is influenced by several connected factors. Poor retention should not automatically be attributed to one application mistake because preparation, environmental conditions, product compatibility, attachment quality, and aftercare may all contribute.
How Much Adhesive Should You Use?
Use enough adhesive to establish appropriate contact between the extension and natural lash without creating excessive buildup. The correct amount depends on the adhesive formulation, viscosity, extension structure, and manufacturer instructions.
Observe the attachment during application. If extensions repeatedly slide, appear overloaded, or fail to establish consistent contact, review the adhesive pickup technique and product suitability.
How Humidity and Temperature Influence Adhesive Behavior
Environmental conditions can change the working characteristics of conventional cyanoacrylate adhesives. Humidity and temperature may influence curing behavior, which affects how much time a technician has to position an extension.
Use an appropriate environmental monitoring method and follow the product's recommended working conditions. Do not apply one universal humidity or temperature target to every adhesive formulation.
Understanding Adhesive Curing Time and Working Speed
A faster-curing adhesive is not necessarily a better choice. If the adhesive begins curing before the technician completes placement, the attachment may become inconsistent.
Developing technicians should prioritize an adhesive working time that supports controlled placement. Experienced technicians may choose different formulations based on their demonstrated application speed and environmental conditions.
Why Attachment Distance and Contact Area Matter
Correct attachment requires suitable contact with the natural eyelash while maintaining an appropriate distance from the eyelid. Direct skin attachment is not an acceptable substitute for proper lash placement.
Insufficient contact may compromise attachment, while excessive adhesive or incorrect positioning may create discomfort and unwanted contact.
How to Recognize Adhesive Problems During Application
- Premature curing: Adhesive appears to lose its working characteristics before placement is complete.
- Sliding extensions: The extension moves instead of maintaining the intended attachment.
- Excessive buildup: Too much adhesive creates visible accumulation.
- Inconsistent bonding: Attachments appear different despite similar application movements.
Review adhesive freshness, storage, environmental conditions, pickup technique, and product compatibility when these problems occur.
How to Improve Eyelash Extension Application Speed Without Sacrificing Quality
Application efficiency develops through repetition, organization, and better control. The objective is not to skip steps but to reduce unnecessary movements and avoid corrections caused by inconsistent technique.
Beginner Workflow: Build Accuracy Before Increasing Speed
New technicians should concentrate on three foundational skills:
- Isolating one natural lash accurately.
- Collecting an appropriate amount of adhesive.
- Attaching extensions with consistent direction and positioning.
Practice these skills deliberately before introducing time-based performance goals. Consistent placement is more valuable than completing an application quickly with frequent corrections.
Intermediate Workflow: Reduce Unnecessary Movements
Once foundational placement is reliable, improve workstation organization.
- Arrange lash trays according to the map.
- Keep frequently used tools within easy reach.
- Use a repeatable section-by-section application sequence.
- Maintain consistent tweezer handling.
- Prepare disposable supplies before the appointment.
- Reduce unnecessary changes in hand position.
Professional Workflow: Improve Consistency and Time Management
Experienced technicians can improve efficiency by planning the service before starting, selecting suitable adhesive products, preparing volume fans where appropriate, and organizing the application sequence.
Review recurring corrections after appointments. For example, repeated stickies may indicate an isolation problem, while frequent slipping may suggest an adhesive or environmental mismatch.
Five Habits That Improve Application Efficiency
1. Organize the workstation: Prepare all essential materials before the client arrives.
2. Maintain controlled movements: Avoid unnecessary repositioning of tweezers and hands.
3. Practice consistent isolation: Develop a repeatable separation technique.
4. Select appropriate products: Match adhesive characteristics and application tools to the technician's technique.
5. Inspect continuously: Correct small problems before they become larger finishing issues.
Speed vs. Quality: What Technicians Should Never Skip
| Inefficient shortcut | Professional alternative | Why it matters |
| Skipping client assessment. | Use a consistent consultation process. | Supports appropriate styling and client suitability. |
| Attaching without complete isolation. | Verify separation before every attachment. | Helps prevent stickies. |
| Using uncontrolled adhesive amounts. | Practice consistent pickup. | Supports clean attachment. |
| Ignoring workstation organization. | Arrange tools before application. | Reduces unnecessary movements. |
| Skipping final inspection. | Perform a complete separation check. | Identifies problems before the client leaves. |
| Reusing disposable supplies. | Use fresh single-client applicators. | Supports professional hygiene. |
Reliable professional equipment can also support a more organized workstation. Technicians considering an alternative adhesive workflow can review the UV LED eyelash glue curing light and precision tweezer kit, provided its adhesive compatibility and safety requirements are independently confirmed.
A Practical Skill Progression From Beginner to Professional
| Skill level | Primary development goal | Recommended focus |
| Beginner | Accurate isolation. | Separation, classic placement, and adhesive control. |
| Developing | Consistent application. | Mapping, direction, and repeatable attachment. |
| Intermediate | Technique flexibility. | Hybrid application and improved workflow organization. |
| Advanced | Complex styling. | Volume fan creation, weight control, and troubleshooting. |
| Professional | Reliable service delivery. | Quality control, client management, hygiene, and efficiency. |
Common Eyelash Extension Application Mistakes and How to Fix Them
Application problems are easier to address when technicians identify the likely cause rather than simply repeating the same technique. The following issues are common areas to review during professional practice.
Poor Isolation and Stuck-Together Natural Lashes
Stickies occur when neighboring natural lashes or extensions become unintentionally connected. Incomplete isolation, poor visibility, or premature attachment can contribute to the problem.
Improve lighting, separate the natural lashes carefully, and inspect each attachment. Never leave connected lashes that create unwanted pulling or tension.
Too Much or Too Little Adhesive
Excessive adhesive can create buildup and messy attachments. Insufficient adhesive may result in poor contact or unstable placement.
Review pickup consistency, adhesive viscosity, and the manufacturer's application recommendations. Practice controlled adhesive collection rather than relying on a fixed quantity for every product.
Incorrect Extension Direction or Uneven Placement
Extensions that point in different directions can create an uneven finished appearance. This may result from inconsistent tweezer positioning, an unsuitable lash map, or poor attachment alignment.
Check the extension direction before releasing it and compare placement across adjacent sections.
Premature Adhesive Curing or Extensions That Slide
Premature curing may be associated with environmental conditions or an adhesive that does not match the technician's working speed. Sliding may indicate insufficient attachment contact or another compatibility problem.
Review the product specifications, environmental conditions, and application technique before changing adhesive products.
Poor Retention After Application
Retention problems may involve preparation residue, unsuitable extension weight, poor attachment, adhesive incompatibility, environmental conditions, or client aftercare.
Evaluate the complete workflow instead of assuming that one product change will solve every retention concern.
Troubleshooting Matrix: Problem, Possible Cause, and Correction
| Problem | Possible cause | Professional correction |
| Stickies | Incomplete isolation or premature attachment. | Separate affected lashes using appropriate techniques. |
| Twisting extensions | Incorrect pickup or attachment alignment. | Review tweezer control and positioning. |
| Poor direction | Inconsistent placement angle. | Recheck direction against the lash map. |
| Adhesive buildup | Excessive adhesive pickup. | Improve controlled adhesive collection. |
| Slipping extensions | Insufficient contact or adhesive mismatch. | Review attachment technique and product suitability. |
| Uneven coverage | Inconsistent section planning. | Review the map and distribution. |
| Premature shedding | Preparation, attachment, product, or aftercare issues. | Evaluate the complete application process. |
| Client discomfort | Skin contact, stickies, irritation, or another reaction. | Stop the service and assess the need for appropriate medical advice. |
Professional Lash Hygiene, Tool Disinfection, and Eye-Area Safety
Hygiene is a fundamental part of professional eyelash extension application. Technicians work near a sensitive area and should maintain consistent cleaning, disinfection, storage, and disposable-supply procedures.
Hand Hygiene and Workstation Disinfection
Wash hands before and after each client. Clean workstation surfaces and disinfect them using appropriate products according to their instructions.
Maintain separate areas for clean equipment and used materials to prevent accidental cross-contamination.
Cleaning and Disinfecting Reusable Lash Tools
Cleaning and disinfection are different processes. Cleaning removes visible residue and contaminants, while disinfection uses an appropriate process to reduce microorganisms.
Reusable tweezers and other instruments should be processed according to manufacturer instructions and applicable local sanitation requirements. Follow appropriate contact times and storage procedures.
Single-Client Disposable Supplies
Microbrushes, mascara wands, disposable applicators, and other designated single-use supplies should not be reused between clients.
Dispose of used materials appropriately and prepare fresh supplies for each service.
Adhesive Handling, Ventilation, and Storage
Follow adhesive storage and expiration instructions. Keep containers properly closed when not in use and avoid unnecessary exposure to adhesive vapors.
Maintain suitable ventilation and follow product safety documentation. If a product causes irritation or unexpected symptoms, stop using it and follow the manufacturer's safety guidance.
Eye-Area Safety and Professional Scope of Practice
Never allow adhesive, cleansing products, tape, or curing equipment to create unsafe contact with the ocular surface. Follow professional training and local licensing requirements.
Lash technicians should not diagnose or treat eye conditions. Stop the service if the client experiences significant pain, irritation, or another concerning symptom. Persistent redness, swelling, discharge, or vision changes warrant appropriate medical assessment.
Daily Professional Hygiene Checklist
Before the client:
- Wash hands and prepare the workstation.
- Clean and disinfect reusable instruments.
- Prepare fresh disposable supplies.
- Check adhesive storage and condition.
- Confirm suitable ventilation and lighting.
During the service:
- Maintain clean and organized working areas.
- Avoid reusing single-use applicators.
- Monitor client comfort.
- Keep adhesive and other products away from the ocular surface.
After the service:
- Dispose of used disposable materials.
- Clean and disinfect reusable tools.
- Disinfect workstation surfaces.
- Store products according to manufacturer instructions.
Eyelash Extension Aftercare: Helping Clients Maintain Their Results
Aftercare is an important part of the professional lash service. Technicians should provide instructions that match the adhesive system, extension products, and manufacturer's recommendations.
What Clients Should Do After Their Lash Appointment
Explain how to care for the extensions and when to resume normal cleansing according to the adhesive manufacturer's instructions. Encourage gentle handling and discourage unnecessary rubbing or pulling.
How to Clean and Maintain Eyelash Extensions
Clients should use appropriate extension-compatible cleansing products and follow the technician's instructions. Gentle cleansing helps remove makeup, oils, and everyday debris without excessive mechanical friction.
After cleansing, clients can gently brush the extensions when appropriate. Avoid pulling, twisting, or aggressively rubbing the lash line.
Common Aftercare Mistakes That Affect Retention
- Rubbing or pulling at extensions.
- Picking at loose extensions instead of seeking professional removal.
- Neglecting appropriate lash hygiene.
- Using products that are not compatible with the extensions or adhesive system.
- Attempting to remove extensions using unsuitable household products.
Refills, Natural Lash Shedding, and Maintenance Expectations
Natural eyelashes continuously grow and shed, so losing individual extensions over time is expected. Each extension is attached to a natural lash, meaning the extension will eventually shed with that lash as part of its normal growth cycle.
Maintenance requirements vary according to natural lash growth, application quality, styling preferences, and daily care. Avoid promising a specific retention period for every client.
When Clients Should Seek Professional Advice
Persistent redness, swelling, pain, discharge, or changes in vision should not be treated as ordinary extension maintenance problems. Clients experiencing these symptoms should seek appropriate medical assessment.
Technicians should not attempt to treat suspected infections or allergic reactions themselves.
For clients and professionals reviewing related beauty equipment, skin and beauty care devices provide a broader collection of personal-care equipment. Any product used around the eyes should be evaluated for its intended purpose and safety instructions.
Frequently Asked Questions About Eyelash Extension Application
How do you apply eyelash extensions step by step?
Start with client consultation and natural lash assessment. Cleanse and dry the natural lashes, position under-eye protection, and create a lash map. Isolate one natural eyelash, pick up a suitable extension, collect controlled adhesive, attach it, and release it carefully. Repeat while inspecting separation and attachment quality. Finish with a complete lash line inspection and aftercare instructions.
How can beginners improve eyelash extension application speed without compromising quality?
Beginners should first develop accurate isolation, controlled adhesive pickup, and consistent placement. Organize the workstation, arrange lash trays according to the map, and practice a repeatable application sequence. Reducing unnecessary movements can improve efficiency, but client assessment, hygiene, isolation, and final inspection should never be skipped.
What is the difference between classic, hybrid, and volume eyelash extension application?
Classic application attaches one extension to one natural lash. Hybrid application combines individual extensions with volume fans to create a textured appearance. Volume application attaches a fan of multiple lightweight extensions to one suitable natural lash. Each method requires appropriate isolation, weight selection, and placement control.
How much adhesive should you use when applying eyelash extensions?
Use a controlled amount sufficient for appropriate attachment without excessive buildup. The correct amount depends on the adhesive formulation, viscosity, extension type, and manufacturer instructions. Avoid applying one universal quantity to every adhesive system.
How can lash technicians improve eyelash extension retention and prevent common application mistakes?
Improve preparation, choose suitable extension weights, maintain accurate isolation, control adhesive application, and monitor environmental conditions. Inspect each attachment for stickies and correct direction. Provide appropriate aftercare instructions and use adhesive products according to their compatibility and storage requirements.
Conclusion: Build a Professional Eyelash Extension Workflow Around Quality
Consistent eyelash extension application depends on a coordinated process rather than one individual technique. Client consultation, natural lash preparation, appropriate mapping, accurate isolation, controlled adhesive attachment, and final inspection all contribute to professional results.
The Quality Before Speed approach provides a practical framework for improving application efficiency without sacrificing client comfort or natural lash integrity. Beginners should focus on mastering isolation and classic placement, while experienced technicians can develop more advanced hybrid, volume, and adhesive-control skills.
UV/LED-assisted curing systems offer another equipment category for professional lash artists, but compatibility, training, exposure protocols, and eye protection must always be considered. Review product specifications carefully before incorporating a new system into your workflow.
Ultimately, professional competence is demonstrated through repeatable technique, clean application, appropriate hygiene, and consistent quality control—not simply completing appointments faster.
If you are reviewing equipment for your workstation, consider the Professional UV LED Eyelash Glue Curing Light Kit as one potential addition to a compatible professional setup. Check the manufacturer's adhesive compatibility and safety documentation before use.
Continue developing one application skill at a time, evaluate recurring mistakes, and make precision the foundation of every professional lash service.
Professional Reference and Safety Considerations
This guide provides general educational information and does not replace professional eyelash extension training, product instructions, local licensing requirements, or medical advice. Technicians should consult relevant professional training organizations, adhesive safety documentation, equipment operating manuals, and applicable local sanitation standards before performing services.
For UV/LED systems, confirm the specified light wavelength, compatible adhesive formulation, exposure protocol, and eye-protection requirements using documentation supplied by the equipment and adhesive manufacturers. Do not assume that general-purpose UV lights are appropriate for eyelash extension application.
Professional practice principle:
“Build speed through consistency, not by removing the checks that protect the client and the quality of the application.”
This principle summarizes the central approach of professional eyelash extension application: accurate isolation, controlled attachment, consistent placement, and careful inspection at every stage.
Pillar Article: Eyelash Adhesive Curing Lamp: Professional UV LED Buying Guide