
UV LED Lash Adhesive Curing: How It Works and Best Practices
Consistent eyelash extension application depends on more than precise isolation and adhesive placement. Lash technicians also need reliable adhesive curing to create stable bonds and maintain an efficient workflow. UV LED lash adhesive curing uses light-activated chemistry to initiate polymerization, offering a different approach from conventional moisture-dependent cyanoacrylate lash glue. However, successful results depend on matching the adhesive formulation with the correct light wavelength, irradiance, exposure time, and lamp positioning. Understanding these factors helps professional lash artists improve application consistency while maintaining appropriate safety precautions.
What Is UV LED Lash Adhesive Curing?
UV LED lash adhesive curing is a light-activated bonding process in which a specially formulated eyelash extension adhesive undergoes polymerization when exposed to a compatible ultraviolet or near-ultraviolet LED light source. Unlike conventional lash glue, which typically reacts with atmospheric moisture, UV-curable formulations use light-sensitive chemical components to initiate the curing reaction.
What Is UV LED Lash Adhesive?
UV LED lash adhesive is a specialized bonding formulation developed to cure under a specified light source. Its chemical composition may include reactive monomers or oligomers, photoinitiators, and other formulation components that support light-triggered polymerization.
These adhesives are designed for professional eyelash extension applications. They require a compatible UV LED curing system rather than an ordinary lash application lamp. The exact wavelength, exposure conditions, and adhesive chemistry vary between manufacturers.
It is important not to assume that every adhesive marketed as UV lash glue uses the same ingredients or operates under identical curing conditions. Technicians should review the product's technical documentation before incorporating it into their workflow.
What Does Curing Mean in Eyelash Extensions?
Curing refers to the chemical process through which reactive adhesive ingredients form a more stable polymer structure. During polymerization, smaller reactive molecules connect into larger molecular chains or networks, transforming the adhesive into a solid bonding material.
In eyelash extensions, the adhesive creates a connection between the natural lash and the extension. Proper curing helps establish the intended bond, although final retention also depends on isolation, attachment technique, adhesive quantity, natural lash condition, and aftercare.
Importantly, a bond that looks dry on the surface is not necessarily proof that the entire adhesive volume has completed its chemical reaction.
How UV LED Curing Differs from Traditional Curing
Traditional eyelash extension adhesives commonly rely on moisture-triggered polymerization. UV LED adhesives instead use light-sensitive chemistry that responds to a compatible light source.
This difference changes how technicians control the application process. Traditional systems require attention to humidity and temperature because these conditions influence adhesive behavior. UV systems introduce additional technical requirements involving wavelength compatibility, light intensity, exposure duration, and lamp positioning.
How Does UV LED Lash Adhesive Work?
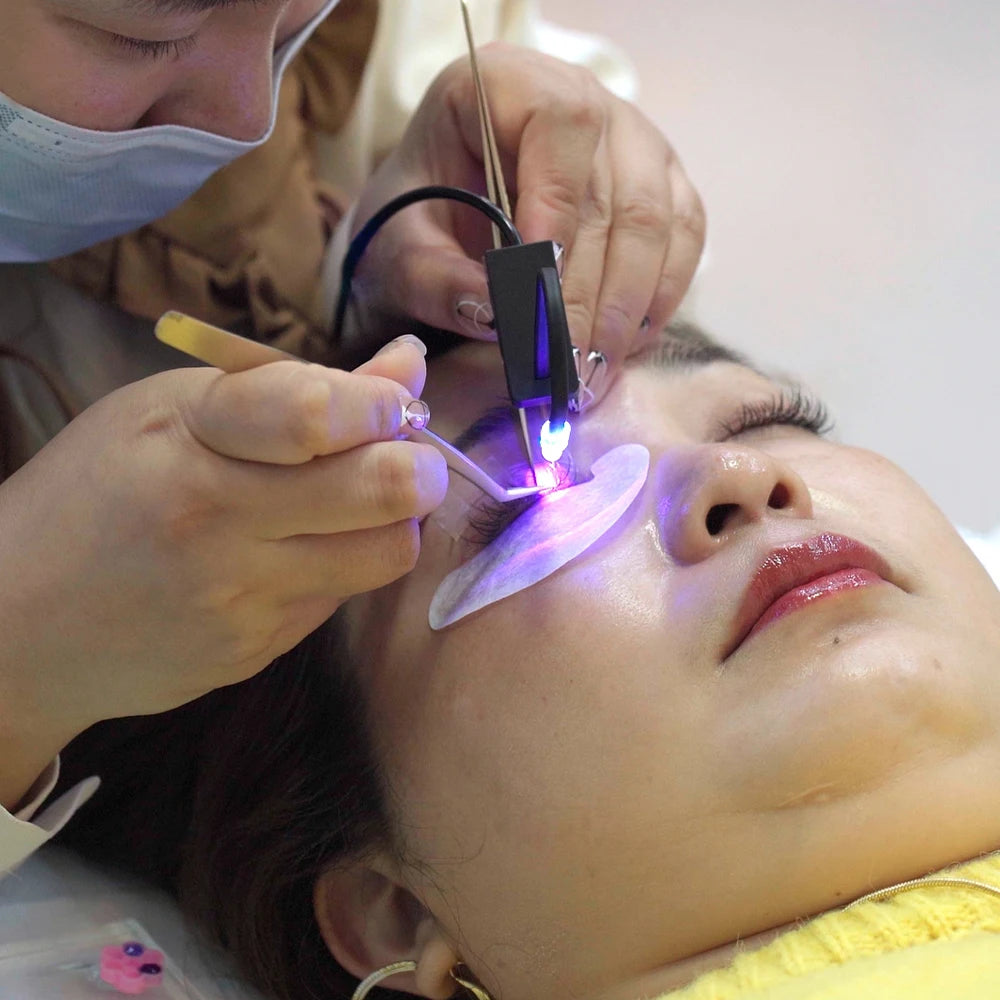
UV LED lash adhesive works through photopolymerization, a chemical reaction initiated when a compatible light-sensitive adhesive absorbs energy from a specified light source. The activated photoinitiator generates reactive species that start polymerization, allowing the adhesive to develop a solid polymer structure.
Understanding Photopolymerization
Photopolymerization is a light-induced chemical process used in several industries, including dental materials, printing, coatings, and specialized adhesives.
In a UV LED lash adhesive system, the process generally involves several stages:
Light absorption: A photoinitiator within the adhesive absorbs light energy within its effective activation wavelength range.
Photoinitiator activation: The absorbed energy causes the photoinitiator to generate reactive chemical species, depending on its specific chemistry.
Initiation: These reactive species interact with suitable components in the adhesive formulation and initiate polymerization.
Polymer chain growth: Reactive molecules connect through a series of chemical reactions, forming increasingly large polymer structures.
Bond development: The adhesive transitions toward its cured state, creating the intended connection between the extension and natural lash.
The efficiency of this process depends on the adhesive formulation and the amount of compatible light energy reaching the reactive material.
What Are Photoinitiators and Why Do They Matter?
Photoinitiators are chemical compounds that absorb light at particular wavelengths and generate reactive species capable of initiating polymerization.
They are essential to UV LED adhesive technology because not every photoinitiator responds equally to every light source. Their absorption characteristics depend on their molecular structure and the surrounding formulation.
For lash technicians, this means that choosing a lamp based only on its appearance, advertised wattage, or general UV classification is insufficient. The adhesive manufacturer's technical documentation should identify the compatible wavelength range and required curing conditions.
How Wavelength Activates the Adhesive
Wavelength describes the distance between successive peaks of a light wave and is commonly measured in nanometers (nm). Different photoinitiators absorb different portions of the light spectrum.
When the lamp emits light within the photoinitiator's effective absorption range, the adhesive can absorb the energy needed to initiate its chemical reaction. If the wavelength is incompatible, the adhesive may not cure as intended, even when the lamp appears bright or powerful.
Technicians should therefore verify the following:
- The adhesive's specified activation wavelength.
- The lamp's actual emission spectrum rather than only its advertised category.
- Whether the equipment manufacturer approves the lamp for the selected adhesive.
- Any specified operating distance and exposure procedure.
Light Intensity, Irradiance, and Exposure Time
Wavelength is only one part of the curing equation. Irradiance describes the optical power received per unit area, commonly expressed in milliwatts per square centimeter (mW/cm²).
Exposure duration describes how long the adhesive receives the light. These factors influence the total radiant exposure delivered to the bonding area.
However, greater electrical wattage does not automatically mean greater useful curing intensity. Electrical power consumption and optical irradiance are different measurements. Beam distribution, distance, optical efficiency, and equipment design also affect the light reaching the adhesive.
There is no universal UV lash adhesive curing time or lamp power specification that applies to every system. Follow the adhesive and equipment manufacturers' documented settings.
What Happens During Adhesive Polymerization?
After light absorption, the photoinitiator generates reactive intermediates that initiate chemical reactions within the adhesive. Polymer chains begin forming and may develop into a more interconnected structure, depending on the formulation.
Light must reach the reactive adhesive region for the intended reaction to occur. Excessive adhesive volume, uneven exposure, obstructions, or incorrect lamp positioning may interfere with curing consistency.
For this reason, controlling adhesive quantity and maintaining the approved light configuration are important parts of professional application.
UV LED Lash Adhesive vs. Traditional Cyanoacrylate Lash Glue
UV LED lash adhesive and traditional cyanoacrylate lash glue differ primarily in their curing mechanisms. Understanding this distinction helps technicians select an appropriate system and avoid treating different adhesive technologies as interchangeable.
How Traditional Cyanoacrylate Adhesive Cures
Conventional eyelash extension adhesives frequently contain cyanoacrylate-based ingredients. These adhesives generally cure through moisture-triggered anionic polymerization.
Moisture present in the surrounding environment and on the bonding surfaces helps initiate the reaction. Relative humidity can influence how quickly the adhesive polymerizes, while temperature may also affect viscosity and reaction behavior.
If environmental conditions fall outside the adhesive manufacturer's recommended range, technicians may experience changes in application behavior, bonding consistency, or retention.
How UV LED Adhesive Cures
UV LED adhesive uses a formulation designed to respond to a compatible light source. Instead of relying primarily on ambient moisture to initiate polymerization, its curing process depends on photoinitiator activation and the delivery of appropriate light energy.
This gives technicians a different form of curing control, but it also creates additional equipment requirements. A compatible adhesive, lamp, exposure procedure, and appropriate protective measures must work together.
Key Differences Between UV and Traditional Lash Adhesives
| Comparison factor | UV LED lash adhesive | Traditional cyanoacrylate lash adhesive |
| Curing mechanism | Light-initiated photopolymerization | Moisture-triggered polymerization |
| Activation requirements | Compatible light source and specified exposure | Ambient moisture and suitable application conditions |
| Environmental sensitivity | Depends on formulation and manufacturer specifications | Often sensitive to relative humidity and temperature |
| Curing control | Managed through compatible light exposure | Influenced by environmental conditions and adhesive chemistry |
| Workflow implications | Requires controlled lamp positioning and exposure | Requires management of adhesive speed and salon conditions |
| Equipment requirements | Compatible UV LED curing lamp | Conventional lash application equipment |
| Compatibility limitations | Requires matching adhesive chemistry and lamp specifications | Requires an adhesive suitable for the intended application conditions |
Does UV LED Lash Adhesive Contain Cyanoacrylate?
Not necessarily. UV-curable adhesive formulations can use different reactive chemistries, and their ingredients should not be assumed to be identical to conventional cyanoacrylate lash glue.
Some formulations may contain cyanoacrylate or other reactive ingredients, while others may rely on different polymerizable components. The actual composition depends on the manufacturer.
Before using a UV adhesive, review its ingredient information, technical data sheet, and safety data sheet (SDS). These documents provide more reliable information than general marketing descriptions.
Wavelength Compatibility: Choosing the Correct UV LED Lamp
Wavelength compatibility is one of the most important considerations when selecting a UV LED lash curing system. A lamp that does not emit light within the adhesive's required activation range may deliver insufficient energy for the intended polymerization process.
Why Wavelength Matching Is Essential
Photoinitiators absorb energy selectively. Their response depends on the wavelengths emitted by the curing lamp and the absorption characteristics of the adhesive formulation.
Using an incompatible lamp can result in incomplete or inconsistent curing. Increasing exposure duration without confirming compatibility is not a reliable substitute for selecting the correct equipment.
How to Read a UV LED Lamp Specification
Before selecting a professional eyelash adhesive curing lamp, examine its technical specifications.
- Wavelength: The documented wavelength or emission range of the light source.
- Emission spectrum: Information showing the wavelengths actually produced by the lamp.
- Irradiance: Optical power delivered per unit area at the specified operating position.
- Exposure controls: Available activation and exposure settings.
- Operating distance: The manufacturer-approved distance between the light source and the target area.
- Optical coverage: The beam distribution and area illuminated during curing.
Do not confuse electrical wattage with optical irradiance. A lamp's electrical rating alone cannot establish whether it delivers the correct light energy to a particular adhesive.
Lamp Distance and Light Coverage
The distance between the lamp and the adhesive can influence the amount of light reaching the bonding area. Beam angle, optical design, positioning, and obstructions may also affect exposure.
Incorrect positioning can create uneven light coverage, particularly when the lamp is moved outside its approved operating geometry.
Technicians should follow the equipment manufacturer's instructions for distance, angle, positioning, and exposure. Avoid directing the curing beam unnecessarily toward the client's eyes.
How to Verify Adhesive and Lamp Compatibility
Use the following verification process before introducing a UV LED curing system into professional services:
- Obtain the adhesive manufacturer's technical data sheet.
- Identify the specified activation wavelength and curing requirements.
- Review the curing lamp's documented emission spectrum and irradiance information.
- Confirm the approved operating distance and exposure procedure.
- Check whether the adhesive and lamp manufacturers document compatibility.
- Review safety instructions and protective equipment requirements before use.
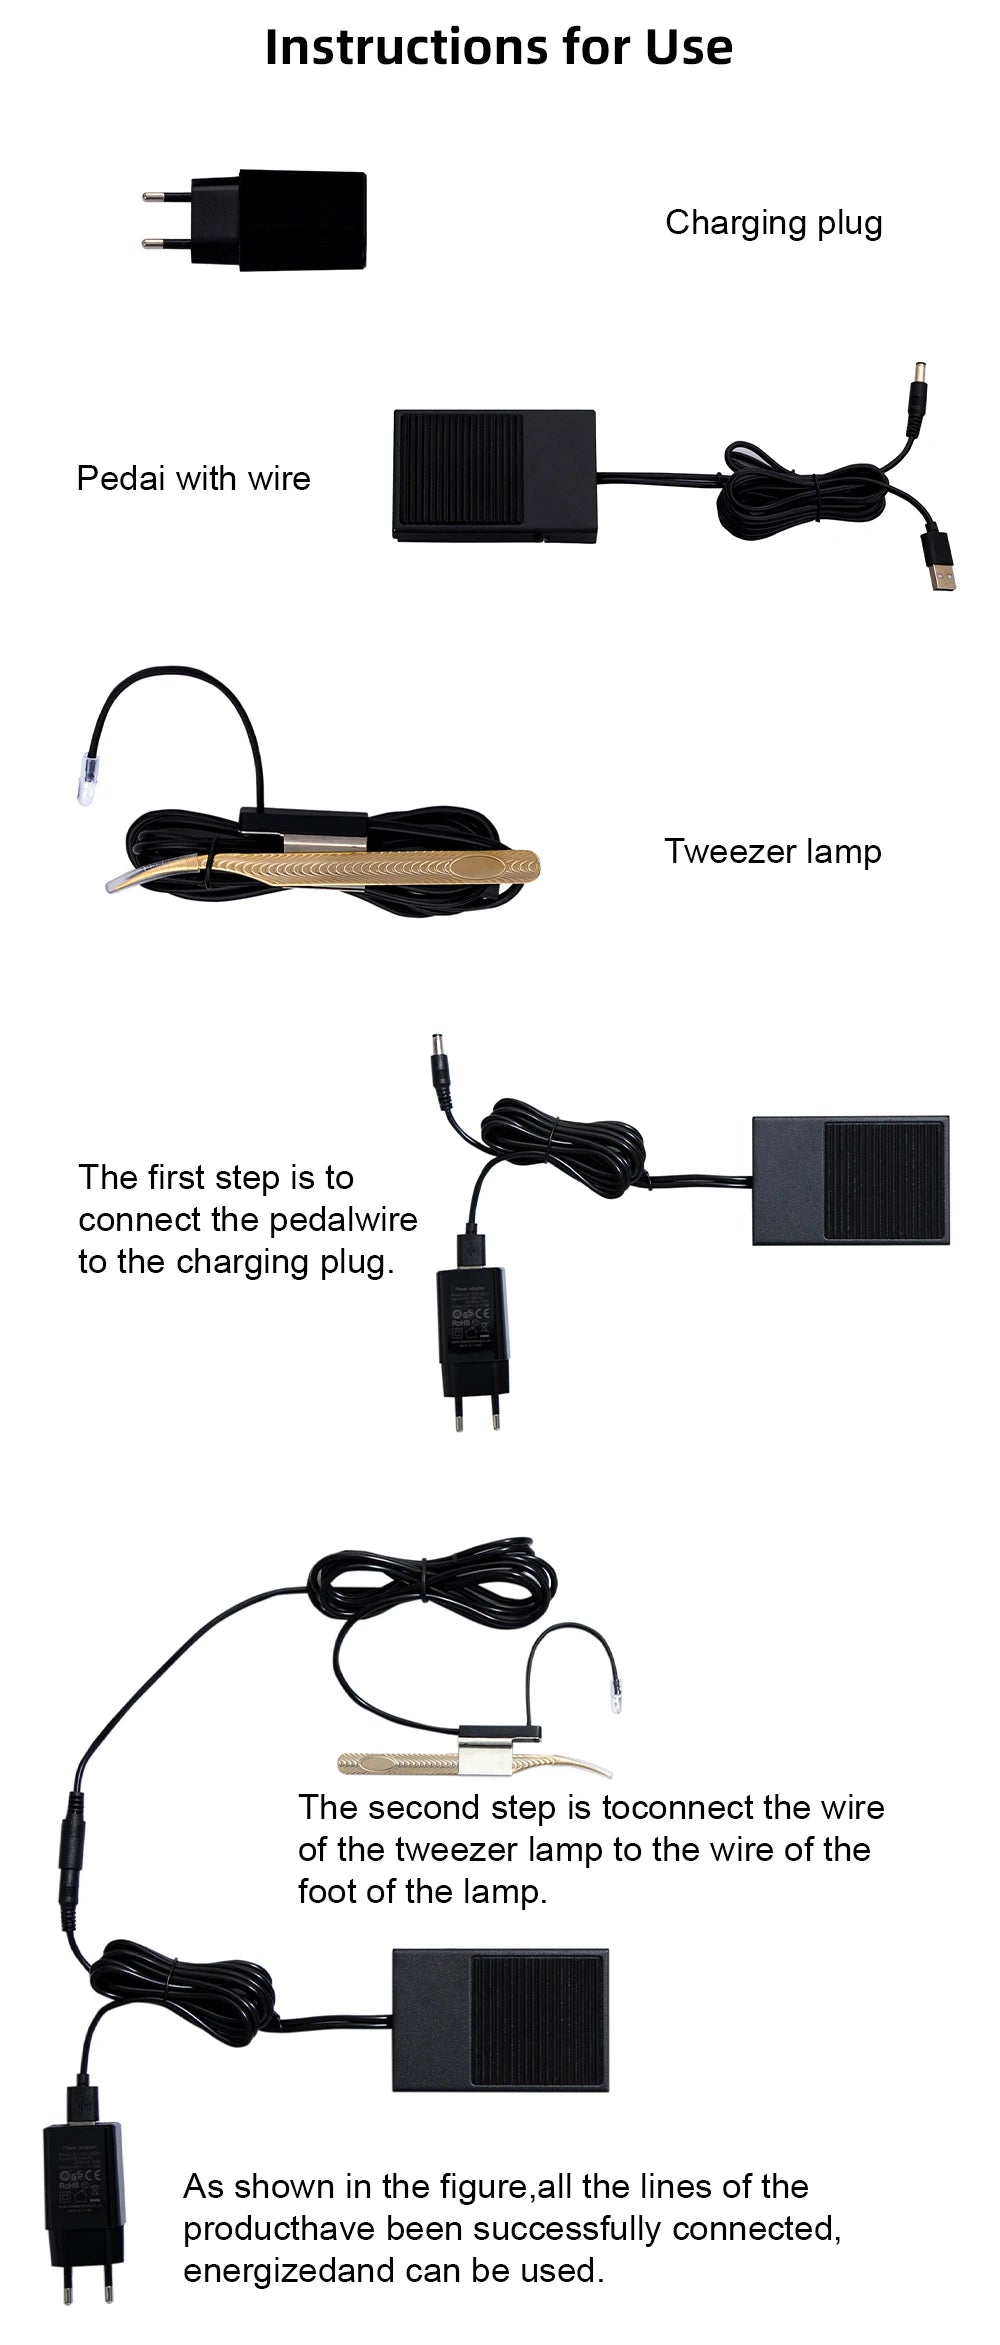
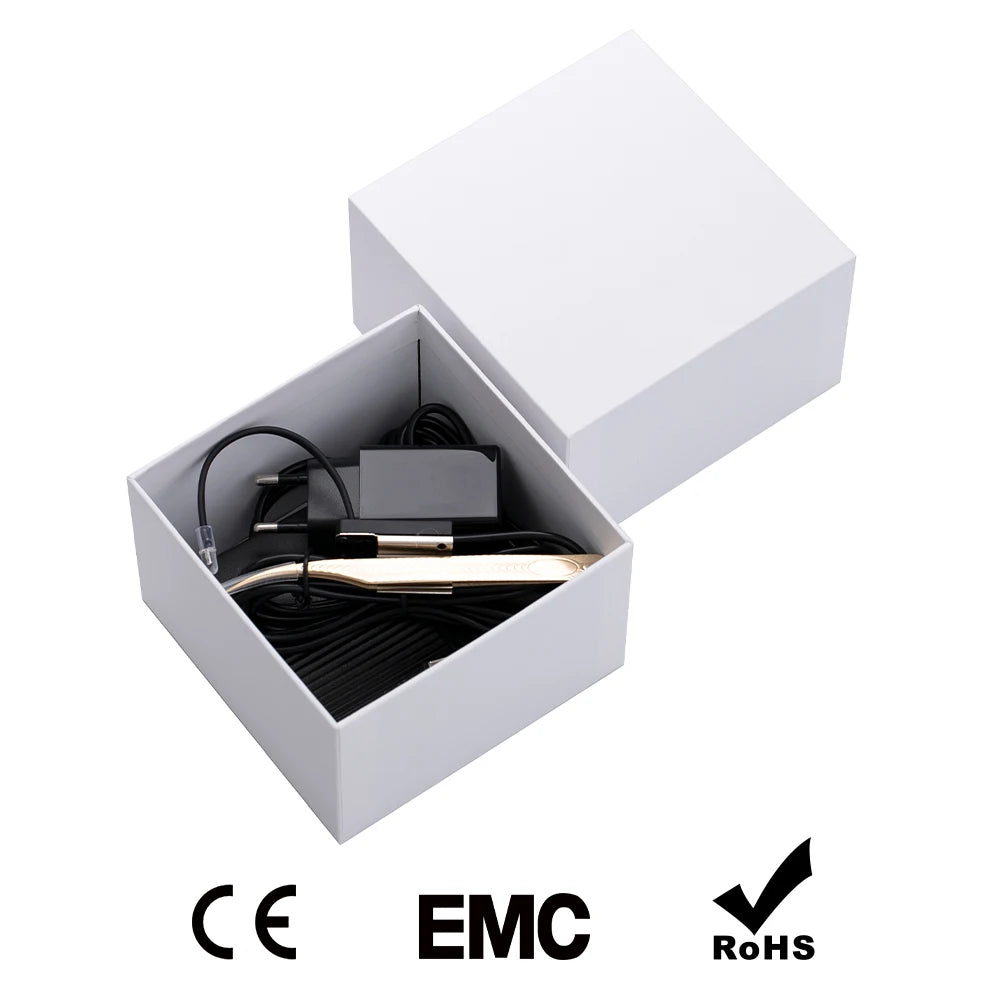
For technicians evaluating professional equipment, the Professional UV LED Eyelash Glue Curing Light Kit is one example of a UV LED lash application kit. Its listing identifies model TL02 and includes precision tweezers. However, specific wavelength, irradiance, and adhesive compatibility information should be independently confirmed before pairing it with a particular UV adhesive.
Explore the available eye care devices when reviewing equipment categories for a broader professional beauty setup.
Professional UV LED Lash Adhesive Curing Workflow
A consistent professional workflow combines appropriate preparation, controlled adhesive application, correct equipment positioning, and manufacturer-approved exposure. Following a repeatable procedure can help reduce avoidable application errors.
Step 1: Prepare the Natural Lashes and Work Area
Begin by preparing a clean, organized workstation. Ensure the client is positioned comfortably and review any relevant adhesive or equipment precautions before starting.
- Clean the natural lashes according to professional application protocols.
- Ensure the lashes are prepared and dried as required by the adhesive manufacturer.
- Arrange the extensions, isolation tweezers, and application tools.
- Inspect the curing lamp and confirm that it is functioning correctly.
- Check that the required protective equipment is available.
Proper isolation is essential because adjacent natural lashes should not become unintentionally bonded together.
Step 2: Prepare and Dispense the Adhesive
Follow the adhesive manufacturer's dispensing and handling instructions. Check the expiration date, storage conditions, and bottle condition before use.
Dispense a suitable quantity using the recommended technique. Avoid excessive adhesive accumulation because larger adhesive volumes may affect light penetration and bonding consistency.
Step 3: Apply the Lash Extension Correctly
Isolate the natural lash and apply the extension using controlled placement. Maintain an appropriate bonding surface and consistent adhesive quantity.
Correct placement matters because curing technology cannot compensate for poor isolation, insufficient contact, or unsuitable attachment technique.
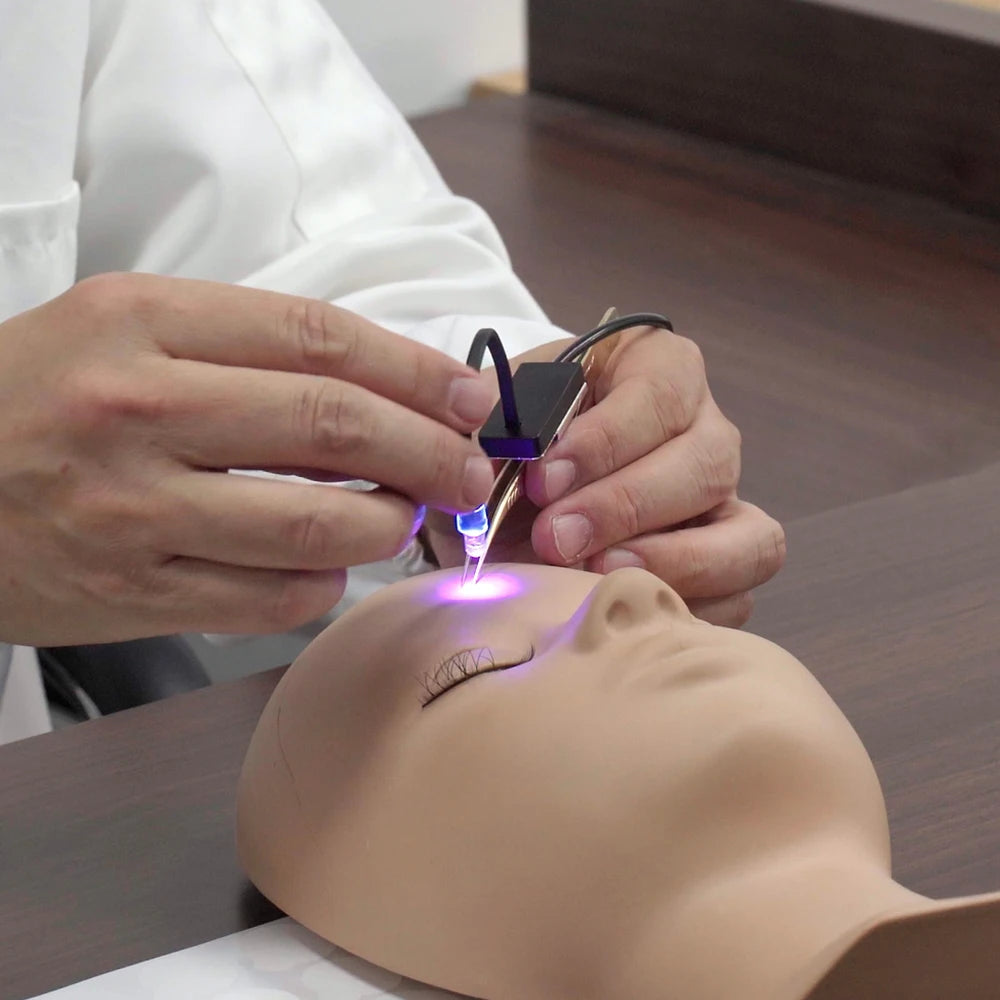
Step 4: Position the UV LED Curing Lamp
Position the curing lamp according to the approved equipment configuration. Ensure that the intended adhesive bonding area receives the required light exposure.
Maintain the specified distance and angle. Do not improvise the positioning procedure or direct the curing beam into open eyes.
Step 5: Follow the Approved Exposure Procedure
Activate the curing system using the manufacturer's specified exposure settings. Exposure duration, irradiance, wavelength, and operating distance should all match the adhesive system's requirements.
Avoid guessing the curing time based on another brand's adhesive or lamp. Different formulations may require different activation conditions.
Step 6: Check the Adhesive Bond and Application
After completing the approved exposure procedure, inspect the application for visible defects.
- Check whether the extension is correctly attached.
- Inspect for visible adhesive buildup or excess material.
- Confirm that adjacent natural lashes remain isolated.
- Look for visible inconsistencies in extension placement.
- Follow the manufacturer's procedure if curing concerns arise.
Visual inspection alone cannot establish complete chemical conversion. Technicians should rely on validated equipment settings and documented procedures rather than appearance alone.
For professionals comparing equipment options, the UV LED eyelash glue curing light kit with precision tweezers provides an example of a combined application-tool setup. The product listing describes a lightweight plastic construction and a listed weight of 0.5 kg. Confirm its technical operating specifications and compatibility before professional use.
Environmental Factors That Affect UV LED Lash Adhesive Performance
Although UV LED adhesive relies on light activation, environmental conditions should not be ignored. Temperature, storage, formulation characteristics, and handling can all influence adhesive consistency and application behavior.
Relative Humidity and Adhesive Consistency
Relative humidity has a particularly established influence on conventional cyanoacrylate lash adhesives because moisture participates in their curing reaction.
UV-curable formulations have different activation requirements, but this does not mean that humidity is irrelevant to every UV adhesive. Specific formulation components and manufacturer recommendations determine whether environmental moisture affects handling or performance.
Maintain suitable salon conditions and follow the adhesive manufacturer's recommended operating range.
Temperature and Salon Conditions
Temperature can influence adhesive viscosity, dispensing behavior, and reaction characteristics. An adhesive stored or used outside its recommended temperature range may become more difficult to handle.
Keep the workstation within the manufacturer's specified conditions and avoid exposing adhesive bottles to unnecessary heat or temperature fluctuations.
Adhesive Storage and Shelf Life
Proper storage helps preserve adhesive quality. Follow the manufacturer's instructions regarding storage temperature, light exposure, bottle sealing, and product lifespan.
- Keep the bottle securely closed when not dispensing adhesive.
- Protect light-sensitive formulations from unintended light exposure.
- Avoid contamination of the bottle opening and dispensing area.
- Observe the stated expiration date and recommended period after opening.
- Replace products that show changes in consistency or other signs of deterioration.
Consistency Between Sessions
Professional lash technicians can improve repeatability by documenting important application variables.
Consider recording the adhesive batch, storage conditions, salon temperature, relative humidity, lamp configuration, exposure settings, and application observations. This information makes it easier to identify patterns when application results change.
UV LED Lash Adhesive Safety: Professional Precautions
UV LED curing systems require careful attention to both optical exposure and chemical handling. The fact that a device uses LED technology does not automatically establish that its light exposure is harmless or that it is suitable for use near the eyes without protective measures.
Protecting the Eyes from Unnecessary Light Exposure
Ultraviolet and near-ultraviolet light exposure should be controlled according to the equipment's documented safety requirements. The eyes should not be exposed directly to the curing beam.
Technicians should maintain the approved lamp positioning, avoid unnecessary reflected exposure, and use any specified shielding or protective accessories.
Never direct a curing lamp toward open eyes, and do not assume that a short exposure is automatically safe under every operating condition.
Protective Eyewear and Equipment Instructions
Use wavelength-appropriate protective eyewear when required by the equipment manufacturer or applicable safety assessment. Protection should be suitable for the actual emission spectrum and should fit correctly.
Ordinary sunglasses should not be treated as a substitute for documented UV protective eyewear. Review the equipment instructions for any additional shielding, positioning, or exposure-control requirements.
Adhesive Handling and Ventilation
Light exposure is only one part of professional lash application safety. Adhesive ingredients may also create risks through skin contact, eye contact, or inhalation of vapors, depending on the formulation.
- Review the adhesive safety data sheet before use.
- Prevent direct contact with uncured adhesive.
- Use appropriate ventilation in the work area.
- Follow recommended hygiene and handling procedures.
- Keep adhesives away from unintended light exposure when required.
- Store products securely and follow the manufacturer's handling instructions.
For broader professional beauty equipment information, the skin and beauty care devices collection provides additional context when organizing a salon equipment setup.
Client Screening and Situations Requiring Extra Caution
Before treatment, review the adhesive manufacturer's contraindications and relevant client safety information. Ask about known adhesive sensitivities and explain the procedure, equipment, and applicable precautions.
Obtain informed consent and follow appropriate professional training requirements. If a client experiences unexpected irritation or an adverse reaction, stop the procedure and follow the appropriate response guidance. Seek medical advice when symptoms warrant it.
Do not continue application when the client reports significant discomfort or when safe exposure conditions cannot be maintained.
What the Available Safety Evidence Can and Cannot Establish
Photobiological safety depends on factors such as wavelength, irradiance, exposure duration, distance, and the amount of light reaching the eye or skin. LED classification alone does not establish that a particular curing system is risk-free.
Similarly, general information about UV LED technology cannot replace a product-specific safety assessment. Technicians should consult equipment documentation, adhesive safety data sheets, and applicable professional safety guidance before use.
UV LED Lash Adhesive Troubleshooting: Common Problems and Fixes
When an application does not produce the expected results, technicians should investigate the complete adhesive and curing system instead of automatically increasing exposure time.
Incomplete or Inconsistent Adhesive Curing
Possible causes include:
- Incompatible lamp wavelength.
- Insufficient irradiance at the bonding area.
- Incorrect exposure duration.
- Improper lamp distance or angle.
- Obstructed light coverage.
- Expired or improperly stored adhesive.
Review the adhesive's technical documentation and verify that the complete lamp configuration matches the approved procedure.
Poor Lash Extension Retention
Poor retention is not necessarily caused by incomplete curing. Other possible contributors include unsuitable adhesive placement, inadequate bonding surface, poor isolation, excessive adhesive, incorrect application technique, or incompatibility between the adhesive and equipment.
Evaluate application technique and equipment settings together before identifying the likely cause.
Adhesive Is Too Thick or Difficult to Apply
Changes in viscosity may be associated with storage conditions, product age, temperature, contamination, or the adhesive's formulation characteristics.
Check the expiration date and storage history. Avoid attempting to correct an adhesive that has deteriorated by adding other substances unless explicitly instructed by its manufacturer.
Using Too Much Adhesive
Excessive adhesive can create unnecessary buildup and may affect how light reaches the reactive material. It can also make accurate lash placement more difficult.
Use a controlled quantity according to the product instructions and maintain consistent application technique.
Incorrect UV LED Wavelength Selection
An incompatible wavelength may fail to activate the adhesive's photoinitiator system effectively. A lamp that appears bright is not necessarily suitable for the formulation.
Compare the documented emission spectrum with the adhesive's activation requirements. If compatibility cannot be established, do not assume the system will cure correctly.
Improper Lamp Positioning or Exposure
Incorrect distance, angle, beam coverage, or exposure duration can change the light energy reaching the adhesive. Movement during curing may also result in inconsistent exposure.
Return to the manufacturer-approved positioning and exposure procedure. Avoid compensating for positioning problems with unverified exposure adjustments.
Professional Tips and Common UV Lash Curing Mistakes
Best Practices for Consistent UV Adhesive Curing
- Select adhesive and lamp combinations with documented compatibility.
- Verify wavelength and irradiance specifications before application.
- Maintain consistent adhesive quantity and attachment technique.
- Follow the approved exposure time and lamp positioning.
- Store adhesive according to manufacturer instructions.
- Inspect equipment regularly for damage or contamination.
- Document application conditions to improve repeatability.
- Use the protective equipment required by the system.
Common Mistakes Lash Technicians Should Avoid
- Using any UV LED lamp without checking adhesive compatibility.
- Assuming higher electrical wattage guarantees better curing.
- Guessing exposure duration based on another adhesive brand.
- Applying excessive adhesive to the bonding area.
- Ignoring protective eyewear and light-positioning instructions.
- Assuming that visual dryness proves complete polymerization.
- Overlooking adhesive expiration dates and storage requirements.
UV LED Lash Curing Equipment Compatibility Checklist
Before beginning a professional service, confirm the following:
- The adhesive is specifically formulated for the selected light-curing system.
- The lamp's actual emission spectrum matches the adhesive manufacturer's requirements.
- The specified irradiance and operating distance are documented.
- The exposure duration and activation procedure are manufacturer-approved.
- The lamp is functioning correctly and its optical components are clean.
- The adhesive is within its expiration date and stored correctly.
- The curing beam can be positioned according to the approved procedure.
- Required wavelength-appropriate protective equipment is available.
- The work area has appropriate ventilation and hygienic conditions.
- The technician understands the adhesive safety data sheet and equipment instructions.
A combined professional tool kit may also be useful when organizing a lash application workstation. For example, the Professional UV LED Eyelash Glue Curing Light Kit is listed as a Pinky Leem TL02 model and includes precision tweezers. Its product description identifies UV LED technology, plastic construction, and a listed weight of 0.5 kg. These listing details do not establish a specific wavelength or compatibility with every UV-curable adhesive, so verify the technical documentation before use.
Frequently Asked Questions About UV LED Lash Adhesive Curing
How Does UV Lash Glue Work?
UV lash glue uses light-sensitive chemistry, typically involving photoinitiators, to initiate polymerization when exposed to a compatible UV LED light source. The reaction transforms reactive adhesive components into a more stable polymer structure that bonds the extension to the natural lash.
Is UV LED Lash Adhesive Different from Regular Eyelash Extension Glue?
Yes. UV LED lash adhesive uses light-initiated polymerization, while conventional cyanoacrylate lash glue generally cures through moisture-triggered polymerization. Their activation requirements and equipment needs differ, although exact adhesive chemistry varies by manufacturer.
How Long Does UV Lash Glue Take to Cure?
Curing time depends on the adhesive formulation, compatible wavelength, irradiance, exposure distance, and manufacturer-approved settings. There is no universal curing duration for every UV lash adhesive. Always follow the specific product's technical instructions.
What UV LED Lamp Is Compatible with UV Eyelash Extension Adhesive?
A compatible lamp must emit light within the adhesive's specified activation wavelength range and meet its documented irradiance, operating distance, and exposure requirements. Check both manufacturers' technical documentation rather than selecting equipment based only on wattage or appearance.
Is UV LED Lash Adhesive Safe for Professional Eyelash Extensions?
Professional use requires compatible equipment, correct exposure procedures, appropriate eye protection, adequate ventilation, and careful adhesive handling. Safety depends on the actual formulation and equipment specifications. Follow manufacturer instructions and avoid claiming that any UV curing system is completely risk-free.
Conclusion: Achieving Consistent UV LED Lash Adhesive Curing
UV LED lash adhesive curing introduces a light-activated approach to professional eyelash extension application. By understanding photopolymerization, photoinitiators, wavelength compatibility, irradiance, and exposure duration, lash technicians can make more informed equipment decisions and establish consistent application procedures.
Successful results require more than switching on a curing lamp. Adhesive chemistry, equipment compatibility, lamp positioning, controlled adhesive placement, environmental conditions, and appropriate safety precautions all contribute to the process.
Most importantly, manufacturer-specific technical documentation should always take priority over generalized curing recommendations. Verify compatibility before combining products, follow approved exposure procedures, and maintain appropriate protective measures throughout every service.
Technicians reviewing their professional setup can explore the UV LED eyelash glue curing light kit as one equipment example and compare its documented specifications with their chosen adhesive system. A carefully matched combination of professional lash tools and compatible curing technology supports a more controlled approach to eyelash extension application.
For additional beauty equipment and educational resources, visit the Beauty & Self-Care Blog for further professional and personal care guidance.
Pillar Article: Eyelash Adhesive Curing Lamp: Professional UV LED Buying Guide