

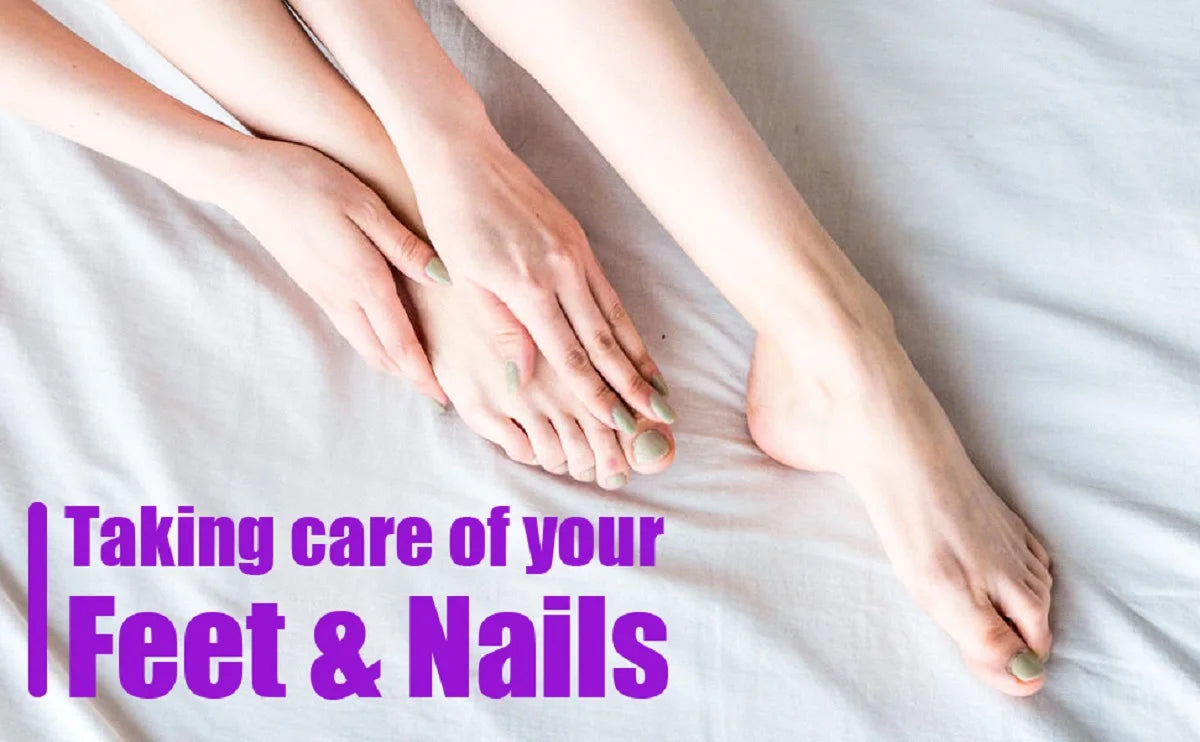
Does how to use callus remover really make feet smooth every week?
Answer: Learning how to use callus remover properly delivers noticeable smoother feet in one weekly session by softening and reducing thickened skin without damaging healthy tissue. With a safe foot file + gentle routine you can keep heels soft, prevent painful cracks, and maintain healthy skin between treatments.
⏱ 12 min readHow to Use Callus Remover Safely for Smooth Feet Every Week
Are your heels cracking, soles thick, or sandals revealing rough patches that make you hide your feet? You’re not alone. Many find at-home treatments confusing or worry they’ll overdo it. This guide shows exactly how to use callus remover—step-by-step—so you get repeatable, salon-level smoothness without risks. Read on to take control of your weekly foot care routine.
how to use callus remover + foot callus removal at home — 💡 See it in action.
Which style suits you best? Read on!
Curious whether a manual foot file or an electric foot file works better for your skin? Learn the differences below and pick the safe tool that fits your pace.
Quick solution: How to use callus remover (at-a-glance)
Direct answer: To perform safe foot callus removal at home, soak or steam feet, gently remove softened callus with a safe foot file or electric foot file in short, light strokes, finish with moisturizer and a protective balm. Limit aggressive removal to once a week and maintain daily care to prevent buildup.
- Soften skin for 5–10 minutes (warm water + mild soap or soak solution).
- Pat feet dry; use a safe foot file in gentle back-and-forth strokes.
- Stop when skin is smooth and even — don’t chase perfect thinness.
- Apply hydrating cream and heel balm; protect with socks overnight if possible.
Why calluses form and what makes them worse
Calluses are the body’s protective response to repeated pressure and friction. Areas that bear weight—heels, balls of feet, and sides—thicken to shield underlying tissue. While protective, untreated calluses can crack, become painful, or trap bacteria.
- Common contributors: tight shoes, high heels, walking barefoot on hard surfaces, uneven gait, dry skin, overweight.
- Hormonal or age-related skin thinning accelerates formation and lengthens recovery time.
- Ignoring daily hydration or filing incorrectly makes calluses return thicker.
How this routine prevents escalation
Regular, gentle control breaks the cycle: weekly callus reduction + daily hydration prevents thick buildup and reduces cracking risk. Less aggressive maintenance yields stronger, healthier skin over months.
Prep: What you need before you start
Gather these essentials so your session is efficient and safe.
- Clean basin or foot spa and warm water (not scalding).
- Mild soap or a soothing soak (Epsom salt optional for soreness).
- Soft towel and pumice or a safe foot file — choose a tool with a gentle grit.
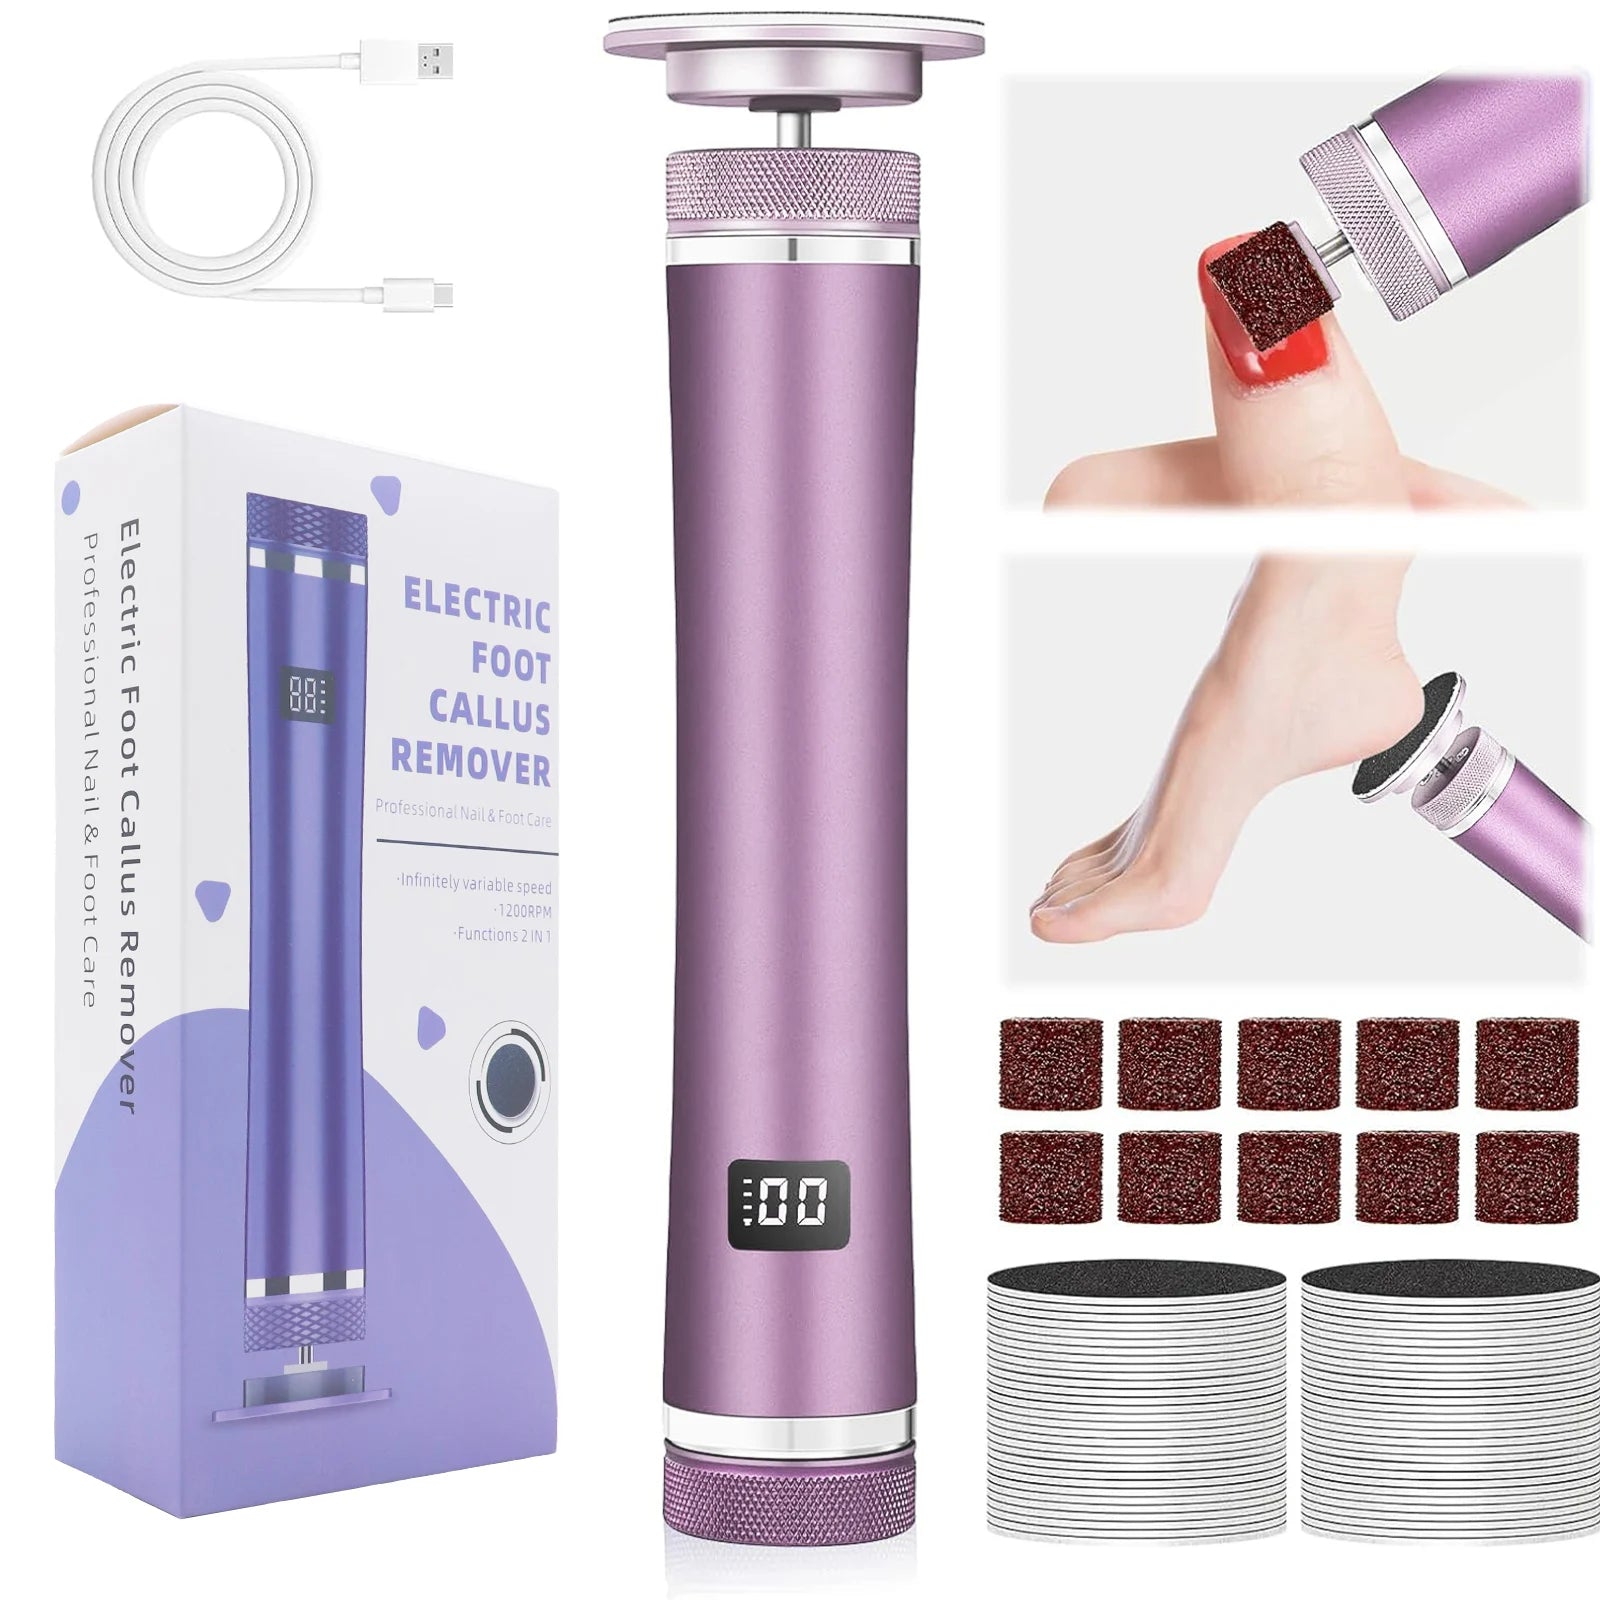
- If you prefer power: an electric foot file for consistent pressure. Product example: electric foot file pro (mentioned organically as tool option).
- Rich moisturizer or heel balm with urea or glycerin for long-lasting hydration.
- Socks for overnight sealing of moisture when needed.
Safety checklist before you begin
- Don’t treat open wounds, infections, or diabetic foot complications without professional clearance.
- Trim toenails first to avoid accidental catching on edges while filing.
- Test a new tool on a small area to gauge pressure and comfort.
Step-by-step — safe foot callus removal at home
Direct answer: Start by soaking feet 5–10 minutes to soften callus. Use a safe foot file or gentle electric device in short, even strokes—avoid aggressive scraping. Rinse, dry, and apply a hydrating cream plus a protective balm. Repeat once weekly, and use a daily foot care routine to maintain results.
- Clean and soak (5–10 minutes). Use warm water and mild soap. Add Epsom salt only if you have no open skin. Soaking softens the hardened layers—this is essential for a gentle removal.
- Gently dry and inspect. Pat feet dry and identify thick spots. Mark problem areas mentally—most often the heel and ball of foot.
- Start with a soft tool. If using a manual safe foot file, hold the foot steady and file in one direction with light pressure. If using an electric device, let the roller or head touch the skin and move it slowly without pressing hard. Short sessions (30–60 seconds per area) prevent over-removal.
- Monitor color and thickness. Stop when the skin becomes uniform and slightly pink; avoid filigree removal down to red or painful skin. Healthy skin should feel smooth, not raw.
- Rinse and neutralize. Rinse away dead skin particles, pat dry, and inspect for missed spots. Light buffing can even texture but keep sessions brief.
- Hydrate deeply. Apply a rich cream or an overnight heel balm with occlusive ingredients. Consider using socks to lock in moisture for faster repair.
- Protect and plan next session. Note how much you removed. If you had to work hard, aim for a gentler follow-up next week. Keep a small travel file for touch-ups.
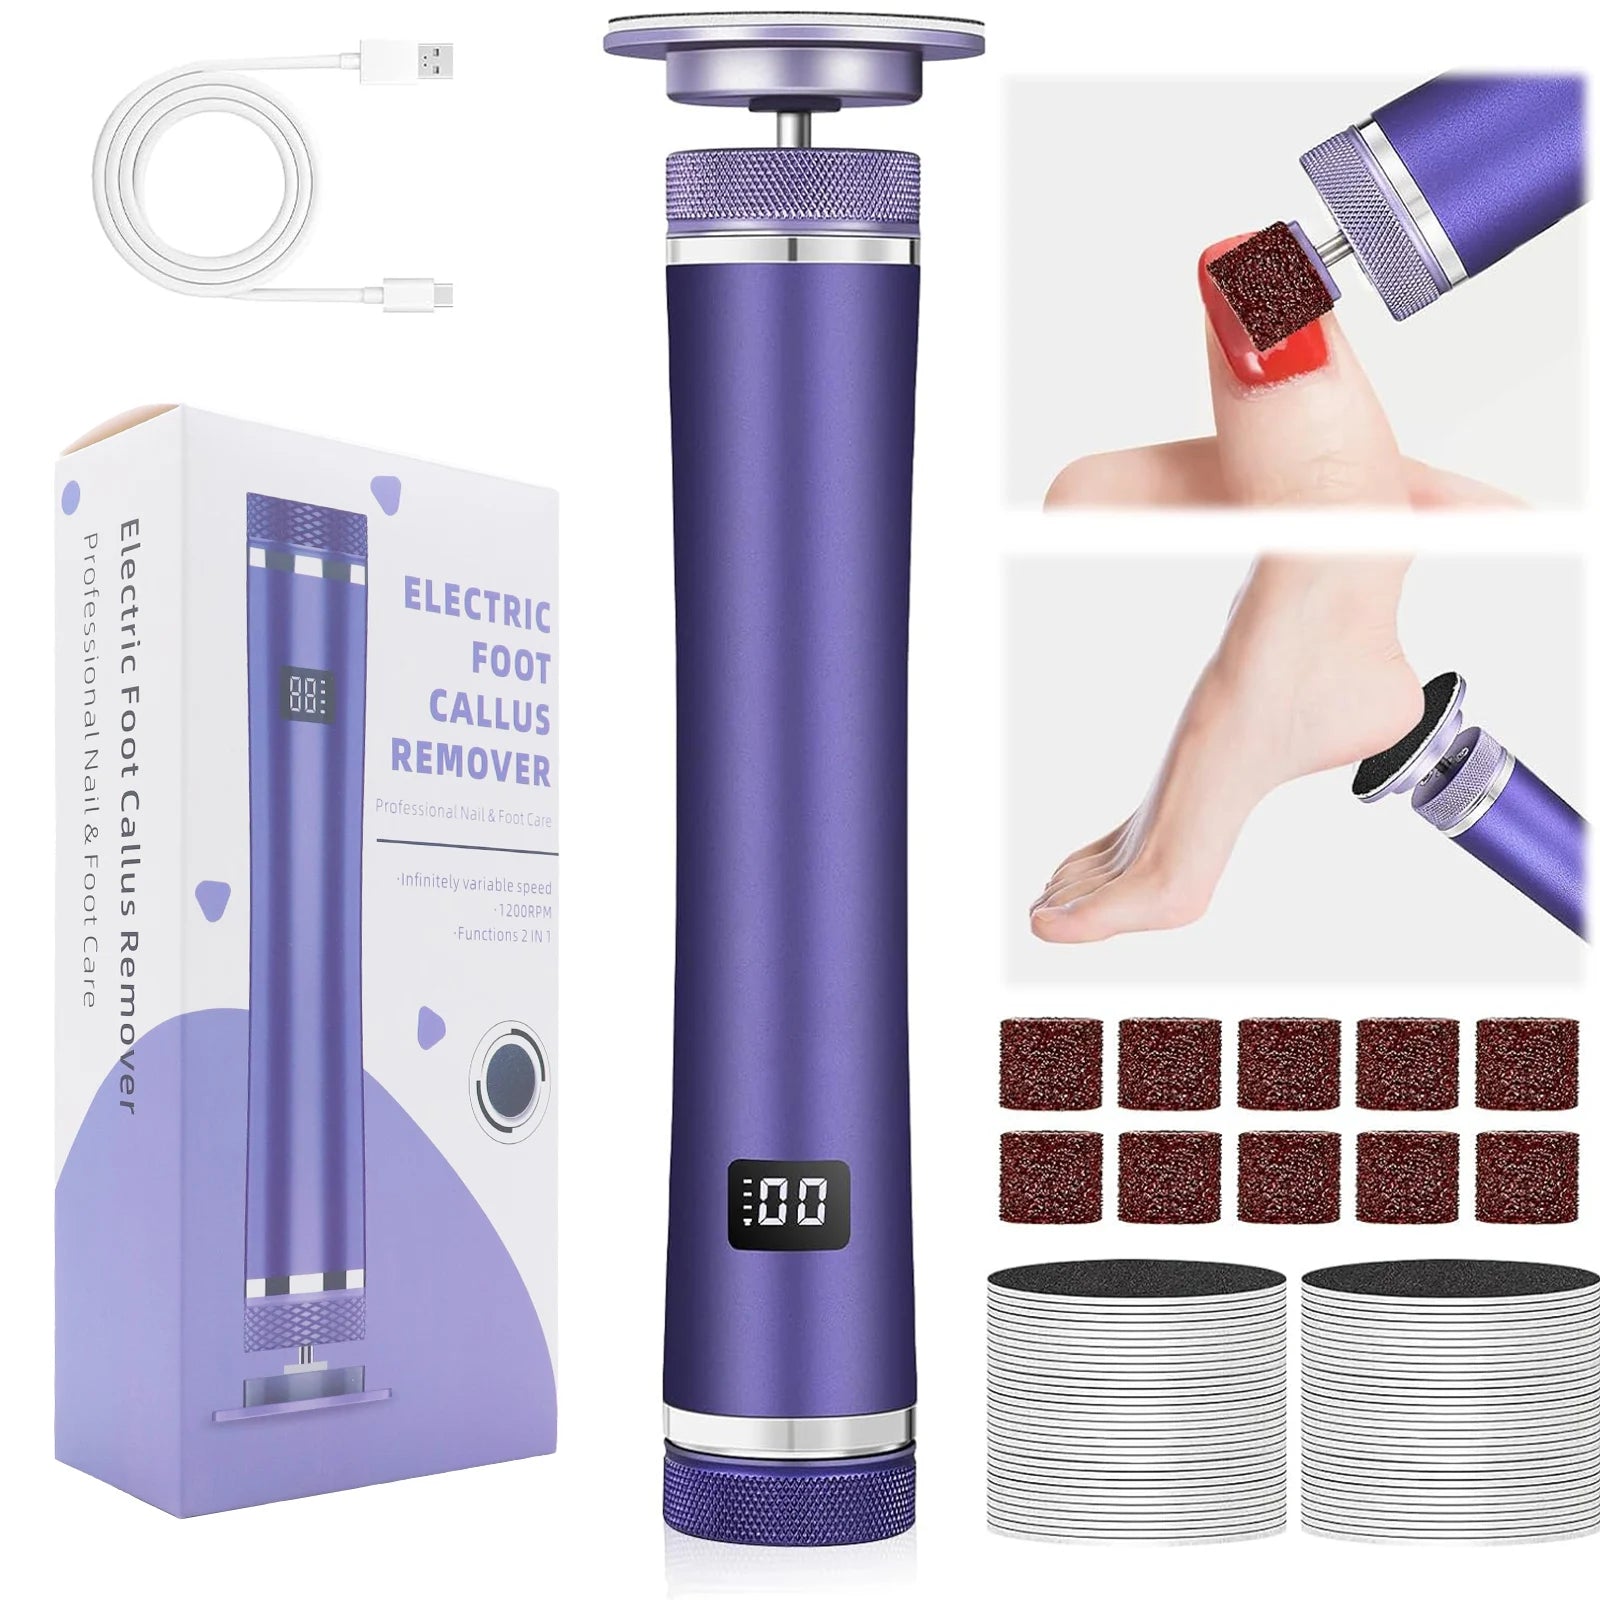
how to use callus remover + safe foot file in week-by-week routine — 💡 Try it with the electric option.
Technique notes: what to avoid
- Avoid scraping aggressively in one spot—this increases pain and slow healing.
- Don’t use metal blades unless trained—they cause permanent thinning and risk infection.
- Never treat diabetic feet or reduced-sensation feet without medical advice.
(Applied to foot care — master the weekly system that keeps calluses away.)
Daily foot care routine & frequency tips
Weekly callus removal is the core ritual. Daily habits determine whether calluses return thicker or stay thin.
- Every day: Rinse feet, pat dry, and apply a lightweight moisturizer after showering. Focus on heels and pressure points.
- Every other day: Light buffing with a soft file or pumice if your skin is quickly thickening.
- Weekly: Full removal session as described above—limit to one thorough session weekly for most people.
- Monthly: Reevaluate shoes and gait if calluses reappear rapidly—consider orthotics or shoe rotation.
Products that help daily maintenance
- Glycerin/urea cream (10% urea for tougher skin).
- Light exfoliating creams for weekly smoothing (use sparingly).
- Socks made of breathable fibers to keep moisture balance.
Compare your options: safe foot file vs pumice vs electric
| Tool | Best for | Speed | Control & Safety | Maintenance |
|---|---|---|---|---|
| Manual safe foot file | Gentle, precise touchups | Slow | High control; low risk if used correctly | Rinse and dry |
| Pumice stone | Very mild exfoliation | Slow | Low risk; best for thin calluses | Clean and dry after use |
| Electric foot file (roller) | Fast reduction for thick callus | Fast | Good if used gently; risk if over-pressed | Replace heads periodically |
Which is best? For many, a hybrid approach works: weekly electric session for thick spots, followed by manual files for edge blending and daily care.
✅ Pros / ❌ Cons at a glance
- ✅ Manual file — excellent control, budget-friendly.
- ❌ Manual — slower and requires patience for big calluses.
- ✅ Electric — fast, consistent results for thicker skin.
- ❌ Electric — higher cost and a learning curve to avoid overuse.
Troubleshooting common problems
Burning, stinging or raw skin after filing
If skin feels raw, you most likely removed too much. Stop treatments, apply an occlusive balm (petrolatum or specialized heel balm), and give the skin 3–7 days to recover. Avoid further filing until fully healed.
Callus returns quickly
Re-check footwear and walking patterns. A persistent hot spot suggests pressure distribution issues. Rotate shoes, add cushioning, or consult a podiatrist if the callus reappears every 1–2 weeks.
Small cracks that keep reopening
Deep cracks often need both removal and barrier repair. Use a urea-based balm plus occlusion (socks overnight). For painful deep fissures, seek professional care.
Aftercare, prevention, and long-term results
Results compound: gentle weekly control plus daily hydration makes thick calluses thin out over months. Expect visible improvement in 3–8 weeks with consistent care.
- Use a moisturizing cream every night for long-term maintenance.
- Protect pressure points with gel cushions in shoes when needed.
- Reassess if you have diabetes, circulation issues, or numbness—medical clearance is required.
natural way to remove callus + daily foot care routine — 💡 Keep a product handy near your sink.
Real user results & before/after
Social proof encourages trust. Here are anonymized examples based on repeat users of weekly routines:
- Maria, 42: “After 6 weeks of gentle weekly filing and nightly heel balm, my heels stopped cracking. It’s painless and fast.”
- Priya, 29: “Switched to a safe electric file for thick spots — I cut my treatment time from 25 to 8 minutes.”
- Before/After snapshot: Average users report a 60–80% reduction in visible thickness after 8 weeks of consistent care.
Where the tool fits in your self-care routine
Think of the callus remover as a repeatable tool: weekly use for transformation, daily maintenance for prevention. Suggested product path:
- Start with a manual file to gauge your skin’s response.
- If callus is thick and resistant, upgrade to an electric tool for controlled power—use low pressure.
- Pair with a moisturizing heel balm and breathable socks for overnight repair.
Want a device that fits this path? Consider the electric file option as a time-saver for thicker build-up: electric foot file pro.
Also explore related categories for complementary tools: Body Care and Health Devices and Skin and Beauty Care Devices for moisturizers, balms, and supportive accessories.
Final step: weekly checklist
| Step | Action | Why it matters |
|---|---|---|
| 1 | Soak feet 5–10 min | Softens callus for safe removal |
| 2 | File gently—30–60s per spot | Removes thick layers without injury |
| 3 | Rinse & dry | Removes debris |
| 4 | Apply rich moisturizer & balm | Restores barrier and speed healing |
Ready to speed up weekly sessions? The electric option reduces time and evens pressure for safe removal. Visit the product page for details.
Mini-FAQ (schema-ready)
How often should I use a callus remover?
A controlled session once a week is ideal for most people. Daily light moisturizing and occasional light buffing prevent thick return. If you need heavy work more often, reduce intensity and consult a professional for safe guidance.
Is it safe to use an electric callus remover at home?
Yes, when used gently and correctly. Start on low pressure, move constantly, and stop at the first sign of tenderness. People with diabetes or poor circulation should get medical clearance before using powered devices.
What ingredients help repair cracked heels after filing?
Look for moisturizers with urea (5–10%), glycerin, lanolin, or petrolatum. Occlusive balms at night plus socks dramatically speed repair by locking in hydration.
Extra resources & next steps
To build a consistent program, pair your callus removal with supportive gear and post-treatment care items found in the following collections: Body Care and Health Devices, Skin and Beauty Care Devices, and Beauty & Self-Care Blog.
Quick reminder: Simple weekly rituals beat occasional extreme measures. Start gentle, stay consistent, and choose tools that match your skin’s response.
Related Articles:
- Rough Feet Exfoliation Fix: A Simple Routine for Softer Heels
- Foot File for Callus Removal: How to Buff Without Over-Exfoliating
- Home Treatment for Calluses: Step-by-Step Methods That Work Fast
- How to Remove Calluses From Feet Permanently: Top Methods Reviewed
Pillar Articles:


