

⏱ 8 min read — Home Skin Analysis Guide: Step-by-Step to Spot Hidden Issues
Does a home skin analysis guide really help you spot hidden skin issues?
The home skin analysis guide shows how to identify dryness, early pigmentation, and hidden congestion using simple tools and observation. This guide explains quick checks, lighting tests, and tracking methods so you can spot subtle changes earlier and decide whether to treat at home or see a professional.
- Clean and photograph skin under natural light.
- Use a focused light (woods lamp or phone flashlight) to reveal texture and pigmentation.
- Gently press, stretch, and note elasticity, redness, and sebum patterns.
- Record findings, compare weekly, and consult a pro for persistent issues.
Worried you’re missing early signs of dullness, dehydration, or uneven tone? This home skin analysis guide helps you decode what your skin is actually doing — not just what it looks like in a quick mirror check. You’ll get clear step-by-step tests, simple tools you already own, and actionable next steps so you can make confident skincare choices today.
Why do a home skin analysis? (Immediate benefits)
Knowing what’s happening beneath the surface prevents wasted products, shortens trial-and-error, and helps you catch issues before they escalate. This guide focuses on clarity and confidence — not complicated equipment. With consistent checks you’ll notice patterns (dehydration cycles, inflammation triggers, sun spots) and act early.
What this guide shows — quick answer
The home skin analysis guide teaches four practical checks: texture, moisture, pigmentation, and barrier health. Each check uses a simple observation plus one home tool so you can quickly decide if DIY fixes or a pro appointment is the right next step.
home skin analysis guide - KentDO 💡 See it in action — check hidden pigmentation and texture.
Set up: lighting, camera, and simple tools that reveal more
Good analysis starts with repeatable conditions. Use natural daylight or a consistent lamp. You’ll need: a mirror, smartphone camera, a focused cool light (or Woods lamp if available), a clean cloth, and a pad of paper to record notes.
- Natural light near a window — best for color and redness.
- Phone flashlight or desk lamp — reveals texture and pore congestion.
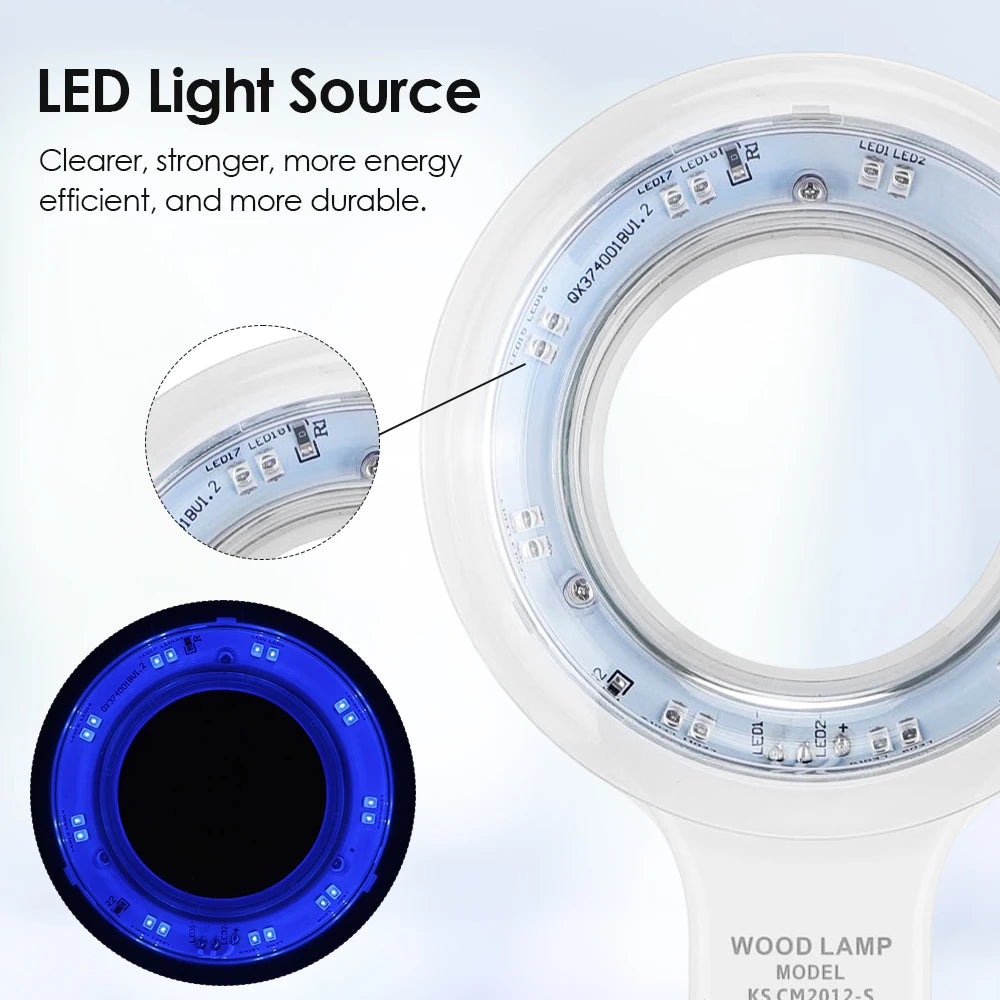
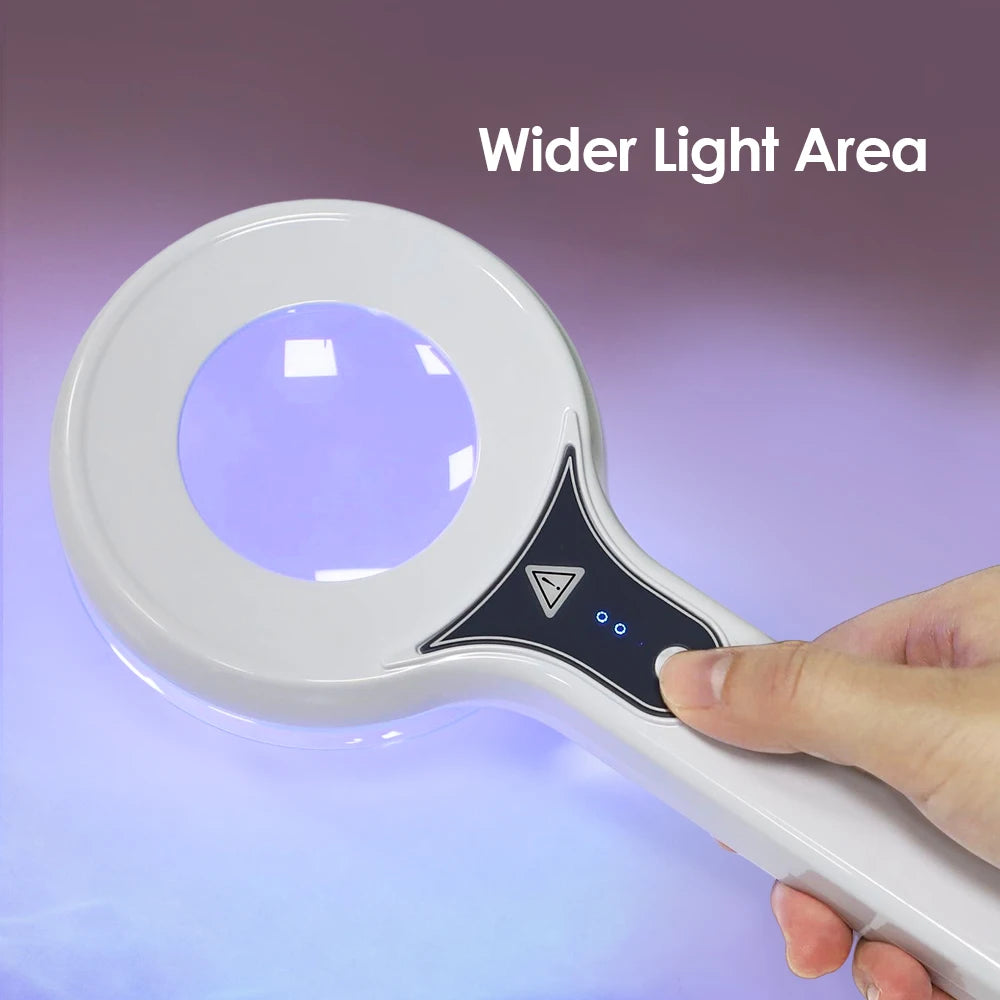
- Optional: a handheld Woods lamp for pigment/porphyrin checks. Consider this product if you want a dedicated tool.
How lighting changes what you see
Direct, cool light exaggerates pores and texture. Diffused daylight gives an honest color read. For consistent tracking, photograph in the same light and distance each time.
Step-by-step skin checks (do this monthly)
1. Clean face → baseline photos
Start clean: remove makeup and oil. Take photos from three angles (front, left, right) with neutral expression. Use the same distance and lighting each time.
2. Texture and elasticity test
Gently pinch and roll a small area (cheek). Note how quickly skin springs back and whether fine lines deepen. Loss of elasticity can indicate collagen breakdown or dehydration.
3. Moisture & barrier test
Press a tissue lightly on the nose and cheeks after 30 minutes without products. Grease shows sebum, while tightness and flaking indicate barrier damage or under-moisturizing.
4. Pigmentation & porphyrin check (use light)
Shine a focused light across the skin at a low angle or use a Woods lamp. Early pigmentation, sun damage, and porphyrins (bacterial markers) become more visible under this method. If you have a skin analyzer device, follow its quick scan protocol.
5. Redness, inflammation & reactive areas
Look for diffuse redness vs pinpoint inflammation. Press test: press a fingertip for 3 seconds — blanching that doesn’t refill normally can suggest vascular issues, while immediate redness that fades suggests temporary irritation.
Compare tools & solutions: quick pros/cons
| Tool | What it shows | Pros | Cons |
|---|---|---|---|
| Phone camera + natural light | Color, redness, overall tone | Free, easy, repeatable | Less detail for texture/pigment |
| Woods lamp / skin analyzer | Pigmentation, porphyrins, oil hotspots | Reveals hidden issues; quick scans | Extra cost; needs basic know-how |
| Magnifying mirror / loupe | Surface texture, comedones | Inexpensive, immediate | Can overemphasize minor flaws |
Which style suits you best? Read on!

home skin analysis guide - KentDO 💡 Compare results week-to-week and refine your routine.
What to record and why it matters
- Photos: Front + sides (same lighting & distance).
- Symptoms: dryness, tightness, oiliness, flaking, itch.
- Triggers: new products, weather, sleep, diet changes.
- Scale: rate severity 1–5 to track progress easily.
Keeping a simple log makes patterns emerge: seasonal dryness, product-triggered rosacea, or recurring congestion before hormonal cycles. Patterns point to solutions — moisturize more, reduce actives, or seek targeted treatments.
Turn findings into a weekly routine (actionable plan)
Use your notes to create a low-risk plan: eliminate one product at a time, add a hydrating step, and protect with SPF daily. If you spot pigment or persistent inflammation, prioritize protection and professional evaluation.
4 steps to maintain skin health after analysis
- Hydrate: non-comedogenic moisturizer morning and night.
- Protect: daily broad-spectrum SPF.
- Repair: introduce barrier-supporting ingredients (ceramides, niacinamide).
- Track: photo + symptom log weekly for 6–8 weeks.
Product spotlight: make analysis easier
This home skin analysis guide pairs well with a focused lamp/skin analyzer to reveal pigmentation and porphyrins that plain light misses. A simple tool shortens the path from observation to action so you can choose the right targeted treatment with confidence. Shop the KentDO Woods Lamp Skin Analyzer.
A clear, repeatable scan routine improves decisions: use a dedicated analyzer or steady LED light, document results, and compare week-by-week to confirm progress or red flags before escalating care. This approach is core to the home skin analysis guide process.
Pros & cons of doing analysis at home
- ✅ Pros: low cost, frequent checks, early detection.
- ❌ Cons: not a medical diagnosis, potential misinterpretation.
- ✅ Win: empowers better product choices and fewer surprise reactions.
Real scenarios & quick solutions
| Scenario | What you see | Action |
|---|---|---|
| Sudden tightness & flaking | Patchy dryness, visible flakes | Stop exfoliants, add barrier cream, hydrate. |
| New brown spots in sunlight | Small pigmented dots on cheeks | Start daily SPF, note progress, seek derm for removal options. |
| Frequent clogged pores | Visible comedones, oil hotspots | Introduce salicylic acid; consider extractions by pro. |
- Recommended device for clarity: KentDO Woods Lamp Skin Analyzer.
- Shop related tools and care devices at Skin and Beauty Care Devices.
home skin analysis guide - KentDO 💡 Use findings to choose targeted solutions — start today.
Real readers: results & social proof
“I started taking weekly photos and using the lamp. I caught early sun spots and fixed my routine before they darkened — saved me from months of guesswork.” — M., 38
Before/after tracking across 6–8 weeks shows reduction in flare frequency for many readers when they followed the simple 4-step plan above.
Mini FAQ — quick answers
Is a home skin analysis accurate?
It’s accurate for spotting visual patterns (texture, pigment, oil) but not a substitute for medical diagnosis. Use it to decide whether to try targeted care or see a dermatologist.
How often should I analyze my skin?
Once every 1–2 weeks for short-term tracking, or monthly for a clear progress record. Keep lighting and distance consistent for reliable comparisons.
Can I use phone light instead of a skin analyzer?
Yes — a phone flashlight reveals texture and pore congestion. A dedicated analyzer can reveal porphyrins and deeper pigment, making some hidden issues clearer.
Ready to stop guessing and start seeing results? Use this home skin analysis guide twice a month, keep simple records, and you’ll have clearer choices — whether you want to tweak your routine or pursue professional care. Learn more tools at Skin and Beauty Care Devices and consider this analyzer to speed up discovery.
Pillar Article: How to Use Woods Lamp Safely: A Simple Guide for Clearer Skin
Other Related Articles:
- Woods Lamp Skin Tips: How to Read Results Without Confusion
- Detect Skin Issues Early: Daily Routine Anyone Can Follow
- UV Light Skin Check Tutorial: What to Look for in Minutes
Explore More:


