

Does UV tech really help identify vitiligo at home?
Answer: Yes — identify vitiligo at home with simple UV tech can reveal early pigment loss invisible in daylight. A Woods-style lamp highlights depigmented areas instantly, helping you spot subtle, expanding patches so you can track changes, photograph progress, and decide when to consult a dermatologist.
⏱ 11 min readIdentify Vitiligo at Home: How UV Tech Reveals Early Skin Changes
Worried about a pale patch you keep overlooking in mirrors or photos? You’re not imagining things: ultraviolet (UV) inspection tools can reveal early pigment loss before it’s obvious in daylight. This guide explains how to identify vitiligo at home using handheld UV technology, what to look for, and how to choose a device that gives clear, usable results so you feel confident taking the next steps.
Why UV Light Works to Reveal Pigment Loss
UV light interacts with skin pigments and fluorescence in a way visible to the naked eye under controlled darkened conditions. Melanin — the pigment that gives skin color — absorbs and scatters light differently than depigmented skin. When illuminated by a Woods-style lamp (long-wave UVA, ~365 nm), healthy pigmented areas and depigmented patches contrast sharply, making subtle early vitiligo visible.
Can I identify vitiligo at home?
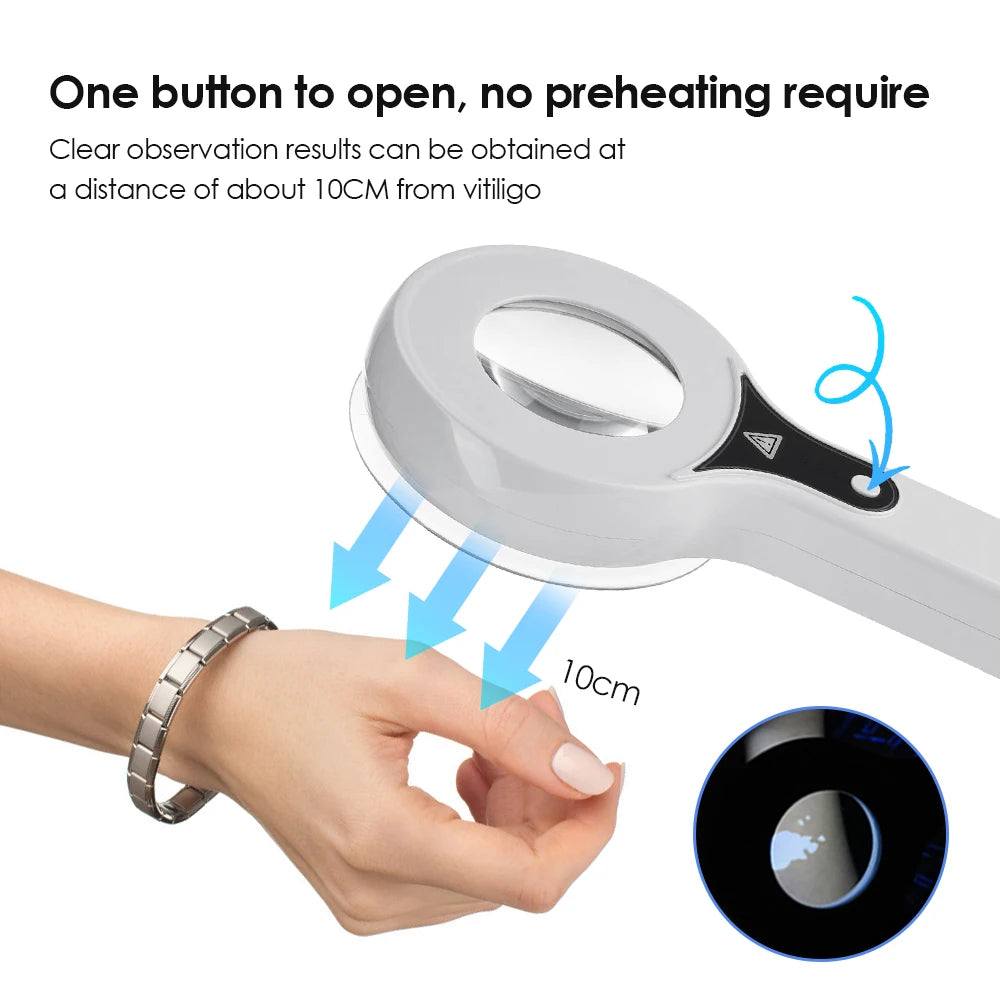
Direct answer: You can identify vitiligo at home using a Woods-style UV lamp to highlight depigmented patches that aren’t visible in daylight. This method helps you document early pigment loss, monitor progression, and collect images for a dermatology consult. Use consistent lighting and angles for reliable comparison.
identify vitiligo at home - KentDO 💡 See it in action — view product
Benefit: Key device features that make diagnosis easier
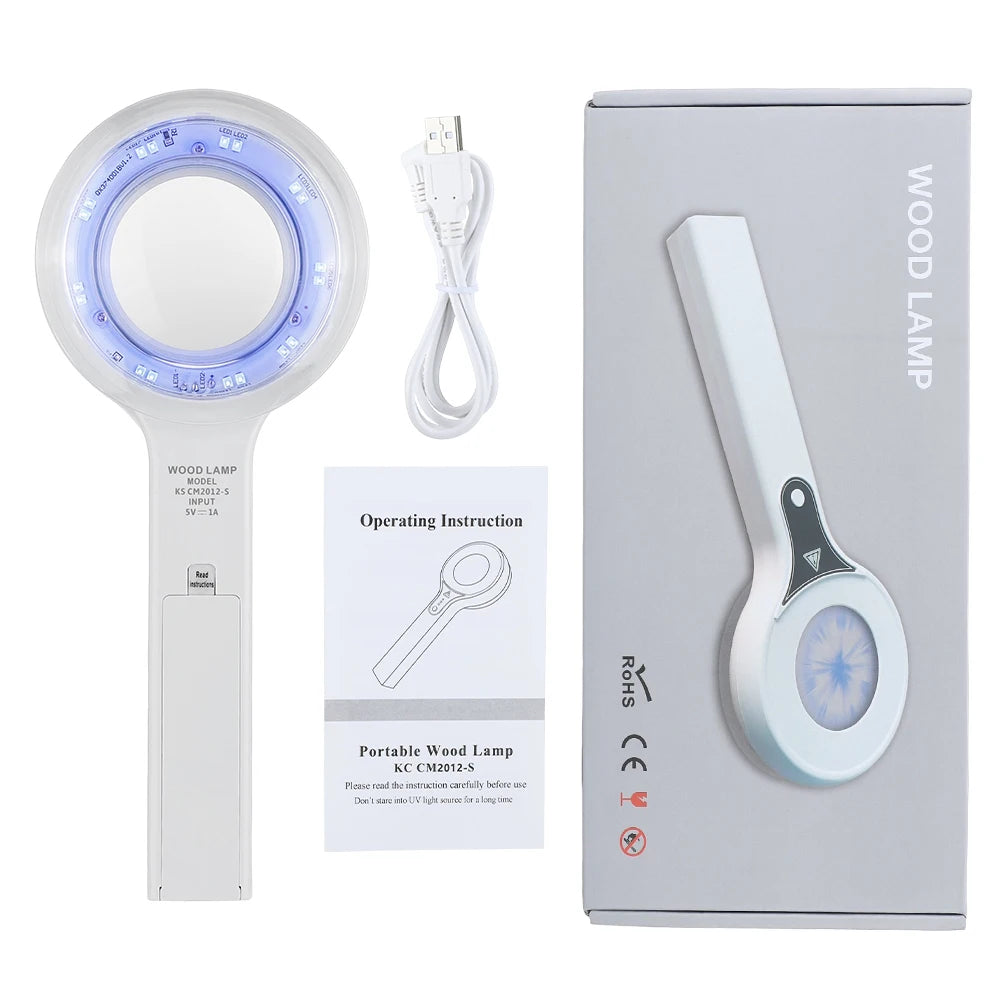
Choosing the right UV device is about visibility, safety, and repeatability. Devices built for skin inspection should offer consistent wavelength output, a comfortable viewing hood or shielding for the eyes, and a size that allows you to examine face, hands, and body patches with ease.
- Stable UVA output — Look for a device that specifies ~365 nm (long-wave UVA) for reliable contrast.
- Even illumination window — Uniform light reduces hotspots that can confuse interpretation.
- Portable & safe design — A handheld lamp with a shielded beam is easier and safer for at-home use.
- Photo capability — Devices that make it easy to take repeatable photos (fixed distance guides or attachments) let you track progress over weeks.
- Low heat & certified components — For safety, choose lamps with temperature control and quality certification.
Quick features comparison
| Feature | Why it matters |
|---|---|
| Wavelength (nm) | Controls contrast; ~365 nm standard for skin pigment inspection |
| Beam uniformity | Prevents false hotspots; easier to compare photos |
| Size/portability | Small enough for home, large enough to inspect torso |
| Photo guide | Supports repeatable documentation |
How to use a Woods-style lamp step-by-step
- Prepare a dark room — dusk or a room you can darken works best to maximize contrast.
- Clean and warm the lamp per manufacturer instructions; ensure the device is at a safe distance.
- Position the lamp 10–30 cm from the test area; start at a standard distance and keep it consistent for future checks.
- Observe patches carefully — depigmented areas will appear brighter or differently hued under UV.
- Photograph the area with the same camera settings and distance for longitudinal tracking.
Safety tips when using UV at home
- Limit exposure time; don’t stare directly into the lamp and shield eyes when possible.
- Follow the device manual on safe distances; prolonged skin exposure isn't necessary.
- Keep a consistent routine for photos — same lighting, angle, and distance to avoid false differences.
identify vitiligo at home - KentDO 💡 See it in action — view product
Compare: Home UV devices vs. clinic tools
Clinics may use larger, higher-output devices, Wood's lamps with filters, and dermatoscopes for confirmatory checks. Home devices trade peak power for safety and portability. For most early detection and monitoring, a quality home UV lamp gives meaningful contrast without the need for clinic-grade equipment — especially when paired with consistent photographic documentation.
| Option | Best for | Limitations |
|---|---|---|
| Handheld Woods-style lamp | Quick home checks, ease-of-use | Lower power than clinic units; user technique matters |
| Clinic Wood's lamp | Comprehensive mapping, professional interpretation | Requires appointment; not for daily monitoring |
| Dermatoscope / digital imaging | Detailed lesion analysis | Specialist tool; higher cost |
How to read results without confusion
Reading UV results requires attention to pattern, border, and context. Vitiligo typically shows: well-defined, symmetrical depigmented patches that fluoresce differently under UV. Other conditions—scar tissue, hypopigmentation after eczema, or tinea versicolor—can also change appearance, so use UV as a screening tool, not a definitive diagnosis.
A simple checklist for interpreting what you see
- Shape & border: Sharp, well-defined borders point toward vitiligo.
- Symmetry: Bilateral or symmetric patches are common with autoimmune vitiligo.
- Location: Hands, lips, around orifices, and joints are common starting points.
- Progression: Compare photos over 2–6 weeks for expansion.
- Associated signs: Hair depigmentation in the area increases likelihood of vitiligo.
Real user stories & before/after notes
Users report spotting faint perimeter lightening weeks before visible changes in daylight. In one documented case, a user noticed a faint rim of contrast around the elbow on UV inspection; within 8 weeks, the daylight-visible area matched the UV-highlighted zone. These observations highlight the lamp’s role in early detection and documentation.
“I thought it was just a small freckle — the lamp showed a bright rim I never saw before. Capturing a photo and sharing it with my dermatologist sped up diagnosis.” — A verified user
✅/❌ Pros & Cons
| Pros | Cons |
|---|---|
| Early detection and tracking | Requires dark room and technique |
| Quick, noninvasive screening | Cannot replace biopsy or lab tests |
| Portable & affordable | Quality varies; cheap units can mislead |
How to choose and where to look
When shopping, prioritize devices designed for skin inspection rather than novelty "black lights." Look for product specs that list wavelength, uniform output, and any safety certifications. If you want a device purpose-built for home skin analysis, consider models that include guides for photography or attachments for consistent distance.
- Check product specs for 365 nm long-wave UVA output.
- Choose a brand with clear usage instructions and support.
- Preferably, pick a device that references skin applications, not party lighting.
Related collections for further reading and complementary devices:
Practical next steps & when to see a doctor
If UV inspection shows consistent depigmentation or progression across photos, document the changes (photo, date, location) and seek a dermatology consult. Early professional evaluation helps confirm diagnosis and opens treatment options that can slow or halt spread.
When to book a professional appointment
- Rapid spread over weeks.
- Involvement of the face or mucous membranes.
- Emotional distress or self-image impact.
- Associated autoimmune symptoms (thyroid issues, etc.).
“The lamp didn’t make the decision for me — it gave me clear photos I could show my dermatologist. That made the visit focused and fast.” — K., 34
Technical deep dive: How devices highlight pigment differences
Long-wave UVA light excites certain skin fluorophores and reveals contrast where melanin is absent. The visual effect depends on:
- Melanin absorption characteristics — Depigmented skin reflects differently under UVA.
- Skin fluorescence — Some substances fluoresce, providing additional contrast.
- Device optics — Filters and lens design affect perceived brightness and uniformity.
Photography guidelines for tracking progression
Consistency is everything when monitoring pigment change. Use the same camera, distance, angle, and dark room setup each time. Include a small ruler or coin for scale in early photos and create a simple log with date and notes.
Suggested photo protocol
- Darken the room to a consistent level.
- Use tripod or steady surface to keep angle identical.
- Place the lamp at the same distance and note it in your log.
- Take 3 shots: close-up, mid-distance, and contextual (limb/face).
- Label images with date and body location.
identify vitiligo at home - KentDO 💡 See it in action — view product
Trust signals: What to expect from quality vendors
Look for clear user guides, visible product specs, and user reviews that reference skin use cases. Strong customer service and return policies also matter — skin tools are personal and need to match your confidence needs.
| Signal | Why it matters |
|---|---|
| Detailed manual | Shows manufacturer understands skin use and safety |
| Clear wavelength spec | Ensures device will deliver meaningful contrast |
| Real user photos | Demonstrates real results and repeatability |
Mini-FAQ (schema-ready)
Can UV light misidentify other skin conditions as vitiligo?
Yes — hypopigmentation from scarring, fungal infections, and other causes can appear under UV. Use UV as a screening tool and seek professional confirmation for diagnosis.
Is it safe to use a Woods-style lamp at home?
When used per instructions — limited exposure, no direct eye staring, and appropriate shielding — handheld UVA lamps are safe for occasional screening. Follow manufacturer safety guidance.
How often should I check suspicious patches?
Weekly or biweekly checks with consistent photography are enough to document progression. If you see rapid change, consult a dermatologist promptly.
Final steps: How to make your at-home findings useful
Collect a simple packet of information for your dermatologist: dated photos, notes on onset and progression, any relevant autoimmune history, and whether hair in the area has lightened. This context accelerates diagnosis and treatment planning.
What to bring to a dermatology appointment
- Printed/phone album of dated UV photos
- Notes on where and when you first noticed changes
- Any family or personal autoimmune history
- Do a home UV check and take photos this week.
- Repeat in 2–4 weeks to look for change.
- If change is present or you’re worried, book a dermatology consult with your photo packet.
Closing: Empowered observation matters
Using UV tech to identify vitiligo at home isn’t about self-diagnosing forever — it’s about spotting early clues, documenting them clearly, and using those records to get fast, precise care. A careful at-home inspection can save months of uncertainty and help you feel in control of the next steps.
Pillar Article: How to Use Woods Lamp Safely: A Simple Guide for Clearer Skin
Other Related Articles:
- Detect Skin Issues Early: Daily Routine Anyone Can Follow
- UV Light Skin Check Tutorial: What to Look for in Minutes
- Home Skin Analysis Guide: Step-by-Step to Spot Hidden Issues
Explore More:













