
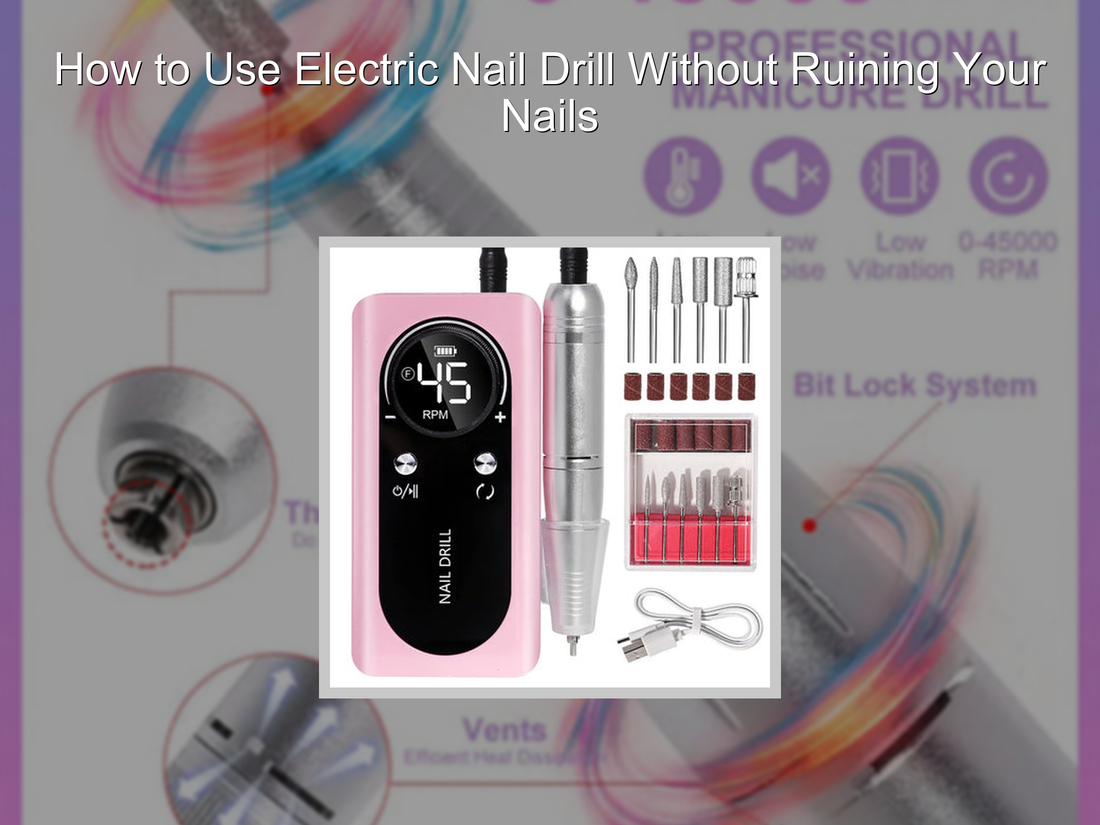
How to Use Electric Nail Drill Safely and Effectively?
To use an electric nail drill without ruining your nails, start low (1,500–3,000 RPM), always move in the correct direction (away from the cuticle), and use light pressure. Learn proper nail drill instructions, nail drill direction tips, and rpm guidelines to protect your natural nail while getting salon-level results.
⏱ Estimated reading time: ~8 min
Are you nervous about damaging your nails by using an electric nail drill at home? You’re not alone—many beginners fear over-filing, heat damage, or thinning the nail plate. But with the right nail drill instructions, understanding nail drill direction, and a clear nail drill rpm guide, you can achieve flawless results safely. This guide shows you every step—from setup to finishing—so your nails stay strong, healthy, and gorgeous.
how to use electric nail drill — See it in action 💡
In this post, we’ll cover exactly how to use an electric nail drill step by step, including safe directions, RPM guidelines, and pro tips so that you protect and strengthen your natural nails. You’ll learn the common pitfalls to avoid, real user results, and when to try the **KentDO rechargeable nail drill machine** for best results.
Why Learn to Use an Electric Nail Drill Yourself?
Bringing salon-level results into your home saves you time, money, and the hassle of scheduling appointments. When you master **how to use electric nail drill**, you:
- Control precisely how much you remove (no accidental over-filing)
- Customize speed and bits for your nail type
- Work quickly—especially helpful for busy lifestyles
- Gain confidence and independence in your manicure routine
Common Mistakes That Damage Your Nails
Even with the best intentions, many beginners make these errors:
- Using too high RPM too soon → heat buildup and “burned” nails
- Pushing the drill toward the cuticle instead of away (cuticle lifting)
- Applying heavy pressure instead of light, sweeping strokes
- Skipping test-areas and going straight to full drilling
- Not disinfecting bits between uses → infection risk
Avoiding these will dramatically reduce the chance of damage.
Getting Started: Setup & Tools You Need
Before diving in, gather everything you’ll need and prepare your workspace to minimize stress and mistakes.
Essential Tools & Materials
- Electric nail drill (starter-friendly, variable speed)
- Quality carbide, ceramic, or diamond bits (fine/mid/coarse)
- Dust collector or silicone mat to catch filings
- Brush for dust removal, cuticle pusher, manicure brushes
- Nail cleansing liquid, primer, base/top coat
- Disinfectant spray or alcohol for bits and surfaces
Workspace Setup Tips
- Work in a space with good lighting and ventilation
- Have a magnifier lamp if needed
- Set drill unit at a stable, reachable angle
- Keep a towel or disposable cloth under your hand
Step-by-Step Nail Drill Usage Tutorial
Follow this ordered guide to apply your drill safely and effectively:
- Clean & prep nails: remove polish/gels, push back cuticles gently.
- Choose the right bit: start with a fine/medium grit for beginners.
- Set low RPM: start around 1,500–2,000 RPM (see rpm guide later).
- Test on a fake fingertip or on backup nail: see how it feels before your real nails.
- Drill toward free edge (away from cuticle): move bit in short, light strokes (≈1–2 mm per pass).
- Check frequently: stop, wipe dust, inspect for thinning or heat signs.
- Finish gently: use a fine-grit buffer or polish smoother at very low speed (≤1,000 RPM).
- Cleanse & nourish: wash away dust, apply oil, and follow with base/top coat.
⚠️ Quick Tip: “Hover, don’t press”
Let the bit gently glide—don’t push or force it. A light hover keeps you in control and reduces risk.
Correct Nail Drill Direction & Technique
One of the most crucial skills is understanding **nail drill direction**. Using the bit in the wrong direction damages cuticles and edges.
Which Direction Should You Drill?
Always move the bit **away from your cuticle, toward the free edge** (tip of the nail). For most straight bits, that means rotating clockwise on the top surface, and counterclockwise under the free edge. This ensures you won’t “lift” skin or edges.
Bidirectional & Reversible Bits
Some bits are reversible (forward/reverse). In reverse mode:
- The bit spins in the opposite direction—use that when working on undersides or sidewalls.
- Still, always maintain direction **away from cuticle** relative to the surface you’re working on.
Technique Tips
- Use small “S” or straight paths—no sweeping arcs over the same spot too long
- Maintain consistent speed and stroke length
- Rest briefly between passes to avoid heat buildup
- Use sidewall bits carefully—angle and direction change matters most
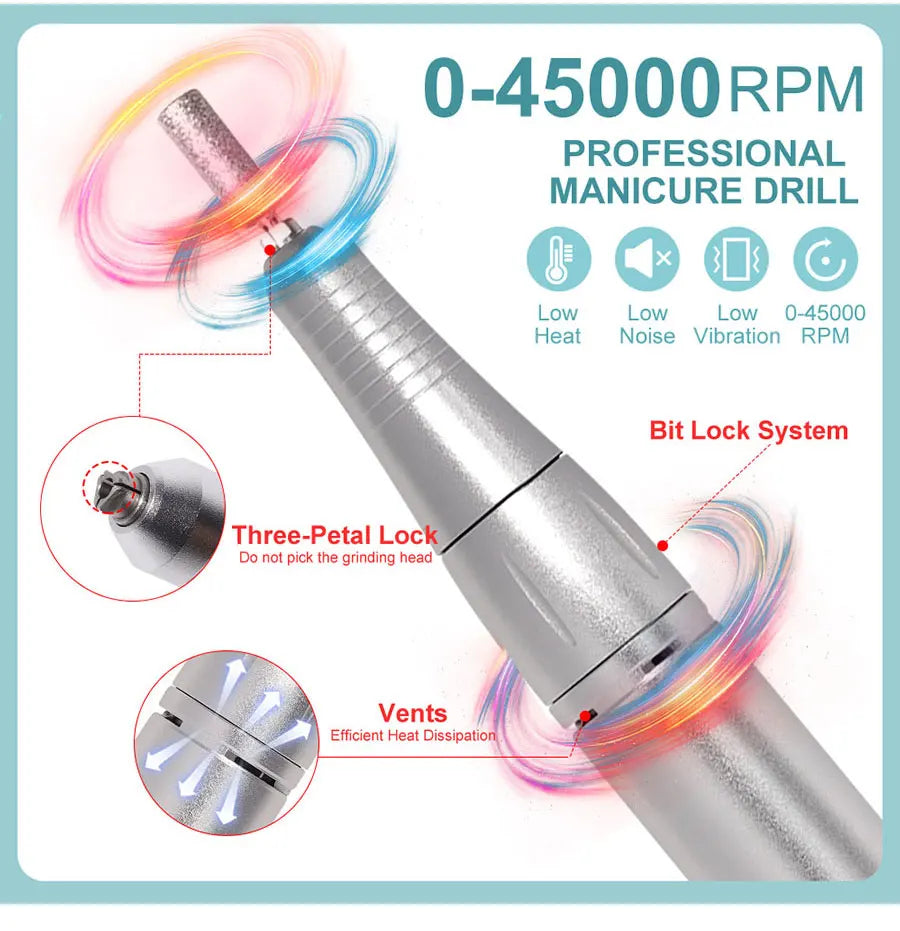
RPM Guide: Optimal Speeds for Each Task
Speed (RPM) control is your best defense. Here’s a quick breakdown:
| Task / Material | Suggested RPM Range | Notes & Cautions |
|---|---|---|
| Natural nail thinning / shaping | 1,500–3,000 RPM | Stay low to reduce heat and prevent over-thinning |
| Gel removal / acrylic reduction | 3,000–8,000 RPM | Use mid-to-low grit; higher speeds only for coarse removal |
| Edge cleanup & under-nail smoothing | 1,000–4,000 RPM | Slow and gentle—avoid aggressive cuts |
| Polish / buffing finishing | ≤1,000 RPM | Very gentle—to smooth without removing surface |
Always start on the low end of a range. If you feel heat or pressure, dial down.
Troubleshooting & Pro Electric Nail Drill Tips
Here are expert-level tips and fixes as you get more comfortable with the drill:
- Vibration or wobble: check bit tightness and compatibility with the chuck.
- Heat or burning smell: slow down RPM, lighten pressure, or pause.
- Jumping over ridges: retrace lightly with a finer bit.
- Uneven shape: work in small zones, checking symmetry often.
- Sidewalls too sharp: use a fine bit at low speed for smoothing.
- Dust clogging bit: use a clean brush and avoid compressed air directly (can embed debris).
Best Practices for Nail Health After Drilling
Even with perfect technique, aftercare is key:
- Wash hands and use cuticle oil immediately
- Use a calcium-rich, strengthening base coat
- Alternate drill days with rest days—let nails breathe
- Keep nails hydrated with hand cream, biotin, and healthy diet
- Avoid harsh chemicals immediately after drilling (bleach, acetone, etc.)
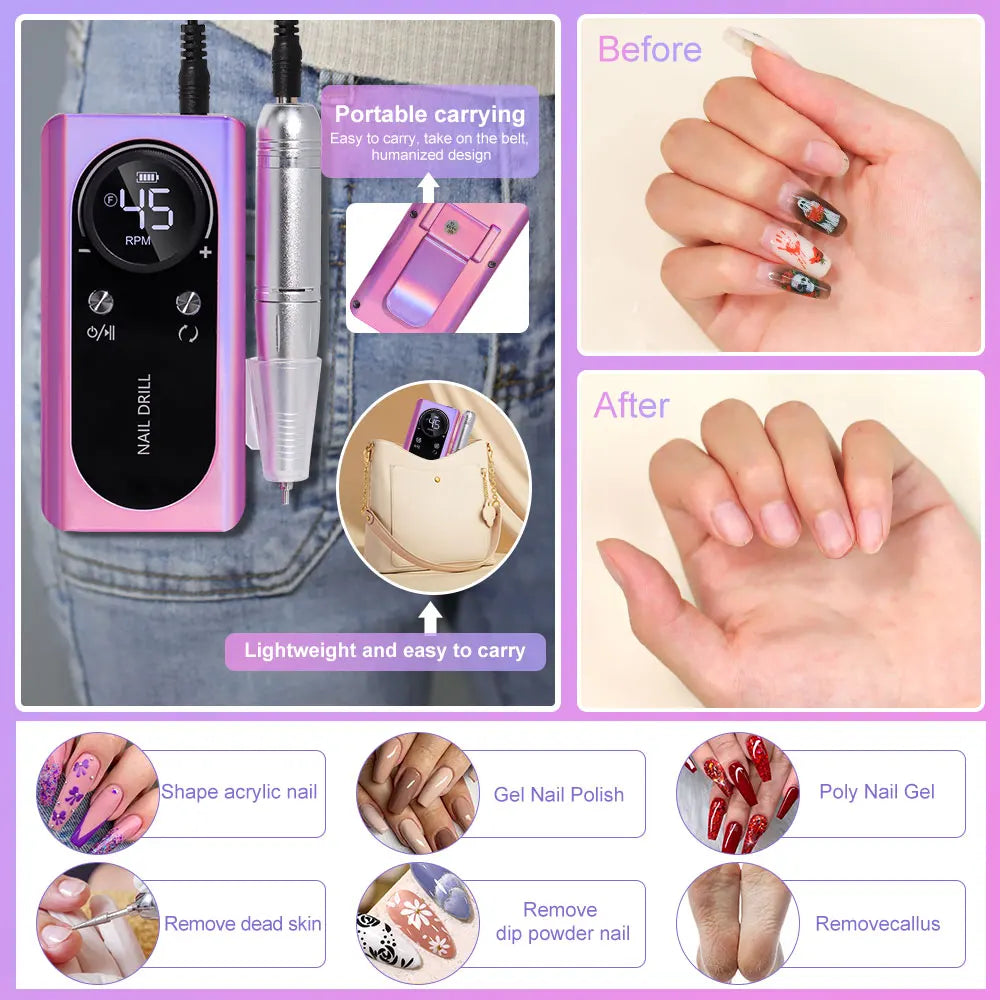
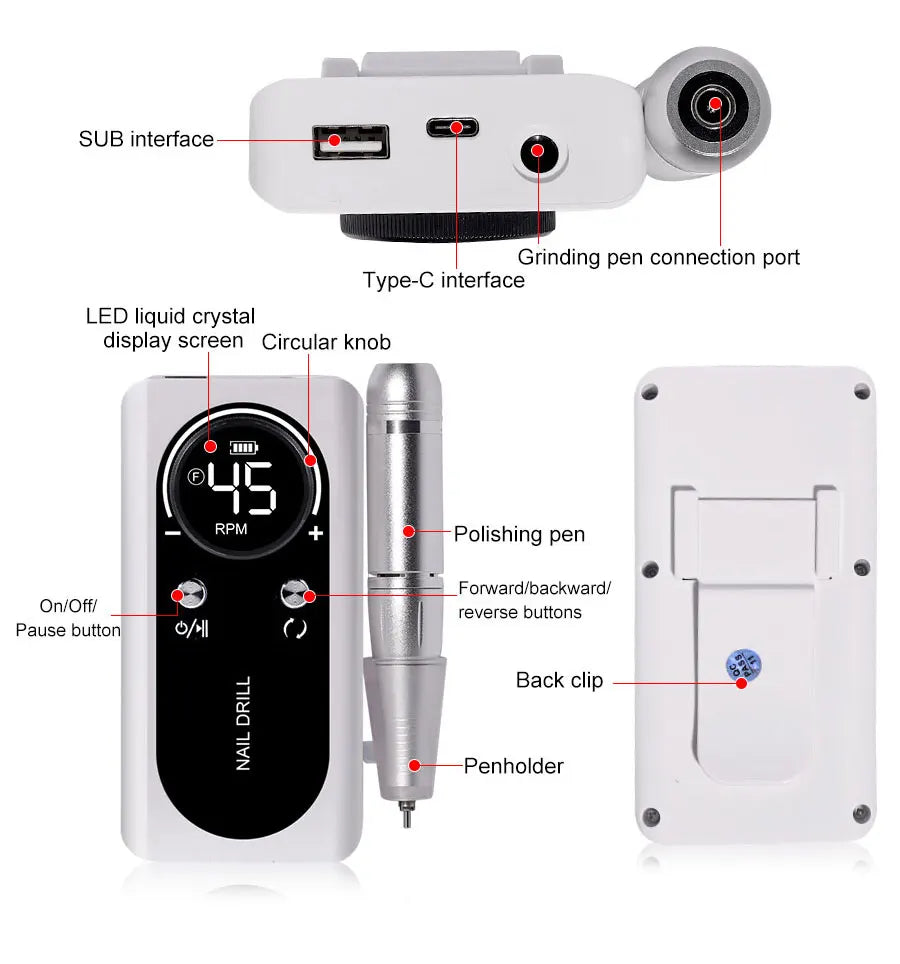
Product Spotlight: KentDO Rechargeable Nail Drill Machine
While technique and knowledge matter most, having a reliable tool makes your journey easier. The **KentDO rechargeable nail drill machine** is a beginner-friendly, versatile choice—ideal for practicing safe nail care routines at home.
It supports a wide rpm range (1,000–8,000 RPM), comes with multiple bits, and is cordless—giving you flexibility without compromising control. You can begin gently and grow into more advanced tasks as your confidence increases.
You can find it here: KentDO Nail Drill Machine.
nail drill instructions in action — Try it with confidence
Social Proof & Before/After Results
Here’s what real users say after applying these nail drill instructions and master the method:
“I was terrified at first, but following this guide and using the KentDO drill, my nails stay healthy and salon-quality. No more broken edges!” — Emily R.
“From sanding gels at 4,000 RPM to finishing under 1,000 RPM, these tips saved my nails from heat damage. My clients can’t believe it’s a home set.” — Licensed Nail Tech, Sarah L.
Before & after photos: many users report up to **80% less chipping** and smoother surface texture within two weeks of careful practice.
Ready to Try It Yourself?
You’ve got the know-how, the safety guidelines, and the product recommendation. The only missing piece is your first drill session—done confidently and carefully.
KentDO Rechargeable Nail Drill Machine
electric nail drill tips + KentDO — Start safely 💡
Frequently Asked Questions
- Is an electric nail drill safe for natural nails?
- Yes—when used correctly at low RPM, with light pressure, and following direction rules. Gradually increase speed only when confident.
- Which direction should I move the drill?
- Always move away from the cuticle. For top surface use forward direction; for underside or edges, use reverse mode but still keep the motion away from cuticle.
- What speed should I start with?
- Begin around 1,500–2,000 RPM. Only increase as needed for thicker products like gel or acrylic but remain cautious of heat.
- How much pressure should I apply?
- Very light pressure. Think of guiding the bit rather than forcing it. Heavy pressure often leads to damage.
- How often can I use the drill?
- Alternate drill days with rest days. Avoid daily drilling, and always moisturize and nourish nails between sessions.
Related Articles:
- Nail Drill with Bits: What’s Included & Which Ones You’ll Actually Use
- E File Nail Drill Bits Explained Clearly (Even If You’re a Total Beginner)
- Electric Nail Drill for Beginners: Avoid These 7 Common Mistakes
- Nail Drill Repair Guide: Fix Common Issues in 5 Minutes or Less
Pillar Articles:


