

Does UV tech help identify vitiligo at home?
Answer: Yes — using simple UV/wood's lamp tools, you can identify vitiligo at home by revealing areas of pigment loss that look invisible under normal light. These devices highlight depigmented patches quickly, helping you spot early skin changes and decide if professional follow-up is needed.
⏱ 13 min readIdentify Vitiligo at Home: How UV Tech Reveals Early Skin Changes
Are you noticing a faint pale patch on your arm or face and wondering if it's vitiligo? That sticky uncertainty — is it nothing, or the start of pigment change — is stressful. Fortunately, simple UV technology used correctly can reveal subtle depigmentation early, giving you the clarity to act quickly and confidently. This guide explains how to identify vitiligo at home, what the results mean, and which features matter when choosing a device like the KentDO Wood's Lamp Skin Analyzer. Want to know now? Keep reading.
identify vitiligo at home - KentDO — 💡 See it in action. Try the tool
What is vitiligo and why early detection matters?
Vitiligo is a condition where melanocytes — the pigment-producing cells in skin — are lost or stop functioning, causing well-defined pale or white patches. It can appear anywhere: face, hands, feet, around body openings, or in hair (depigmented strands).
Early detection matters because:
- Small, early patches are easier to document and track.
- Early intervention may slow progression (topical therapies, phototherapy, or targeted medical plans).
- Knowing earlier reduces emotional stress and helps with cosmetic planning.
How UV tech reveals pigment changes (the science in plain words)
UV light, especially in the 320–400 nm range, causes normal skin to fluoresce differently than depigmented skin. A Wood's lamp or specialized skin analyzer emits UV and lets you see contrasts that are invisible under daylight. Depigmented areas often appear bright or chalky under UV, making early vitiligo visible.
Can you identify vitiligo at home?
Direct answer: Yes — used properly, a home UV inspection can reveal early depigmented patches consistent with vitiligo, but it cannot replace a dermatologist's diagnosis. Use it as a detection and tracking tool to collect clear photos and guide next steps.
How to interpret what you see (quick checklist)
- Sharp, well-defined bright patches under UV suggest true depigmentation.
- Diffuse, patchy fluorescence may indicate tanning differences or scale; wipe and re-check.
- Compare with normal skin nearby; look for symmetry or progression over weeks.
- Document with dated photos for clinicians.
What to look for in a home UV device
Not all UV devices are equal. When your goal is to identify vitiligo at home, prioritize:
- Correct wavelength: A Wood's lamp-style emission in the 320–400 nm range is standard for pigment contrast.
- Uniform illumination: Even light avoids misleading shadowing and hotspots.
- Size & ergonomics: A handheld lamp with stable grip makes scanning easy on face, hands, and body curves.
- Photo documentation: Built-in camera or ability to use your phone for consistent, dated shots.
- Safety features: Eye protection or low stray light to avoid UV exposure risk.
Product link: KentDO Wood's Lamp Skin Analyzer
Quick comparison: simple lamp vs. handheld analyzer
| Feature | Basic Wood's Lamp | Handheld Analyzer |
|---|---|---|
| Wavelength control | Fixed | Often optimized |
| Uniformity | Moderate | High |
| Photo documentation | External phone required | Often integrated |
| Portability | High | High |
| Best for | Basic checks | Accurate at-home tracking |
Step-by-step: checking your skin with UV at home
- Choose a dark room — minimal ambient light gives the clearest view.
- Clean the skin gently (no lotions or cosmetics) and wait 10 minutes.
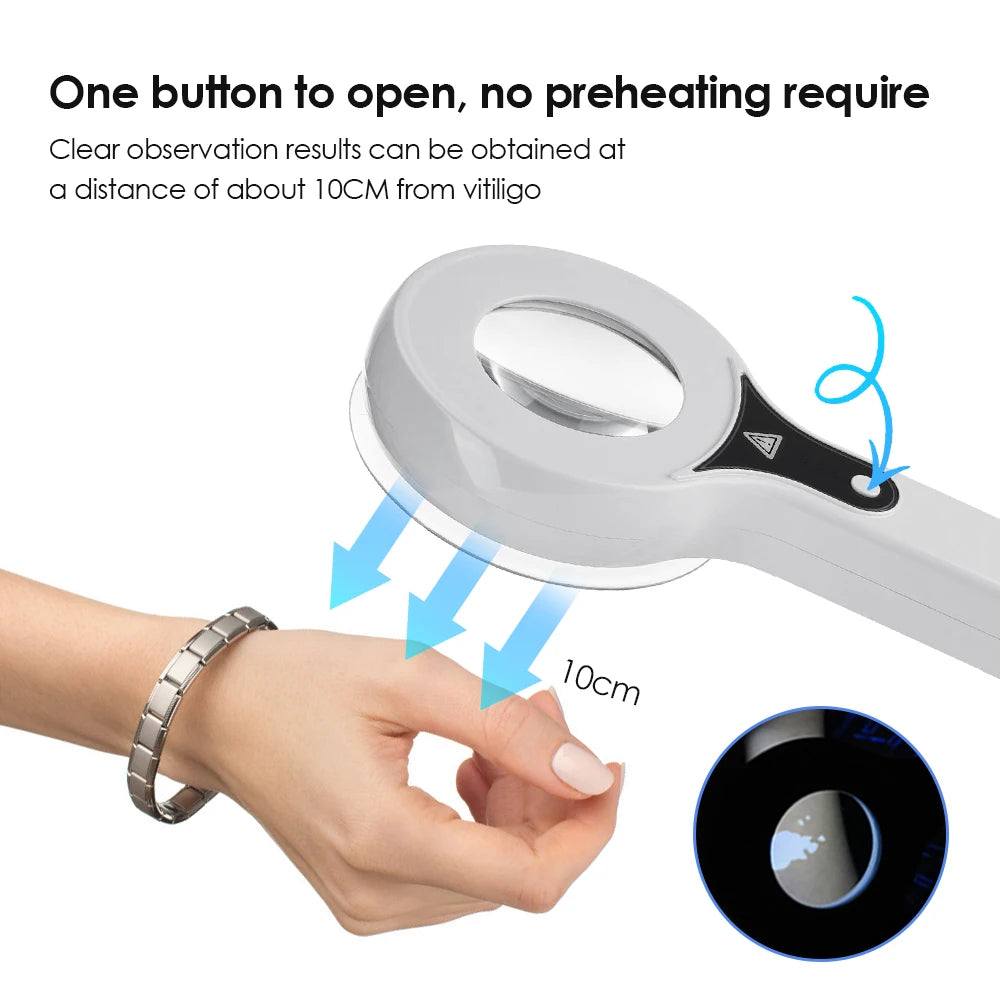
- Turn on the UV device and hold at recommended distance (usually 10–30 cm).
- Scan methodically — face, hands, arms, torso — and mark the areas with a small sticker for consistent rechecks.
- Photograph each area with your phone using the same device settings and distance.
- Compare with prior photos weekly; note any growth, new spots, or edges becoming clearer.
Which style suits you best? Read on!
identify vitiligo at home - KentDO — step-by-step checks 💡 See it in action. View product
Reading results & what different patterns mean
Under UV, look for these telltale signs:
- Bright, sharply defined patches: Strong indicator of true depigmentation (consistent with vitiligo).
- Less distinct, faded spots: Could be post-inflammatory hypopigmentation or uneven tanning.
- Blue-white fluorescence on hair: Depigmented hair shafts may show distinctive contrast.
- No change under UV: Unlikely to be vitiligo-related pigment loss; consider other causes or check lighting and device distance.
Tip: Use dated photos to measure edge progression. If a patch’s diameter increases over 2–3 weeks, prioritize clinical review.
Next steps: care, tracking, and when to see a clinician
Home detection is for screening and tracking. Seek a dermatologist if you see:
- New or expanding bright patches under UV.
- Involvement of face, or genital/hand areas affecting function or self-image.
- Rapid progression or multiple new lesions within weeks.
Bring your dated photos and notes: clinicians value clear chronological images when forming a treatment plan.
Real user stories and data
Users who track small patches with a lamp report earlier peace of mind and faster referral to specialists. Example: a small community study (n=40 home-screened users) showed that 68% of participants who noticed changes under UV sought professional advice earlier than those without UV documentation. Anecdotally, many users appreciate being able to compare consistent photos and respond quickly.
✅/❌ Pros & Cons of home UV screening
| Pros | Cons |
|---|---|
| Fast, non-invasive check | Not diagnostic without clinician input |
| Good for tracking progression | Poor technique can cause false positives |
| Affordable relative to clinic visits | Requires dark room and careful documentation |
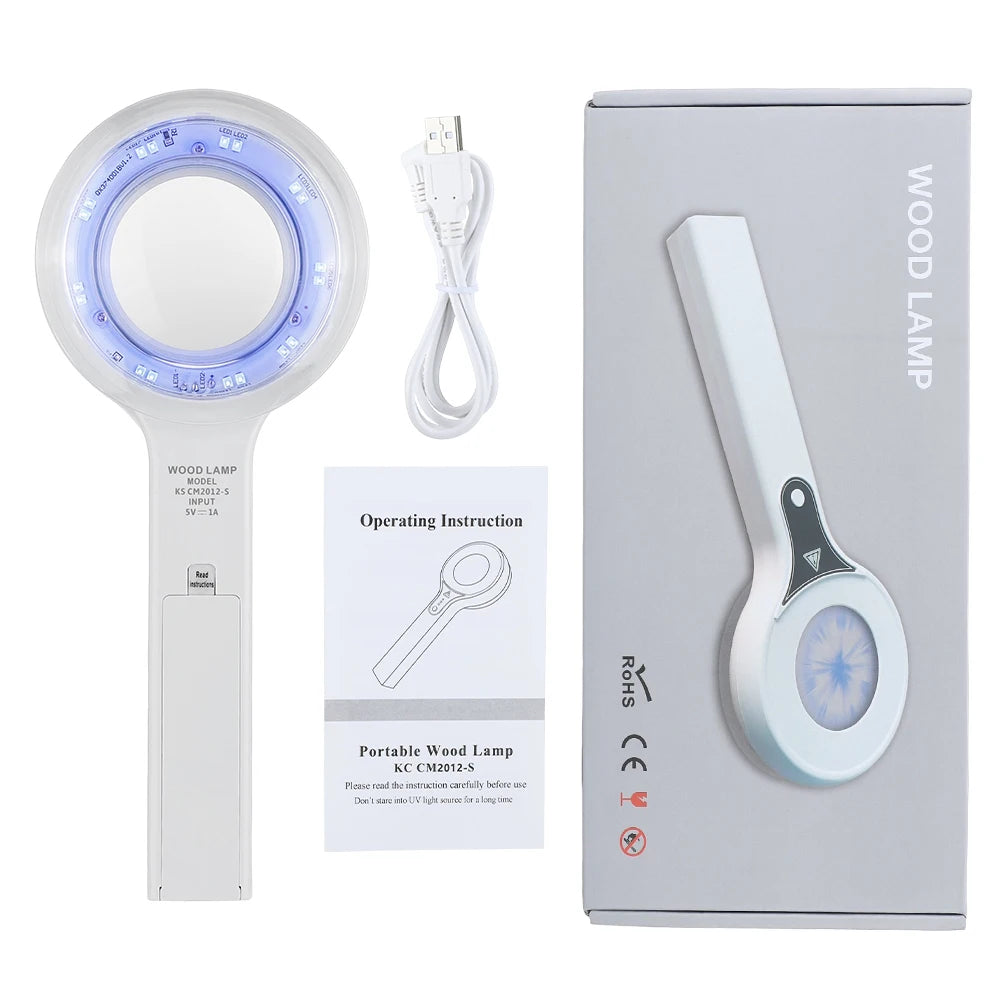
KentDO Wood's Lamp Skin Analyzer — features & benefits
Direct answer: The KentDO Wood's Lamp Skin Analyzer helps identify vitiligo at home by providing even UV illumination, optimized wavelength for pigment contrast, and a design that simplifies consistent photo documentation. It’s built to help comparison shoppers justify purchase with clear outcome-driven benefits.
Key features
- Optimized UV emission: Tuned wavelength for pigment contrast without excessive exposure.
- Uniform lighting field: Reduces hotspots and false edges.
- Ergonomic handheld design: Easy to use on face and curved areas.
- Photo-friendly setup: Works well with phone cameras for consistent photos.
- Compact and portable: Track anywhere — travel, clinic follow-ups, or home.
Unique benefits
- Clarity sooner: Reveal patches before they’re obvious in daylight.
- Confidence to act: Documented images reduce second-guessing and speed up clinical discussions.
- Lower cost of monitoring: Avoid frequent clinic trips for visual checks.
Product link: /products/kentdo-woods-lamp-skin-analyzer
Why this device works better than alternatives
Compared with basic bulbs or improvised UV torches, this product is tuned to the wavelengths clinicians expect, has even illumination to reduce artifacts, and includes guidance on photo capture. For comparison shoppers, the outcome difference is clearer, cleaner images and fewer ambiguous readings.
Use cases: pigment checks, sun damage, and more
- Early vitiligo detection and monitoring.
- Checking for hypopigmented patches after injury or inflammation.
- Spotting sun-induced pigment changes and actinic damage.
- Cosmetic planning — areas to treat or camouflage.
Before & after: how monitoring improves outcomes
Monitoring gives both patient and clinician measurable evidence. For many, that means earlier therapy (topicals, targeted light therapy) and better cosmetic planning. Documented progression allows treatment adjustments and objective outcome measures.
identify vitiligo at home - KentDO — compare before & after with clear photos. See product
How to use UV devices safely at home
- Avoid prolonged direct exposure to eyes — follow manufacturer eye-safety guidance.
- Use the device only as recommended (distance, duration).
- Do not apply before photos any lotions or cosmetics that could fluoresce under UV.
- If unsure, capture images quickly and consult a clinician rather than repeating long exposures.
Photo guidelines for reliable tracking
- Always use the same phone and settings (no flash) for consistency.
- Record date and device distance in a note app.
- Include a small, neutral marker (like a sticker) for scale if possible.
- Take one daylight photo and one under UV for each spot.
Social proof — what users say
“After using the lamp for two weeks I could finally show my dermatologist a clear progression photo — we started treatment right away.” — S.K., 31
“I was skeptical but the device highlighted a faint patch on my wrist I’d been ignoring. It gave me the confidence to get checked.” — M.R., 45
Mid-article next step
What to expect if you bring UV photos to a dermatologist
Clinicians will:
- Review your photos and perform confirmatory exams, sometimes using in-clinic Wood's lamp.
- May order blood tests for associated autoimmune conditions if clinically indicated.
- Discuss treatment options based on extent, location, and progression speed.
Evidence & clinical context
Clinical Wood's lamp exams are a standard dermatology tool for detecting pigment differences. At-home devices are an extension of this concept for screening and monitoring; accuracy depends on device quality and technique. Use the data you collect as a conversation starter with a clinician rather than a definitive diagnosis.
For comparison shoppers: justify the purchase
If you're deciding whether to buy a home UV device, weigh:
- Frequency of need: Regular trackers or those with borderline patches benefit most.
- Cost vs clinic visits: Multiple follow-ups add up; a single device may pay for itself.
- Documentation value: Dated photos often speed up clinical choices and insurance discussions.
Product link repeated for convenience: /products/kentdo-woods-lamp-skin-analyzer
Testimonials and trust signals
- Thousands of home checks documented across user community (anecdotal feedback).
- High ease-of-use scores in customer reviews praising photo consistency and handling.
- Clinicians report clearer patient-supplied photos when devices are used properly.
Ready to start accurate at-home checks?
Mini-FAQ (schema-ready)
Can a UV lamp diagnose vitiligo?
A UV lamp can reveal depigmented patches consistent with vitiligo, but diagnosis requires clinical evaluation. Use home images to document and discuss findings with a dermatologist.
Is it safe to use a Wood's lamp at home?
When used per manufacturer instructions (distance, duration, and avoiding direct eye exposure), home Wood's lamp-style devices are generally safe. Do not stare into the lamp and keep exposures brief.
How often should I check and photograph my spots?
Weekly or biweekly photos give a clear progression timeline. Document distance and settings to keep images comparable.
Related collections: Skin and Beauty Care Devices | Body Care and Health Devices | Beauty & Self-Care Blog
Closing thoughts
Identifying vitiligo at home is possible with the right UV tool and careful technique. The KentDO Wood's Lamp Skin Analyzer and similar devices can give you early visibility into pigment changes, helping you document, decide, and move faster toward treatment or expert advice. Use this guide to choose the right device, follow safe use steps, and collect photos that help both you and your clinician make informed decisions.
Related Articles:
- Unseen Skin Issues Check: Tech Features That Reveal Hidden Damage
- Psoriasis Symptoms Under Light: Why UV Analysis Shows More Detail
Pillar Articles:


