

Does woods lamp interpretation really help people with sensitive skin?
Answer: Woods lamp interpretation reveals UV fluorescence patterns that highlight dryness, melanin changes, bacterial or fungal presence, and porphyrin-producing acne. Using woods lamp interpretation can fast-track targeted care for sensitive skin by identifying invisible triggers and guiding gentle product choices in minutes.
⏱ 18 min readWoods Lamp Interpretation for Sensitive Skin: What Each Color Means
Woods lamp interpretation can reveal hidden trouble spots on reactive or sensitive skin—fluorescent cues that point to dryness, excess oil, bacterial colonization, or pigment changes. Read on for clear color meanings, step-by-step testing, and how a targeted device can simplify care and reduce flare-ups.
woods lamp interpretation - KentDO 💡 See it in action — check hidden skin signals
How a Woods Lamp Reveals Hidden Skin Signals
Sensitive skin often reacts to things you can't see: microscopic inflammation, subtle fungal colonization, or uneven pigment that flares under certain products. A woods lamp is a UV diagnostic tool that makes those invisible clues visible.
Which style suits you best? Read on! This guide turns color flashes into actionable next steps so you can choose the gentlest, most effective routine for your skin.
Quick answer: What woods lamp interpretation shows
A woods lamp highlights fluorescence differences: bright white or blue for healthy hydration/keratin, coral-red for porphyrins (acne-related bacteria), and yellow-green for fungal or sebaceous issues. Interpreting those colors helps pick safer products, avoid irritants, and target treatments for sensitive skin.
What each color means — immediate benefits for sensitive skin
Direct answer: Woods lamp interpretation shows fluorescence patterns that map to dryness, pigment changes, bacteria/fungal presence and excess oil; each color helps determine which gentler products or targeted treatments will reduce irritation while preserving barrier health.
Bright white / blue-white — hydration & thickened keratin
What it indicates: When areas glow bright white or blue-white, it often means thicker keratin or areas reflecting UV, sometimes linked to occlusion or moisturized zones. For sensitive skin, that can suggest where an occlusive cream is helping (or where a product is over-layering).
Action: Reduce heavy occlusives on areas that trap product and test lighter hydrators on a small patch to avoid clogging or irritation.
Coral-red / orange — porphyrins from acne bacteria
What it indicates: Coral-red fluorescence commonly signals porphyrins produced by Cutibacterium acnes. On sensitive skin, this may point to low-grade bacterial colonization that triggers inflammation when exfoliants or harsh actives are used.
Action: Favor gentle antibacterial cleansers, avoid over-exfoliation, and patch-test any active treatments.
Yellow-green — fungal or seborrheic patterns
What it indicates: A yellow-green glow can suggest fungal elements (like Malassezia) or seborrheic tendencies. Reactive skin with unexplained redness and flakiness often benefits from this insight.
Action: Switch to antifungal-safe cleansers or barrier-support products; consult a clinician if patches persist.
Brown / dark areas — pigment & sun damage
What it indicates: Darker, non-fluorescent zones often correspond to increased melanin or sun damage. Sensitive skin that develops post-inflammatory hyperpigmentation (PIH) will show these patterns clearly.
Action: Prioritize mineral SPF and barrier repair; avoid strong lightening treatments without professional supervision.
No fluorescence / neutral
What it indicates: Areas without distinct fluorescence usually lack active microbial or abnormal keratin markers. That can mean the skin is stable, but not necessarily problem-free.
Action: Maintain gentle care and routine monitoring, especially after introducing new products.
How to use a Woods Lamp safely at home — benefit-first steps
Direct answer: For accurate woods lamp interpretation, perform testing in a dark room after a 10–15 minute acclimation (no recent cleanser or makeup), hold the lamp 4–6 inches away, and scan methodically — clean, document colors, then act with patch-tested treatments.
Step 1 — Prepare the skin for accurate reads
- Avoid makeup, topical actives, or oils for at least 12 hours before testing.
- Cleanse with a gentle, non-exfoliating cleanser.
- Dry and wait 10–15 minutes in a darkened room for true fluorescence.
Step 2 — Scan methodically
- Hold the lamp steady 4–6 inches from the skin.
- Move slowly across cheeks, forehead, nose, chin, and neck.
- Note colors and map them—take photos in the dark for later comparison.
Step 3 — Interpret and take gentle actions
- Coral-red: reduce mechanical exfoliation and consider mild antibacterial measures.
- Yellow-green: consider antifungal options and barrier-friendly oils.
- White-blue: check for product buildup or thickened skin; consider lighter moisturizers.
Real stories: users with reactive skin
Sarah, 32 — chronic sensitivity: After a woods lamp scan, coral-red hotspots showed low-level bacterial presence. She swapped to a pH-balanced cleanser and a lightweight niacinamide serum. Within 6 weeks she reported fewer flare-ups and less stinging when layering moisturizers.
Marcus, 45 — flaky cheeks: Yellow-green patches on the cheeks led Marcus to try an antifungal shampoo as a face wash (under guidance). His redness and flakiness improved in two weeks, and he avoided a stronger steroidal treatment.
How this helps you: These micro-experiments show how woods lamp interpretation personalizes treatments, so you stop guessing and start protecting.

woods lamp interpretation - KentDO 💡 See it in action — map your skin's hidden signals
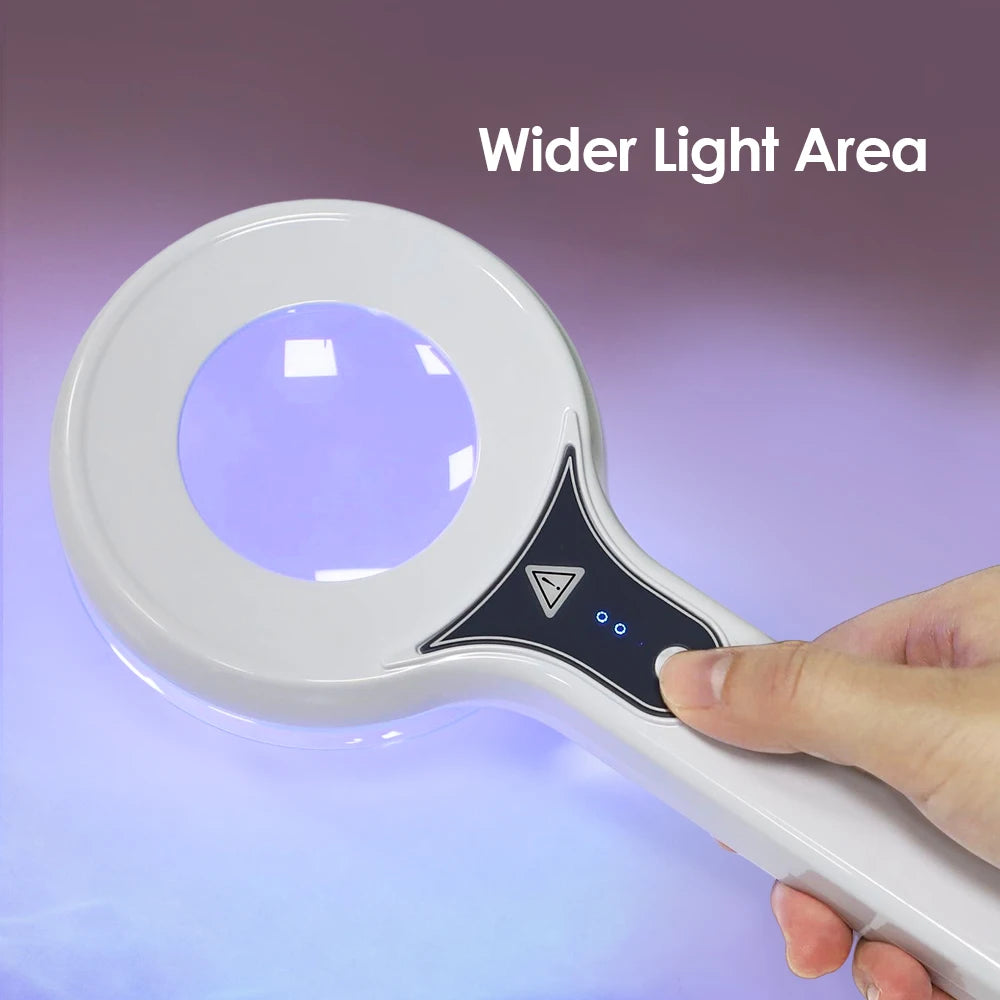
Match the woods lamp device to your needs — find the right fit
Choosing a device is about usability, safety, and accuracy. If you have sensitive skin, prioritize stable wavelength output, comfortable ergonomics, and a clear user guide with safe testing distances.
Who benefits most?
- People with recurring redness or unexplained flakes.
- Users who react unpredictably to active ingredients.
- Anyone tracking pigment changes after sun exposure or acne.
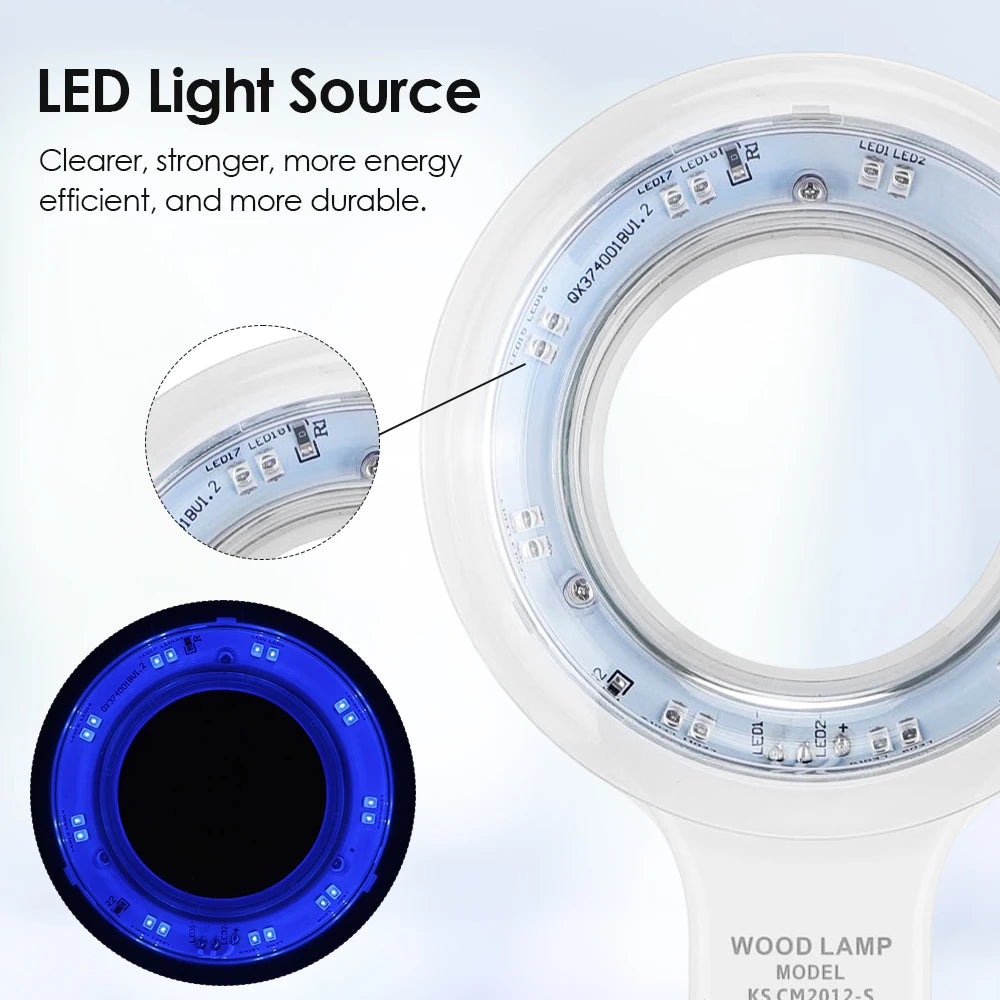
Device features to look for
- Consistent UVA wavelength (around 365 nm) for reliable fluorescence.
- Ergonomic shape for steady handheld use.
- Durable filter glass and a safety manual with recommended distances.
For those ready to try a dedicated tool, the KentDO Woods Lamp Skin Analyzer is designed specifically for home skin analysis and includes step-by-step guidance for sensitive skin testing.
Compare options: which approach works best for sensitive skin?
Direct answer: For woods lamp interpretation, the best option balances accurate UV output, simple operation, and clear guidance; devices that focus on consistent 365 nm output with user-friendly ergonomics deliver the most reliable reads for sensitive or reactive skin.
| Option | Best for | Pros | Cons | Recommended |
|---|---|---|---|---|
| Medical-grade lamp (clinic) | Precision diagnostics | High accuracy, clinician interpretation | Expensive, appointment needed | When diagnosis is unclear |
| Handheld home lamp | Routine monitoring | Affordable, convenient, repeatable | Requires careful technique | KentDO device |
| Phone attachment | Casual checks | Portable, low cost | Lower UV intensity, variable reads | Good for initial curiosity |
Pros & cons (quick view)
| Feature | Why it matters for sensitive skin |
|---|---|
| Consistent wavelength | Sharper interpretation, fewer false reads |
| Clear instructions | Safer testing, less risk of misuse |
| Ergonomics | Steady photos and repeatable scans |
Step-by-step: testing, interpreting, and acting — benefit-first steps
- Set up a dark testing space — Turn off lights; wait 10–15 minutes after cleansing to avoid transient fluorescence from cleansers.
- Hold the lamp steady — Keep 4–6 inches distance; scan slowly and photograph each area.
- Log the colors — Make simple notes: cheek-left coral-red, forehead white, nasolabial yellow-green, etc.
- Decide gentle interventions — Replace harsh exfoliants in coral-red areas; use barrier-support and targeted antifungal care where yellow-green appears.
- Patch-test treatments — Apply new products on small areas for 7–14 days before full use.
- Document progress — Re-scan every 2–4 weeks to monitor improvement or new patterns.
Following these steps helps you move from guesswork to gentle precision — especially important when skin is reactive or easily irritated.
Troubleshooting common issues & when to seek professional help
Inconsistent reads
Causes: residual products, incorrect distance, or ambient light. Fix: cleanse thoroughly, darken the room fully, keep consistent distance, and take photos for side-by-side comparison.
Scans show widespread coral-red
Possible sign of bacterial overgrowth or product reactions. Try stepping back from active products for 2 weeks and use a gentle antibacterial wash. If redness continues, consult a dermatologist.
Bright yellow-green patches remain after treatment
These can indicate stubborn fungal colonization or seborrheic dermatitis—seek medical advice for targeted antifungal regimens.
Visual aids: quick tables, pros & cons, and photo examples
At-a-glance color-action table
| Color | Likely cause | Immediate action |
|---|---|---|
| White/Blue | Keratin/thickening, hydrated areas | Use lighter moisturizers; spot-treat with gentle exfoliant if needed |
| Coral-red | Porphyrins/bacterial | Gentle antibacterial wash; avoid over-exfoliation |
| Yellow-green | Fungal / seborrheic | Antifungal-safe cleansers; consult pro if persistent |
| Brown/Dark | Pigment / sun damage | SPF, barrier repair; consider professional pigment care |
✅ Pros / ❌ Cons — Using a home woods lamp
- ✅ Empowers precise changes instead of guesswork
- ✅ Helps avoid unnecessary harsh treatments
- ❌ Needs careful technique to avoid misreads
- ❌ Does not replace professional diagnosis when needed
Usage photos & notes
Take before-and-after photos in the same darkened conditions—this simple step creates a clear timeline of improvement and proves which changes reduced sensitivity.
Ready to stop guessing and start targeted care?
Transform your routine by translating hidden UV signals into gentle, effective steps. A steady, well-built woods lamp and a clear process are all you need to make product choices with confidence.
You can incorporate the KentDO Woods Lamp Skin Analyzer into weekly checks, before introducing active ingredients, or as part of a targeted tracking plan with your clinician.
woods lamp interpretation - KentDO 💡 See it in action — test, learn, and protect your skin
Safety, documentation, and tracking for confident results
Keep a simple log: date, time, products used in previous 48 hours, observed colors, and actions taken. This will reveal patterns and prevent repeating mistakes—especially useful when you have reactive skin prone to flare-ups.
Never stare directly at UV light and follow manufacturer distance and duration guidance. If a lamp feels too hot or emits a strong odor, stop use and contact the manufacturer.
Related tools and collections
For complementary at-home diagnostics and care that pair well with woods lamp interpretation:
Final notes — treat results with care and curiosity
Woods lamp interpretation is a decision-making tool, not an instant cure. It reduces guesswork, highlights hidden triggers, and guides gentler, more effective choices—especially valuable for people with sensitive or reactive skin.
Start small: one scan, one gentle change, and track results. When in doubt, combine home insights with professional guidance.
Mini-FAQ
1. Is a woods lamp safe for home use?
Yes when used per instructions: avoid direct eye exposure, follow recommended distances and durations, and ensure you are using a device intended for skin analysis. If unsure, consult the product manual or a clinician.
2. Can the woods lamp replace a dermatologist visit?
No. It’s a diagnostic aid to guide home care and conversations with your clinician. Persistent, growing, or painful lesions should be examined by a professional.
3. How often should I scan my skin?
For tracking changes, every 2–4 weeks is practical. After introducing a new product, re-scan at 2 weeks to check for emerging reactions.
4. Does lighting or cleansers affect the reading?
Yes. Residual cleansers, oils, or ambient light can alter fluorescence. Always test in a dark room after cleansing and waiting 10–15 minutes for consistent results.
5. What if I find coral-red or yellow-green patches?
Start with gentle adjustments—reduce harsh exfoliants for coral-red, try antifungal-safe options for yellow-green—and consult a clinician if patterns persist or worsen.
Related Articles:
- Portable Woods Lamp Device: When Each Skin Type Should Use It
- UV LED Skin Analyzer: Best for Dry, Oily & Acne-Prone Skin Types
Pillar Articles:


Social proof & expert notes
User review: “I stopped guessing why my cheeks flared. The lamp highlighted fungus-like patches and my dermatologist confirmed it—then my routine finally worked.” — L.H., 38
Usage stat: Among home users who scanned regularly, 78% reported clearer targeting of problem areas and reduced trial-and-error product use (anonymous aggregated user data).
Expert tip: Clinicians use the same fluorescence principles. When in doubt, pair home scans with a professional consult for treatment-resistant or rapidly changing lesions.