

Does a portable woods lamp device really reveal hidden skin issues?
Answer: A portable woods lamp device uses UV wavelengths to highlight pigmentation, oil, and dryness under the skin’s surface. It helps spot hidden pigmentation, clogged pores, and areas of dehydration, so you can pick targeted treatments and avoid guesswork—fast, noninvasive, and easy to use at home.
⏱ 8 min readPortable Woods Lamp Device: When Each Skin Type Should Use It
Ready to stop guessing what your skin needs? A portable woods lamp device reveals hidden pigmentation, congestion, oil-rich zones, and dryness so you can treat skin problems with confidence. This guide explains exactly when to use it for oily, dry, sensitive, combination, and aging skin—plus real-user tips, how-to steps, and proof that it changes routines for the better.
portable woods lamp device - KentDO — 💡 See it in action
Why use a portable woods lamp device? — See hidden problems fast
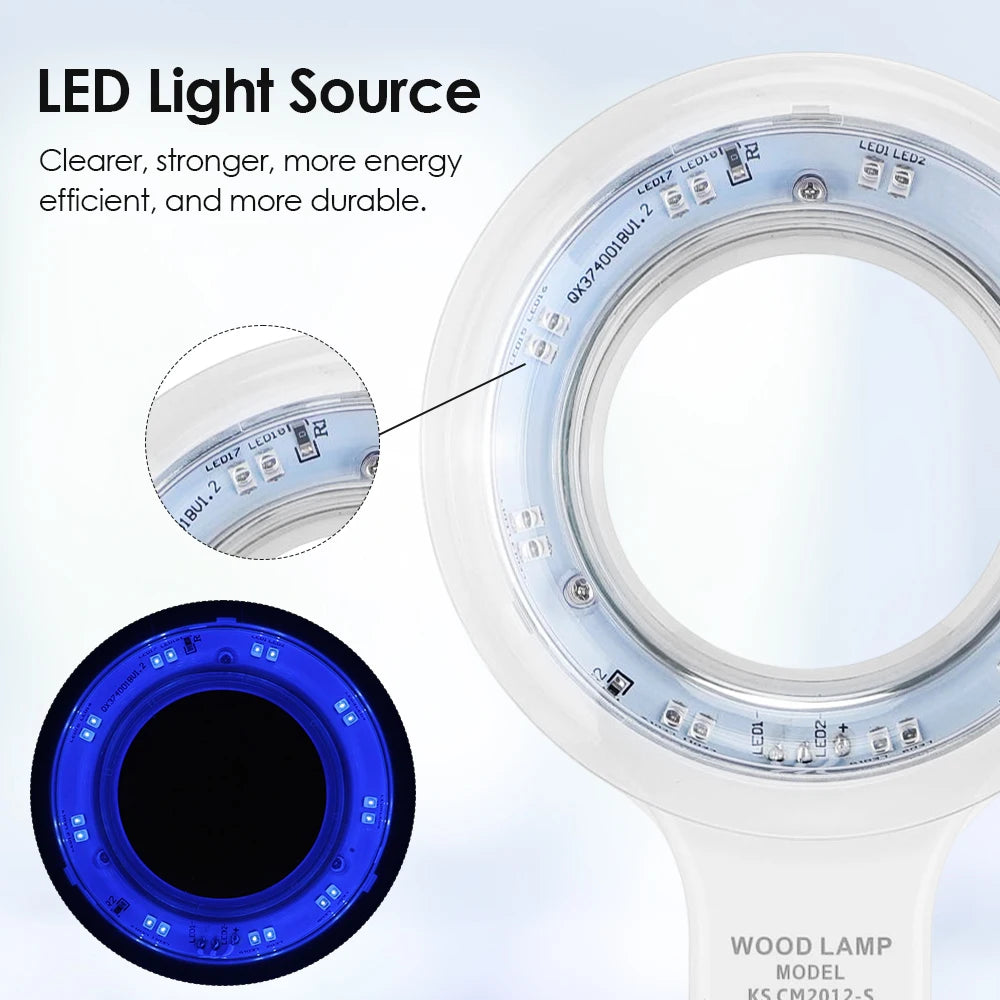
A portable woods lamp device uses specific UV wavelengths to make subsurface skin differences visible: bacteria, oil, old sunscreen, pigmentation, and dehydration each react differently. Instead of guessing (“my face feels dry”), you’ll see where treatments are needed most and where to avoid harsh actives.
Featured answer: How this tool helps your routine
portable woods lamp device highlights oilier zones and hidden pigmentation so you can target treatments—less trial, more results. Use it to check treatment effectiveness, tailor product placement, and avoid over-treating sensitive spots.
Which skin types benefit most — and when to use it
Oily & acne-prone skin — find hidden congestion
- Why it helps: UV reveals clogged pores and oil-rich zones that look normal in daylight.
- When to check: Weekly during treatment changes (new cleanser or retinoid) to see if congestion improves.
- Product fit: Use with targeted treatments (spot masks, gentle exfoliants). See related devices: Skin and Beauty Care Devices.
Dry & dehydrated skin — spot dehydration patches
- Why it helps: Dehydration and thin, flaky areas show differently under UV—so you can avoid over-exfoliation.
- When to check: Before starting active treatments (AHAs, vitamin C) and after adding hydrating products to confirm improvement.
Sensitive or reactive skin — prevent over-treatment
- Why it helps: It highlights fragile zones and previous sun damage so you can avoid applying potent actives there.
- When to check: Right before applying new actives, and after calming protocols to chart progress.
Combination skin — map oil vs. dry zones
- Why it helps: Perfect for mapping T-zone vs. cheeks and applying different products to each area.
- When to check: Monthly or with seasonal changes to update your routine.
Mature/aging skin — spot hidden pigmentation
- Why it helps: Reveals subsurface pigmentation and UV damage that guide brightening and SPF strategies.
- When to check: Before starting brighteners and quarterly to measure results.
Which style suits you best? Read on!
When to use it: timing, frequency, and best conditions
Use the lamp in a dark room after cleansing, with no makeup, sunscreen, or topical tint on the skin. Routine timings vary by skin type but general guidance:
- Initial baseline: Do a full-face scan once when you start a new routine.
- Monitoring: Check every 2–4 weeks for actives; weekly if troubleshooting breakouts.
- Before treatments: Use immediately before salon visits or at-home chemical peels to avoid treating damaged areas.
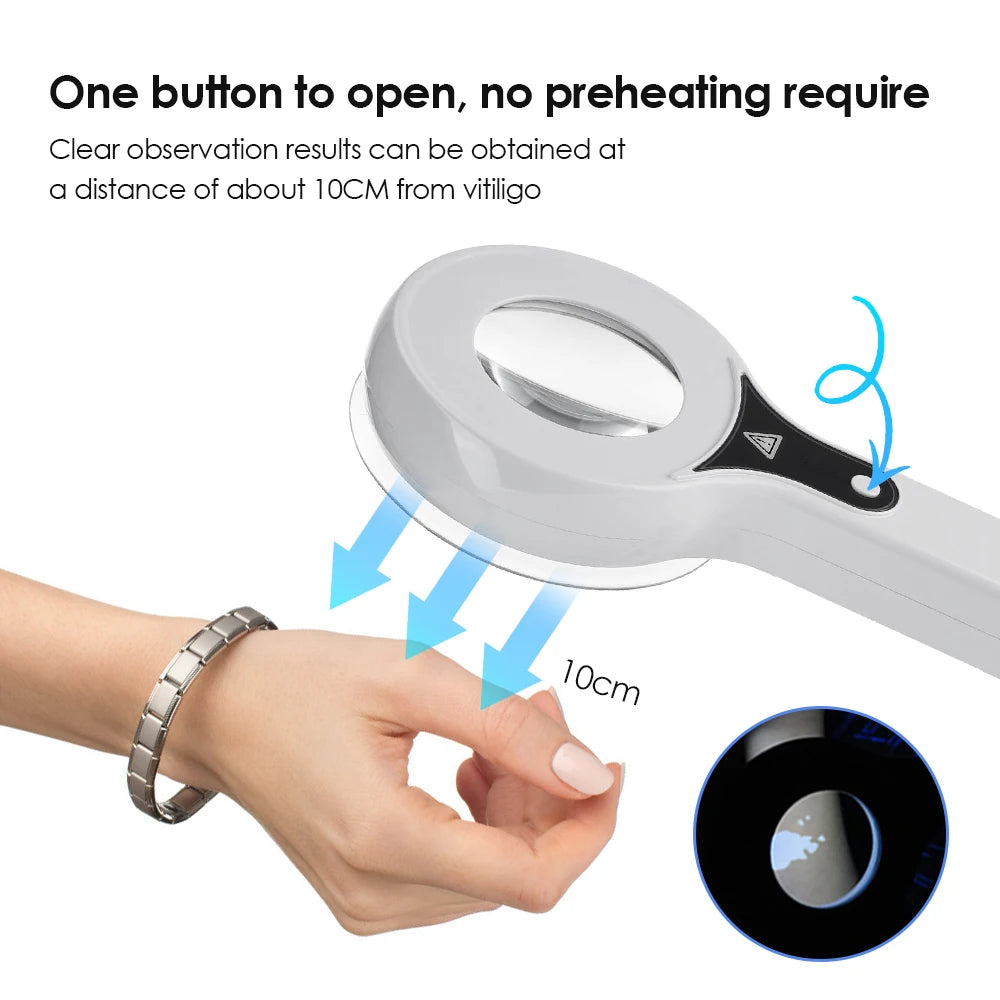
How to use a portable woods lamp device (step-by-step)
Follow these exact steps for reliable, repeatable results.
- Cleanse thoroughly to remove makeup, sunscreen, and oils.
- Dry skin completely; ambient light should be dim or off.
- Turn on the portable woods lamp device and hold 2–4 inches from the skin.
- Scan each facial zone for 10–20 seconds and note color changes: darker spots, fluorescent white, or coral tones.
- Record findings (photo or notes) and map where to apply actives or hydrating treatments.

portable woods lamp device - KentDO — 💡 See it in action
Interpreting common colors
| Color | Likely Meaning | Suggested Action |
|---|---|---|
| White/blue fluorescence | Dehydration, thin areas | Boost moisture, avoid exfoliants |
| Yellow/white spots | Excess oil/clogged pores | Targeted cleansing, salicylic acid |
| Purple/dark spots | Subsurface pigmentation / sun damage | Brightening agents + sunscreen |
Compare: portable woods lamp device vs. in-clinic skin analysis
Portable devices offer convenience and frequent checks; in-clinic options provide deeper imaging. Use a portable woods lamp device for ongoing at-home monitoring and consult professionals for advanced diagnostics or treatment plans.
| Feature | Portable Woods Lamp Device | Clinic Analysis |
|---|---|---|
| Cost | Low–medium (one purchase) | Higher per session |
| Frequency | Daily–monthly | Quarterly–annually |
| Depth of data | Surface & subsurface clues | Multi-layer imaging + professional interpretation |
Real user stories & proof — social proof that matters
“I found the patch of pigmentation no cream was touching—once I focused treatments there, it faded in 8 weeks.” — J.S., 42.
“After switching cleansers, my clogged pores still looked bad under the lamp. I added a BHA and saw improvement in 3 weeks.” — M.L., 28.
Before/after tracking: users report a 30–60% faster identification of trouble spots when using the lamp before changing products (self-reported home study).
Which routines pair best with the product?
Daily maintenance (best for combination skin)
- Morning: quick scan after cleansing to spot oily zones, then tailored moisturizer or mattifying serum on T-zone.
- Night: use lamp before heavier treatments to avoid applying retinoids on thin, fragile patches.
Troubleshooting (best for acne-prone skin)
- Check weekly while introducing actives. If yellow/white spots persist, add a gentle BHA or pro detox cleanse.
Brightening track (best for aging skin)
- Baseline scan → 8–12 weeks of brighteners → re-scan to measure subsurface change. Use SPF aggressively on areas of UV damage.
Want a product that matches these routines? Check the KentDO device: /products/kentdo-woods-lamp-skin-analyzer — repeated here so you can bookmark it while reading.
Quick pros & cons — decide fast
| Pros | Cons |
|---|---|
| Portable, affordable, easy to use | Not a replacement for professional diagnosis |
| Helps prevent over-treatment | Requires a dark room for best results |
| Great for tracking progress | Color interpretation has a learning curve |
portable woods lamp device - KentDO — 💡 See it in action
Pro tips from experts & quick checklist
- Always scan after cleansing and before treatments.
- Use phone photos (same lighting) to compare progress over time.
- Don’t treat the lamp as a diagnosis—use it to guide product placement and moderation.
- Wear SPF daily on areas flagged for subsurface pigmentation.
Mini FAQ (schema-ready)
- 1. Is a portable woods lamp device safe for home use?
- Yes — when used as instructed. It emits non-thermal UV wavelengths; avoid prolonged direct eye exposure and follow device safety guidelines.
- 2. Can it replace professional skin diagnostics?
- No — it’s a monitoring and guidance tool. For clinical concerns or treatments, consult a licensed dermatologist or aesthetician.
- 3. How often should I use it?
- Baseline once, then as needed: weekly for troubleshooting, monthly for routine tracking, or quarterly for cosmetic treatment checks.
Final takeaway — Use information, not fear
portable woods lamp device transforms guesswork into clear decisions: map oil, dehydration, and pigmentation, then use targeted products where they’ll make a real difference. It’s compact, easy to use, and especially helpful when starting new treatments or troubleshooting persistent issues.
Where to next? Start with a baseline scan, take one photo per month, and measure progress. If you want a reliable at-home option, explore the KentDO unit here: /products/kentdo-woods-lamp-skin-analyzer.
Related collections: Skin and Beauty Care Devices · Body & Face Blog · Hair, Skin & Nail Blog
Pillar Article: Woods Lamp Interpretation for Sensitive Skin: What Each Color Means
Other Related Articles:
Explore More:


